TestComplete supports integration with Zephyr Squad (formerly known as Zephyr for Jira) and enables you to automate Zephyr test cases in your Jira projects with TestComplete tests.
In this tutorial, we explain how you can connect to a Jira project from TestComplete, how to assign TestComplete tests to Zephyr test cases as test automations, and how to run these test automations and view their results.
 If you are a novice user, we recommend that you first go through the Getting Started tutorial to get familiar with TestComplete.
About This Tutorial
In this tutorial, we assume that you are already familiar with Jira and have a Jira project with test cases that you want to automate.
Requirements
To complete this tutorial, you will need the following:
-
A Jira account. If you do not have a Jira account, you can sign up for a free trial.
-
The Zephyr Squad app installed on your Jira server. If you do not have the app, you can install a trial version.
To learn how to install the app, see the Installation section of the app in Atlassian Marketplace.
-
A classic Jira project. If you do not have a suitable Jira project, you can create one. To learn how to do this, see Create a project in the Jira documentation.
-
At least one Zephyr test case must be added to your Jira project. You will assign your TestComplete test to that test case. To learn how to create Zephyr tests, see Create Tests (for Jira Cloud) or Create Tests (for Jira Server).
-
TestComplete 14.10 (or later).
-
The Zephyr Squad Integration plugin must be enabled in TestComplete. By default, this plugin is installed and enabled automatically when you install TestComplete.
-
A TestComplete project with a test you will use to automate your Zephyr test case.
Note: If you are new to TestComplete, we recommend that you first go through the Getting Started tutorial to learn how to create projects and record tests.
-
Your computer (where TestComplete is installed) must be able to access your Jira project.
Projects Used in This Tutorial
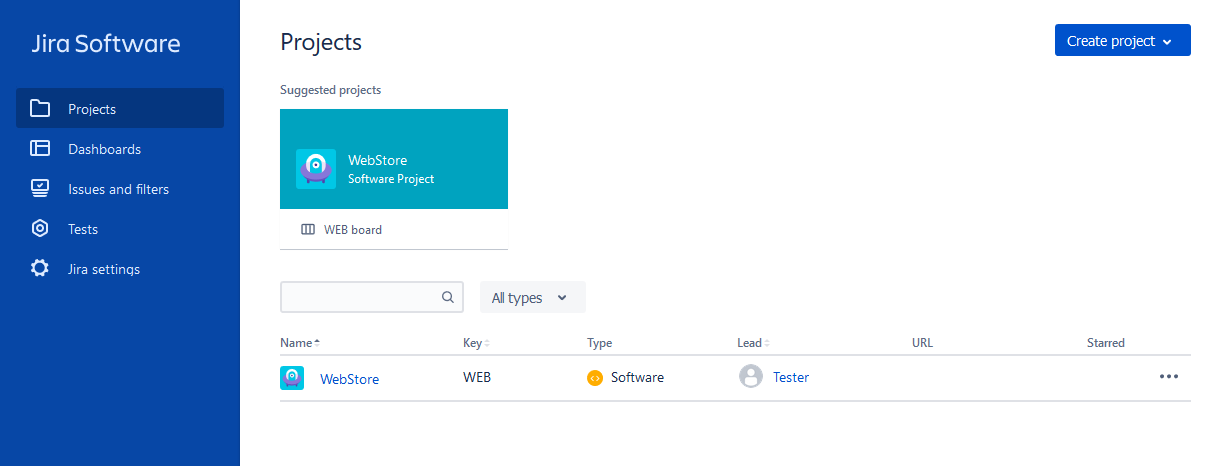
In this tutorial, we use a sample Jira project called WebStore:
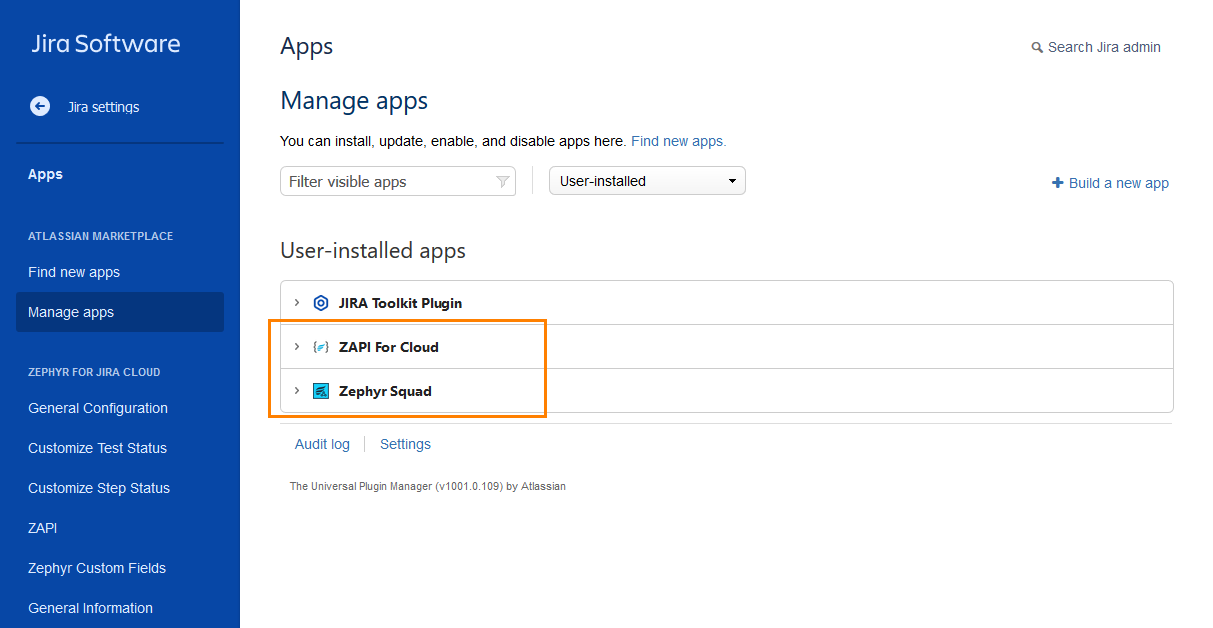
The project already has the Zephyr Squad Cloud app installed and configured:
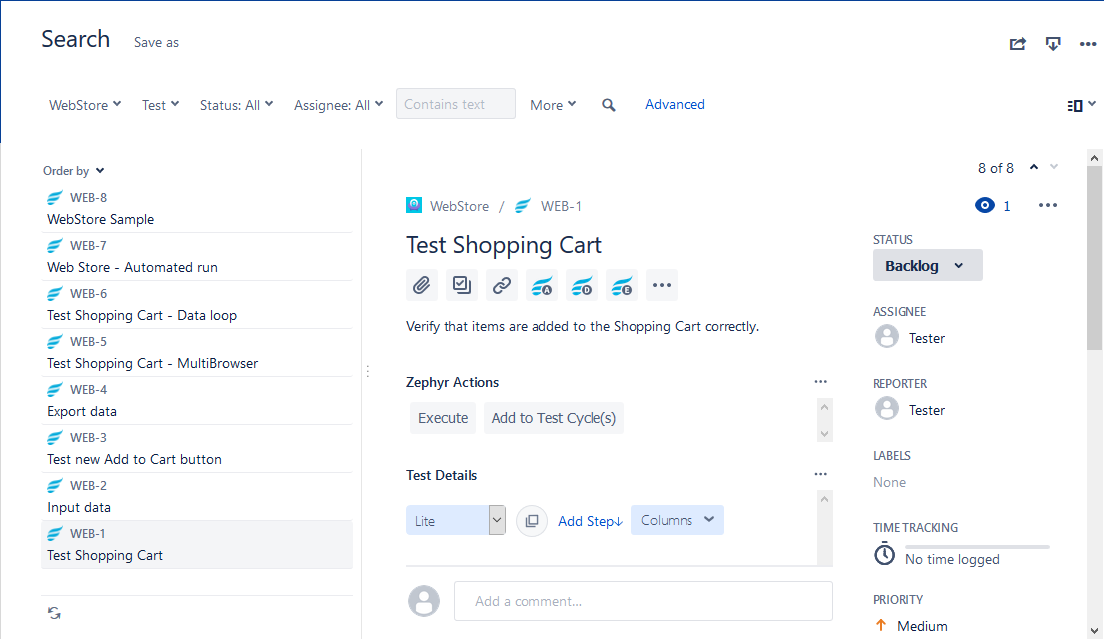
In addition, our sample Jira project already contains several test cases we would like to automate:
1. Get Zephyr API Keys (For Zephyr Squad Cloud)
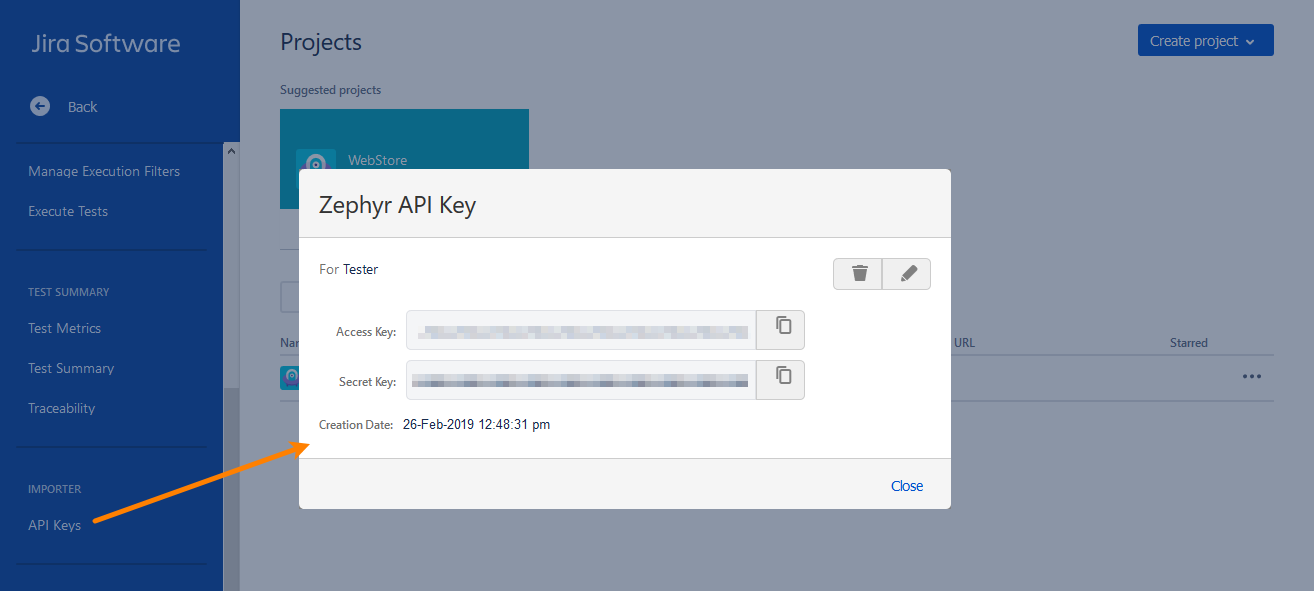
If you use Zephyr Squad Cloud, you will need Zephyr API keys to access Zephyr test cases from TestComplete:
Note: If you use Zephyr Squad Server, skip this step.
-
Open your web browser and connect to your Jira project.
-
In the Jira main menu, click Tests.
-
In the Importer section, click API Keys.
-
If no keys have been generated yet, click Generate new key.
-
Copy the generated Access key and Secret key.
Note: It may take some time for newly generated keys to become active. TestComplete will not be able to access your Zephyr test cases until the keys become active.
2. Configure Your TestComplete Project
-
Launch TestComplete and open the project that contains the tests you want to use as automations for your Zephyr test cases.
If you do not have suitable tests, create them.
-
Click Connect to Zephyr Squad on the TestComplete toolbar.
-
On the resulting Properties > Zephyr Squad page of the project, specify the connection settings:
-
To make sure the specified connection settings are valid and your TestComplete project can connect to your Jira server, click Test Connection.

-
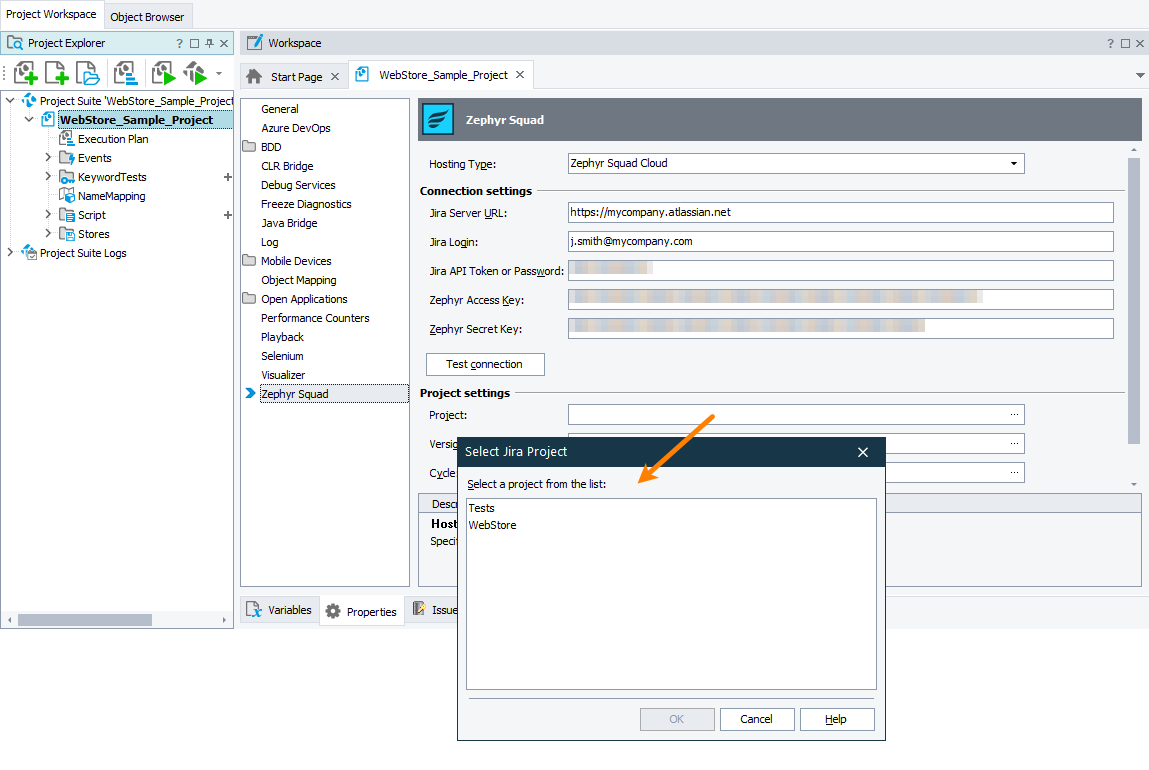
In the Project text box, click the ellipsis button and select your Jira project:
-
You can also specify the project’s release and test cycle to which the test results will be sent. You can also specify them later by using command line arguments. The arguments can be helpful when you run your tests automatically, for example, from your CI system.
In this tutorial, we will run our tests manually, so we will specify the release version and test cycle on the Zephyr Squad page of the project.
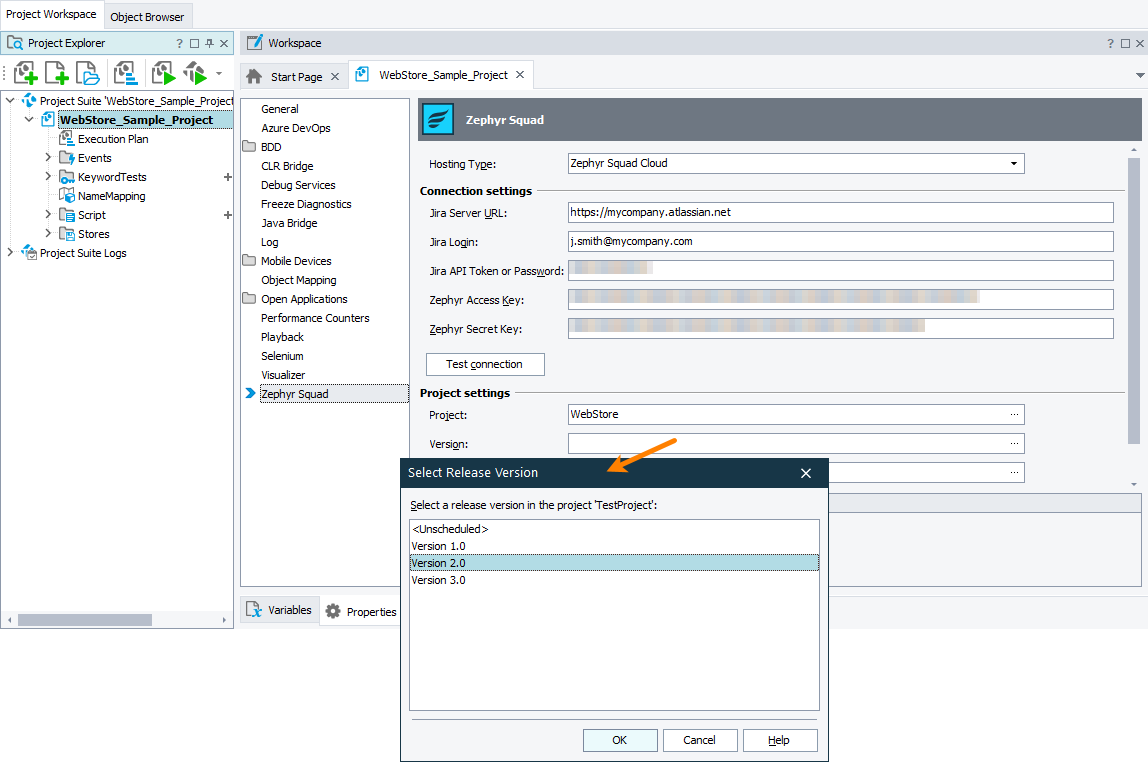
In the Version text box, click the ellipsis button and select the needed release from the resulting Select Release Version dialog:
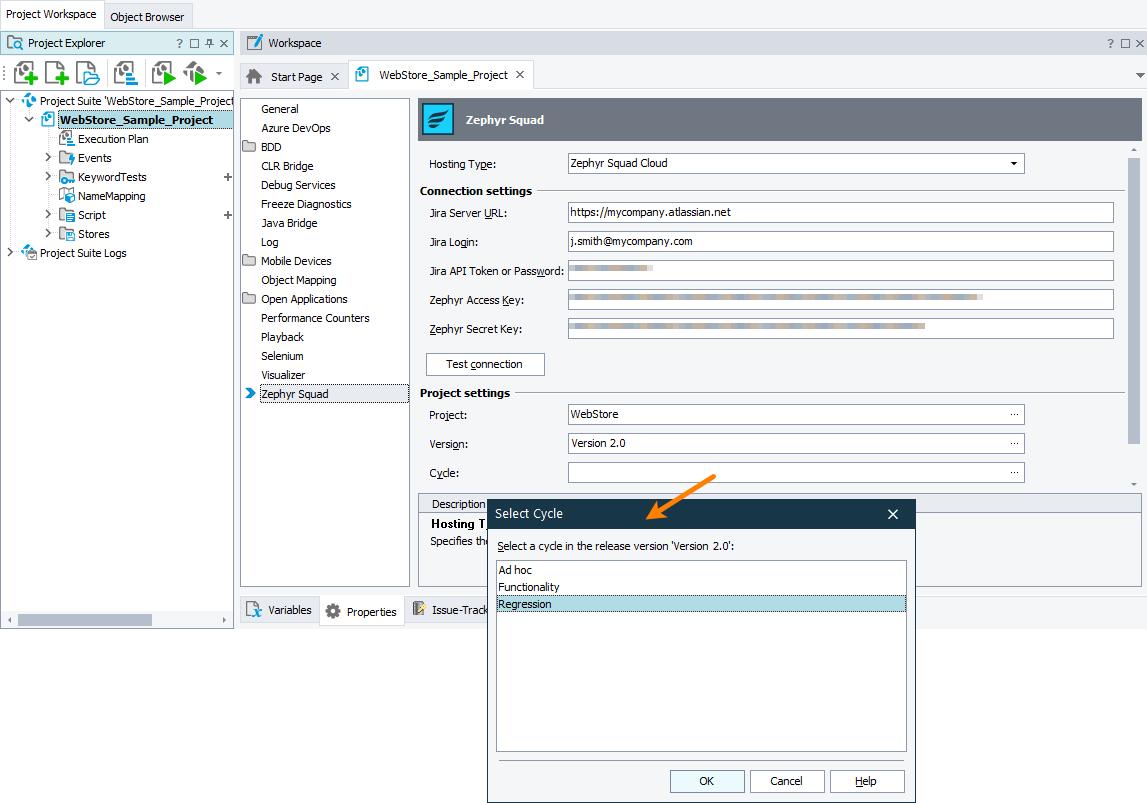
In the Cycle text box, click the ellipsis button and select the needed test cycle from the resulting Select Cycle dialog:
Note: If you do not specify a release version, TestComplete will send the test results to the default Unscheduled version. If you do not specify a test cycle, TestComplete will send the test results to the default Ad hoc test cycle.
-
Save the changes.
3. Assign TestComplete Test Items to Zephyr Test Cases
-
Switch to the Execution Plan editor of your project. This editor specifies the tests to be run when you run your test project.
 If your project does not have test items, create them
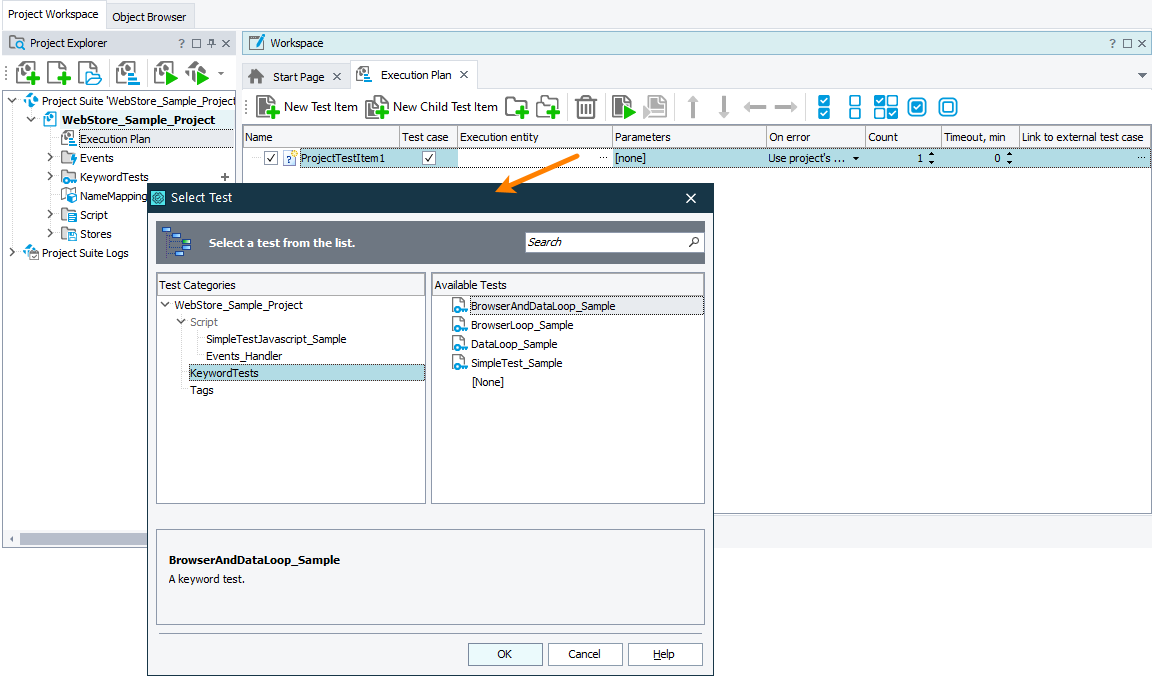
In our sample WebStore_Sample_Project project, we have several test items specified:
-
Make sure the test item you want to use is marked as a test case. Only those items that are marked as test cases can be used to automate Zephyr test cases.
-
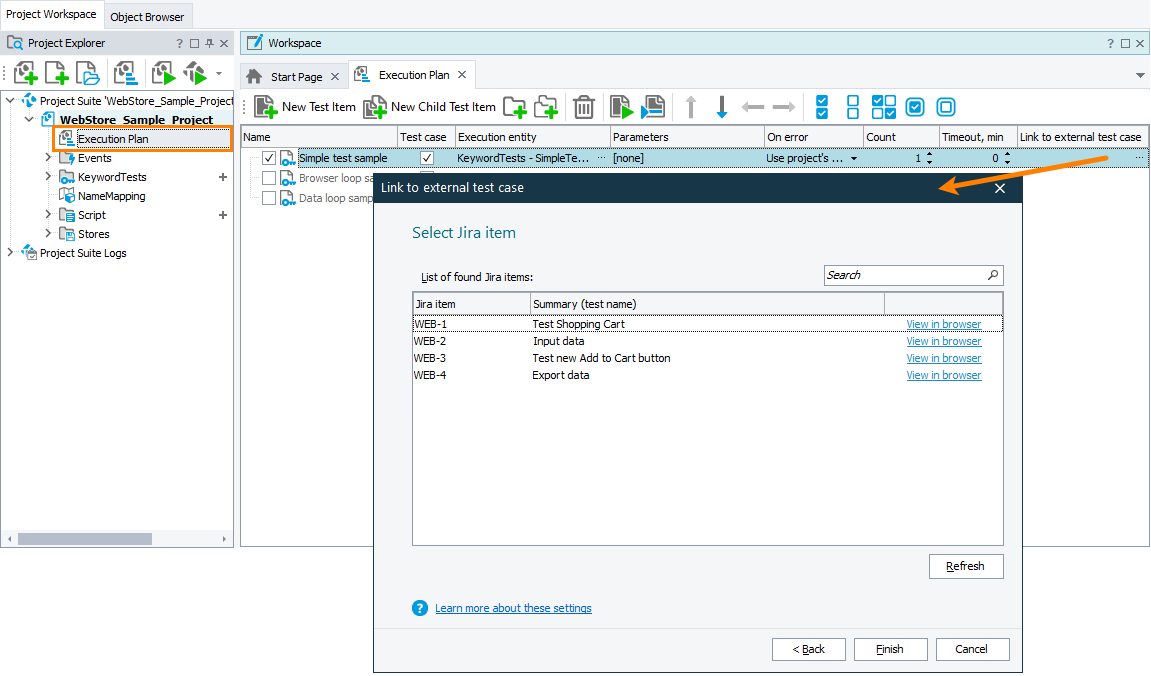
Select the needed test case and click the ellipsis button in its Link to external test case column.
-
TestComplete will connect to your Jira project and show the Link to External Test Case wizard with a list of available test cases:
Select the needed test case and click Finish.
-
If needed, repeat steps 1–3 to assign more test cases to the Zephyr test cases.
-
Save the changes.
4. Run TestComplete Tests
To execute test automations assigned to Zephyr test cases, you run the appropriate test cases in TestComplete. You can run test cases from the TestComplete UI, or you can run them from the command line or from your CI system.
For simplicity, in this tutorial, we will run a test case from the TestComplete UI:
-
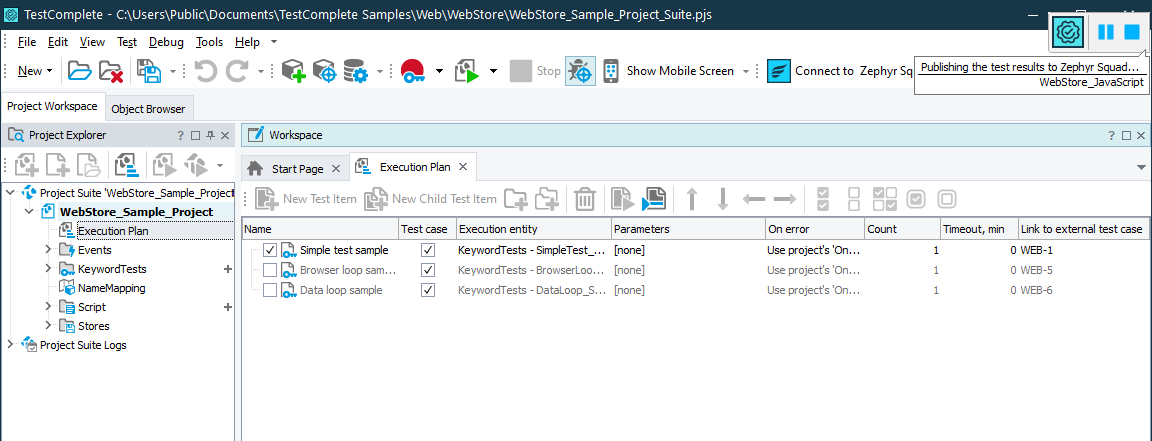
Select the test case assigned to a Zephyr test case and click
 Run Focused Item on the toolbar.
 -
TestComplete will run the test case and send the test item results to Jira:
5. View TestComplete Test Results in Jira
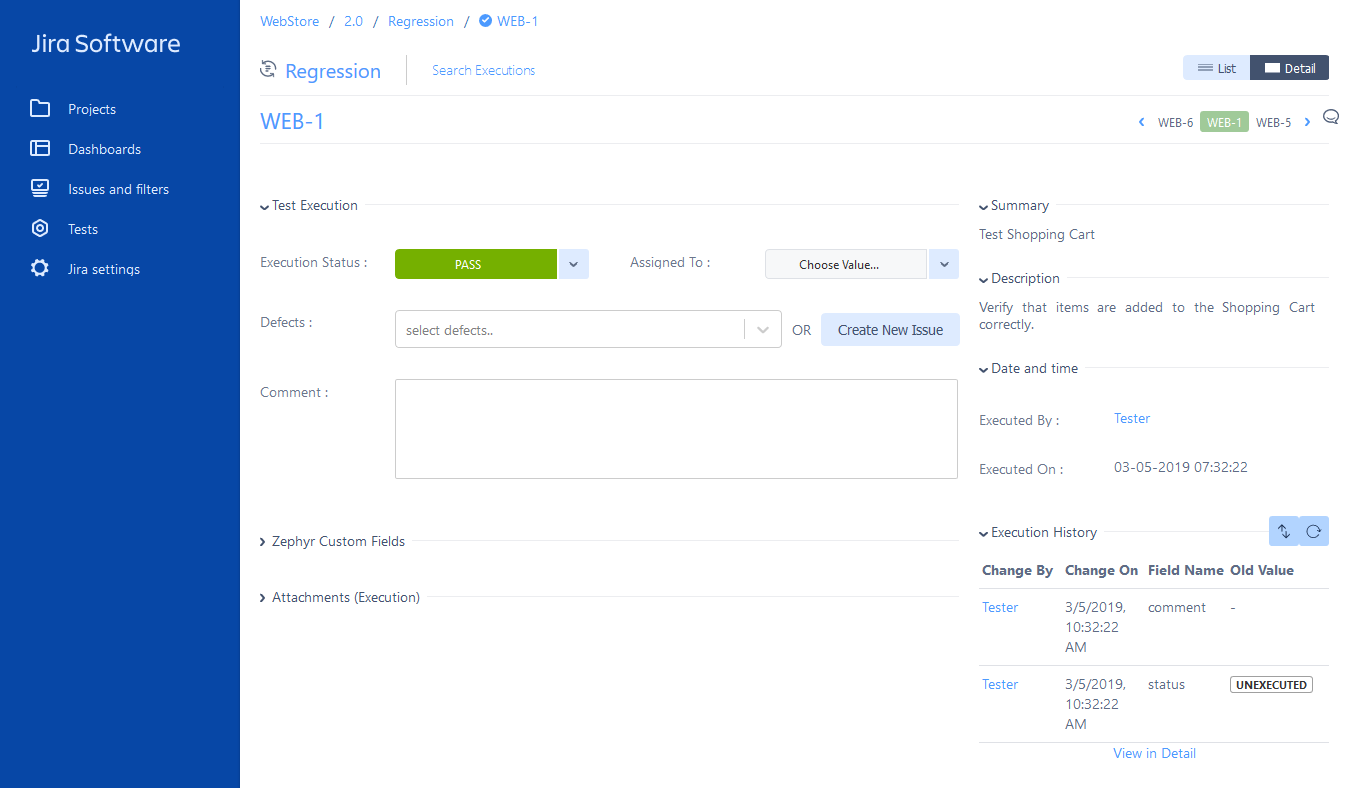
In Jira, you can view TestComplete test results the same way you view test case executions. If a TestComplete test case is executed without errors, the test execution status in Jira will be Pass:
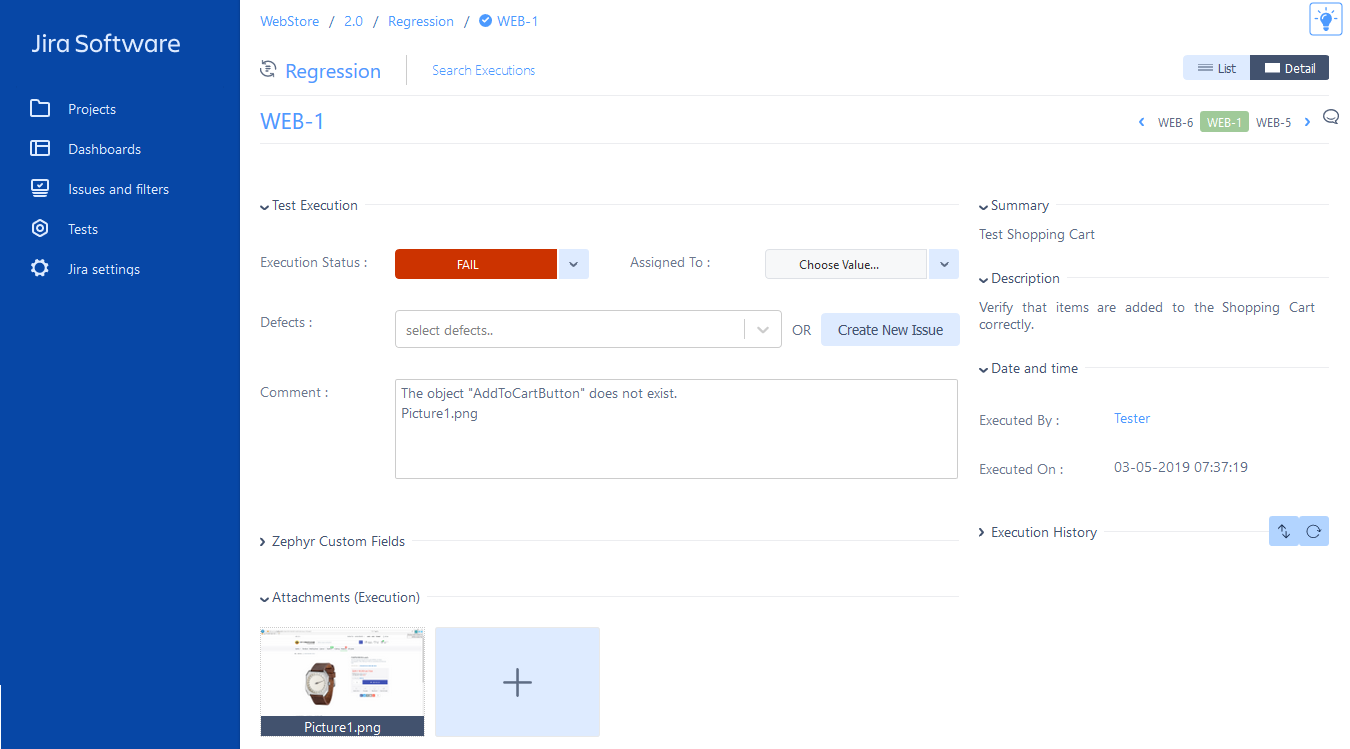
Otherwise, the test execution status will be Fail:
You can view the first error message posted to the TestComplete test log in the Comment section of the test execution in Jira. The screenshot of your computer’s desktop will also be attached to the execution.
Conclusion
This concludes the tutorial. You have assigned a TestComplete test to a Zephyr test case in a Jira project and run the test. As you can see, automating test cases with TestComplete is easy.
To learn more about TestComplete integration with Zephyr Squad, see the following topics:




 Integration With Zephyr Squad