If you use Zephyr Squad to plan and monitor your testing efforts, you can use TestComplete to create automations for your test cases in your Jira project. The results of those automation runs will be sent to Jira and included in your test metrics.
This topic describes how to run test automations created with TestComplete and how to send their results to the desired releases and test cycles in Jira.
Requirements
Jira Cloud
– or –
Jira Server 7.2.x–7.13.x
– or –
Jira Data Center 7.2.x–7.13.x
-
Your Jira must have the Zephyr Squad plugin installed.
Keep the default Test issue type for Zephyr test cases in Jira. For TestComplete 14.20 and later: If you use a custom issue type name for Zephyr test cases, you will have to configure your TestComplete project to locate them manually. See Link TestComplete Projects to Custom Zephyr Test Case Issue Types.
-
TestComplete version 14.10 (or later)
-
Zephyr Squad Integration Plugin must be enabled in TestComplete. By default, the plugin is installed and enabled automatically when you install TestComplete. If you experience issues with Zephyr integration, make sure the plugin is enabled in the File > Install Extensions dialog (you can find the plugin in the Common group).
-
Your TestComplete workstation must have access to your Jira project.
Prerequisites
-
In TestComplete, create tests you want to use as automations for your test cases in Jira. To learn how to create tests, see Creating Tests.
-
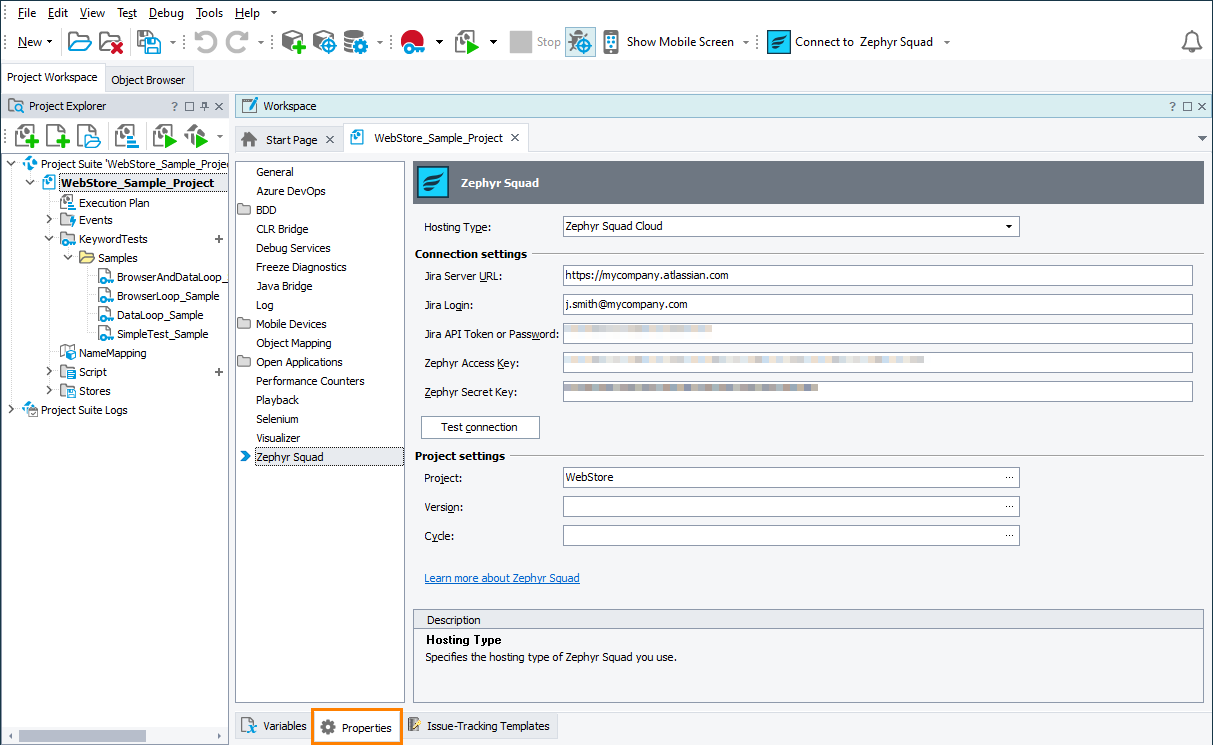
Click Connect to Zephyr Squad on the TestComplete toolbar.
-
On the resulting Properties > Zephyr Squad page of your TestComplete project, bind your TestComplete project to your Jira project that contains the Zephyr test cases you want to automate. To learn how to connect projects, see 1. Connect your TestComplete project to your Jira project.
-
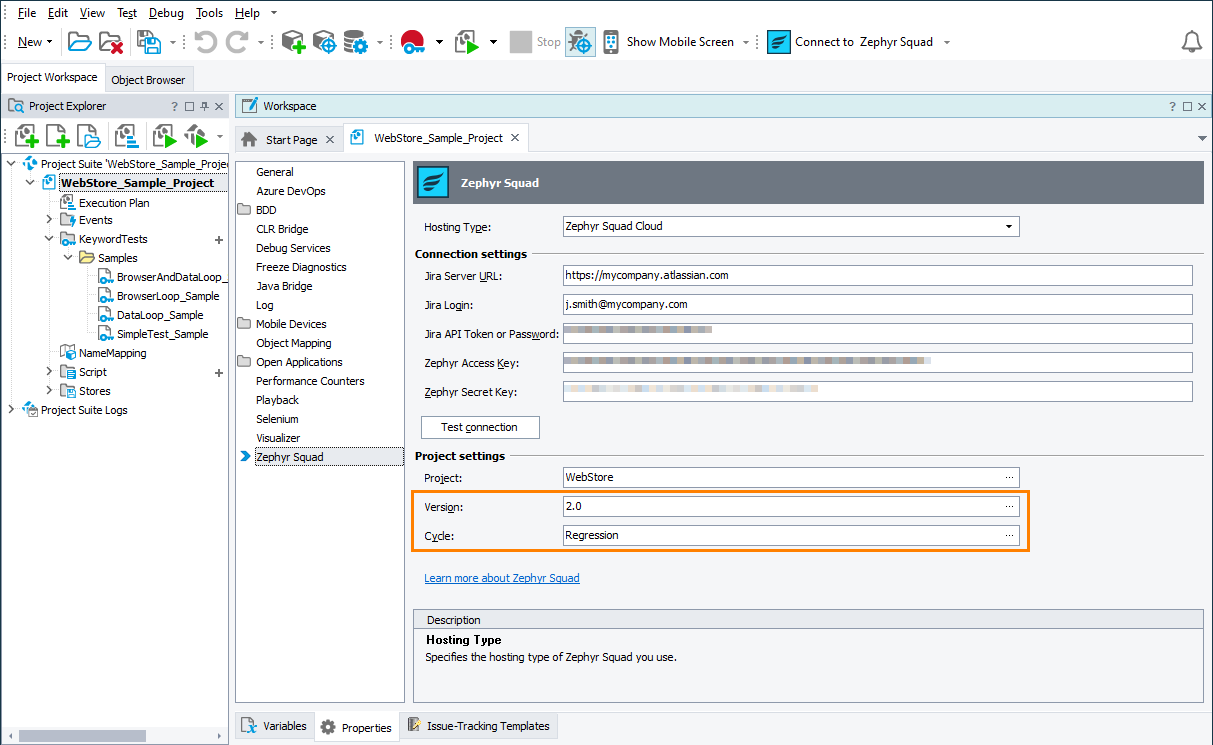
(Optional.) Specify the release version and test cycle of your Jira project to which you want to send automation test results.
Note: If you are planning to run tests from the command line or from a CI system, you can specify the release version and test cycle later.
-
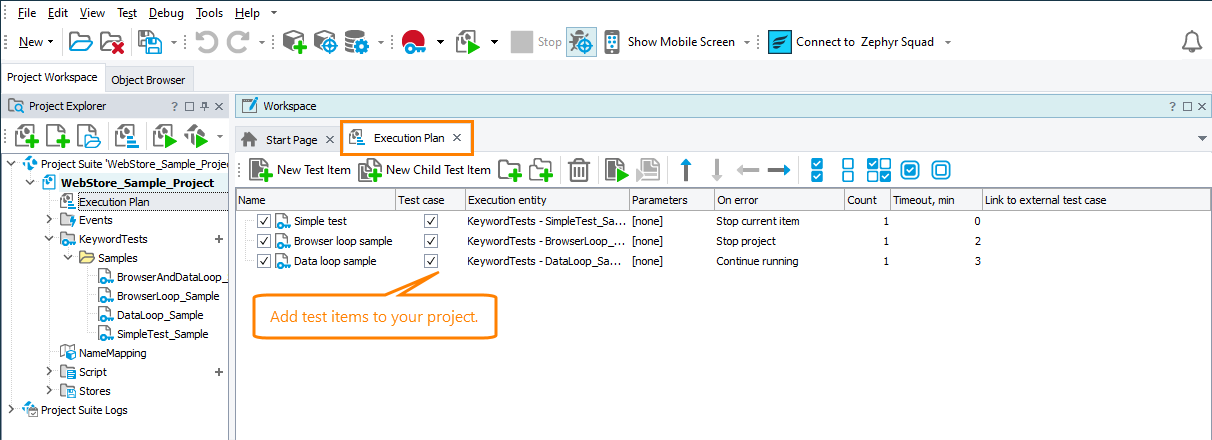
Open the Execution Plan editor of your TestComplete project and add the test items that will run the created tests. To learn how to create test items, see the description of the project’s Execution Plan editor.
Make sure that the added test items are marked as test cases. Only test cases can be used for Zephyr test case automation:
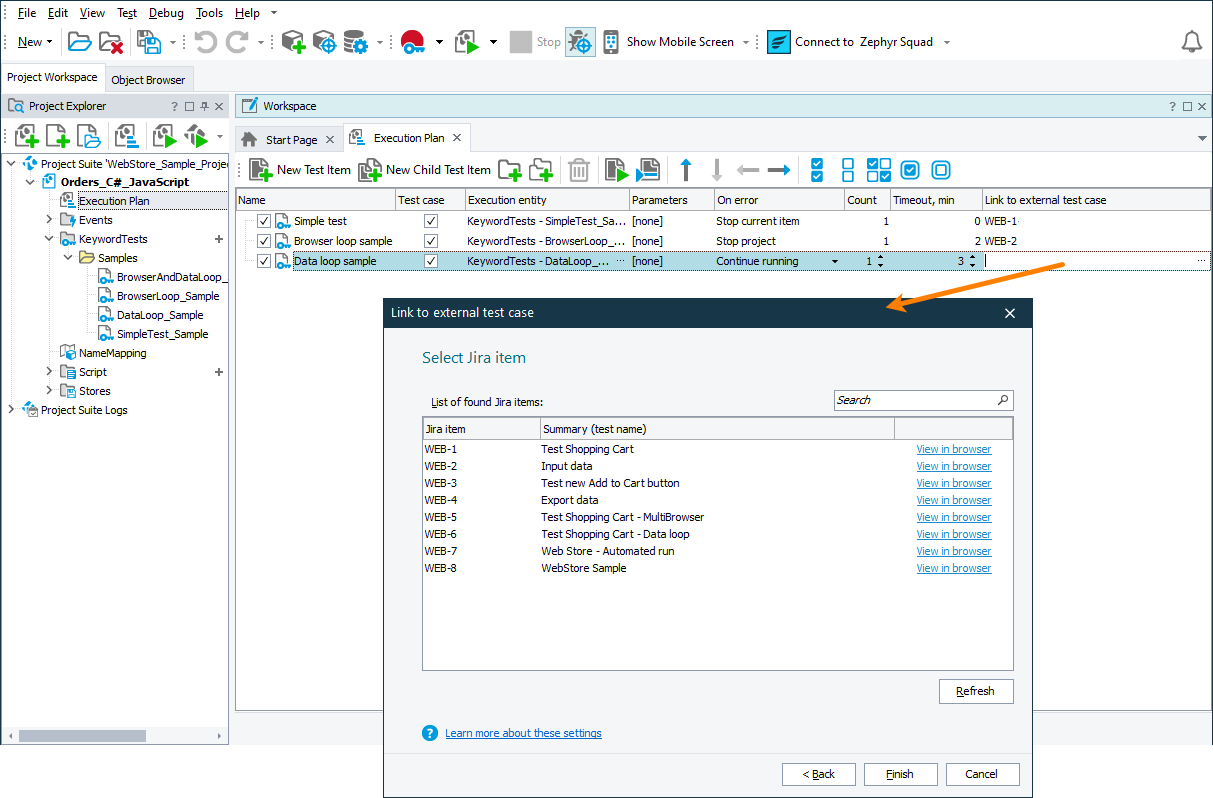
For each test case in TestComplete, specify the Zephyr test case it will automate.
– or –
Use the
aqTestCase.BeginandaqTestCase.Endmethods to mark the code that you want to use as automations for Zephyr test cases. To learn more, see To Assign TestComplete Test Items to Zephyr Test Cases.
Now, you can run your test automations.
Run test automations
 Running test automations from Jira is not currently supported.
Manually from the TestComplete UI
If you assign test items to Zephyr test cases
To run a single test case, select it in the Execution Plan editor and then click  Run Focused Item.
To run all the enabled test cases, run the entire project by selecting Test > Run Project from the TestComplete main menu or by clicking  Run Project on the Project Explorer toolbar.
If you assign test cases to Zephyr test cases directly in your script units
Run a script routine that contains the aqTestCase.Begin method call. To learn about various ways you can run script routines, see To Run a Script Routine.
Automatically
From the command line
To run all the enabled test cases of your TestComplete project, use the project command line argument:
TestComplete.exe "C:\AutomatedTests\WebStore_Sample_Project_Suite.pjs" /r /p:WebStore_Sample_Project
To run an individual test case of your TestComplete project, use the project and test command line arguments:
TestComplete.exe "C:\AutomatedTests\WebStore_Sample_Project_Suite.pjs" /r /p:WebStore_Sample_Project /t:"Simple test"
To run a script routine that contains the aqTestCase.Begin method call, use the project, unit and routine command line arguments:
TestComplete.exe "C:\AutomatedTests\WebStore_Sample_Project_Suite.pjs" /r /p:WebStore_Sample_Project /unit:Unit1 /routine:Main
To specify the release version and test cycle to which you want to send test results, use the ZephyrVersion and ZephyrCycle command line arguments:
TestComplete.exe "C:\AutomatedTests\WebStore_Sample_Project_Suite.pjs" /r /p:WebStore_Sample_Project /t:"Simple test" /ZephyrVersion:2.0 /ZephyrCycle:Regression
From your continuous integration (CI) system
If you use Jenkins, use the TestComplete Support plugin to add a TestComplete Test build step to your build and configure the step to run the needed test items (or script routines). To learn more, see Integration With Jenkins.
If you use Azure DevOps or Team Foundation Server, configure your pipeline to run the created TestComplete test. To learn more, see Integration With Azure DevOps and Team Foundation Server via TestComplete Test Adapter.
If you use a CI system (for example, Bamboo), use the TestComplete command line arguments described above to run the needed test cases (or script routines) and send the test results to the needed release and test cycle of your Jira project.
Send Test Results to Jira
After TestComplete finishes running the specified test case (or test cases), it will send the test results to your Jira project automatically.
It will send the test results to the Jira project’s release and test cycle the ZephyrVersion and ZephyrCycle command line arguments specify. If the arguments are not specified, TestComplete will send the results to the release and test cycle your TestComplete project’s properties specify. If the properties are not specified either, TestComplete will send the test results to the default release version (Unscheduled) and to the default test cycle (Ad hoc).
If the test cycle that the ZephyrCycle command line argument or the Cycle project property specifies does not exist, it will be created and added to the specified release version.
View Test Results
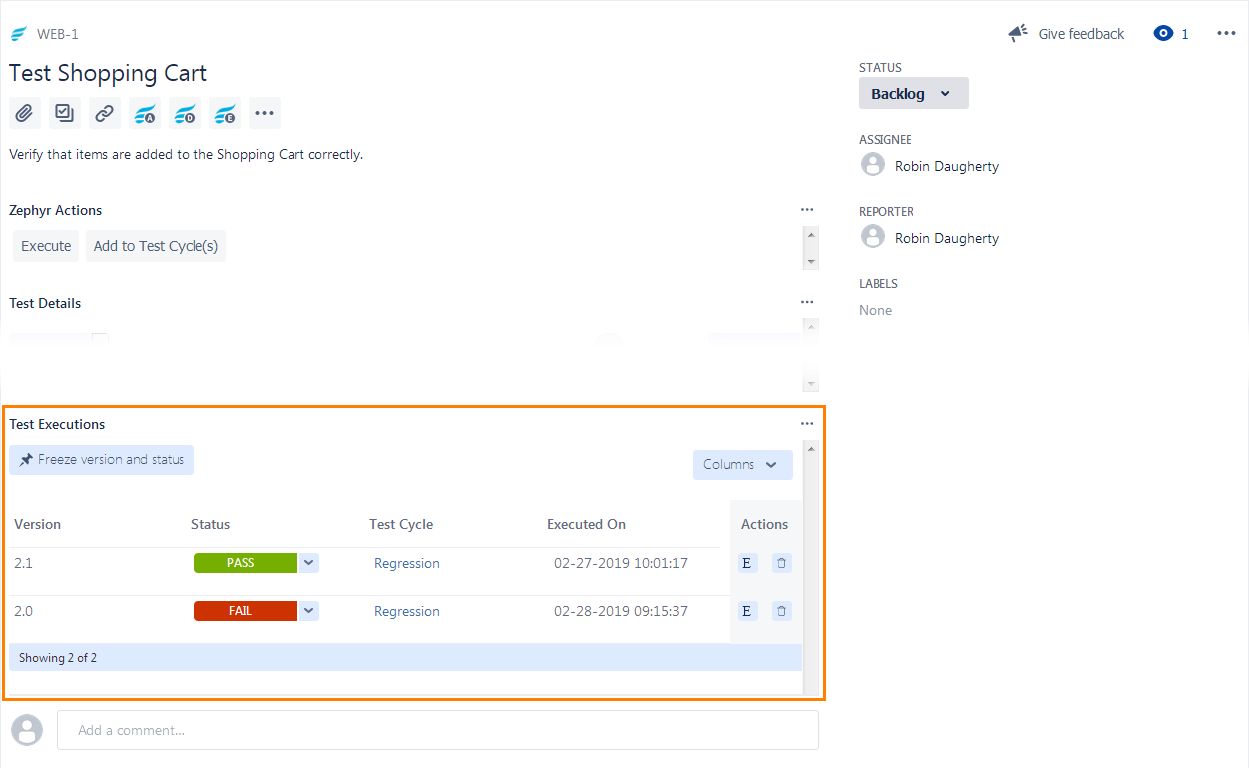
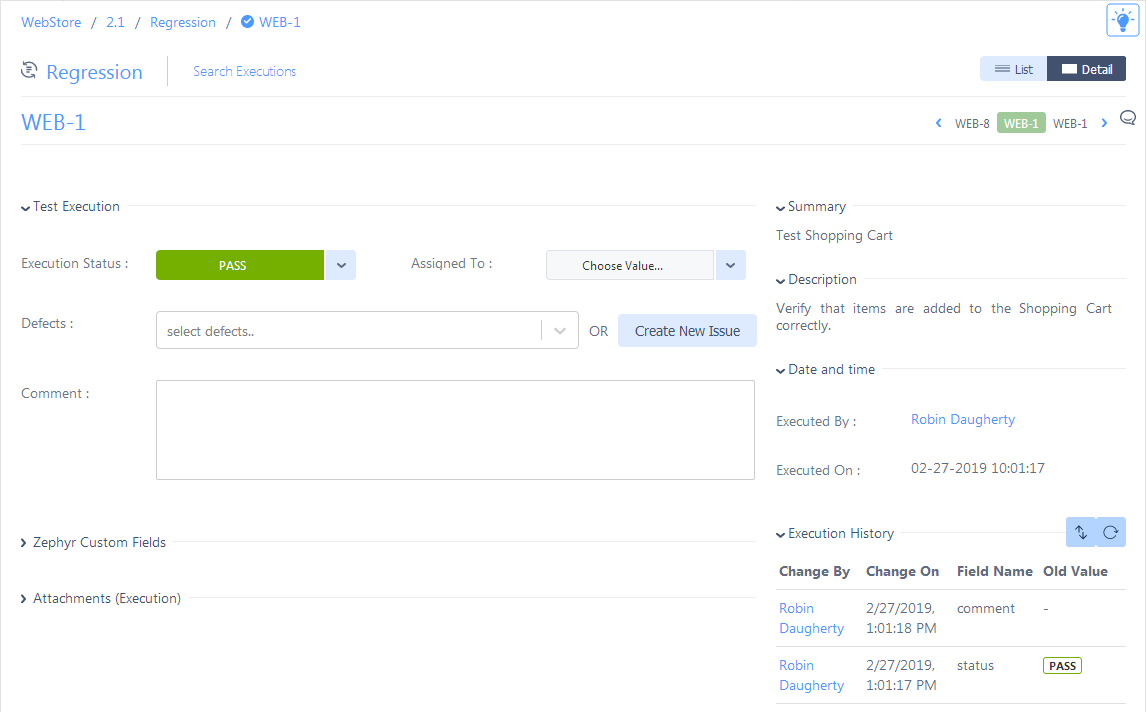
TestComplete sends the test status (Pass or Fail) to Jira and assigns it to the specified test case execution. You can view it in the Test Execution section of the test case in Jira:
You can also view it on the Test Executions page of your Jira project:
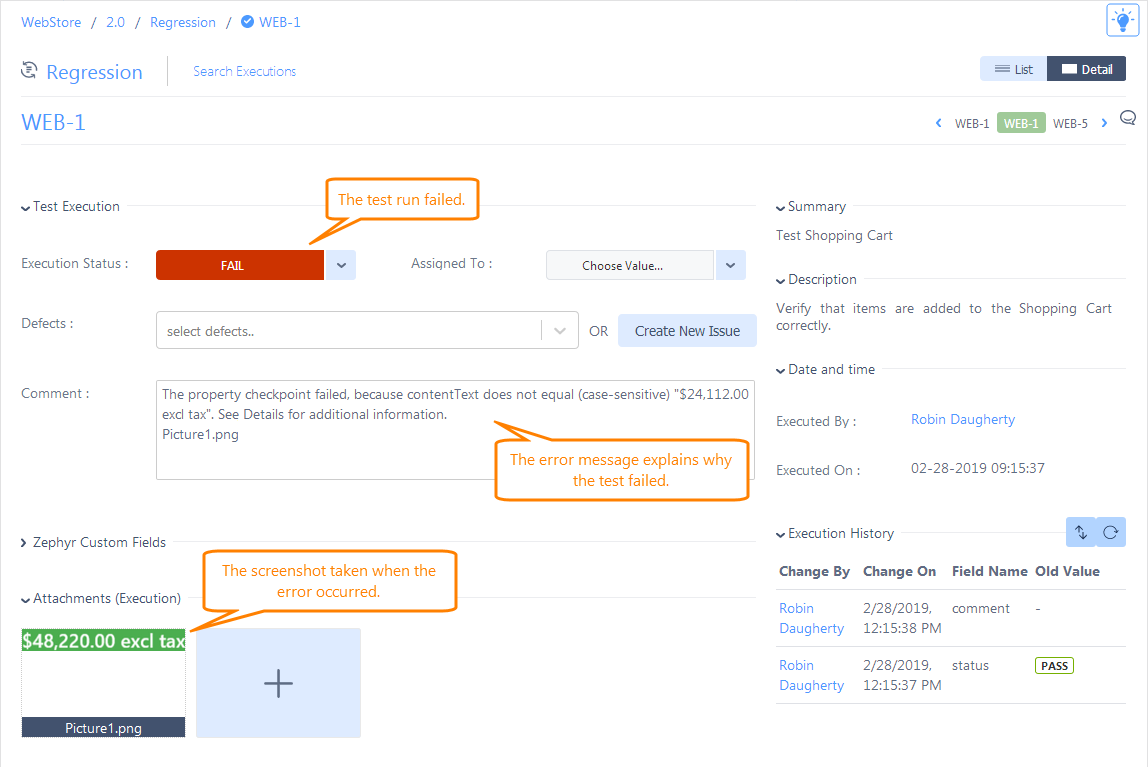
If a TestComplete test fails, the first error message of the test log and the screenshot of your computer desktop taken when the error occurred will be added to the test execution:
If several test cases are assigned in TestComplete to a single Zephyr test case, their results will be added to the test case’s execution history one after another.
In the same way, if your test has several iterations (for example, for test items, you can set the number of iterations in the Count column of your project’s Execution Plan editor), the iteration results will be added to the test case’s execution history one after another.
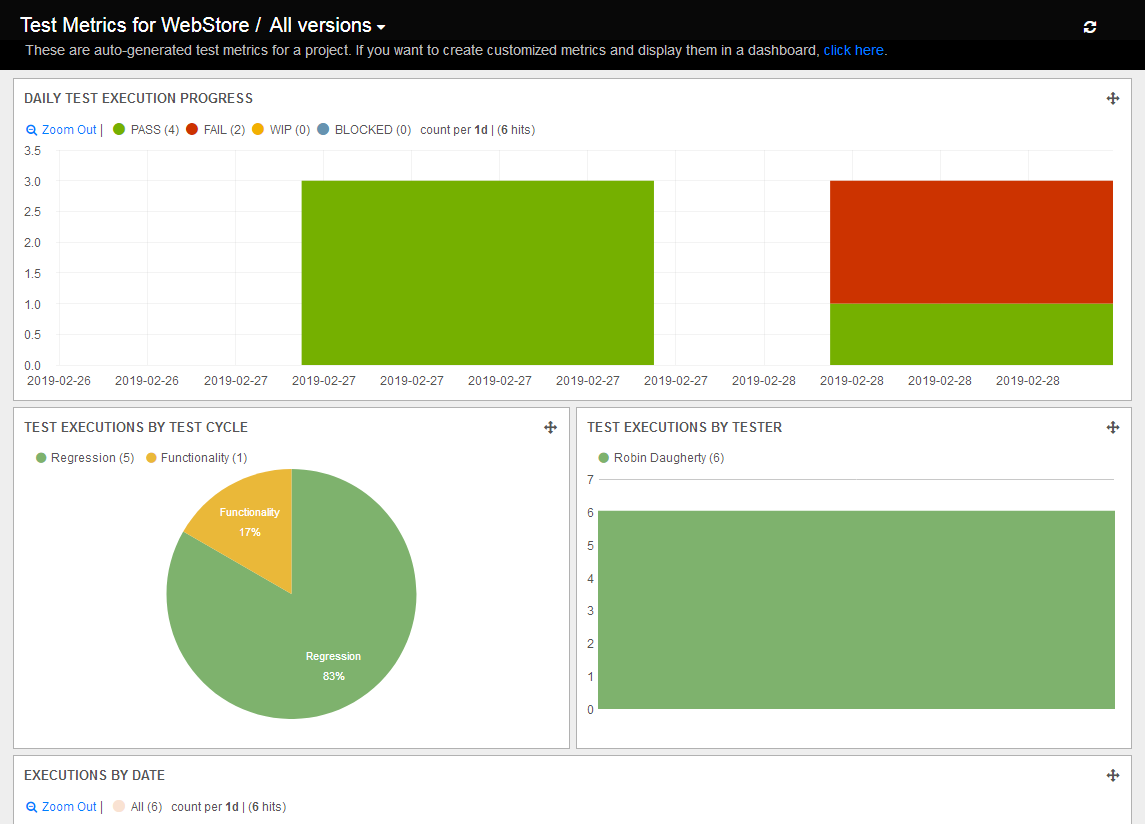
The test results sent from TestComplete will also be included in your test metrics and charts:
See Also
Integration With Zephyr Squad
Running Tests
Integration With Continuous Integration (CI) Systems
Integration With Jenkins

 Requirements