
You use the Template editor to create, view and edit issue-tracking templates.
 Opening the Editor to Create or Edit a Template
| Note: | If you want to use a global template in your test project, you need to create and configure this template before opening the project in TestComplete. |
Opening the Editor to Create or Edit a Template
To create or edit a project-specific issue-tracking template:
-
Use the Issue-Tracking Templates page of the project editor. To display this page:
-
Double-click your project in the Project Explorer panel.
-
Click Issue-Tracking Templates at the bottom of the editor to activate the Issue-Tracking Templates page.
— or —
-
Right-click your project in the Project Explorer panel and select Edit | Issue-Tracking Templates from the context menu.
The page lists all the available templates.
-
-
To add a new template, right-click somewhere within the Issue-Tracking Templates page and choose
 New Item from the context menu.
To edit an existing template, right-click it and select Edit from the context menu.
To create or edit a global template:
-
Use the Template Manager. To open the manager:
-
Click
 Template Manager on the Issue-Tracking toolbar.
-
-
To add a new template, click Add.
To edit an existing template, select the needed template and click Edit.
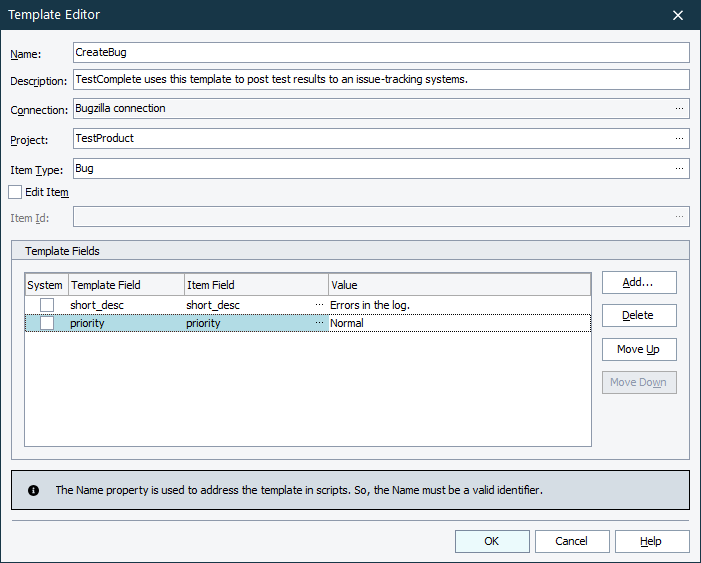
TestComplete will open the Template Editor dialog:
Configuring a Template
-
In the Template editor, specify the template name and description in the Name and Description edit fields.
Note: The template name will be used as the name of the script method that will create or edit the item. So, the template name must be a valid identifier for the scripting language used in your project. The naming rules used in scripting languages supported by TestComplete may slightly differ from each other. To make the method name matching the naming rules of any scripting language, use only alphanumeric and underscore characters in it and start the name with a letter. The template name should not coincide with the name of another template since the
IssueTrackingobject cannot contain two methods having the same name.It is recommended to make the names descriptive. This will make it easier for other testers working with your project to use the template you created. For instance, the name
CreateBugReportInMyProjectis more informative and understandable than justBugReport. Another good guideline is to start method names with a verb. -
Click the ellipsis button of the Connection box. TestComplete will display the Connection Manager dialog that lists existing connections to issue-tracking databases:
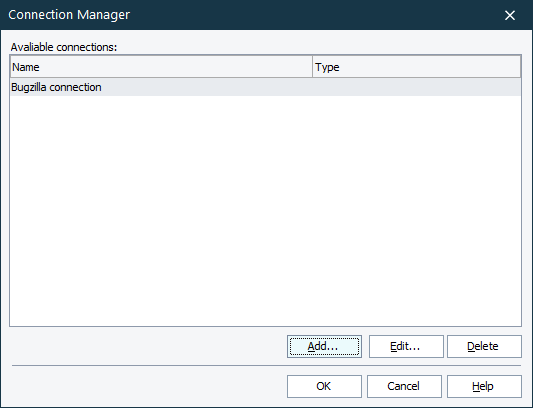
You can either select an existing connection from the list or create a new connection. To create a connection, click Add and then follow instructions of the ensuing Connection Wizard.
Choose the desired connection in the list and click OK. TestComplete will close the Connection Manager and show the connection name in the Connection field of the Template Editor.

TestComplete stores the connection settings on the computer, on which the connection has been created. That is, if you or your colleague open the project on another computer, you will have to create the connection on that computer (if the connection does not exist). Else, the template will not be valid. The connection settings are specific to your user account. If other users log into your computer and launches TestComplete, they will have to create their own connection in order to make the template valid.
-
Choose the project, to which the item will be added or to which the item belongs (if you are going to edit item fields). To select the project, click the ellipsis button in the Project edit box and select the needed project in the Select Project dialog.
-
Specify the item type in the Item Type edit box. You can click the ellipsis button and select the needed item type in the Select Item Type dialog.
-
A template can create new or edit an existing item in the selected issue-tracking system. If the template is intended for editing, select the Edit Item check box in the Template Editor dialog. In the Item Id text box, specify the identifier of the item you want to edit. You can click the ellipsis button and select the needed item in the Select Item dialog.
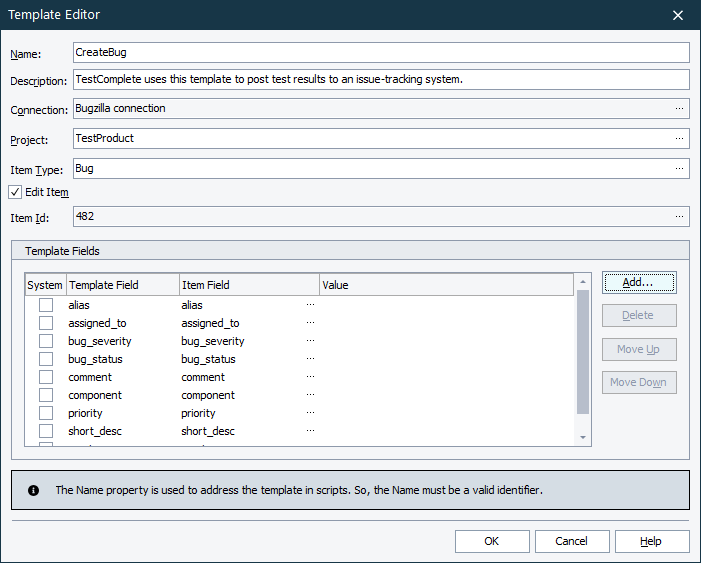
If the template will be used for creation of items, do not select the Edit Item check box.
When editing an existing issue-tracking template, the action type can only be changed for the project-specific templates. Global templates do not allow you to change the type of performed action.
-
Create template fields and map these fields to item fields:
-
Click Add in the Template Fields section. The Select Fields dialog will appear:
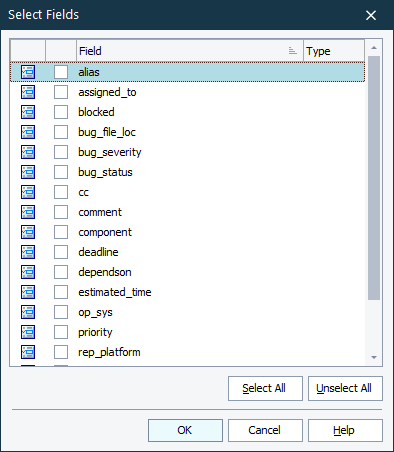
In the dialog, choose item fields that you want to store data via the template fields.
-
In the Template Field column, specify template fields. They will be used as template parameters.
-
In the Value column, specify the default parameter values. TestComplete will use them if you omit parameters when calling your template from tests.
The order of template fields specify the order of parameters. To change the order use the Move Up and Move Down buttons.
To delete a parameter, select it in the list and press Delete. The parameters that are marked as System, cannot be deleted.
-
-
Click OK to save the template.