In QAComplete, you can view connection logs for QAComplete Integration for JIRA to check which adjustments you and other users applied to items. With this functionality, you quickly gather all data about changes made to items, which makes it much easier to troubleshoot and review the development process.
 |
Before you start viewing the logs, make sure you have properly configured the JIRA integration plugin. |
Access the connection log screen
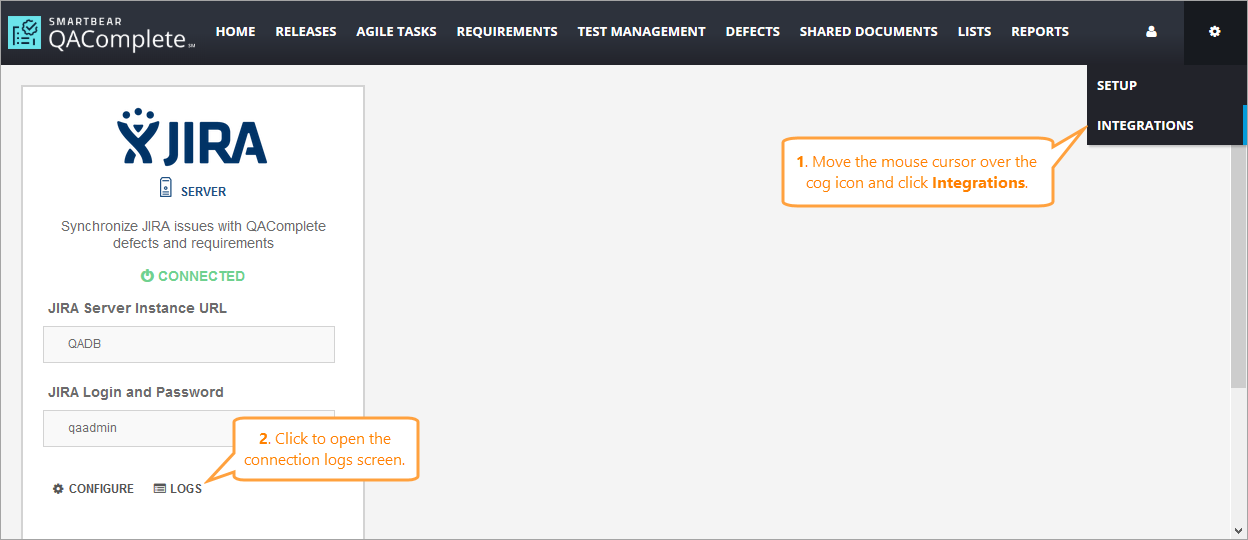
To open the screen with connection logs, do the following:
-
Go to > Integrations.
-
If you have connected QAComplete to your JIRA instance, the connection form that appears will show the
Connectedmessage. -
Click Logs to open the screen with connection logs.
Working with the connection log screen
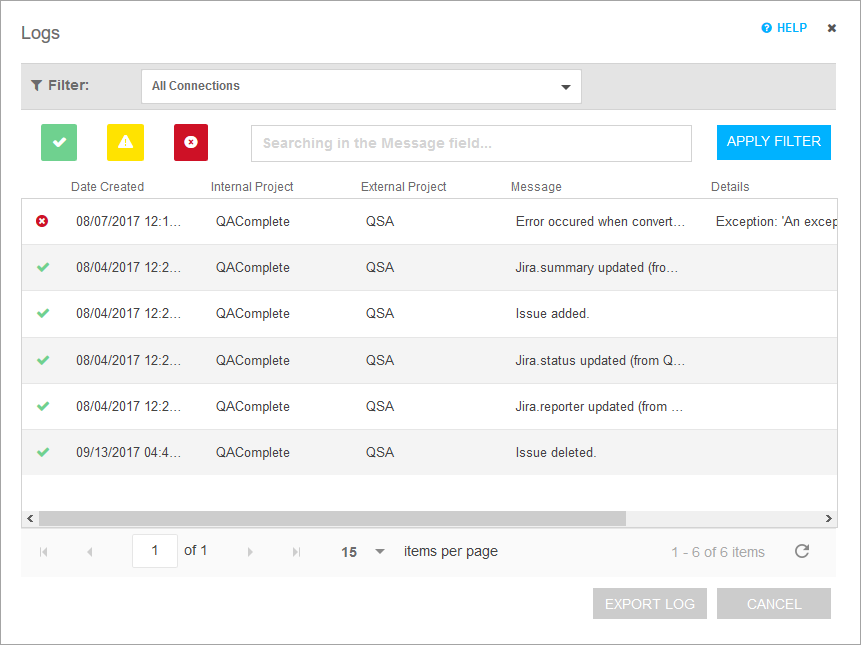
On the screen with connection logs, QAComplete displays all information about changes applied to the items in a table form.
The table includes the following columns:
| Column | Description |
|---|---|
| ! | The type of the log record. |
| Date created | The date and time the change was applied. |
| Internal Project | The name of the QAComplete project the item belongs to. |
| External Project | The name of the JIRA project the item belongs to. |
| Message | The message describing the change that was applied. |
| Details | The issue details (for warnings and error logs). |
| Action | The link leading to mapping. |
Record types
There are three types of records QAComplete displays on the connection log screen:
-
Ok records describe the changes that were applied correctly.
-
Warning records describe the changes that encountered some issues while trying to be applied.
-
Error records describe the changes that were not applied for some reason.
Tip: Usually, the records of this type include some information in the Details column, allowing you to determine the source of the problem and to solve it.
To command QAComplete to display or hide the records of a specific type, click the needed icon on the screen toolbar.
Navigate and sort
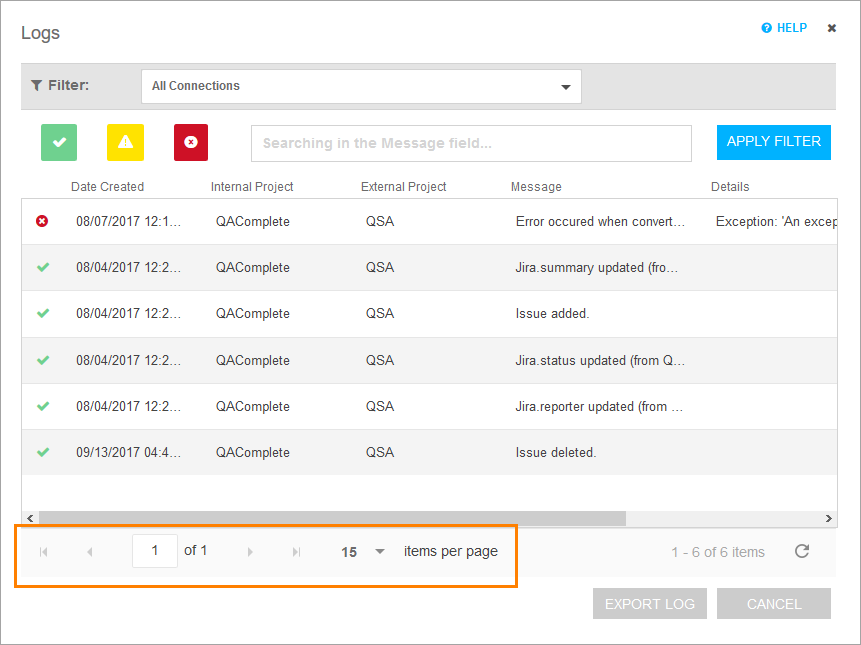
To navigate through available log records, use the pagination toolbar at the bottom of the screen.
-
Use the arrow keys to switch between pages.
-
To immediately jump to a specific page, specify its number in the edit box.
-
Select the amount of items to display in the Items per page drop-down list.
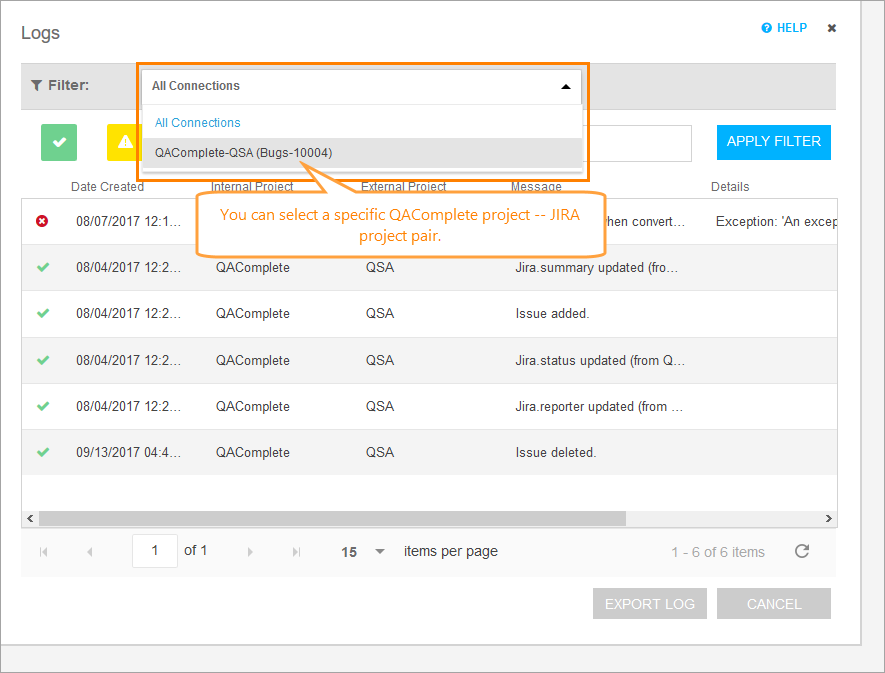
To command QAComplete to display only the records that belong to a specific pair of QAComplete and JIRA projects, select that pair in the Filter drop-down list.
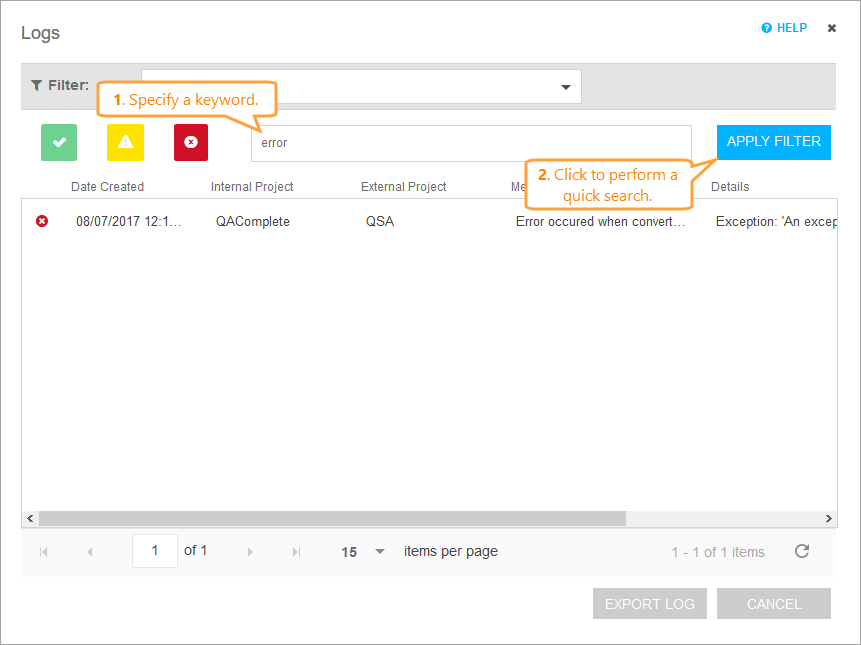
You can also perform a quick search for the needed record using a keyword:
-
In the search box on the screen toolbar, specify the keyword.
-
Click Apply Filter.
After that, only the records that contain the specified keyword in the Message column will be displayed.
Switch to a mapping form
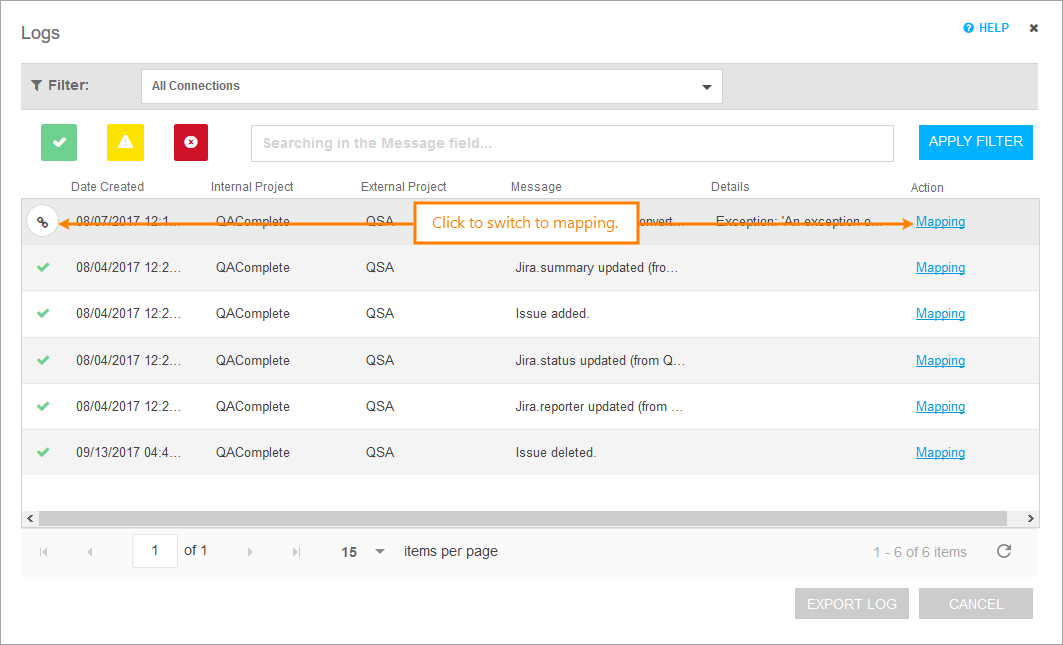
For every record in the log, you can quickly switch to the corresponding Mapping form to ensure the fields have been set up properly. For this, do one of the following:
- Click the Mapping link in the Action column.
- Move the mouse cursor over the record, then click the Mapping button that appears on the left.
Export logs
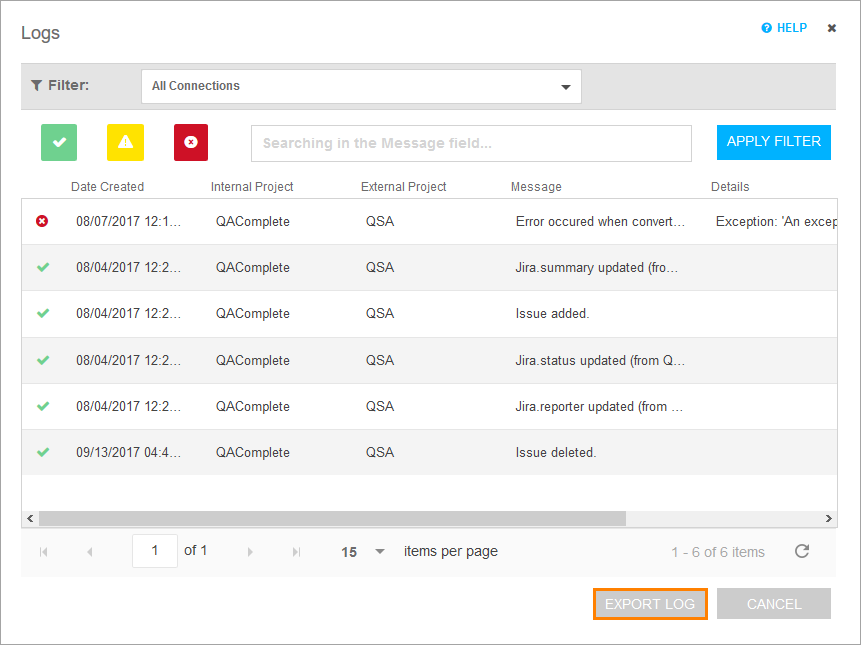
You can export all records from the connection log screen to a CSV file. To do that, click Export Log.
In addition to the columns that appear on the connection log screen, the CSV file also includes the following information:
| Column | Description |
|---|---|
| ConnectId | The unique ID of the QAComplete–JIRA synchronization. Can be used for troubleshooting. |
| InternalProjectId | The ID of the synchronized QAComplete project. |
| InternalEntityCode | The type of the synchronized QAComplete item. |
| SubEntity Code | The type of the synchronized QAComplete subitem. Used for notes and attachments. |
| InternalId | The ID of the synchronized QAComplete item. |
| ExternalEntityCode | The type of the synchronized JIRA item. |
| ExternalId | The ID of the synchronized JIRA item. |
| LinkedItemId | The unique ID of the link between QAComplete and JIRA items. Can be used for troubleshooting. |
| Log Level |
The record type.
|

