This topic describes how to configure your QAComplete application with your selected identity provider – Okta, PingOne, or Azure Active Directory.
Requirements
Get the following credentials from your identity provider:
- entityId (Identity Provider Issuer)
- Identity provider Single Sign-On URL
- X.509 Certificate
To learn how to do it, see one of the following:
Enable single sign-on
-
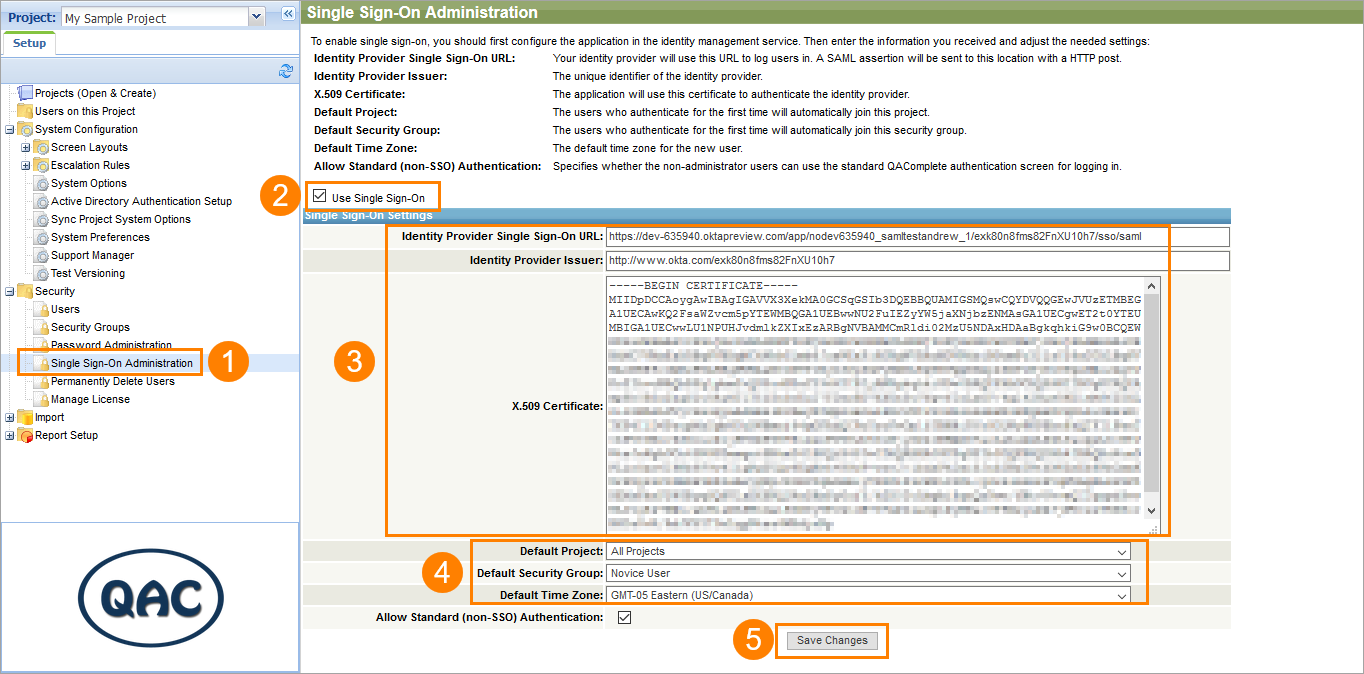
Go to > Setup > Security > Single Sign-On Administration.
-
Select the Use Single Sign-On check box.
-
Enter the necessary data to the following fields:
- Identity Provider Single Sign-On URL
- Identity Provider Issuer
- X.509 Certificate
For SaaS users, this page will have some additional settings:
- Login URL
- Domain name (read-only – the domain name will be formed during the SSO configuration automatically)
-
If a user with no existing QAComplete profile tries to log in with the single sign-on credentials, the QAComplete profile will be created for the user automatically. This profile will use the following settings:
-
Default Project – The newly created QAComplete user will automatically join this project.
-
Default Security Group – The newly created QAComplete user will automatically join this security group.
-
Default Time Zone – The default time zone for the new user.
-
-
Click Save changes.
Allow standard authentication
When single sign-on is enabled and configured, all the users use the single sign-on logon screen by default. To allow them using the QAComplete standard authentication, select the Allow Standard (non-SSO) Authentication check box on the Single Sign-On Administration screen.
Tip: This option does not affect QAComplete security administrator accounts. They will still be able to use the QAComplete authentication screen.

