To start using single sign-on with your QAComplete application, you need to set up the identity management service first.
-
Log in to your PingOne administrator account or create a new one.
-
On your user profile home page, switch to the Applications tab.
-
Click Add Application and select the New SAML Application option in the drop-down list.
-
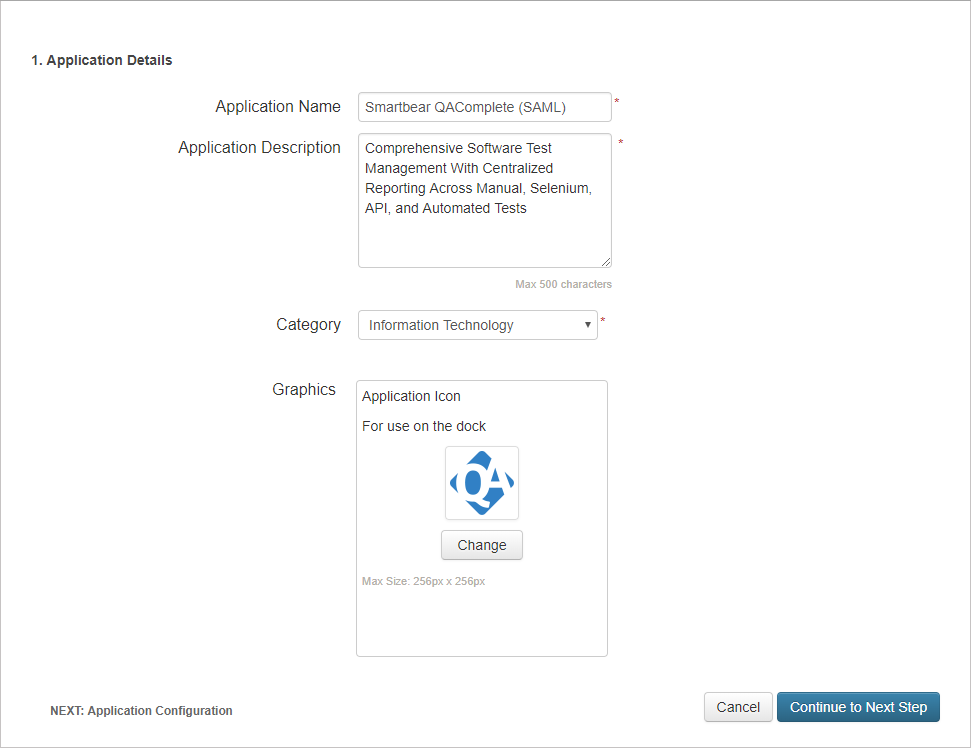
In the Application Details form, specify the following settings:
-
Application Name – The name registered for your application inside PingOne.
-
Application Description – A short snippet of arbitrary information about the application.
-
In the Category drop-down list, select the category for your application in accordance with its purpose and functions.
-
Optionally, upload the application logo in Graphics.
-
-
Click Continue to Next Step to proceed.
-
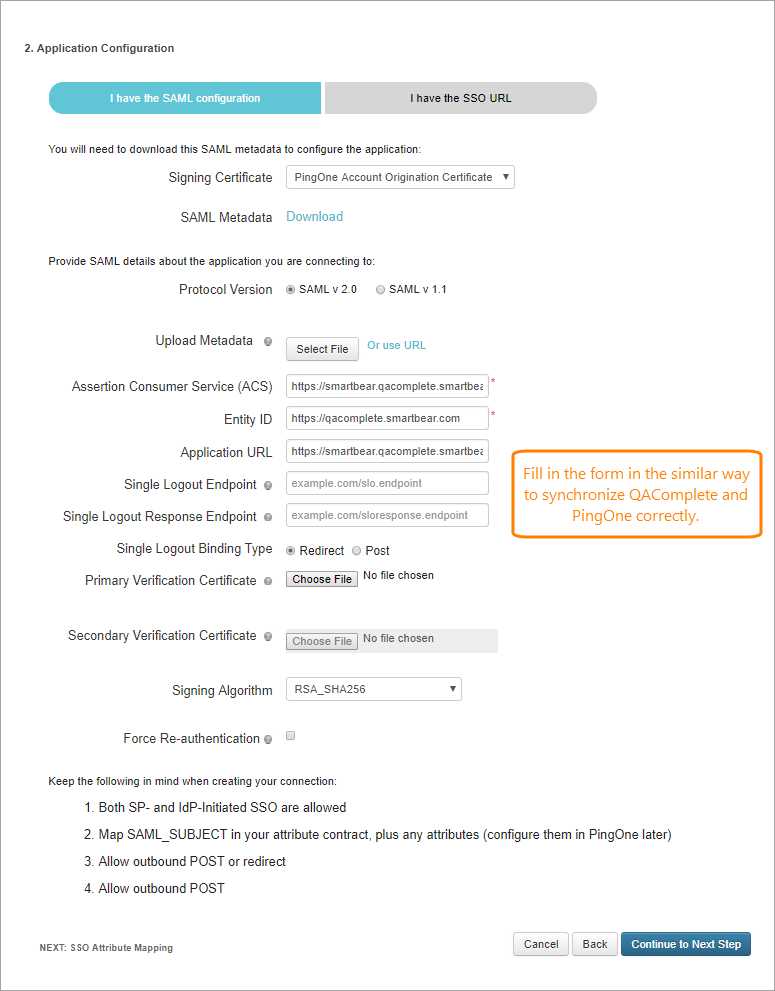
On the next page, click I have the SAML configuration. Then, you need to configure SAML as follows:
Option Software as Service On-Premises Signing Certificate PingOne Account Origination Certificate Protocol Version SAML v 2.0 Assertion Consumer Service https://<your SaaS domain>*.qacomplete.smartbear.com/sso/callback http://https://[your server name]//sso/callback Entity ID https://qacomplete.smartbear.com https://[your server name]/ Application URL https://<your SaaS domain>*.qacomplete.smartbear.com/common/Logon.asp?app=agSP https://[your server name]//common/Logon.asp?app=agSPEnt Single Logout Binding Type Redirect Signing Algorithm RSA_SHA256 *: Use the value of the Domain name field. You can find it in > Setup > Security > Single Sign-On Administration in QAComplete.
-
Click Continue to Next Step to proceed.
-
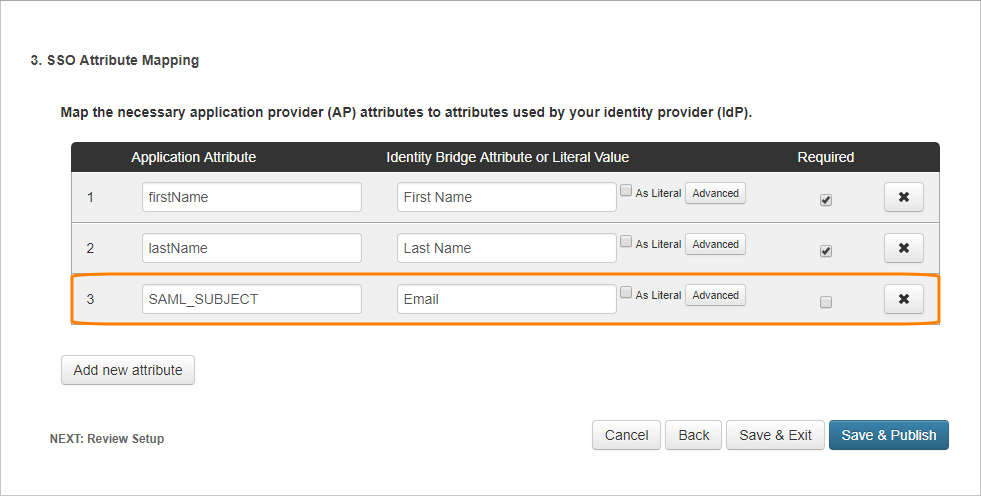
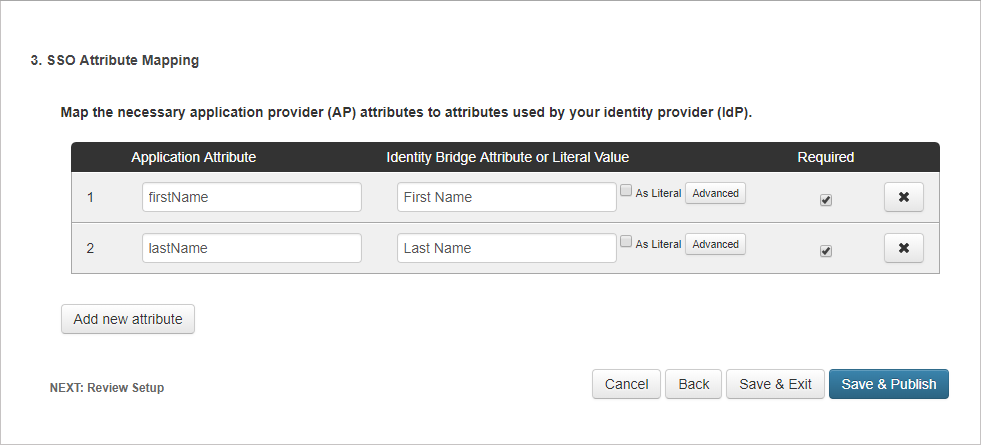
On the next page, click Add new attribute to map the necessary application attributes to identity attributes.
Attribute Statements Application Attribute Identity Bridge Attribute or Literal Value Required firstNameFirst NameYes lastNameLast NameYes -
Click Save & Publish to proceed.
-
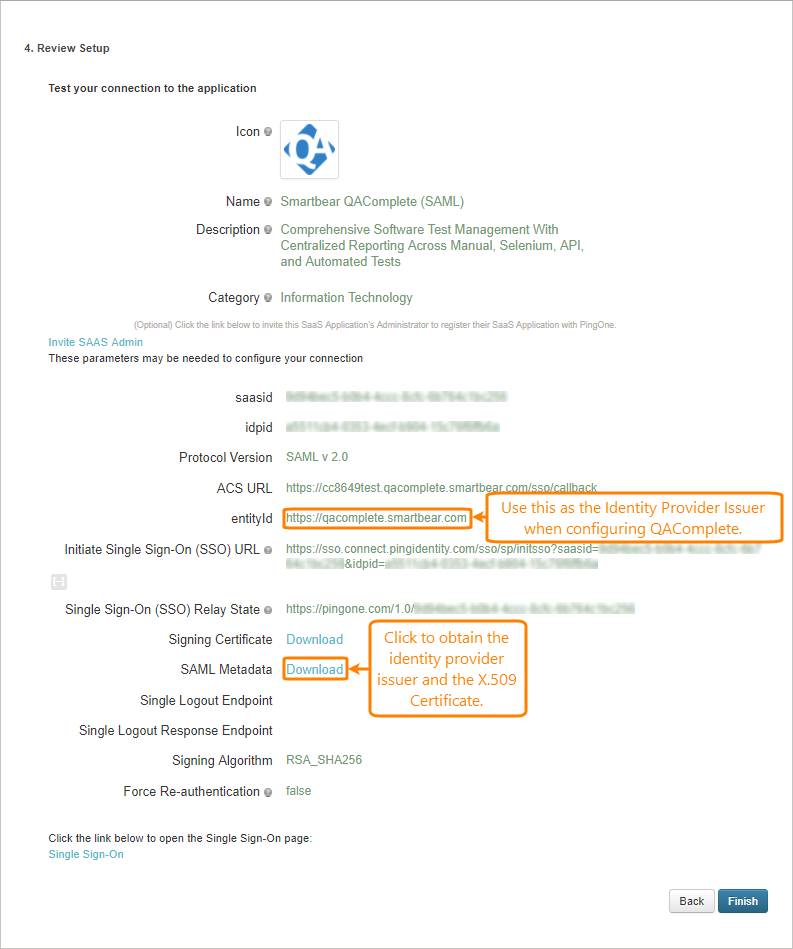
On the Review Setup page, get the necessary data for setting up QAComplete:
- entityId (Identity Provider Issuer)
- Identity provider Single Sign-On URL
- X.509 Certificate
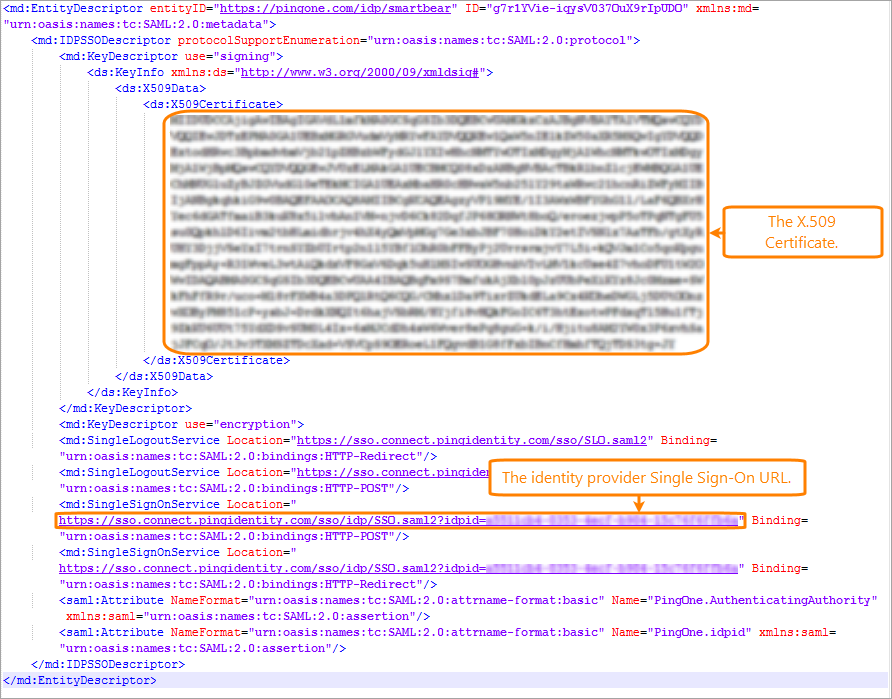
To get the identity provider Single Sign-On URL and X.509 certificate, download the SAML Metadata file. Open it and copy the following information:
-
Identity provider Single Sign-On URL: The value of the Location attribute of the
<md:SingleSignOnService>tag. -
X.509 certificate: The text between the
<ds:X509Certificate>tags.
Save these values somewhere else to use them during the QAComplete configuration.


 Define custom usernames