To start using Azure Active Directory to log in to QAComplete, you need to add your QAComplete application to your Azure instance first.
-
Log in to Azure Portal using an administrator account.
-
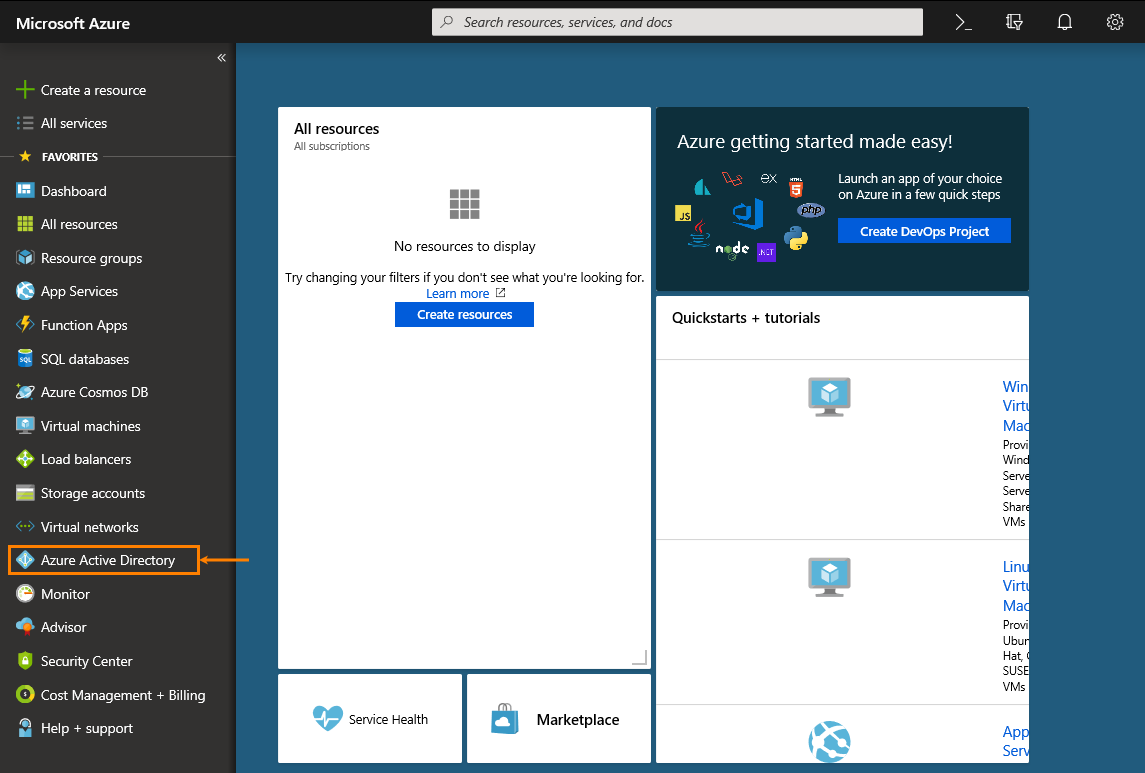
On the menu bar on the left, select Azure Active Directory:
-
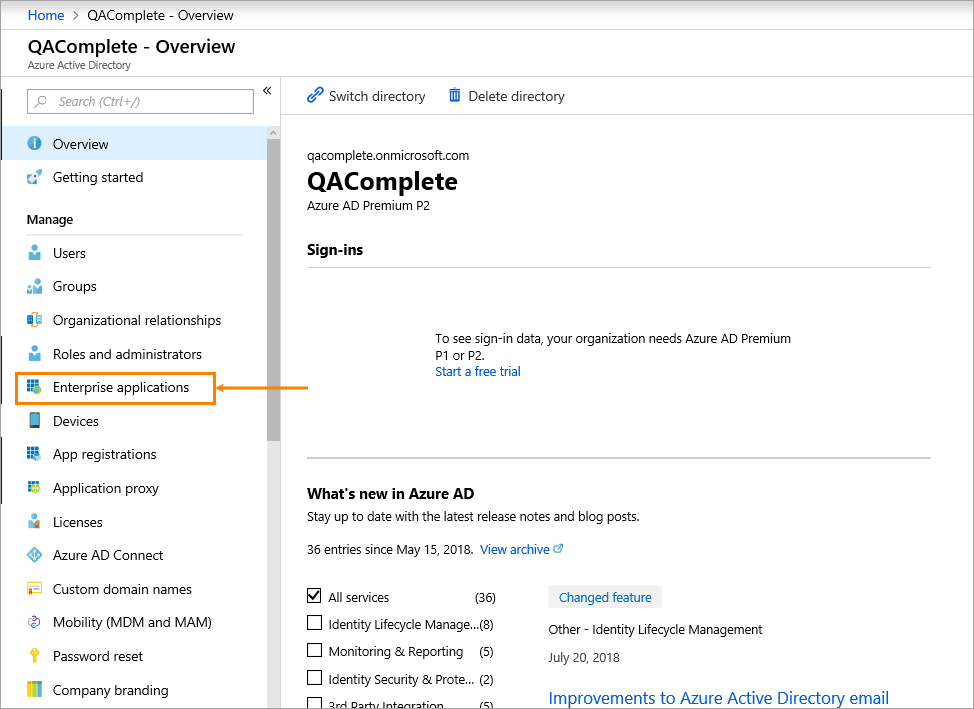
The Overview screen will appear. In the Manage section on the left, select Enterprise applications:
-
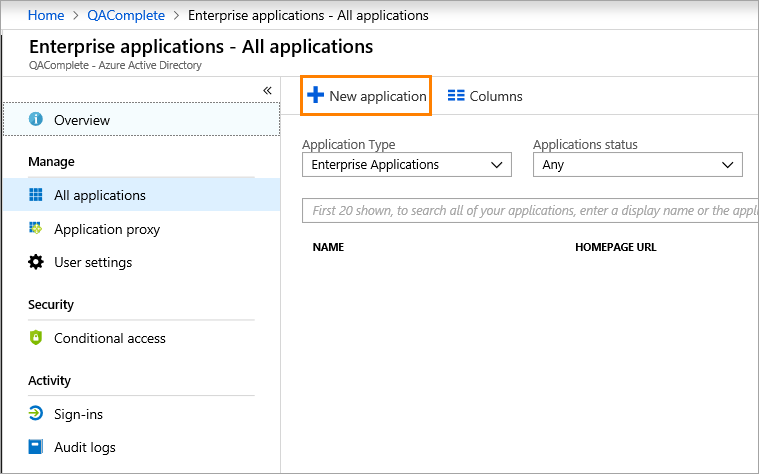
Double-click New Application:
-
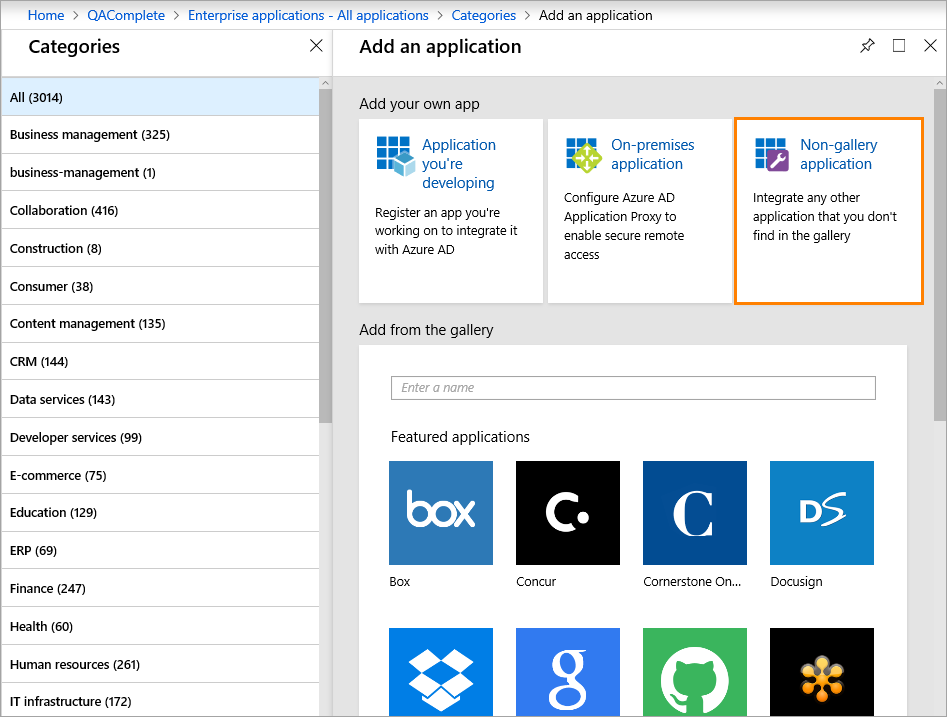
In the subsequent Add an Application form, double-click Non-gallery application:
-
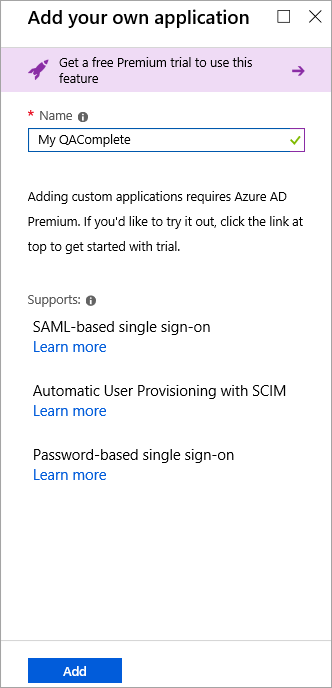
In the Name edit box, specify a comprehensive name that will be used for your QAComplete instance throughout Azure Active Directory:
-
Click Add at the bottom of the form.
-
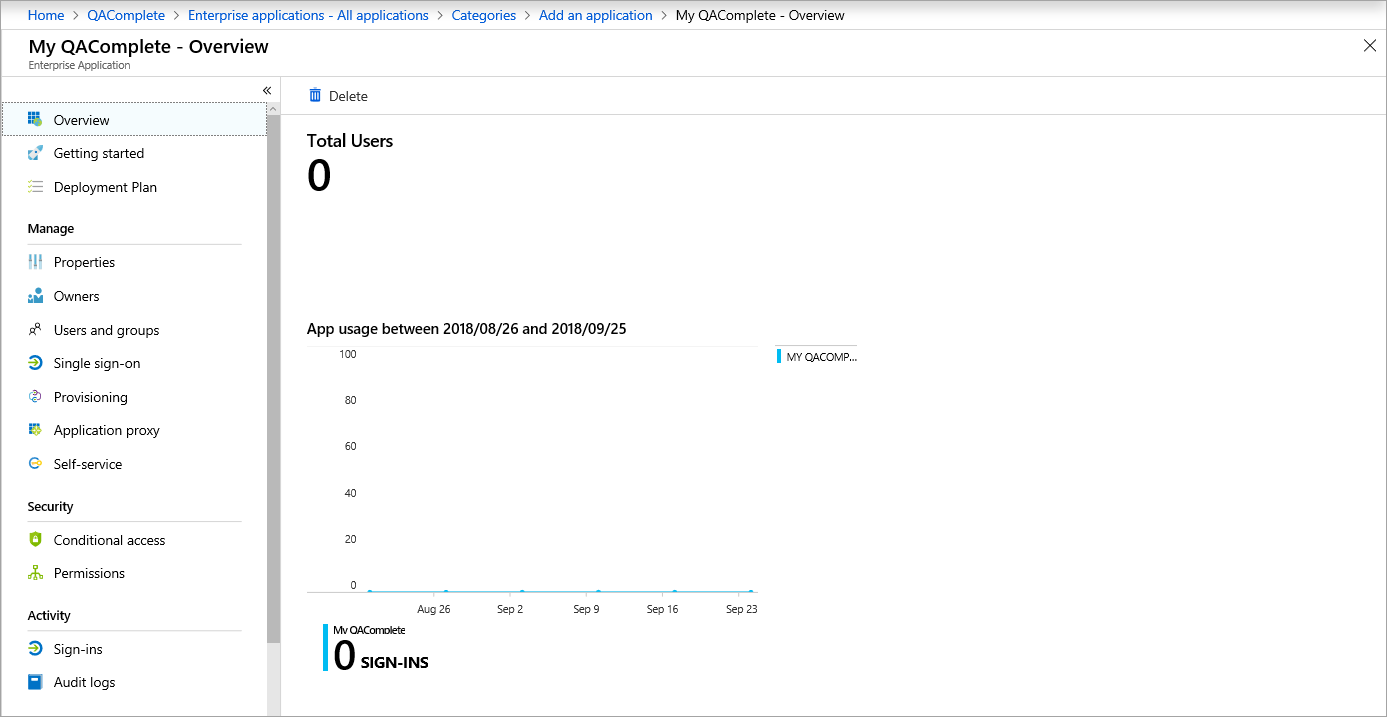
Wait a bit – your application will be added to your Azure instance. After that, the Overview screen will appear:
-
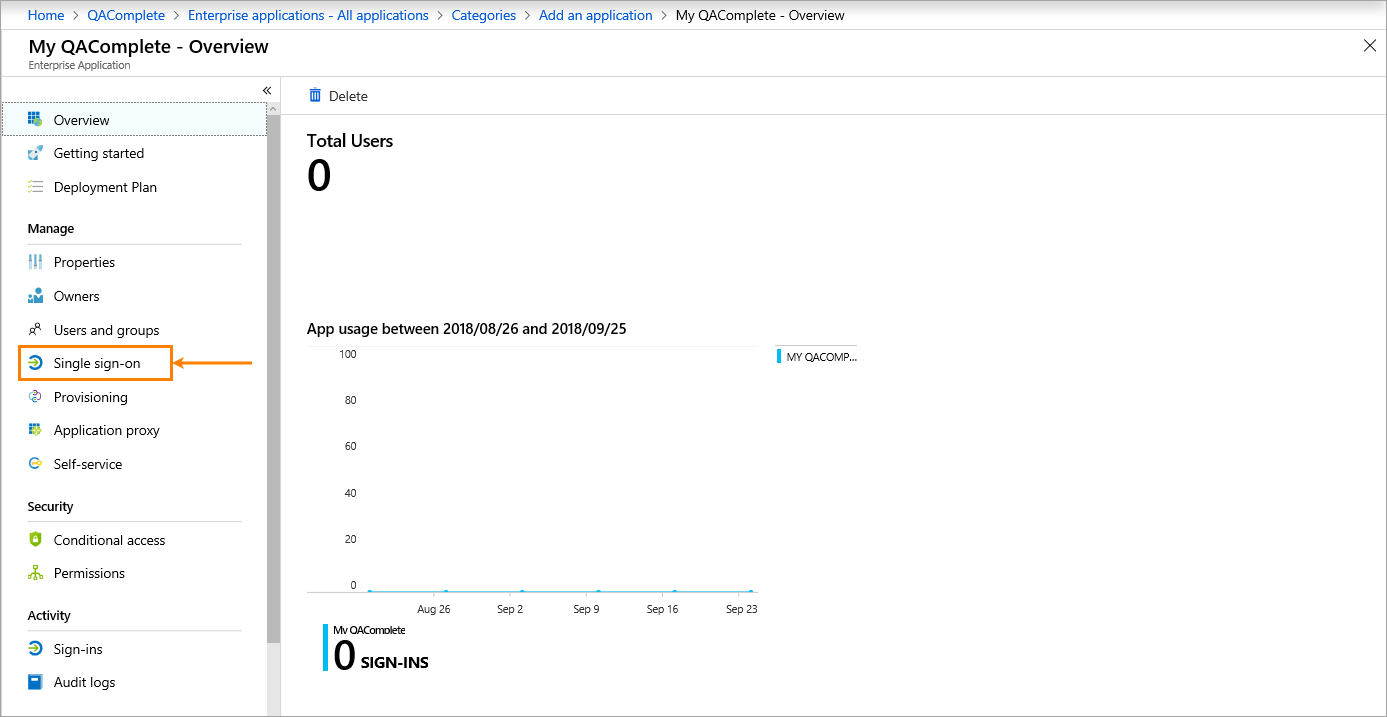
In the Manage section on the left, select Single sign-on:
-
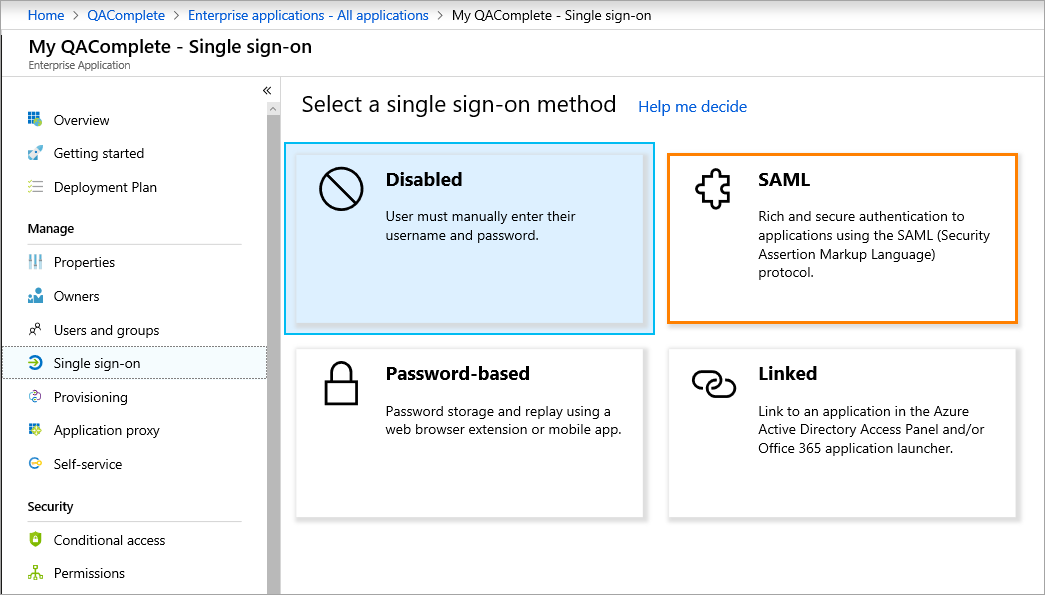
In the form that appears, select SAML:
-
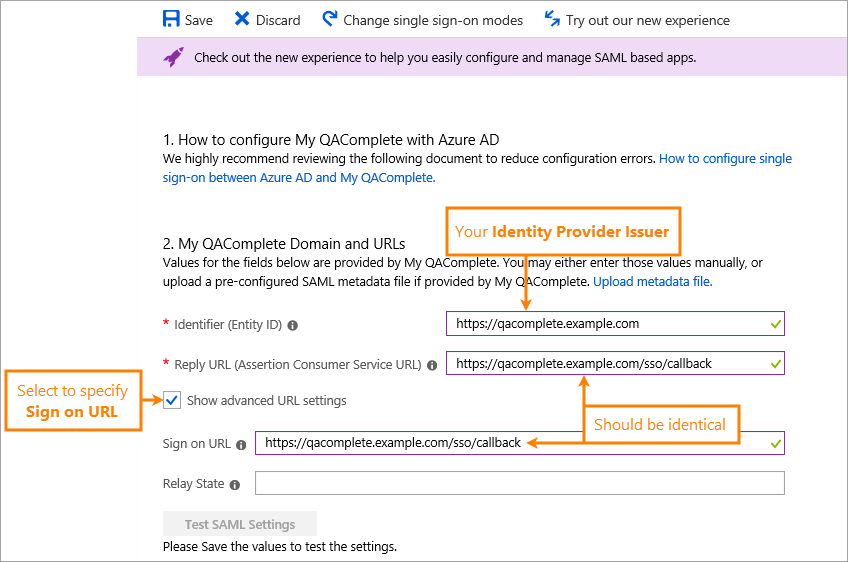
Provide information about your QAComplete instance:
1 It will be Identity Provider Issuer in QAComplete. Store this value in a safe location.
2 Use the value of the Domain name field. You can find it in > Setup > Security > Single Sign-On Administration in QAComplete.
 For QAComplete On-Premises users: Please keep in mind that Azure Active Directory supports the HTTPS protocol only. You will not be able to configure the connection between Azure Active Directory and a QAComplete instance that uses the HTTP protocol.
 -
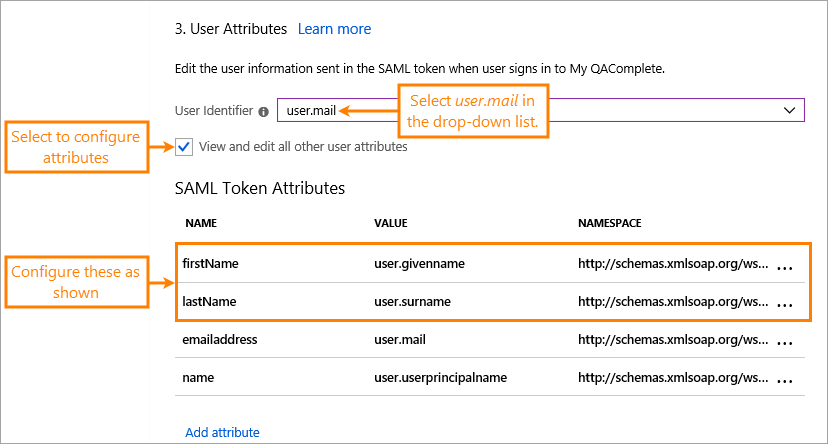
In User Identifier below, select user.mail.
-
Select the View and edit all other user attributes check box and make sure the following mapping rules are configured:
Name Value firstName user.givenname lastName user.surname See the screenshot below:
-
Next, scroll down to the Configuration section and click Configure application.
-
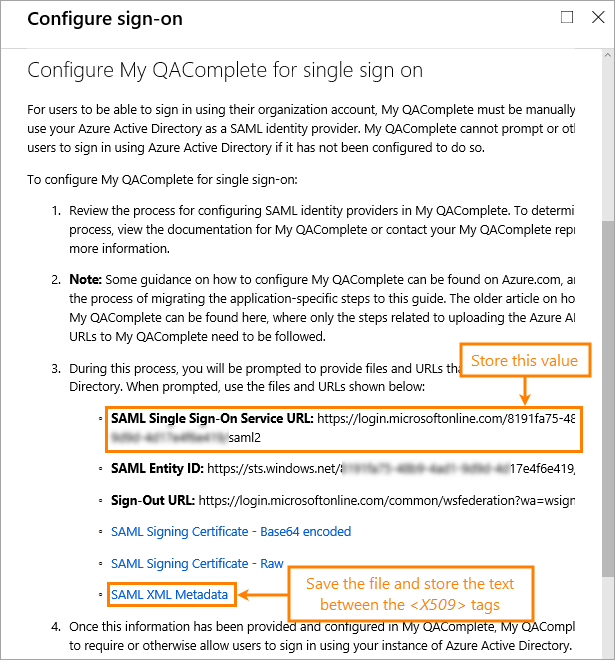
Retrieve the necessary data to configure QAComplete:
- entityId (Identity Provider Issuer): Identifier (Entity ID)
- Identity provider Single Sign-On URL: SAML Single Sign-On Service URL
-
From SAML XML Metadata:
- X.509 certificate: The text between the
<X509Data>tags.
- X.509 certificate: The text between the
Store this data in a safe location.
-
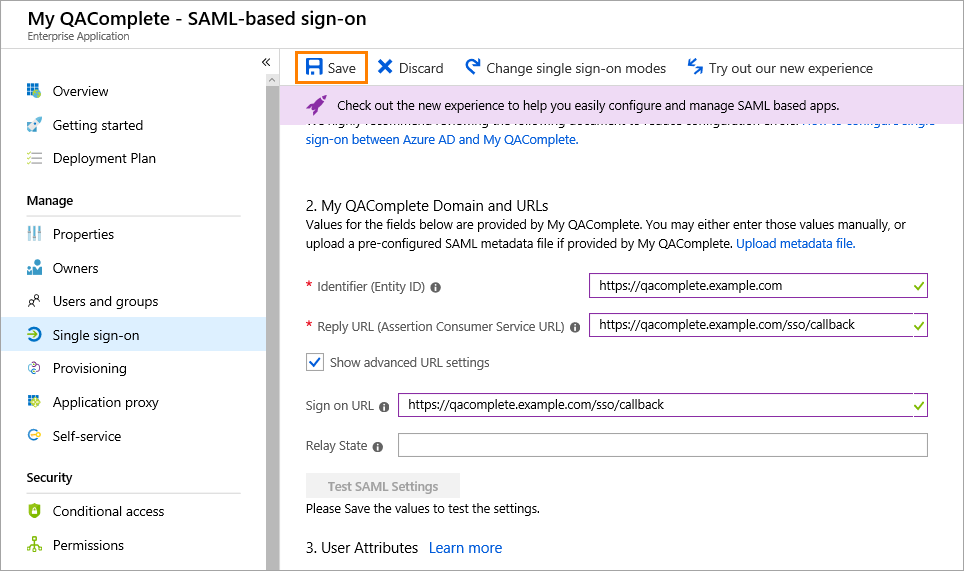
Click Save.
Now, your QAComplete instance should be available as an application in Azure Active Directory.
Next steps
-
Assign users to the QAComplete application in Azure Active Directory.
-
Configure QAComplete to use Azure Active Directory single sign-on.
See Also
Assign Users to Applications in Azure
Configure QAComplete for Single Sign-On
Azure Active Directory

