A single-page application (also known as SPA) is a web application that uses one URL for all its screens. The browser loads a page from the URL one time for the whole session. During its functioning, the application sends requests to the web server without changing the URL. Such applications are quite popular because they allow making web pages more dynamic and responsive.
LoadNinja has functionality to run scripts against single-page applications in the same way as it runs scripts against regular web applications. After reproducing a website user’s experience during recording, command virtual users to perform the same actions you performed to run load, scalability, and performance tests.
How it works
When working with a single-page application, the URL of the page the user works with doesn’t change. For that reason, LoadNinja cannot automatically mark the difference between the application screens, so it doesn’t create steps automatically. You have to manually create a step for each individual application screen.
In LoadNinja, such steps are called synthetic steps. Each synthetic step is a logical block that combines the actions the user performs on a specific screen of the application.
To create a synthetic step during recording
-
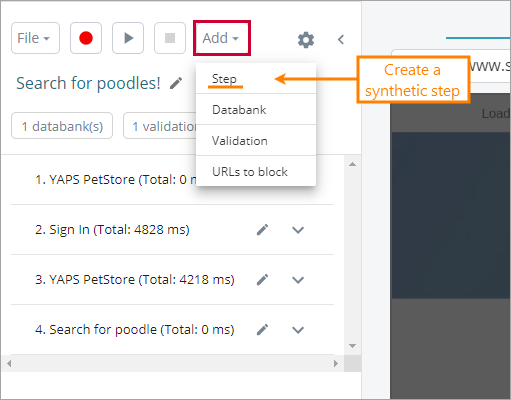
Select Add > Step on the toolbar of the UI test editor:
-
In the subsequent dialog, name the step as you like:
 Another way to create synthetic steps is to group recorded events and actions. To learn more about this functionality, see below.
All synthetic steps are marked with the icon in the step list.
To group existing actions and events into a synthetic step
-
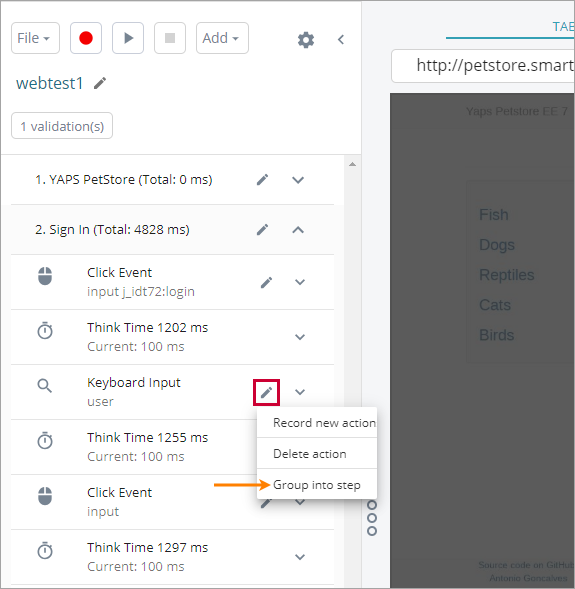
Locate one of the events you want to include in the synthetic steps, in the step list.
-
Select > Group into step:
-
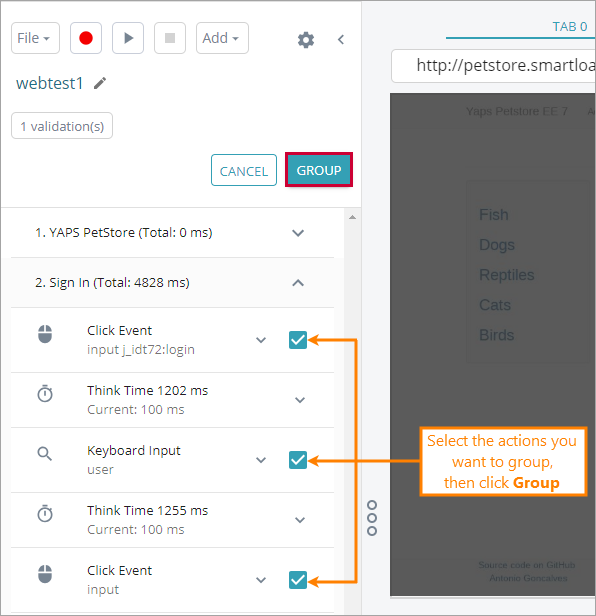
LoadNinja will enable the grouping check boxes. Select the ones near the events you want to group into step:
-
Click Group.
-
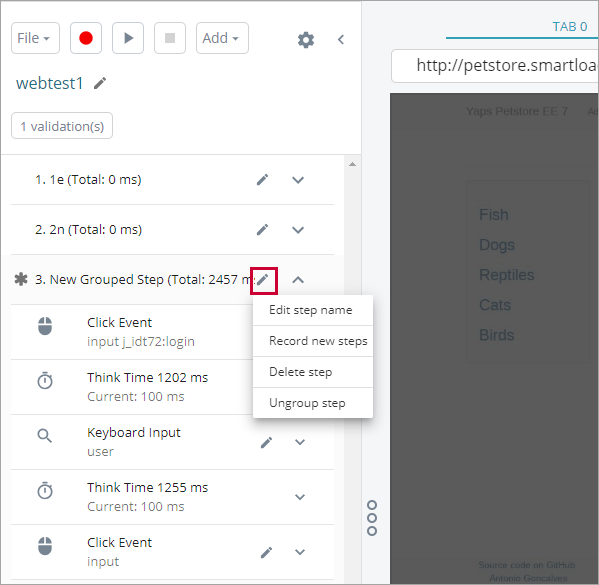
(Optional) To rename the step, select > Edit step name, specify a new name in the edit box, then press Enter.
| Note: | All actions and events within a specific step that you have not explicitly added to a synthetic step, LoadNinja will automatically collect into another synthetic step. |
To rename a synthetic step
-
Locate the synthetic step you want to rename.
-
Select > Edit step name.
-
Specify a new name in the edit box.
-
Press Enter.
To ungroup a synthetic step
By ungrouping, you remove the synthetic step from the step list. This action does not affect the events and actions that the step contains. All of them will be preserved and moved to the step above.
-
Locate the synthetic you want to ungroup, that is, remove from the step list.
-
Select > Ungroup step.
To learn how to delete a step completely, along with all actions and events it contains, see Delete events or steps.
Example
To try out testing single-page applications, create a script to test the Fonty website:
It is a single-page application that can replace the font on any website with one of the fonts from Fonty's database.
-
Click Create Test on the LoadNinja toolbar.

-
Command LoadNinja to record a test against an External/Public application.
-
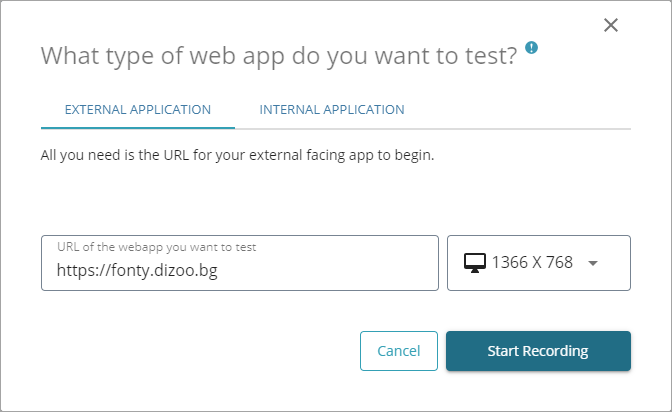
In the subsequent dialog, enter the website’s URL:
Then, click Start Recording.
-
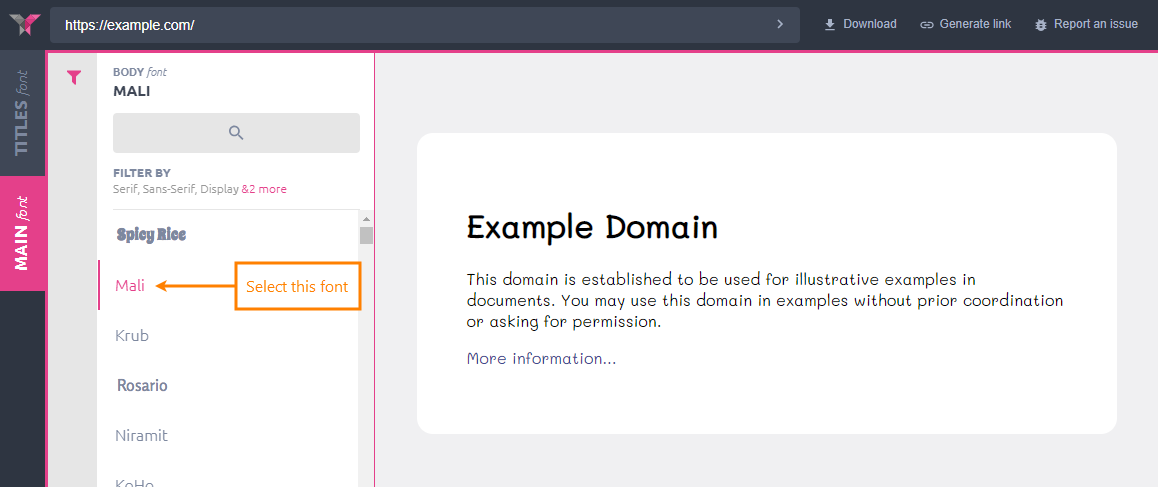
When the script recorder appears, at the tested page’s top, enter
https://example.comin the edit box:Click the arrow on the edit box’s right.
-
Fonty will open the requested page within the frame, but the URL of the page you are on will remain the same. This makes it the perfect time to logically separate the steps of your script.
On the script recorder’s toolbar, select Add > Step.
-
In the subsequent dialog, name your custom step: for example,
Framed website. Click Add New Step once ready.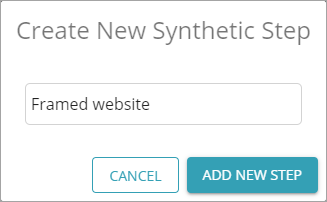
-
This is it — LoadNinja has separated your newly created step from the preceding actions. All actions you will perform further will be associated with the new step.
Feel free to try out things with Fonty: try changing fonts, filtering the list, and so on. For now, let’s command Fonty to use the Mali font with the page we have opened. To do that, simply click the name of the font in the list:
-
It looks like everything works fine. Click Download on the website’s toolbar.
-
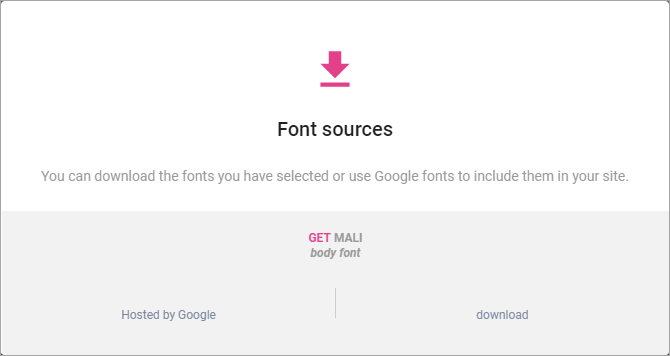
The website has opened a dialog window, but the URL of the page is still the same.
This means it would be a good idea to create another custom step.
Select Add > Step on the script recorder’s toolbar, name the new step
Dialog, confirm the creation by clicking Add New Step. The newDialogstep will appear in the list of steps. -
Let’s finish our test by clicking Hosted by Google in the dialog. It will open the Google Fonts website and create a step automatically.
-
Click on the toolbar.
-
Our script is fully operational now, and it is logically split into several steps depending on the screen a user interacts with. Let’s replay it to ensure everything works fine. Click Play Recording.
The replay results should appear without any issues. This means our script works properly. You can safely append it to a scenario and run a load test based on this script.

