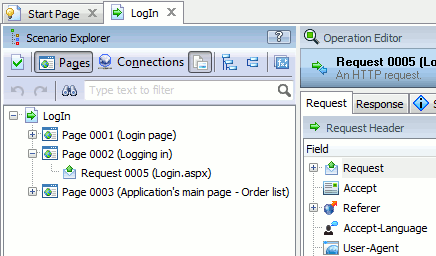
When you are recording a scenario, LoadComplete identifies requests initiated by user actions (for example, by clicking a mouse button or pressing Enter), marks those requests as web pages and groups recorded traffic by them.
Pages are essential elements of test scenarios and LoadComplete collects some testing metrics by pages: page load time, pages with errors and so on.
However, there can be situations when LoadComplete is not able to detect a web page (this can happen, for example, with traffic of Rich Internet Applications). In this case, you can group needed requests by pages manually. This way you can enhance your test reports by tracking metrics and SLA criteria for these custom pages.
You can define custom pages both when recording scenarios and when editing existing scenarios.
Creating Custom Pages
To indicate a custom page during scenario recording:
-
Enter the page name in the edit box on the Recording toolbar.
-
Click the
 Start New Page button to confirm adding the page. This is not required though, because LoadComplete automatically detects that you have entered a custom page name.
LoadComplete will create a custom page and show you a notification about it.
To set a custom initial page, enter the needed page name in the Recording toolbar right after the recording starts, before you start recording traffic.
LoadComplete will record all subsequent requests as belonging to the new page, until you either open a new page or add another custom page.
Viewing Pages in Scenarios
In the Scenario editor, you can group recorded requests by pages. To view pages, click  Pages on the editor’s toolbar.

For more information on the available grouping settings, see Scenario Explorer.
To learn how to create custom groups in scenarios at design time, see Adding Custom Pages.

 Creating Custom Pages