This page relates to the new version of the tunnel that has been introduced to CrossBrowserTesting. If you use the legacy tunnel version, see CBT Tunnel (Legacy).
About
-
The SecureTunnel executable is available in form of a command-line utility, a desktop application, and the Enterprise Connection Manager.
The command-line utility is helpful when you need to automate the tunnel start and stop.
-
The utility works on Windows, Linux and Mac OS systems.
-
It works with both HTTP and HTTPS traffic.
-
The utility is resource friendly. It doesn’t have any specific requirements and can run on almost any machine, even on a “weak” one.
-
For details of the tunnel functioning, see Local Testing — Secure Tunnels.
1. Set up the command-line utility
-
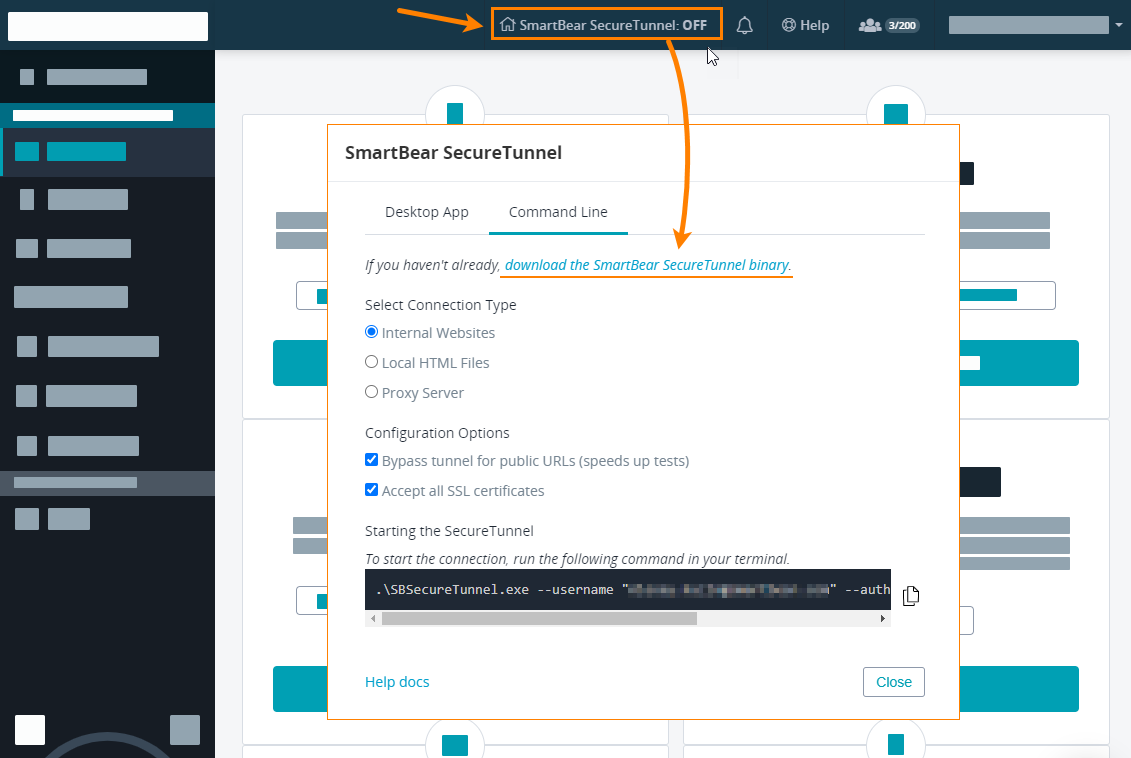
You can download the SecureTunnel command-line utility from the product UI.
– OR –
You can use these links to download the utility:
-
That’s all. You can run the downloaded executable as it is.
Depending on the security settings, the operating system may ask your permission to run it. Grant the permission.
2. Start the tunnel
In general case, you can start the tunnel from the CrossBrowserTesting website or on your computer (see SecureTunnel Desktop App). Using the command-line utility implies that you start the tunnel from your computer. Open the command line window and enter the command like this:
SBSecureTunnel.exe --username "[email protected]" --authkey aaabbbXXXXXNNNNccc --acceptAllCerts
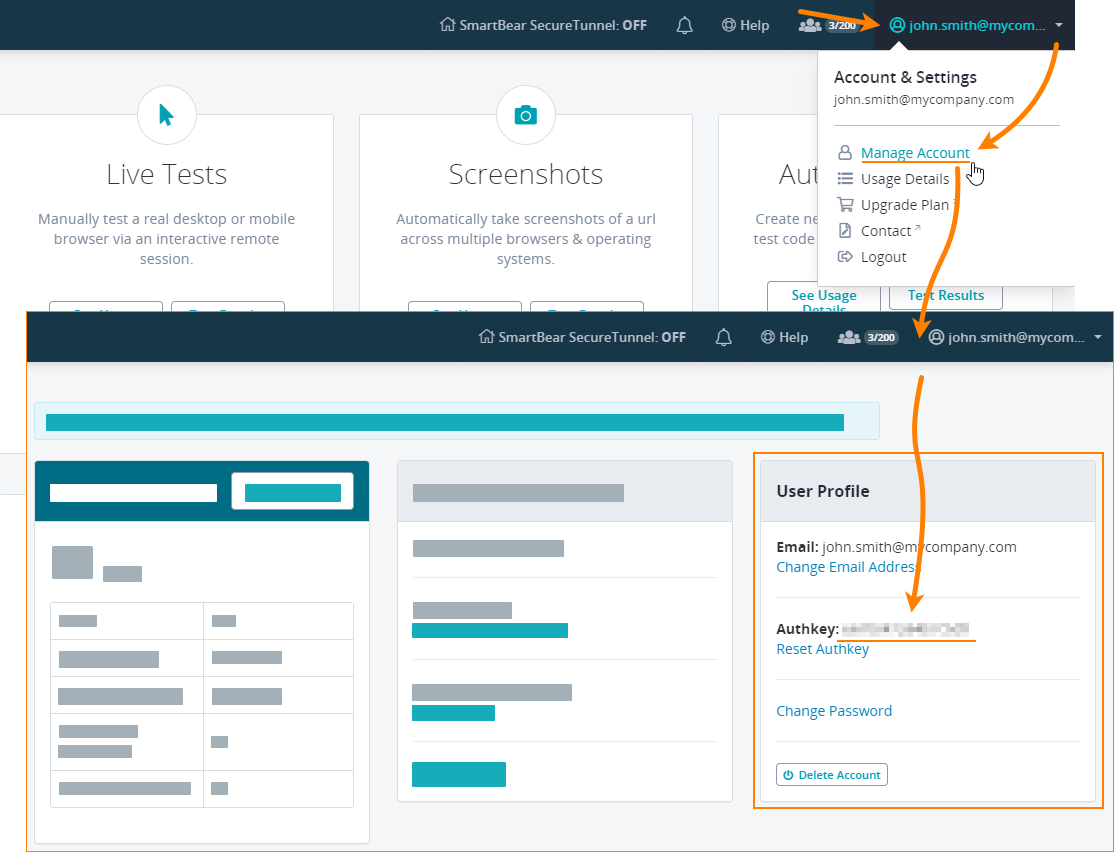
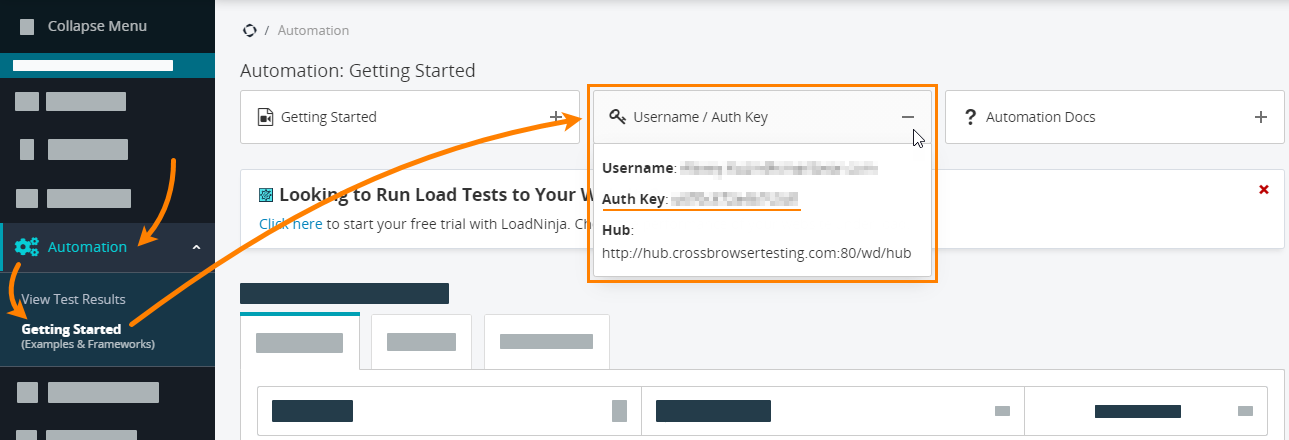
Here, --username is your CrossBrowserTesting account (email address), and --authkey is your authentication key (also called API key). --acceptAllCerts commands the tunnel to accept security certificates. For detailed information on supported command-line parameters, see below.
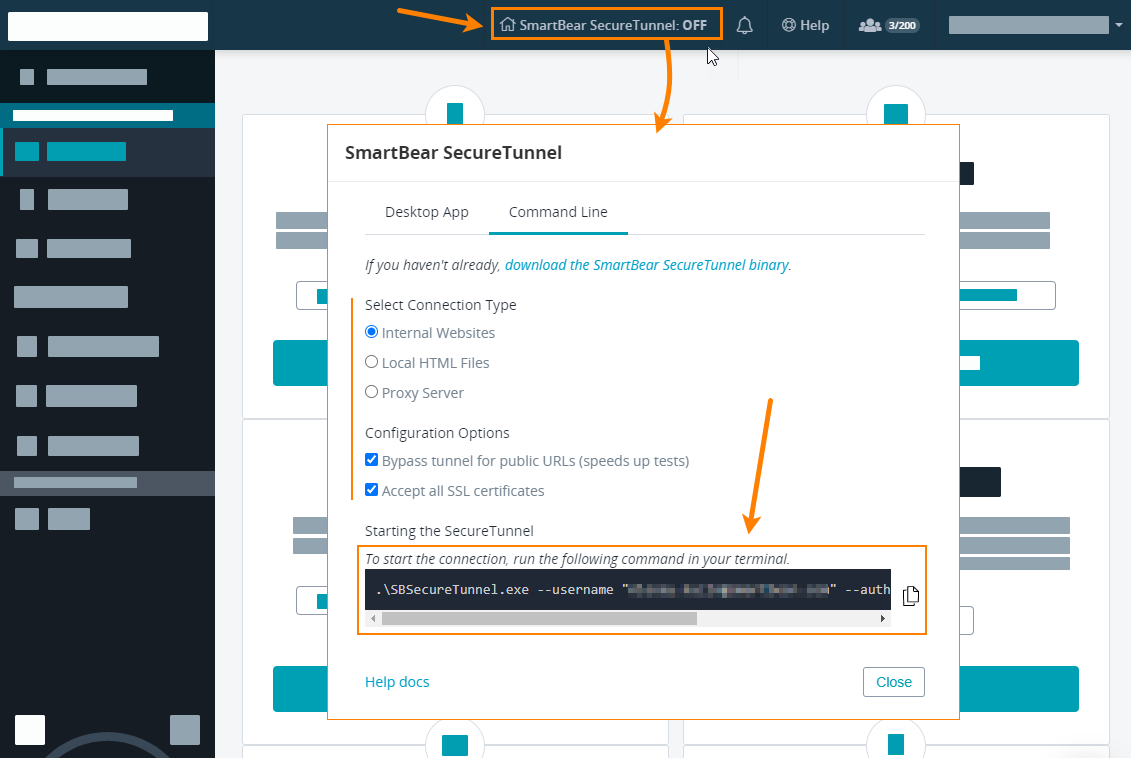
Tip: You can get the needed command line at any time on the CrossBrowserTesting website: open the Secure Tunnel dialog box and select the needed options on the Command Line tab. The dialog will update the sample command line respectively:
 The tunnel connects to the
 geo.tunnel.smartbear.com server through port 443. It is important that proxies and firewalls running in your network allow connection to this URL and port.
However, if your organization uses the Enterprise Connection Manager, then the connection to this URL and port is needed for that Manager. The tunnels that users set up on their machines don’t need it.
3. Run your tests
After the tunnel is up and running, you can create or run your tests as you regularly do. For details, see the following links:
 Important notes:
-
When you have the tunnel up and running, tests of all types — live, screenshots, automated (Record and Replay, Selenium, and others) — will send their traffic through that tunnel.
-
It’s important to check if the tunnel is on before you start testing. See how you can do this.
-
Due to specifics of some operating systems and browsers, the URLs that include
localhost,localor127.0.0.1may not open through the tunnel. For information on possible workarounds, see How to refer to local resources.
4. Close the tunnel
Option 1 – From the web site
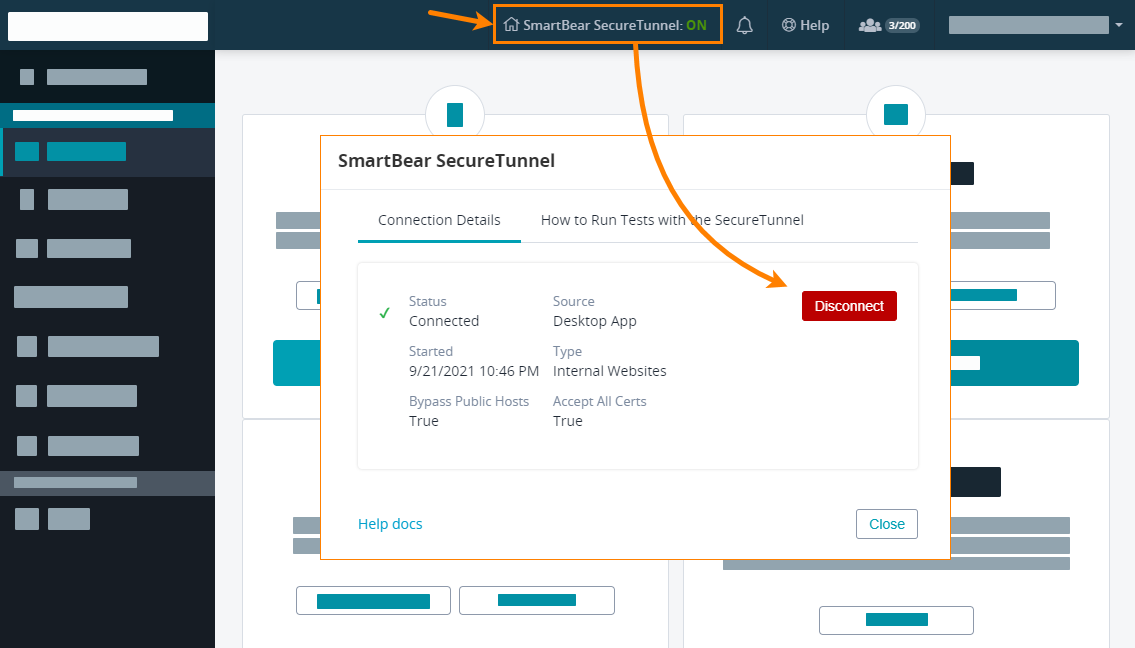
Regardless of the way you started the tunnel, you can close it on the CrossBrowserTesting website: open the Secure Tunnel dialog box and click Disconnect.
Option 2 – From your computer
The tunnel exists while the command-line utility is running. You can close it, for example, by pressing Ctrl+C in the command-line window.
You can also close the tunnel from the command line by using the --kill parameter. See below.
Command-line syntax
The utility supports special parameters to enable you to configure every aspect of tunnel functioning. The parameters can be organized into the following logical groups:
SBSecureTunnel.exe <required-params> <working-mode-params> <additional-params>
Required parameters
By using the SBSecureTunnel command-line utility, you can start SecureTunnel in various configurations. In every call, you should specify these parameters:
SBSecureTunnel.exe --username your-account --authkey auth-key
-
--usernameis the name of your CrossBrowserTesting account (for example,[email protected]). -
--authkeyis your authentication key (also called API key).
Recommended parameters
In most cases, you will run the utility with the following parameters:
SBSecureTunnel.exe --username your-account --authkey auth-key --acceptAllCerts
This call initiates the tunnel of the Internal Websites type with the the Accept all SSL certificates and Bypass tunnel for public URLs settings enabled (for more information on them, see Tunnel Settings).
Note that the Internal Websites mode is used by default and doesn’t require any command-line argument for activation. The same is with the Bypass … setting.
Working mode parameters
By default, the utility runs the tunnel in the Internal Websites mode. If you want to run it in other modes — Local HTML files or Proxy Server — you need to add special parameters to the command line.
Run in Local HTML Files mode
To use the tunnel for testing local HTML files (the Local HTML files option in the Desktop version of the tunnel app), add the --dir folder parameter to the command line:
SBSecureTunnel.exe --username your-account --authkey auth-key --dir "c:\my work\files"
The --dir parameter specifies the folder on your computer (that is, the computer where the tunnel utility is running) that stores the tested files. If the folder name includes spaces, enclose it in quotes (like in the example above).
Run in Proxy Server mode
To run the tunnel in the Proxy Server mode, add the --proxyIp and --proxyPort parameters to the command line:
SBSecureTunnel.exe --username your-account --authkey auth-key --proxyIp ip-address --proxyPort proxy-port-number
Bypass tunnel for public URLs
By default, the Bypass tunnel for public URLs setting is on and you don’t need to add anything to the command line to activate it.
If you need to disable the setting, add --bypass false to the command line:
SBSecureTunnel.exe --username your-account --authkey auth-key --bypass false
Accept all SSL certificates
To enable the Accept all SSL certificates setting, add --acceptAllCerts to the command line. If this parameter is absent, the setting is off:
SBSecureTunnel.exe --username your-account --authkey auth-key --acceptAllCerts
Additional options
--httpProxy proxyAddr or --httpsProxy proxyAddr
You need to add these parameters to the command line if your computer (the computer, where the tunnel utility is running) uses a proxy server to connect to the Web.
proxyAddr specifies the name or IP address of your proxy server, for example:
SBSecureTunnel.exe --username your-account --authkey auth-key --httpProxy 192.168.1.17
If your proxy requires a user name, password, or specific port, you can use the following syntax:
ProxyUser:ProxyPassword@ProxyAddress:ProxyPort
For example:
SBSecureTunnel.exe --username your-account --authkey auth-key --httpProxy userName1:[email protected]:8080
--tunnelname name
Creates a named tunnel. name is an arbitrary string that identifies the tunnel. It should not coincide with the name of any other existing tunnel. If that string includes spaces, slashes or colons, enclose it in quotes. See also Named Tunnels. Example:
SBSecureTunnel.exe --username your-account --authkey auth-key --acceptAllCerts --tunnelname "New app tunnel"
Commands the tunnel executable to monitor the specified file. Once the file appears, the tunnel executable shuts down. The file format and contents don’t matter. It can be an empty file. The SecureTunnel utility checks only the file presence. See also Using Tunnels in Automated Tests.
| Note: | If the file name contains spaces, enclose it in quotes. |
--ready file-name
Commands the tunnel executable to create the specified file after the tunnel connection has been set up successfully (the created file is empty). Your automation framework can check the presence of this file to determine if the tunnel is ready or not. See also Using Tunnels in Automated Tests.
| Note: | If the file name contains spaces, enclose it in quotes. |
When this parameter is used in the command line, the SecureTunnel utility posts messages about its work to the command-line window. This will help you diagnose issues when the tunnel fails to start. By default, the verbose mode is off.
See Also
Local Testing — Secure Tunnels
Tunnel Settings
Secure Tunnels – Tips
Using Tunnels in Automated Tests
SecureTunnel Desktop App

 See instructions
 Live (or Manual) Testing