The VMware version of Private Node Server can run on VMware ESXi 5.5 and later. This guide explains how to deploy it on ESXi using vSphere Client.
Download
Request a download link for the virtual machine image from your AlertSite Sales Representative or Customer Success Advisor.
The VM is available in two formats, depending on how you wish to import the VM:
-
OVA – a single file for easier deployment, it can be deployed directly from the URL.
-
OVF+VMDK files in a zipped archive.
Deployment: key points
-
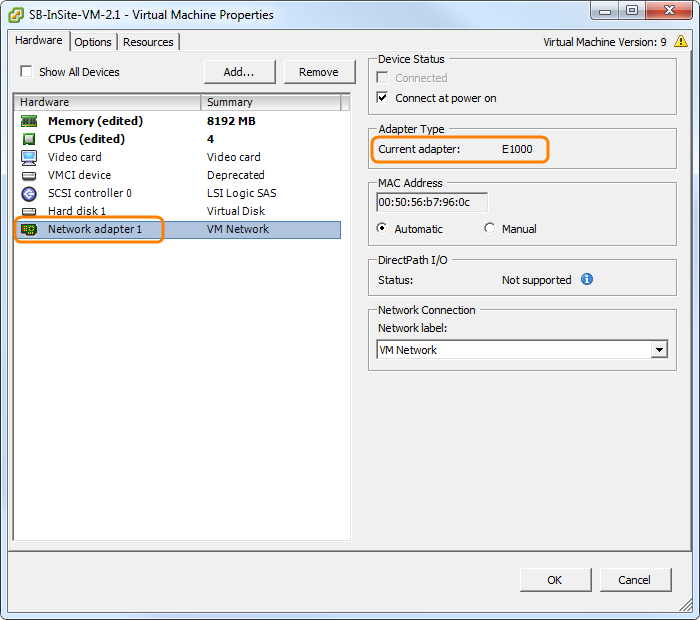
An E1000 or VMXNET 3 virtual network adapter needs to be configured for the VM to operate. For more information about VM network adapter types, see VMware documentation:
-
The VM must be initially connected to a virtual network that has DHCP enabled. Once the VM is up and running, it can be configured to use a static IP address using the web interface that is part of Private Node Server. After that, you can switch the VM to your preferred virtual network.
-
Note for vSphere Web Client users: Use the Chrome or Firefox browser to import the VM. Internet Explorer has a 4 GB limit for file uploads, so you will not be able to import the Private Node Server VM by using Internet Explorer.
-
Using snapshots with Private Node Server virtual machines is not supported, so they must be disabled. If you use VMware scheduled tasks or third-party backup software that creates snapshots, do not take snapshots for this VM. All monitoring data is stored and backed up on AlertSite servers, so there is no need to back up the VM using snapshots.
Deploy the VM using vSphere Client
Below are instructions for deploying Private Node Server on ESXi 6.0 using vSphere Client 6.0. The steps for other versions may differ slightly.
-
Launch vSphere Client and connect to your ESXi host.
-
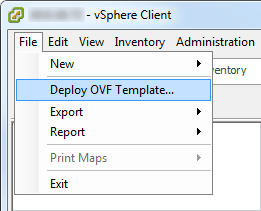
From the main menu, select File > Deploy OVF Template.
-
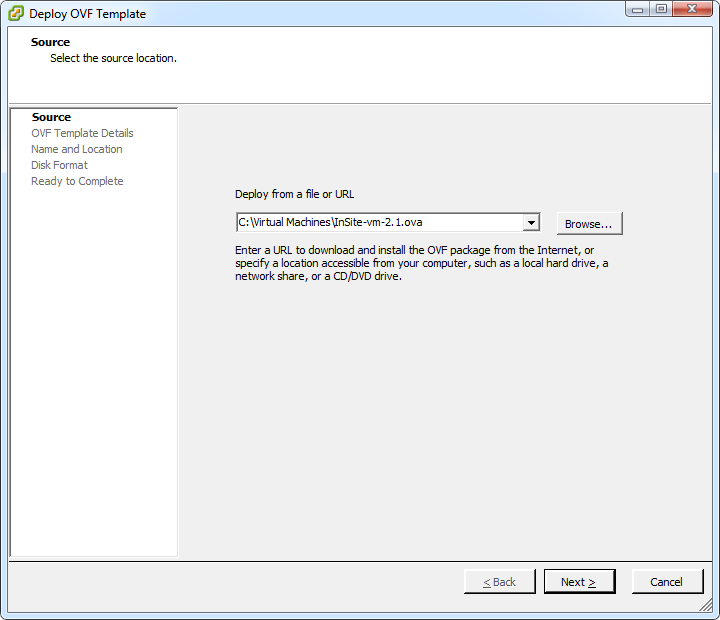
Browse for the .ova or .ovf file and click Next.
-
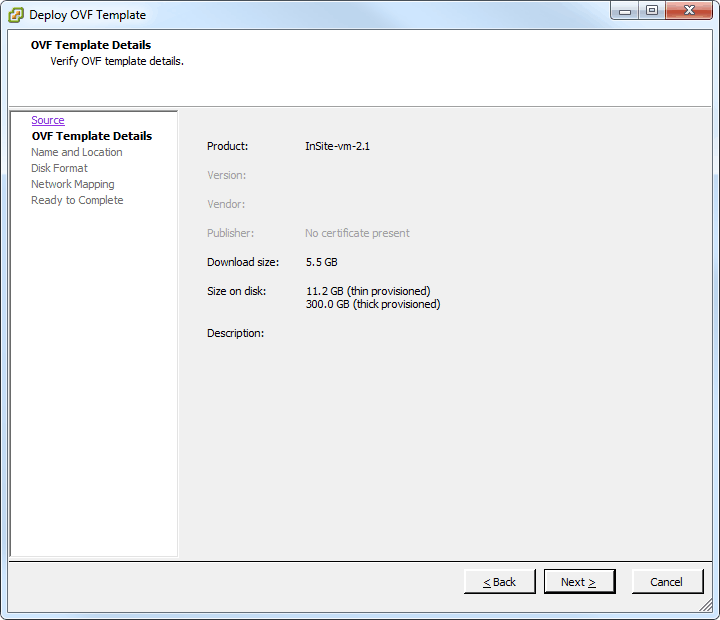
Review the VM image information and click Next.
-
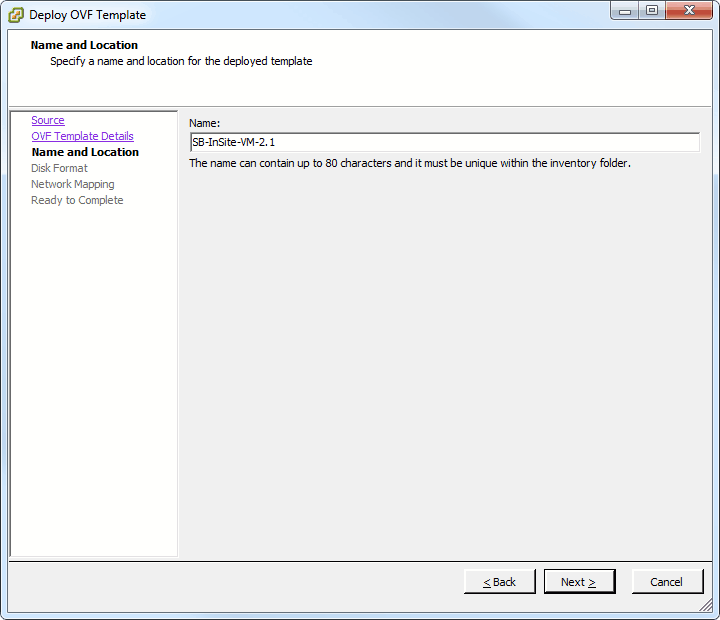
Give your virtual machine a name and (if asked) select the inventory folder for this VM. Click Next.
-
If deploying to a cluster, choose a specific host within the cluster where to run Private Node Server.
-
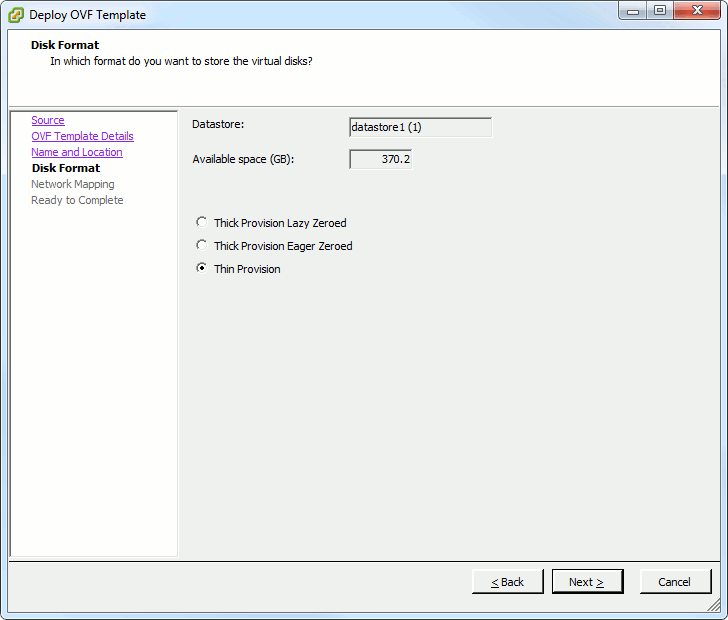
On the Disk Format page, choose between Thick Provision (allocate all the disk space now) or Thin Provision (allocate the disk space dynamically as the data is written).
-
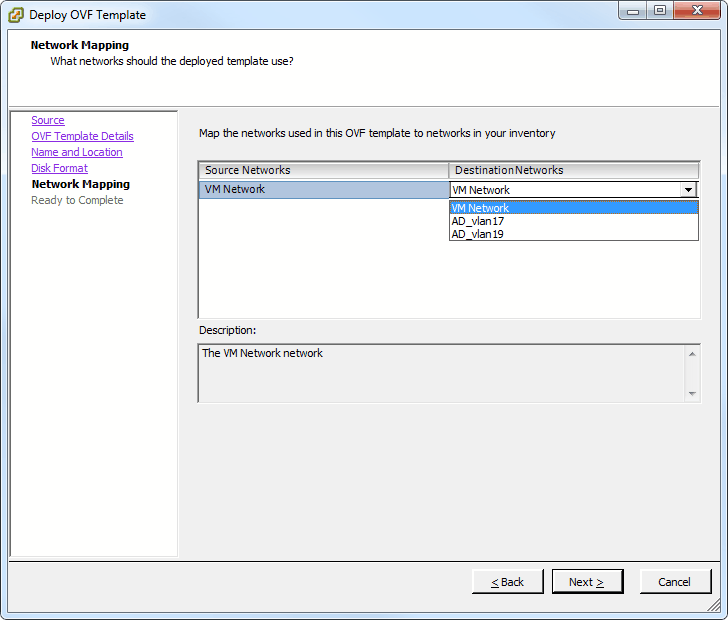
On the Network Mapping page, select the virtual network to connect Private Node Server to. This network must be DHCP-enabled and have an Internet connection. If needed, you can switch the VM to a non-DHCP network later, after the initial configuration.
-
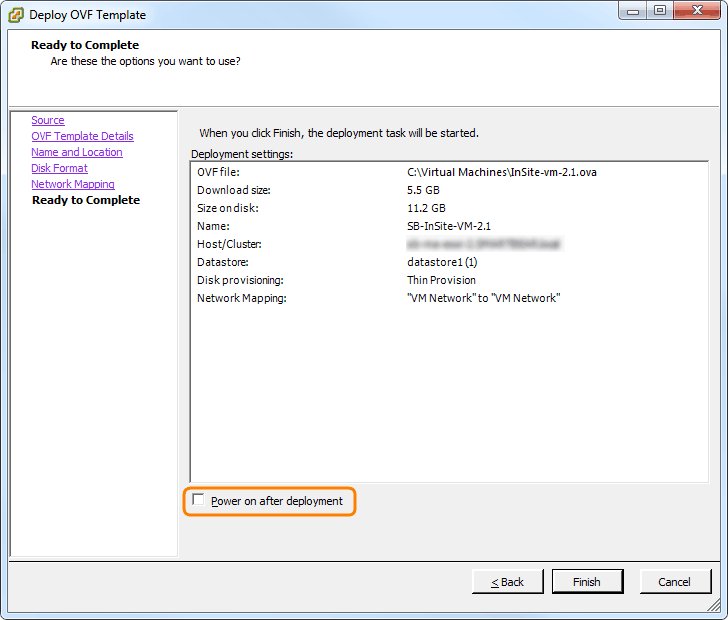
On the last screen, unselect Power on after deployment and click Finish.
VM settings
Once the VM is deployed, you need to edit the VM configuration to meet the minimum system requirements for the desired monitoring capacity.
-
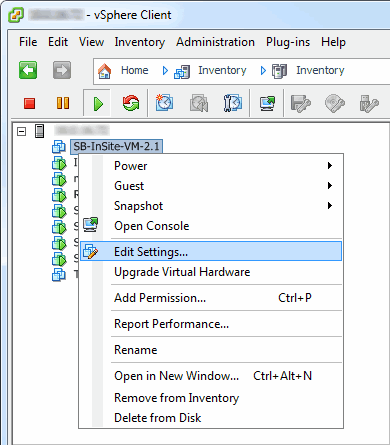
Right-click the VM and select Edit Settings.
-
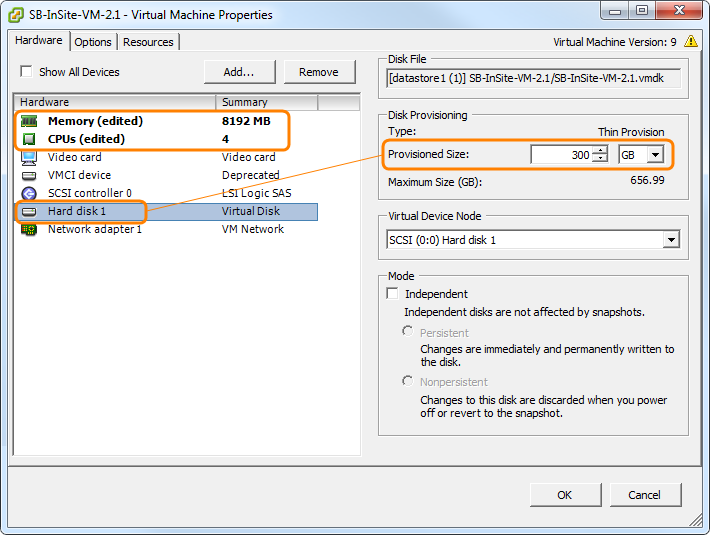
Set the VM memory, CPU, and hard disk size.
-
Make sure the VM’s network adapter type is E1000 or VMXNET 3. If it is not, remove the existing network adapter and add a new one of the E1000 or VMXNET 3 type.
-
(Optional) To disable snapshots on the VM level (rather than in your backup software):
-
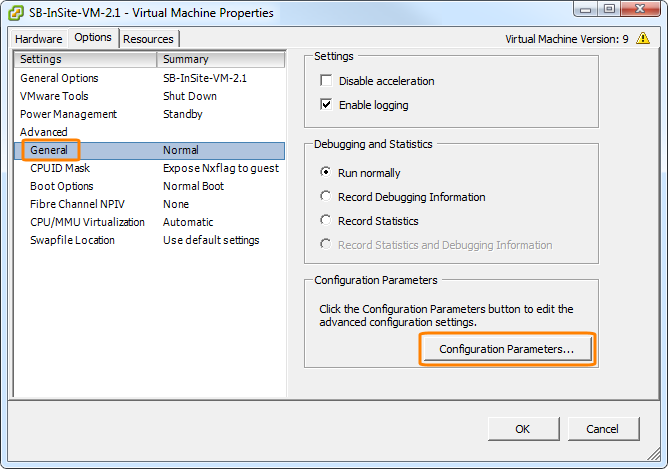
On the Options tab, select the Advanced > General category and click Configuration Parameters.
-
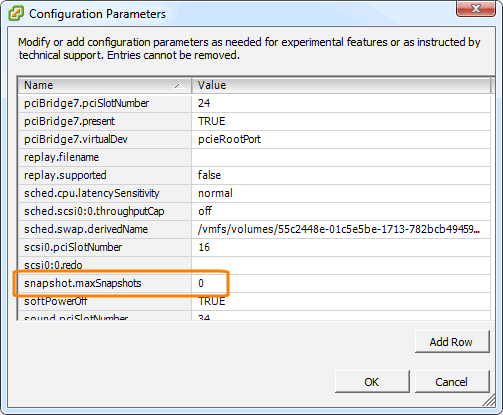
Add the
snapshot.maxSnapshotsoption (if it does not exist yet) and set the value to 0. -
Click OK.
-
-
Set the other options as needed and click OK to save the changes.
Start Private Node Server
After you have adjusted the hardware options for the VM, you can power it on.
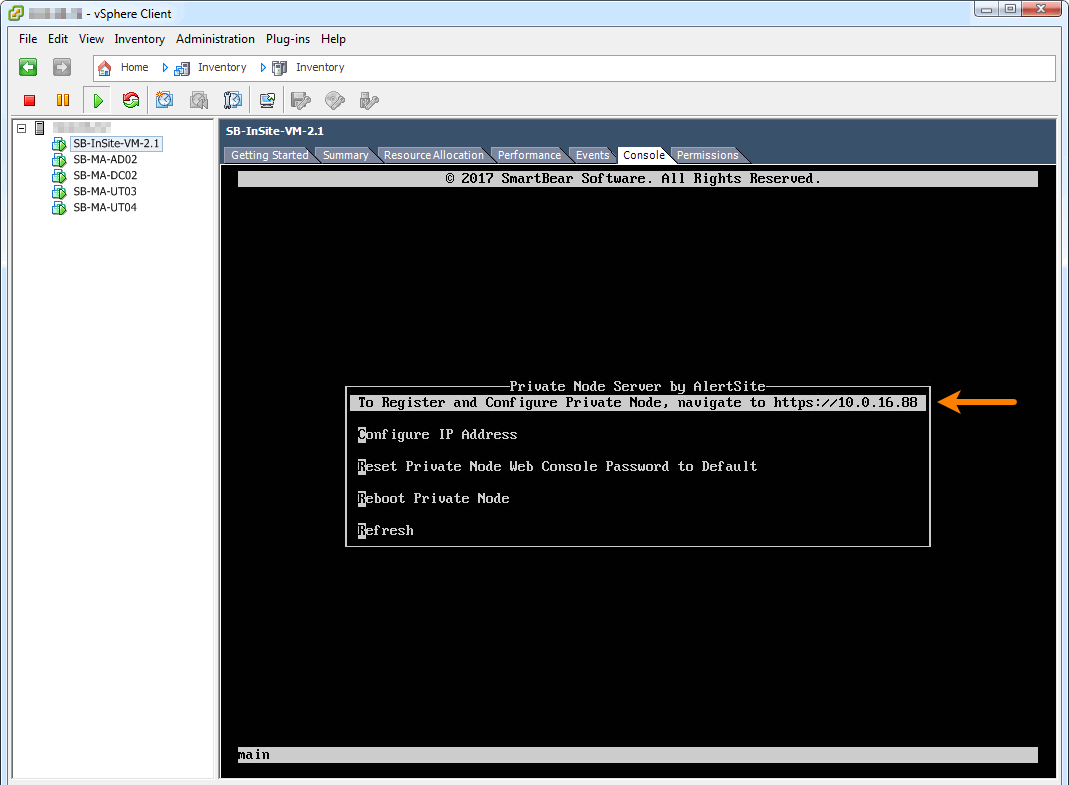
Switch to the Console tab and verify that the VM has been booted and you can see the console menu. There is no need to interact with the VM console – you can configure your private node via a web interface (Control Panel) accessible at https://<IP address>.
If you use Private Node Server 2.1 or later, you can see the VM IP address in the top right corner of the console menu.
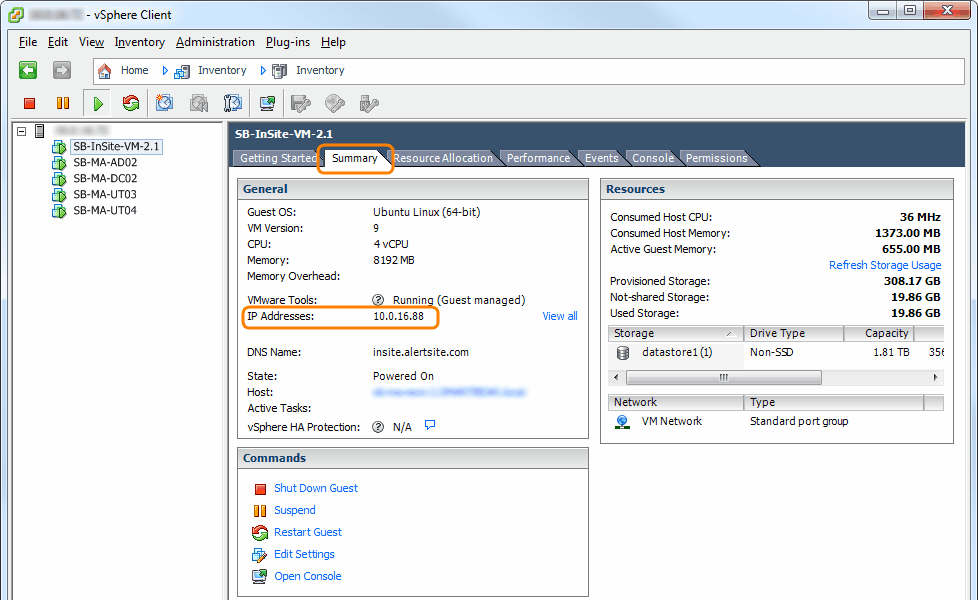
If you use Private Node Server 2.0.x, you can find the IP address on the Summary tab of your VM:
You can now access the private node’s control panel from any computer on the same network by navigating to https://<IP address> in a web browser.
What’s next
There are a few more things you need to do to get your Private Node Server truly up and running:
-
Register Private Node Server in AlertSite – add your private node as a location in AlertSite.
-
Initial Configuration of Private Node Server – configure email relay and other internal options.
-
Monitor the location status:
-
Configure Connectivity Alerts – get notified when connectivity from the location to the AlertSite platform is lost.
-
Configure ServerAgent (optional) – monitor the node health and resource utilization.
-
See Also
Private Node Server Overview
Private Node Server Control Panel (Web Interface)
Setting Up Private Locations

