Amazon Web Services (AWS) is a suite of cloud services and infrastructure, including online-hosted virtual machines, storage, networking and more. It allows users to deploy a virtual server with the required configuration with just a few clicks.
SmartBear provides a preconfigured AMI (Amazon Machine Image) for users who want to run Private Node Server in the Amazon EC2 cloud. This guide explains how you can launch an instance of Private Node Server.
Requirements
You must have an Amazon Web Services (AWS) account before deploying Private Node Server on Amazon EC2.
Region availability
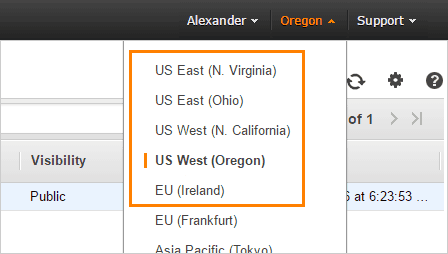
Private Node Server is currently available in the following AWS regions:
| Code | Name |
|---|---|
| us-east-1 | US East (N. Virginia) |
| us-east-2 | US East (Ohio) |
| us-west-1 | US West (N. California) |
| us-west-2 | US West (Oregon) |
| eu-west-1 | Europe (Ireland) |
Considerations
-
Remember that Amazon charges for the time during which instances run, for the storage, bandwidth and other virtual machine parameters. See https://aws.amazon.com/ec2/pricing/.
-
Private Node Server is not eligible for the AWS Free Tier.
-
If you are going to launch your instance into a virtual private cloud (VPC), make sure that an Internet gateway is attached to your VPC, so that Private Node Server can communicate with the Internet and AlertSite.
-
Auto-scaling (launching new instances automatically) is not supported for Private Node Server, because each instance needs to be registered manually in AlertSite.
-
Using EBS snapshots with Private Node Server is not supported, so they should not be used. If you use third-party backup software that creates snapshots of your EBS volumes, do not take any snapshots for your Private Node Server instance.
All monitoring data is stored and backed up on AlertSite servers. In case of a catastrophic failure, you would simply launch a new instance and register it using the old registration ID. The data would then populate to the new instance.
Launch Private Node Server from an AMI
-
Open the Amazon EC2 console at https://console.aws.amazon.com/ec2.
-
From the top menu, select the region where you want to launch Private Node Server.
-
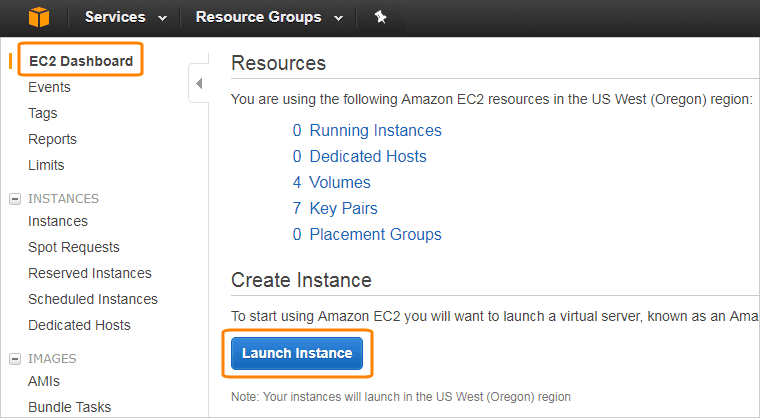
On the EC2 Dashboard, click Launch Instance.
-
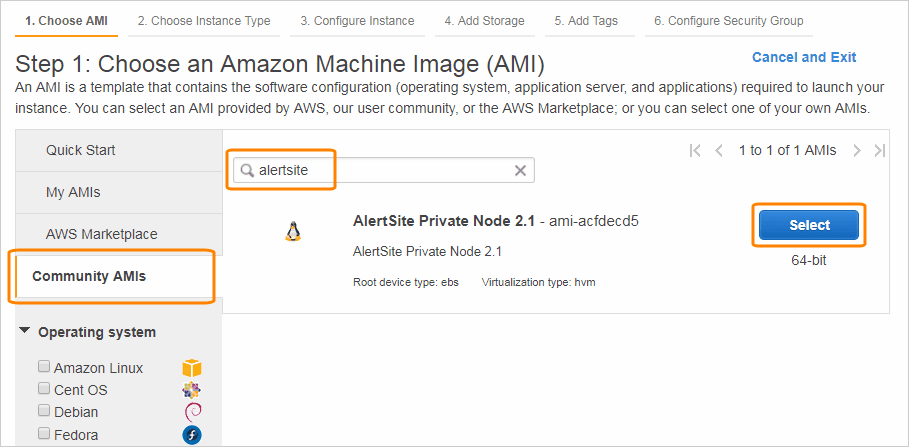
Select Community AMIs, then search for AlertSite. You should see the AMI named AlertSite Private Node <version>.
-
Click Select next to the AMI name. If there are multiple versions, select the latest one.
-
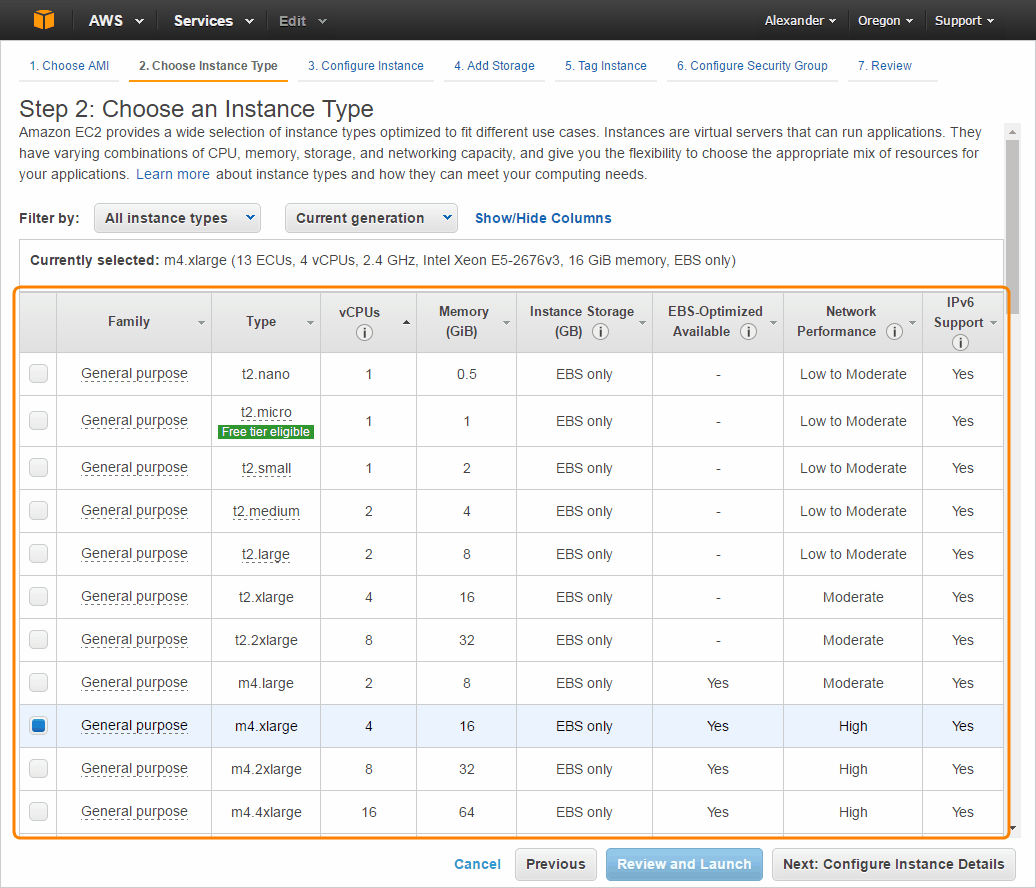
Choose the instance type that meets the requirements for your desired monitoring capacity, then click Next: Configure Instance Details.
-
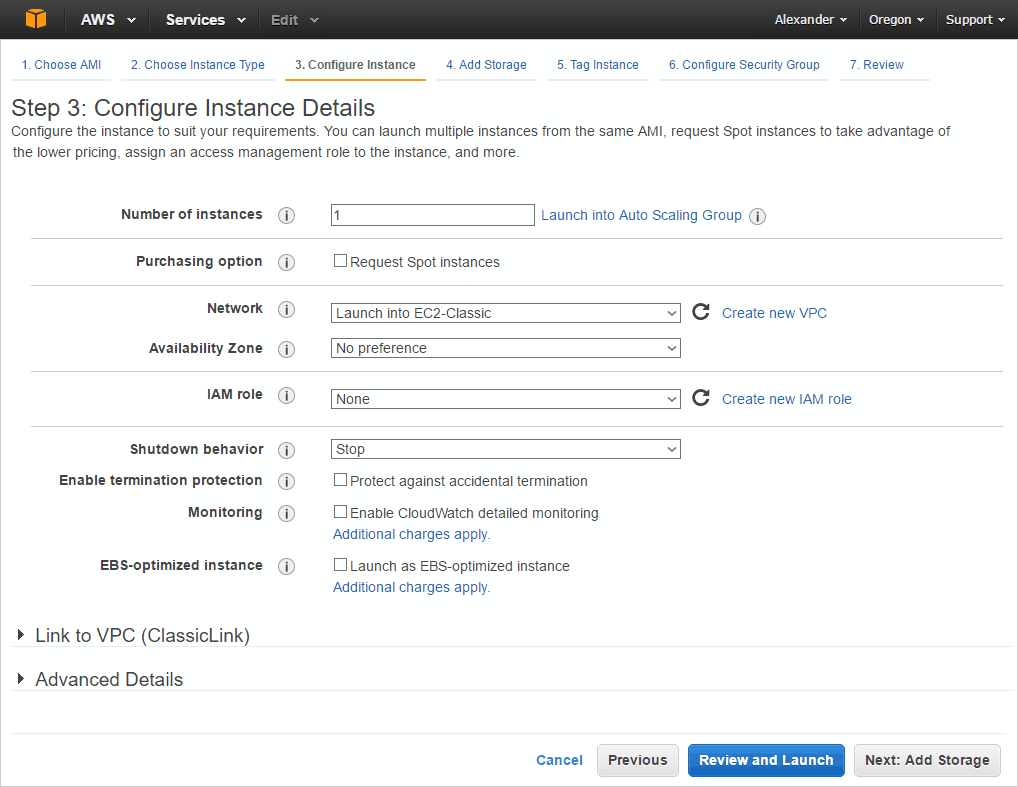
On the next screen, you can select the network, subnet, and other parameters. Once done, click Next: Add Storage.
-
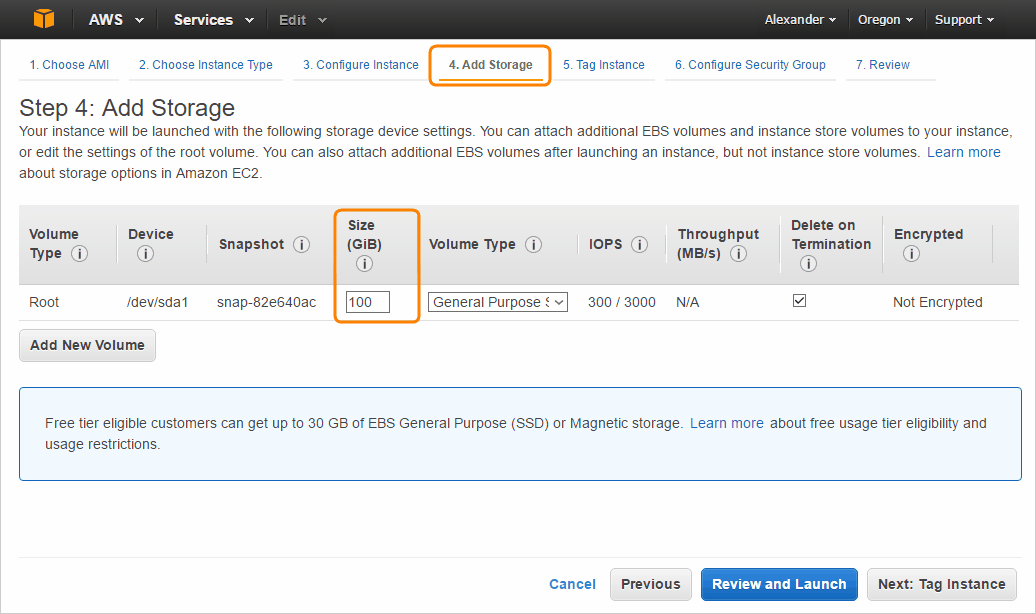
(Optional.) Add additional storage to your instance, if needed. Then click Next: Tag Instance.
-
Name your instance and click Next: Configure Security Group.
-
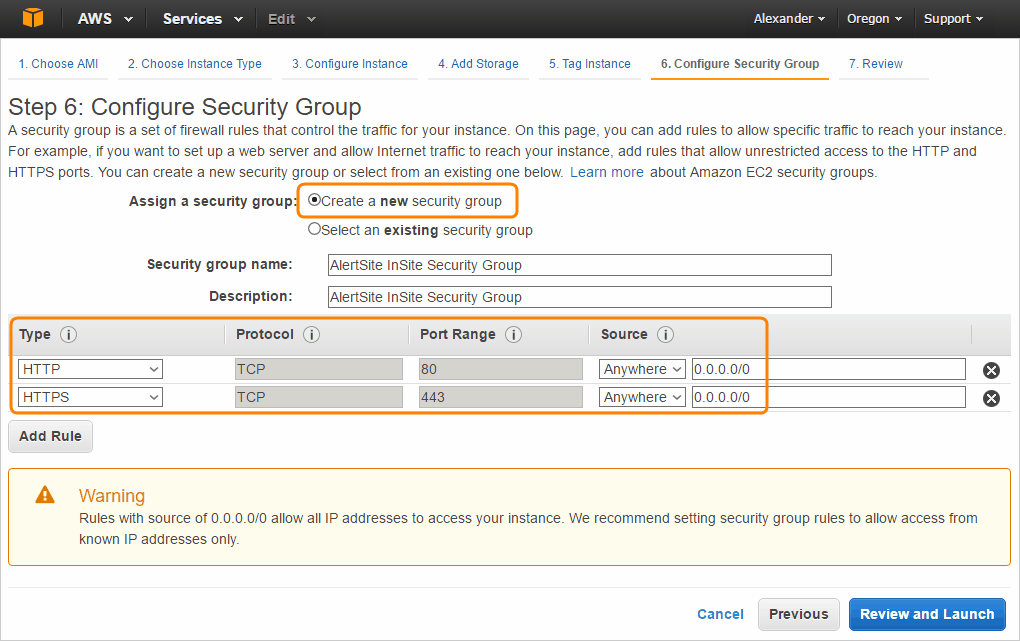
Now you need to configure a security group that will allow access to the private node’s control panel (web interface). To do that, select Create a new security group and enter a name and description for the group.
Add the following rules for inbound traffic:
Type Protocol Port Range Source Purpose HTTPS TCP 443 Anywhere 0.0.0.0/0
-or-
Specific IP addresses from which you will access the private node’s control panel.To access the Control Panel (web interface) of Private Node Server. HTTP TCP 80 Anywhere 0.0.0.0/0
-or-
Specific IP addresses from which you will access the private node’s control panel.To access the Control Panel (web interface) of the Private Node Server. Note that http:// will automatically redirect to https://. -
Click Review and Launch.
-
Review the instance launch details and click Launch.
-
When you are asked to specify a key pair, select Proceed without a key pair, select the acknowledgment check box, and click Launch Instances.
Your Private Node Server instance is now running.
 |
You will be charged for each hour or partial hour your instance is running, from the moment it boots until you terminate it. When you no longer need the instance, be sure to terminate it as explained below. |
Get the instance IP address
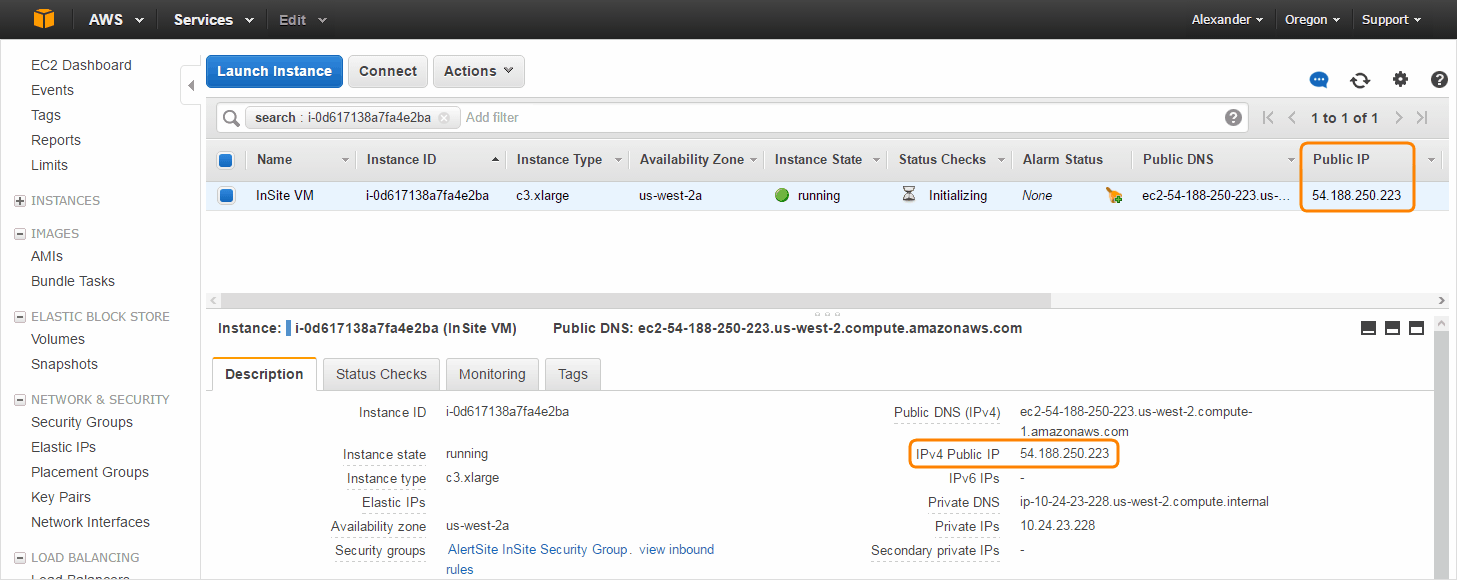
You need to know the IP address of your Private Node Server to access its web interface (Control Panel). To find the IP address:
-
In the Amazon EC2 console, select Instances on the left.
-
Select your running instance.
-
Find the Public IP value in the table, or in the Description pane at the bottom.
Notes:
-
If you launched the instance into a VPC, you can also access it via its private IP from computers in the same network.
-
If you stop (pause) your instance, it will get a new public address next time you start it, unless you use an elastic IP address.
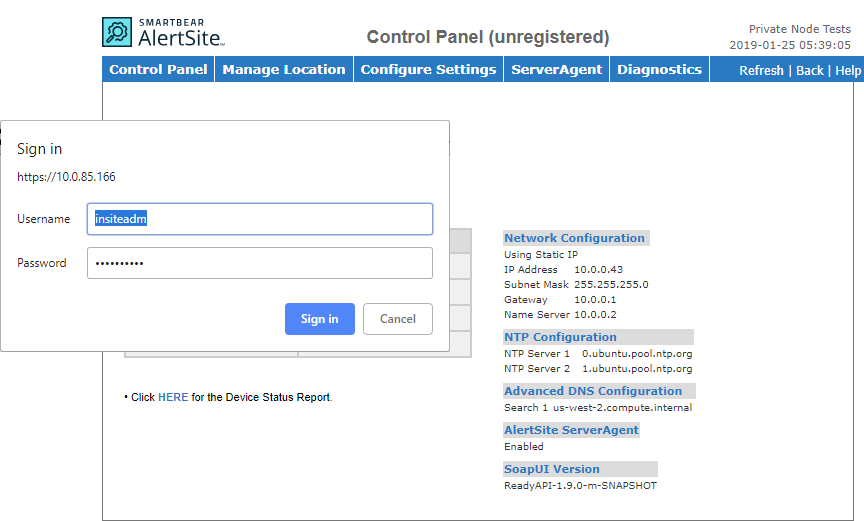
Once you know the IP address, navigate to https://<ip address> in your browser. Ignore the certificate warning and log in as insiteadm / 1nSitePa$$. You will see the Private Node Server Control Panel informing you that the node is not registered.
Complete the configuration
There are a few more things you need to do to get your Private Node Server truly up and running:
-
Register Private Node Server in AlertSite – add your private node as a location in AlertSite.
-
Initial Configuration of Private Node Server – configure email relay and other internal options.
-
Monitor the location status:
-
Configure Connectivity Alerts – get notified when connectivity from the location to the AlertSite platform is lost.
-
Configure ServerAgent (optional) – monitor the node health and resource utilization.
-
Resize an instance
You can add more CPUs, memory and storage to your existing Private Node Server instance later, if needed. For more information, see Resizing Your Instance in Amazon AWS documentation.
Terminate an instance
When you no longer need an instance, you can terminate (delete) it. Historical monitoring data is stored in AlertSite, so terminating an instance will not delete its monitoring data, unless you also delete the corresponding location from AlertSite.
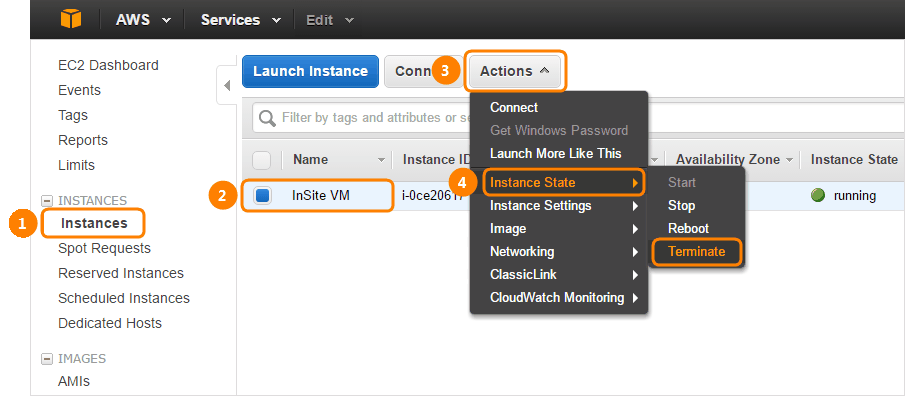
To terminate an instance:
-
Open the Amazon EC2 console at https://console.aws.amazon.com/ec2.
-
On the left, select Instances.
-
Select the Private Node Server instance that you want to terminate.
-
Click Actions and select Instance State > Terminate.
-
Confirm the termination.
-
Wait until the Instance State column for this instance displays terminated.
See Also
Private Node Server Overview
Private Node Server Control Panel (Web Interface)

