Transaction monitors simulate a user’s path through a website, such as buying something, logging in, or searching a website. You create transactions by recording actions in Firefox or Chrome using AlertSite script recorder, DéjàClick. DéjàClick is a free browser extension that automatically records and plays back user action, with no programming needed.
In this tutorial, we will use the Chrome browser to create a transaction monitor for Amazon.com. The monitor will search Amazon for Star Wars and verify that the search results contain the film Star Wars: A New Hope.
1. Start the transaction recorder
-
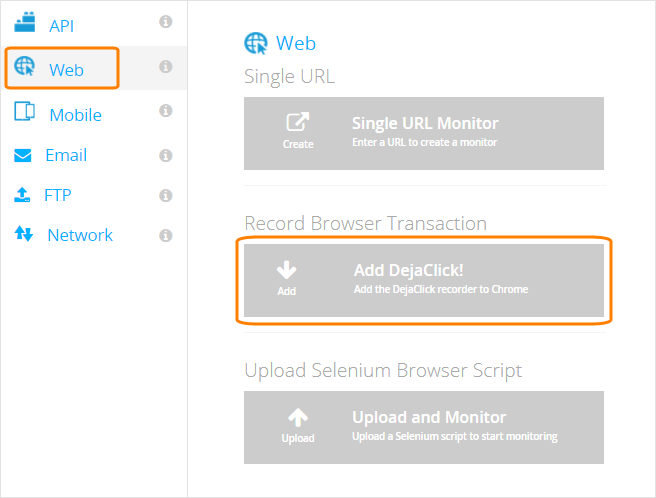
On the Dashboard, hover over + Add New, select Monitor, and then Web.
-
Under Record Browser Transaction, click Add DéjàClick.
If you do not have the DéjàClick extension installed, the button will say Download and Monitor – click it to install DéjàClick.
The DéjàClick recorder will appear to the left of the Chrome window.
2. Record a transaction
-
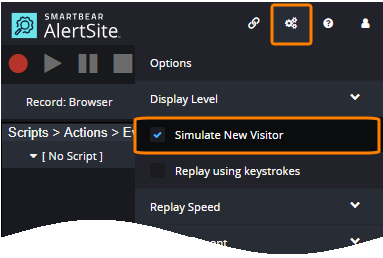
On the DéjàClick toolbar, click and select Simulate New Visitor. This will adjust the recorder settings to simulate visiting a website for the first time to avoid caching issues.
-
Click
 Begin recording.
 -
Open the starting page of the transaction and do what a typical user would do – click the links, fill in forms, and so on.
In this tutorial, we will search for Star Wars on Amazon:
-
Navigate to amazon.com.
-
Enter star wars into Amazon’s search box and press ENTER.
-
3. Create a keyword validation
To make sure your web pages contain correct content, you can add keyword validations to your transaction. For example, if you log into an application as TestUser, you expect Hello TestUser appear on the page, and if it is not there, the application is not working properly.
Let’s create a keyword validation:
-
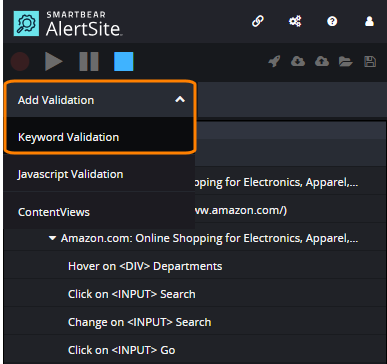
On the DéjàClick toolbar, click Add Validation and select Keyword Validation.
-
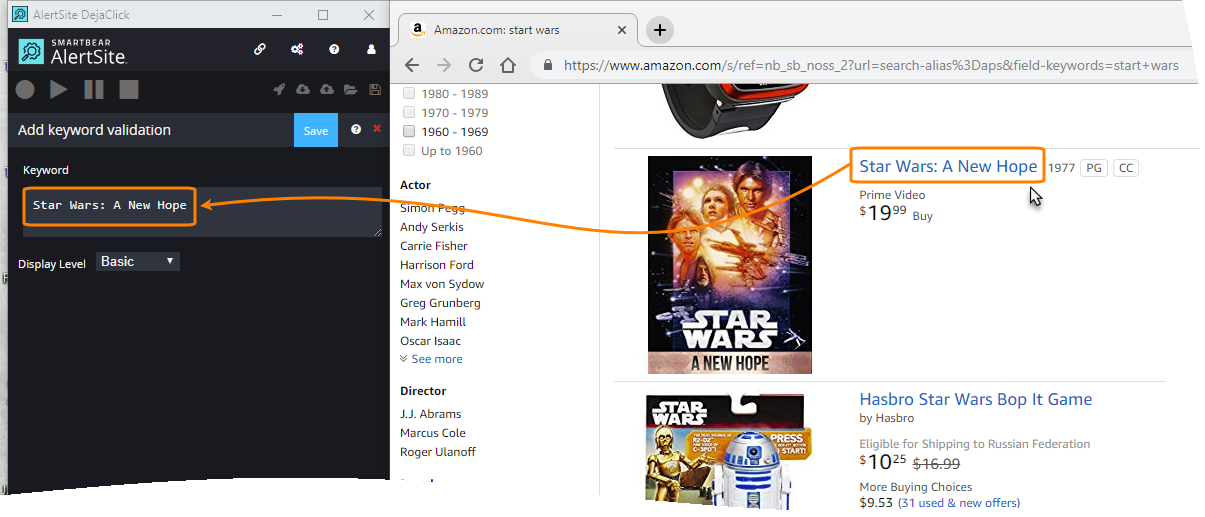
Click the text "Star Wars: A New Hope" to create a keyword validation for it, and then click Save.
-
You can repeat steps 2-3 to add validations for other phrases on the page.
The transaction is now configured to raise an error if the text does not appear on the page.
4. Finish recording
Click ![]() Stop recording on the DéjàClick toolbar. You will see a message with the number of recorded events.
Stop recording on the DéjàClick toolbar. You will see a message with the number of recorded events.
For now, the transaction is temporarily stored on your computer. We need to upload it to AlertSite so that the transaction will run from the global monitoring locations. We will do this later in this tutorial.
5. View the recorded transaction
All recorded user actions appear in the DéjàClick window to the left of the Chrome window. Pages with keyword validations have the K mark. On the Properties tab, you can review event and playback parameters.
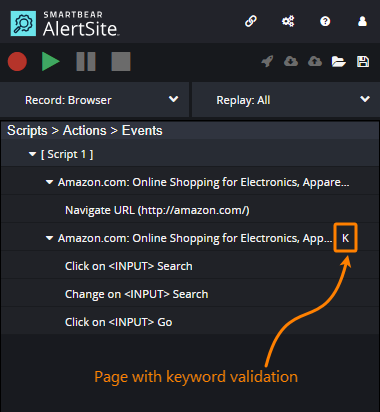
If the recording includes extra hover and click steps that are not essential for the transaction flow, you can delete them. To do this, select a step and press Del or Backspace, or click a step and select > Delete (this requires DéjàClick Chrome v. 1.4.2.0 or later).
6. Verify transaction on the desktop
Before uploading the recorded transaction to AlertSite, you need to replay it locally to make sure it works correctly:
-
Click
 Replay on the DéjàClick toolbar.
DéjàClick will repeat the recorded actions in the browser.
-
If you see a message about page content timeout, click Skip to Next Event, and DéjàClick will automatically adjust the timeout.
-
When the replay is complete, the results appear in the Results tab in DéjàClick.
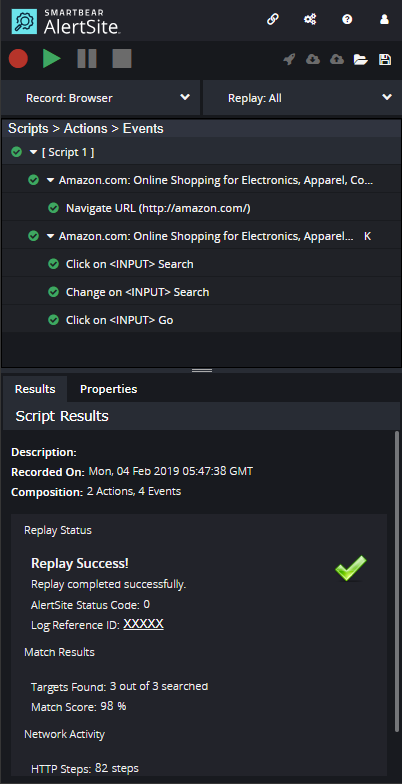
If there was an error, try re-recording the transaction or try adjusting playback parameters on the Properties tab. For troubleshooting tips, see DéjàClick Troubleshooting Guide.
7. Upload transaction to AlertSite
After the local replay completes successfully, you can upload the transaction to AlertSite. To do this:
-
On the DéjàClick toolbar, select > Sign In to log in to your AlertSite account.
-
Click on the toolbar to upload the recording.

-
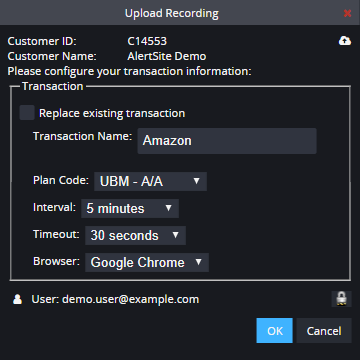
Specify your monitor parameters:
-
Transaction Name – Enter the monitor name.
-
Plan Code – If you have multiple monitoring plans, select the plan to use for this transaction.
-
Interval – How often the monitor will run the transaction. Default is 5 minutes.
-
Timeout – How long the monitor waits for a response to each network request (for example, HTTP GET) before reporting a timeout error. The recommended value is 30 seconds.
-
Browser – The browser that AlertSite will use to run the transaction: Firefox or Chrome. You may want to use a specific browser if your website is designed or optimized for that browser.
-
Click OK.
-
-
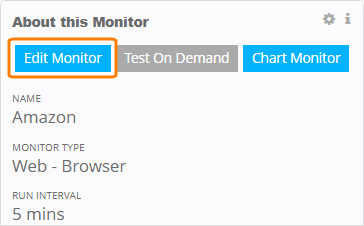
You will be redirected back to AlertSite, where you will see the monitor summary. Click Edit Monitor.
-
Switch to the Locations tab and select the locations from which you want the monitor to run.
-
Review and change other settings as needed.
-
Click Save to save the monitor configuration.
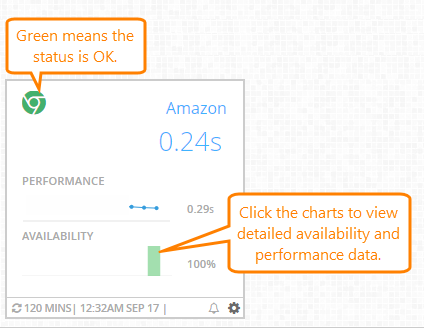
The monitor will start collecting data shortly. You can see the run results on AlertSite dashboards.
What’s next
 Selecting Locations for Monitoring
 DéjàClick User Guide – learn how to fine-tune transactions

 Instal DéjàClick