About tested application list
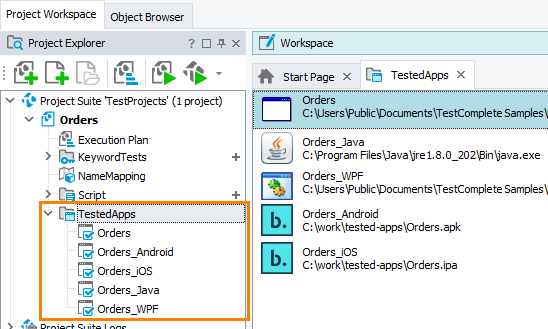
A TestComplete project can include a list of tested applications. You can see them in the Project Explorer under the TestedApps node:

This list helps you manage and work with tested applications easier. For instance:
-
You can configure and store the command-line arguments for the applications to launch, so you will not need to set the command line every time you need to run your application.
-
You can easily run the tested applications from your tests or from the TestComplete UI.
-
During the test recording, TestComplete can start these applications automatically, and so on.
Open the page
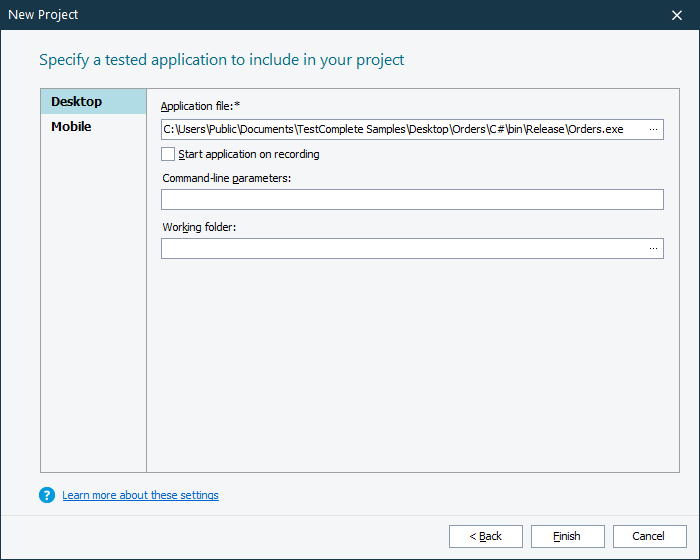
In the New Project wizard, you can add desktop tested applications to your project. To do this, you choose the Tested application check box on the first page of the wizard, and on the subsequent page, you select Desktop. Here is the sample view of the page:
When to choose
Select the Desktop application type if you are going to test standalone Windows applications (native, .NET, WPF, Java, and others), for example:
- 32- and 64-bit applications
- Command-line utilities
- Java executables (.exe)
- Other applications
Note that you can skip this step and add tested applications to your project at any time later. See Adding Tested Applications.
If you are going to start test recording right after creating the project, then you can also skip this step: by default, TestComplete will automatically add the applications, which you start during the recording, to the list of tested applications. This is controlled by TestComplete’s Recording > Add applications automatically to the Tested Application list option.
Requirements
To test desktop applications with TestComplete, you need a license for the Desktop module.
Parameters
-
In the Application file text box, specify the application you want to add to your project:
-
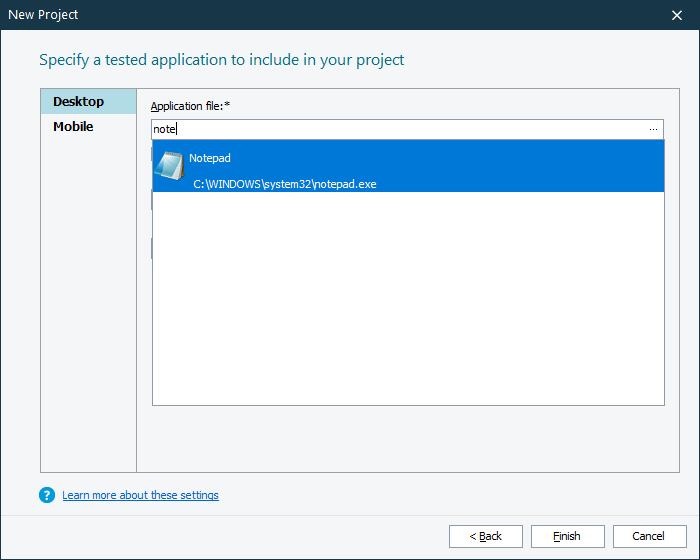
Type the application name or its file name manually. TestComplete will search for the application in the list of installed applications and display matches in the drop-down list.
– or –
-
You can click the ellipsis button and browse for the executable in the subsequent dialog.
-
-
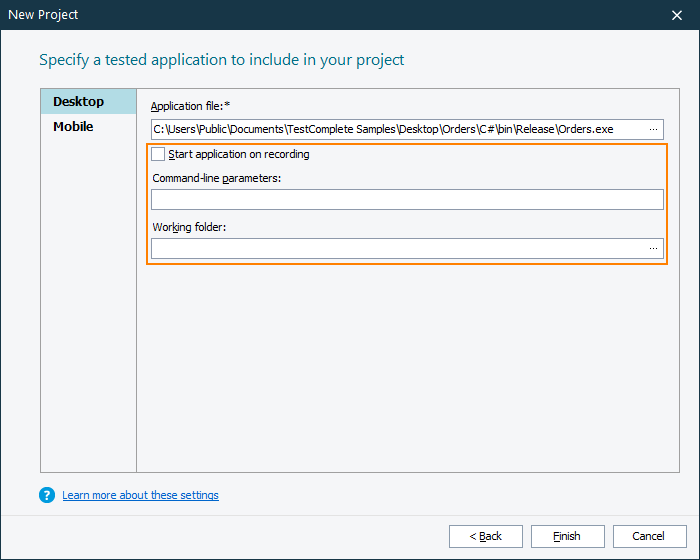
After you specified the tested application, the wizard will display additional parameters to configure. You can set them in the wizard or keep the edit fields blank and change the parameters at any time later:
-
Start application on recording – Select this check box to command TestComplete to start the selected application automatically every time you start test recording. You can disable this later, if needed.
-
Command-line parameters – The command-line arguments to be passed to the tested application on start.
-
Working folder – The folder that will be set as the current folder for the application on start.
If you specified a Java application, the wizard will offer additional settings specific to Java applications. For detailed information on them, see Java Application Parameters.
-
-
After you configured the parameters, click Finish. TestComplete will create the project and will add the specified application to the project’s TestedApps collection.
See Also
Create New Project Wizard
About Tested Applications
Creating Projects and Project Suites


