
This topic describes how to work with Git branches from TestComplete.
Ways to work with branches vary depending on whether you use built-in TestComplete dialogs or use dialogs of the TortoiseGit client.
 Working With Branches via TestComplete Dialogs
Working With Branches via TestComplete Dialogs
Creating New Branches
To create a new branch:
-
Open the Branches dialog. You can do one of the following to display it:
- Select File > Source Control > Branches from the TestComplete main menu.
- Right-click within the Project Explorer and choose Source Control > Branches from the context menu.
- Click
 Branches on the Source Control toolbar (if the toolbar is hidden, right-click the main menu and select Source Control in the ensuing context menu to show the toolbar).
- Right-click within the Local branches list and choose Create Branch from the context menu.
- In the ensuing New Branch dialog, specify a name for the branch.
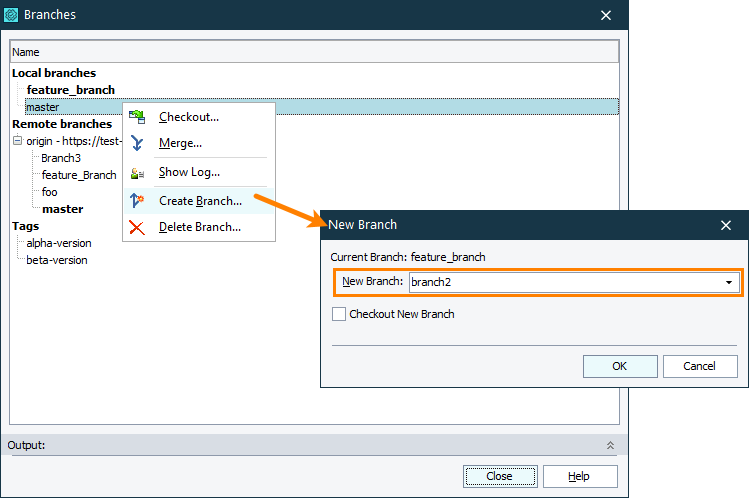
Creating branches via built-in Branches dialog - If you want to switch to the newly created branch, enable the Checkout New Branch option.
- Click OK to create a new branch.
- Click Close to close the Branches dialog.
This will create an empty named branch. Afterwards, you can submit changes to this branch.
Creating Branches When Committing
To create a new branch and submit changes to this branch:
-
Open the Commit dialog. You can do one of the following to display it:
- Select File > Source Control > Commit from the TestComplete main menu.
- Right-click within the Project Explorer and choose Source Control > Commit from the context menu.
- Click
 Commit on the Source Control toolbar.
- Click the ellipsis button next to the Branch field.
- In the ensuing Branch Operation dialog, select the Create a new named branch option.
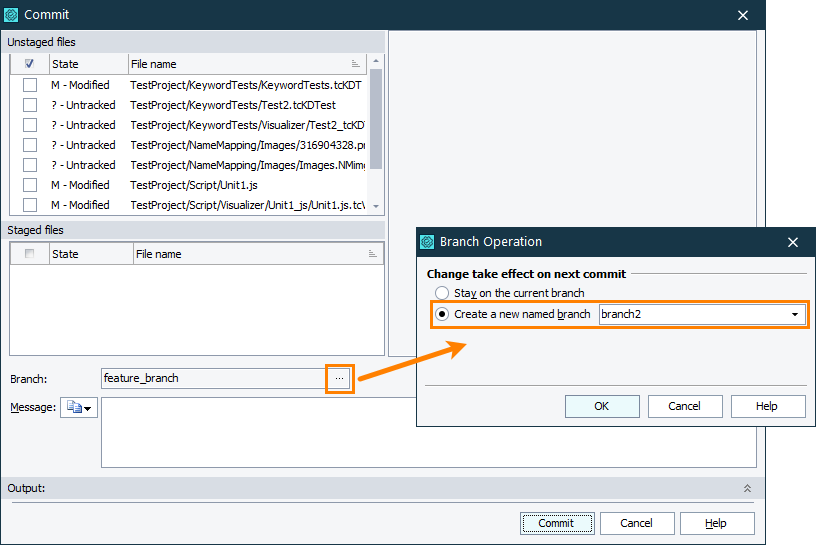
Creating branches via built-in Commit dialog - Enter the name of a new branch and click OK. This will close the Branch Operation dialog.
- Select the files you want to commit to the new branch.
- Specify a commit message.
- Click the Commit button to create a named branch and commit the changes to this new branch.
Switching Branches
To switch from one branch to another:
-
Open the Branches dialog. You can do one of the following to display it:
- Select File > Source Control > Branches from the TestComplete main menu.
- Right-click within the Project Explorer and choose Source Control > Branches from the context menu.
- Click Branches on the Source Control toolbar (if the toolbar is hidden, right-click the main menu and select Source Control in the ensuing context menu to show the toolbar).
- Right-click the desired branch and choose Checkout from the context menu.
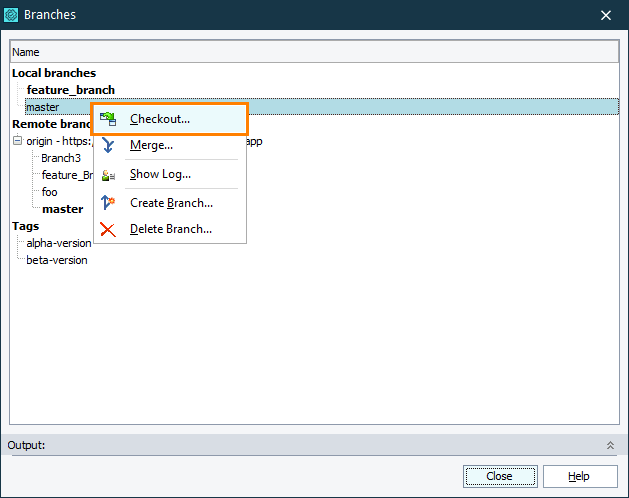
Switching branches via built-in Branches dialog - Confirm that you want to switch to the selected branch.
-
TestComplete will notify you that project files were modified and suggest reloading them. Select Yes to All to reload all project files.
Merging Branches
To merge two separate branches into one branch:
-
Open the Branches dialog. You can do one of the following to display it:
- Select File > Source Control > Branches from the TestComplete main menu.
- Right-click within the Project Explorer and choose Source Control > Branches from the context menu.
- Click Branches on the Source Control toolbar (if the toolbar is hidden, right-click the main menu and select Source Control in the ensuing context menu to show the toolbar).
- Right-click the branch you want to merge with your current branch and choose Merge from the context menu.
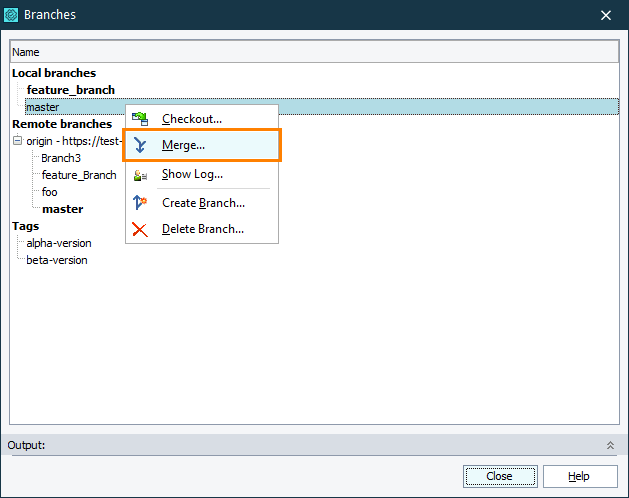
Merging branches via built-in Branches dialog - Confirm that you want to merge the selected branch and your current branch.
-
TestComplete will notify you that project files were modified and suggest reloading them. Select Yes to All to reload all project files.
Deleting Branches
To delete an existing branch:
-
Open the Branches dialog. You can do one of the following to display it:
- Select File > Source Control > Branches from the TestComplete main menu.
- Right-click within the Project Explorer and choose Source Control > Branches from the context menu.
- Click Branches on the Source Control toolbar (if the toolbar is hidden, right-click the main menu and select Source Control in the ensuing context menu to show the toolbar).
- Right-click the desired branch and choose Delete Branch from the context menu.

You cannot delete your current branch and unmerged branches. 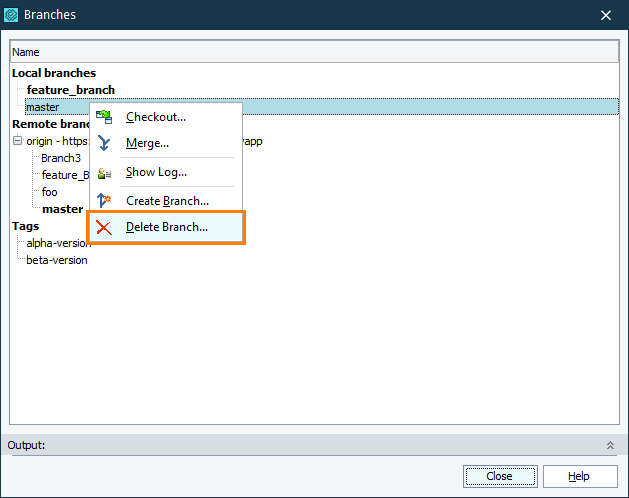
Deleting branch via built-in Branches dialog - Confirm that you want to delete the selected branch.
Working With Branches via TortoiseGit Dialogs
Creating New Branches
To create a new branch:
-
Open the Create Branch dialog. You can do one of the following to display it:
- Select File > Source Control > Create Branch from the TestComplete main menu.
- Right-click within the Project Explorer and choose Source Control > Create Branch from the context menu.
- Click
 Create Branch on the Source Control toolbar.
- In the ensuing dialog, specify a name for the branch and other options (if needed).
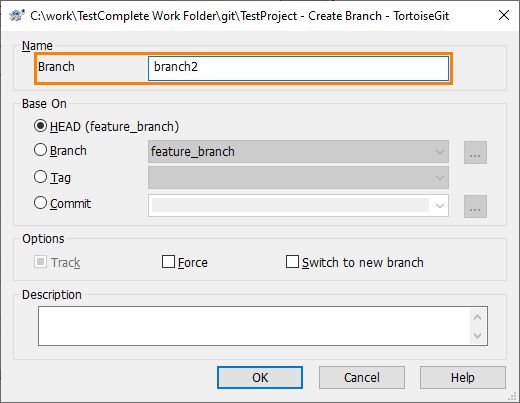
Creating branches via TortoiseGit Create Branch dialog - Click OK to create a new branch.
This will create an empty named branch. Afterwards, you can submit changes to this branch.
Creating Branches When Committing
To create a new branch and submit changes to this branch:
-
Open the TortoiseGit Commit dialog. You can do one of the following to display it:
- Select File > Source Control > Commit from the TestComplete main menu.
- Right-click within the Project Explorer and choose Source Control > Commit from the context menu.
- Click Commit on the Source Control toolbar.
- Enable the New branch option and enter the name of a new branch to the Commit to field.
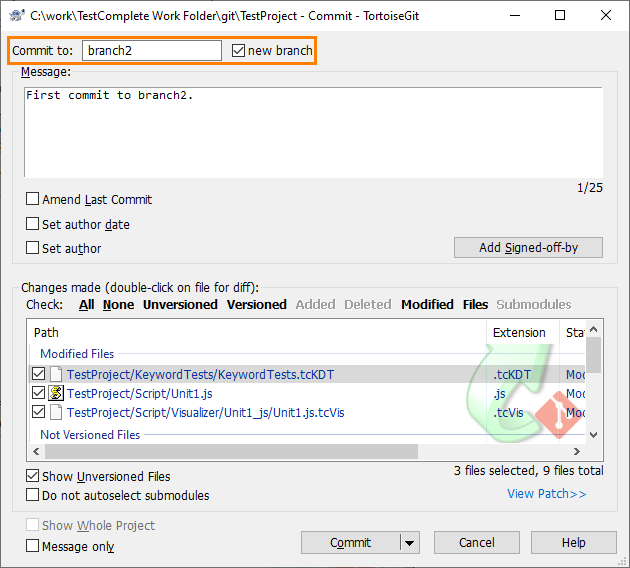
Creating branches via TortoiseGit Commit dialog - Select the files you want to commit to the new branch.
- Specify a commit message.
- Click the OK button to commit the changes to the new branch.
Switching Branches
To switch from one branch to another:
-
Open the TortoiseGit Switch/Checkout dialog. You can do one of the following to display it:
- Select File > Source Control > Switch/Checkout from the TestComplete main menu.
- Right-click within the Project Explorer and choose Source Control > Switch/Checkout from the context menu.
- Click
 Switch/Checkout on the Source Control toolbar.
- Ensure that the Branch option is chosen and select the desired branch in the drop-down list.
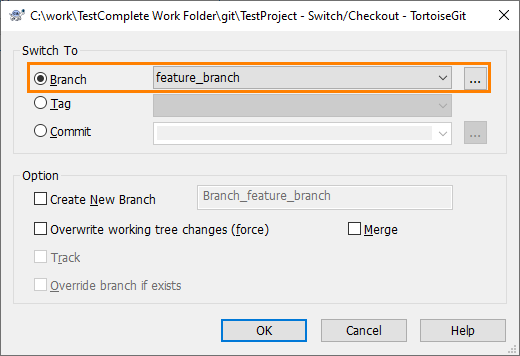
Switching branches via TortoiseGit Switch dialog - Click OK to switch to the selected branch.
-
TestComplete will notify you that project files were modified and suggest reloading them. Select Yes to All to reload all project files.
Merging Branches
To merge two separate branches into one branch:
-
Open the TortoiseGit Merge dialog. You can do one of the following to display it:
- Select File > Source Control > Merge from the TestComplete main menu.
- Right-click within the Project Explorer and choose Source Control > Merge from the context menu.
- Click
 Merge on the Source Control toolbar.
- Ensure that the Branch option is chosen and select the branch you want to merge with your current branch in the drop-down list.
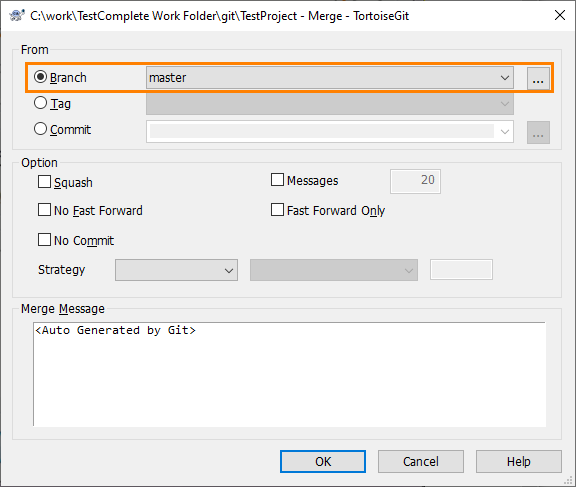
Merging branches via TortoiseGit Merge dialog -
TestComplete will notify you that project files were modified and suggest reloading them. Select Yes to All to reload all project files.
Deleting Branches
To delete an existing branch:
-
Open the TortoiseGit Switch/Checkout dialog. You can do one of the following to display it:
- Select File > Source Control > Switch/Checkout from the TestComplete main menu.
- Right-click within the Project Explorer and choose Source Control > Switch/Checkout from the context menu.
- Click Switch/Checkout on the Source Control toolbar.
- Click the ellipses button next to the Branch option.
This will open the TortoiseGit Browse Ref dialog.
- Right-click the desired branch and choose Delete Branch from the context menu.
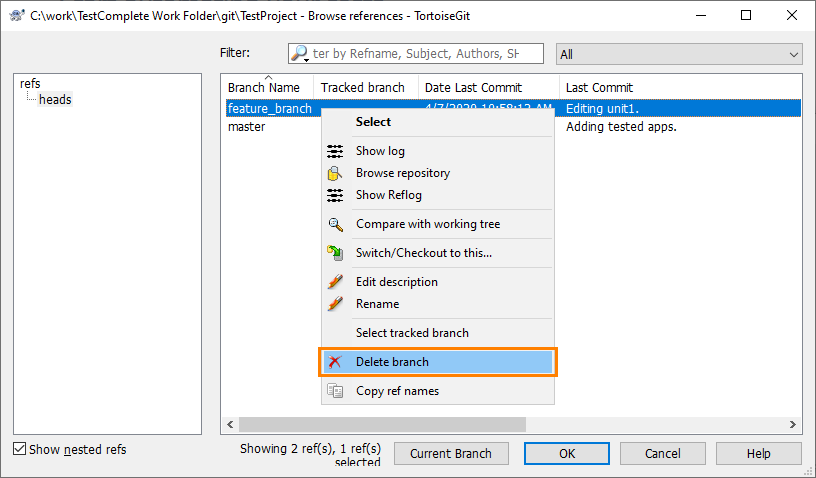
Deleting branch via TortoiseGit Browse Ref dialog - Confirm that you want to delete the selected branch.