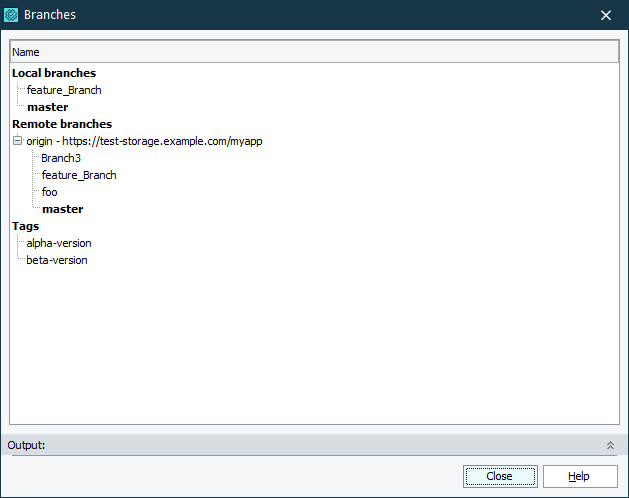
Use this dialog to work with branches and tags: create, delete, checkout, merge, and so forth.
The dialog is displayed when you do any of the following:
- Select File > Source Control > Branches from the TestComplete main menu.
- Right-click within the Project Explorer and choose Source Control > Branches from the context menu.
- Click
 Branches on the Source Control toolbar. If the toolbar is hidden, right-click the main menu and select Source Control in the ensuing context menu to show the toolbar.

The dialog lists all local and remote branches and tags. The current branch is highlighted in bold.
The Output field shows the output from the Git command-line utility (git.exe). This data is helpful to diagnose a problem in case of an error. The Output field is collapsed by default.
Creating New Local Branch
To create a new local branch:
- Right-click within the Local branches list and choose
 Create Branch from the context menu.
 - In the ensuing New Branch dialog, specify a name for the branch.
- If you want to switch to the newly created branch, enable the Checkout New Branch option.
- Click OK to create a new branch.
Viewing the Changes in The Branch
To view what changes were made to some particular branch:
- Right-click the desired branch and choose
 Show Log from the context menu.
Deleting a Local Branch
 |
You cannot delete your current branch and unmerged branches. |
To delete a local branch:
- Right-click the desired branch within the Local branches list and choose
 Delete Branch from the context menu.
 - Confirm that you want to delete the selected branch.
Switching Branches
To switch to some particular branch:
-
Right-click the desired branch and choose
 Checkout from the context menu.
 -
TestComplete will notify you that project files were modified and suggest reloading them. Select Yes to All to reload all project files.
Merging Branches
To merge some particular branch into your current branch:
- Right-click a branch you want to merge with your current branch and choose
 Merge from the context menu.
 - Confirm that you want to merge the selected branch and your current branch.
-
TestComplete will notify you that project files were modified and suggest reloading them. Select Yes to All to reload all project files.
Creating Tags
To create a tag:
- Right-click within the Tags list and choose
 Create Tag from the context menu.
 - In the ensuing New Tag dialog, specify a name for the tag.
- If you want to add some description to the tag, enable the Create annotated tag option and specify the description in the Message field.
- Click OK to create a new tag.
Deleting Tags
To delete a tag:
- Right-click the desired tag within the Tags list and choose
 Delete Tag from the context menu.
 - Confirm that you want to delete the selected tag.
Merging Specific Tag Into Current Branch
To merge some particular tag into your current branch:
- Right-click a tag you want to merge with your current branch and choose
 Merge from the context menu.
 - Confirm that you want to merge the selected tag and your current branch.
-
TestComplete will notify you that project files were modified and suggest to reload them. Select Yes to All to reload all project files.
Rolling Back to Specific Tag
To roll back your project or project suite to the state of some particular tag:
-
Right-click the desired tag within the Tags list and choose
 Checkout from the context menu.
 -
TestComplete will notify you that project files were modified and suggest reloading them. Select Yes to All to reload all project files.
