
 Do not switch to the TestComplete help during test recording. The recording engine traces and records all user actions, so the recorded test will contain commands that simulate “switching”.
To see the instructions, you can print them before starting the record. Or, if you have two monitors, you can move the TestComplete help system window to the other monitor.
-
TestComplete will start test recording, switch to the recording mode and show the Recording toolbar on screen:

-
When recording starts, TestComplete automatically launches the Orders tested application. If the application does not start, you can launch it manually by selecting it from the Run App menu of the Recording toolbar. You can also launch the application from Windows Explorer or any other file manager. If the application is not on the list of tested applications, TestComplete will add it there.
TestComplete records the application start using a special application launch test command. You will see this command later, when we will analyze the recorded test.
-
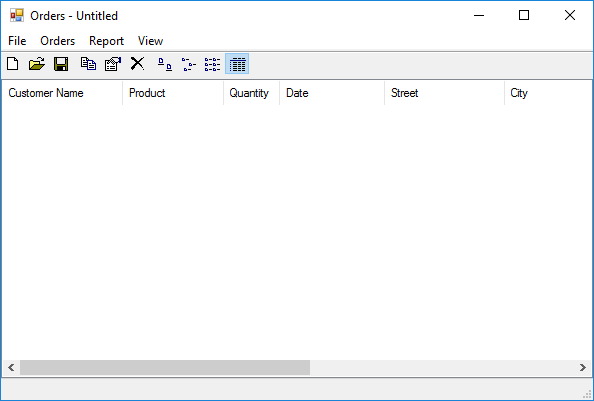
Wait until the application starts, and the application main window appears:
-
Switch to the Orders application and select File > Open from its main menu. This will bring up the standard Open File dialog.
-
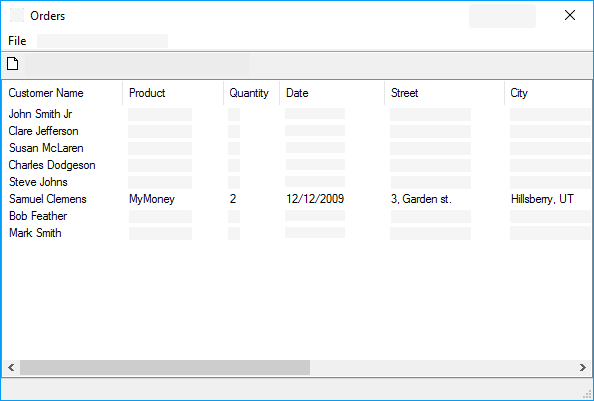
In the dialog, open the MyTable.tbl file. It resides in the C:\Users\Public\Public Documents\TestComplete 15 Samples\Desktop\Orders folder. Some file managers can display the Public Documents folder as Documents.
We recommend that you type the fully-qualified file name into the File name box of the Open File dialog. Typing instead of using the mouse will help you avoid problems if the test is played back on a different operating system, or if the Open File dialog displays a different initial folder when the test is played back later. -
After specifying the file in the File name box, click Open. The Orders application will load data from the file and display this data in the application main window.
-
Click the Samuel Clemens row in the list of orders.
-
On the Orders toolbar, click
 Edit order. This will call the Order dialog.
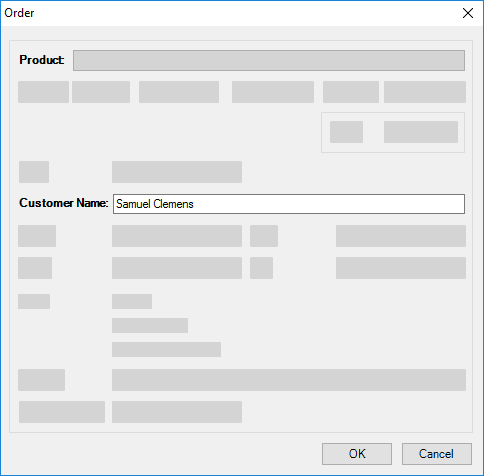
-
In the dialog, click within the Customer Name text box to move the insertion point there. Right-click within the Customer Name box and choose Select All from the context menu, and then enter Mark Twain as the customer name.
-
Click OK to close the dialog. TestComplete will update the customer list in the application main window.
-
Insert a comparison command into our test. It will verify that the application customer list displays the modified name - Mark Twain.
We call the comparison commands checkpoints. TestComplete offers various types of checkpoints that are suitable for verifying different types of data (see Checkpoints). One of the most frequently used checkpoints is a Property checkpoint. It is used to check data of application controls. We will use this checkpoint in our tutorial.
To create a property checkpoint, you can use the Create Checkpoint wizard, or you can create a Quick Checkpoint. In this tutorial, we will demonstrate how to create Quick Checkpoints:
-
Click
 on the Recording toolbar and make sure that Quick Checkpoints are enabled:
: Enabling Quick Checkpoints")
-
Move the mouse pointer to the customer list. TestComplete will highlight it with a red frame. Wait until the
 icon becomes opaque and move the mouse pointer to it. TestComplete will show a list of the most commonly used properties for which you can create Quick Checkpoints:
: Selecting the object to check")
-
In the list, click wItem. This property provides access to individual items of tree view controls:
: wItem property")
-
TestComplete will open the Create Checkpoint wizard that will show a list of object properties. This list includes properties provided by TestComplete as well as properties defined by the tested application. For instance, our tested application was created in C#, so the list includes properties of the appropriate .NET class. They are of the .Net category (see the Available Properties table).
The
wItemproperty we have clicked will be highlighted:: Property list")
-
To specify the cell holding the Mark Twain string, enter 5 into the Item box (5 is the index of the Mark Twain item in the tree view. Indexes are zero-based). Enter 0 in the SubItem box.
The test engine will retrieve the item data and display it in the property list.
-
In the Condition column, leave the default comparison condition, Equals (case-sensitive).
-
The Value column specifies the baseline data against which the checkpoint will compare the actual data during the test run. Leave the current value.
-
Select the check box of the property:

-
Click Finish to complete the checkpoint creation.
-
TestComplete will append the checkpoint command to the recorded test and will show a notification about it. You can continue recording user actions.
-
-
Close the Orders window by clicking the
Xbutton on the window caption bar. This will display the dialog asking if you want to save changes. Click No. -
Click
 Stop on the Recording toolbar to stop the recording. TestComplete will process the recorded test commands and save them to a test.
 Prev
Prev
See Also
About Tested Application
Recording Automated Tests
About Property Checkpoints