
After you have finished recording, TestComplete opens the recorded keyword test for editing and displays the test contents in the Keyword Test editor:
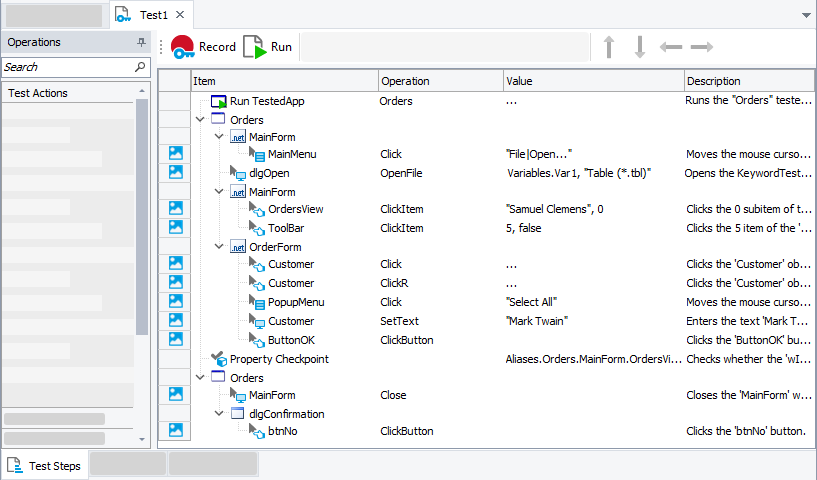
The recorded test is similar to the test shown in the image above. Your actual test may differ from this one. For example, it may have other object names or window indexes if you have recorded the test on a C++ Builder or Delphi application.
The test contains the commands that correspond to the actions you performed on the Orders application during the recording. We call the test commands operations.
Below the commands, there is the Test Visualizer panel that displays images that TestComplete captured for operations during test recording:
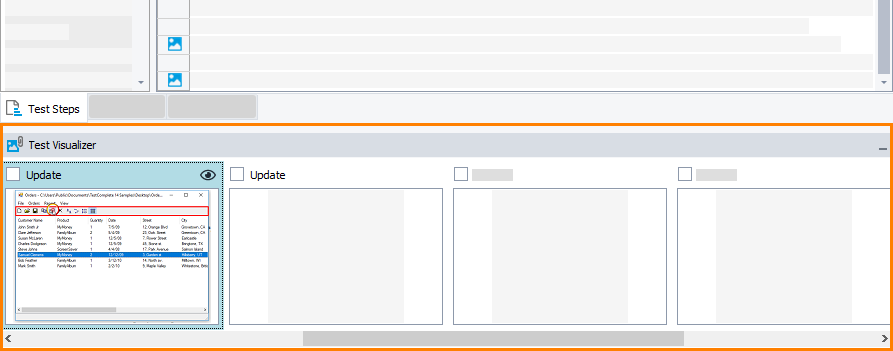
These images illustrate the recorded operations and help you better understand which action the operation performs. TestComplete captures images only for those operations that correspond to user actions (mouse clicks, typing text, and so on).
When you choose an operation in the editor, Test Visualizer automatically selects the appropriate image so you can easily explore the application state before the operation is executed. To view the needed image closely, double-click it in the Test Visualizer panel.
For more information on working with images, see the topics in the Test Visualizer section.
The first operation in the test is Run TestedApp. It is used to launch the tested application (in our case, it is the Orders application) from a keyword test. TestComplete automatically records this operation when it launches the application automatically or detects an application launch from the Recording toolbar or somewhere from the operating system UI.

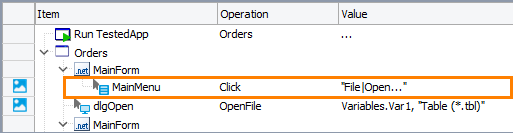
The next operation corresponds to the selection of the File > Open menu item.
The next operation simulates opening the file via the Open File dialog:
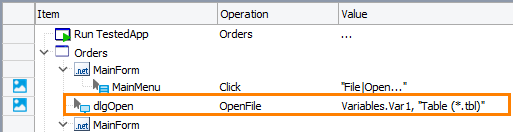
In certain cases, TestComplete can record a sequence of operations that simulate actions you perform when working with the Open File dialog controls.
| Note: | It is recommended to type the full name of the file you want to open in the File name box of the Open file dialog instead of navigating to the file using the dialog controls. This approach lets you record a test that will be executed successfully regardless of the operating system, navigation bars and panels available in the dialog and of the path displayed in the dialog.
If your test contains a sequence of operations simulating actions over the Open File dialog, you can modify the test and manually replace those operations with the OpenFile method call. |
After that, there follow operations that simulate your actions with the application main window and the Order form:
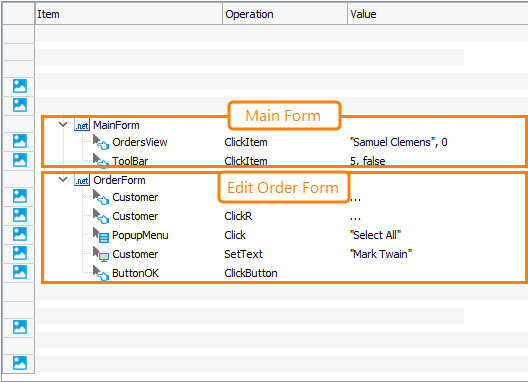
For more information on simulating mouse events, keyboard input, and other actions from your scripts, see Simulating User Actions.
Then there is the comparison operation that we added during test recording:
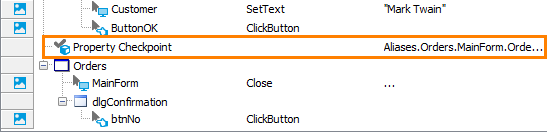
Finally, there is the operation that closes the Orders application and the operation that simulates the “No” button press in this message box.

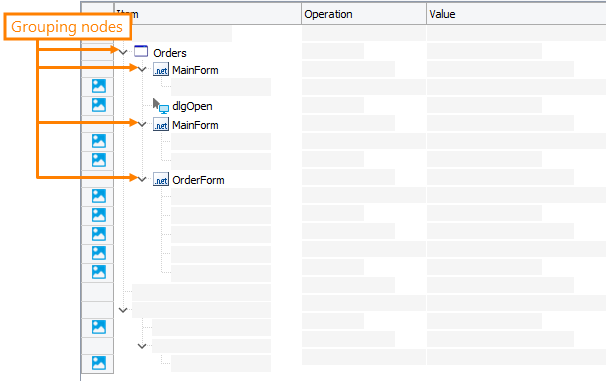
As you can see, TestComplete automatically organizes the operations into groups that correspond to the processes and windows that you worked with. Grouping makes the test structure easier to understand and also provides some information on the object hierarchy that exists in the application under test.
We recorded user actions on one process (Orders). So, we have only one “process” group node. It contains all of the actions that you simulated on the process windows and controls. The actions that we performed on windows and controls of the Orders process are organized into a number of “window” grouping nodes:
You may notice that the names of the tested process and its windows and controls differ from the names that we saw in the Object Browser panel in one of the previous steps. For instance, in the Object Browser, the tested process was named Process("Orders"), while in the test it is called Orders; the main window was called WinFormsObject("MainForm"), while in the test it is called MainForm, and so on.
There is a logical reason for this: by default, TestComplete automatically generates and uses custom names for the objects that you worked with during the test recording. Generating and assigning custom names is called name mapping. TestComplete maps the names because the default names may be difficult to understand. It may be difficult to determine which window or control corresponds to a name. Using mapped names makes the test easier to understand and more stable. Along with mapping names, TestComplete also stores images of the mapped objects in the Name Mapping repository. This helps you understand which window or control one or another mapped object matches. For more information on mapping names, see Name Mapping.
 Prev
Prev