
You can use optical character recognition (OCR) to capture the text that your tested application renders on the screen and then use that text to verify your application’s data. You can also use it to find tested UI elements by their text. This can be helpful when testing applications and controls that TestComplete does not support or graphical objects (for example, charts), the data of which TestComplete cannot access.
In this tutorial, we will show how you can use optical character recognition in your tests.
 About This Tutorial
About This Tutorial
By default, TestComplete uses optical character recognition to record user actions on controls it does not support. When you record a user action on a non-supported control, TestComplete automatically recognizes its text and records the action as an action on an appropriate text block.
However, in this tutorial, we will show you how you can add OCR-based commands to tests manually. This way, you will be able to better understand how you can use OCR in your tests.
 If you are new to TestComplete, we recommend that you first go through the Getting Started tutorial to get familiar with the tool.
We will show how to:
-
Add a command that will capture the image of the specified on-screen area and recognize the text in that area.
-
Select a fragment of the recognized text and simulate a user action on an area that contains the selected fragment.
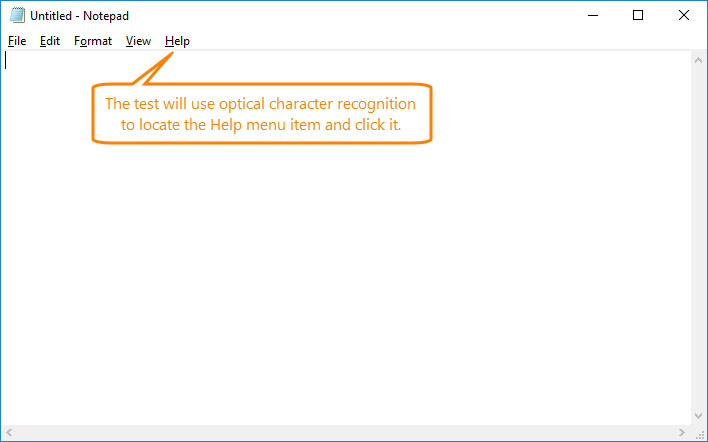
In this tutorial, we will use the Notepad application that is included in the Windows operating system. We will show how to click a Help menu item of the Notepad main window using optical character recognition:
Requirements
-
Your TestComplete version must be 12.60 or later.
-
You need an active license for the TestComplete Intelligent Quality add-on.
-
The Intelligent Quality add-on must be enabled in TestComplete.
You can enable the add-on during TestComplete installation. If you did not enable the add-on during the installation, you can do this at any moment later via the File > Install Extensions dialog. To do that, select File > Install Extensions from the TestComplete main menu and enable the Intelligent Quality > Intelligent Quality Core plugin in the resulting dialog.
-
Optical Character Recognition support must be enabled in TestComplete.
By default, it is enabled automatically if you enable the Intelligent Quality add-on during TestComplete installation. If you experience issues with optical character recognition in your tests, select File > Install Extensions from the TestComplete main menu and make sure the Optical Character Recognition plugin is enabled (you can find it in the Intelligent Quality group). If the plugin is disabled, enable it. In the confirmation message that TestComplete shows when you enable the plugin, click the link to read a third-party license agreement. If you agree to the license terms, click Enable OCR.
In addition, make sure that you do not have the legacy OCR plugin installed and enabled. You can find the plugin in the Common group.
-
Your computer must have access to the ocr.api.dev.smartbear.com web service. If you have firewalls or proxies running in your network, they should allow your computer to access the web service.
-
Your firewall must allow traffic through port 443.
1. Create a Test Project
-
Close any project or project suite opened in TestComplete.
-
From the main menu, select File > New > New Project, and follow the instructions in the subsequent Create New Project wizard to create a new project.
Note: When selecting a scripting language for your project, you can choose any language with which you are comfortable.
2. Add an OCR Action Operation to the Test
When creating a new project, TestComplete automatically creates an empty keyword test in it. Let’s add a command the test. The command will recognize all the text in the Notepad window and then simulate a click on a window area that has the Help string (that is, on the Help item of the main menu):
-
Launch Notepad if it is not launched yet.
-
In TestComplete, open the created keyword test.
-
In the Operations panel of the created test, locate the OCR Action operation. To find the operation faster, you can type part of its name in the Search box at the top of the Operations panel:

-
Select the operation in the Operations panel and click in the Test Steps area of the test to add the operation to the test. TestComplete will open a wizard that will assist you with configuring the operation:

Click the image to enlarge it.
-
On the first page of the resulting wizard, select the Notepad main window:
-
Click the target glyph (
 ) with the left mouse button and keep the button pressed.
 -
Wait until the TestComplete window is minimized, and then drag the target glyph to the Notepad main window.
-
Wait until the window is highlighted with a red frame and release the left mouse button.
TestComplete will restore its window and show the selected window in the wizard:

Click Next.
-
-
On the next page of the wizard, TestComplete will show the captured image of the selected window and the text recognized in the window (recognizing the text may take some time, please wait). In our case, the only text the Notepad window contains is the window caption and the labels of the main menu items:

-
Specify the text fragment on which you want to simulate a click. You can type the needed text manually in the Substring to work with text box or you can select it in the Recognized text box:

To specify the needed text, you can use the asterisk (*) or question mark (?) wildcards. The asterisk corresponds to a string of any length (including an empty string), the question mark corresponds to any single character (including none).
Type Help in the Substring to work with text box.
Leave the Preferences parameter set to its default value.
Click Next.
-
On the next page of the wizard, select the action you want to simulate on the area that contains the specified text fragment. We will simulate a mouse click:

Click Next.
-
On the next page, you can review the target text fragment and set additional parameters of the action to simulate. We will leave the default values:

-
Click Finish.
TestComplete will add the OCR Action operation to your test:

3. Run the Test
Now, let’s run the test and make sure that TestComplete can find the needed text and a click on it.
| Note: | The Notepad application must be running and activated on the screen. Either run it manually, or add a command that will start the application at the beginning of your test. |
To run your test, click  Run on the toolbar:

TestComplete will do the following:
-
Capture the image of the Notepad main window,
-
Recognize text in it,
-
Find the Help substring in the recognized text,
-
Find the window area, to which the substring belongs,
-
Simulate a click on the area.
You can view the test results in the test log:

Click the image to enlarge it.
If TestComplete finds several entries of the specified substring, it will simulate a click on the first entry found and post a warning to the test log.
If TestComplete fails to find the specified substring, it will post an error to the test log. To learn why this can happen, see Optical Character Recognition - Troubleshooting.
Conclusion
You have created a simple test that uses optical character recognition to simulate user actions. As you can see, creating such tests is easy. To learn more about optical character recognition in TestComplete, see the following topics: