About
When mapping objects in default (not cross-platform compatible) mode, TestComplete uses default predefined properties as object identification criteria (for instance, ObjectType, id, value, and so on). Typically, these properties can accurately identify an object in a web application. However, for some modern Web applications, you can face issues when, for correct object identification, standard predefined properties are not enough. Such applications often don’t use standard attributes for object identification – instead, they use custom attributes for this purpose (like data-test-id, ng-model, ng-bind, and so on). In these cases, you can specify additional custom attributes (accessed using the attributes and dataset properties) of the corresponding web object. These attributes will identify the object uniquely. Applications created with React and AngularJS frameworks commonly use custom attributes for the object identification, so the approach described below is helpful for them.
Video Tutorial
Access to Custom Attributes
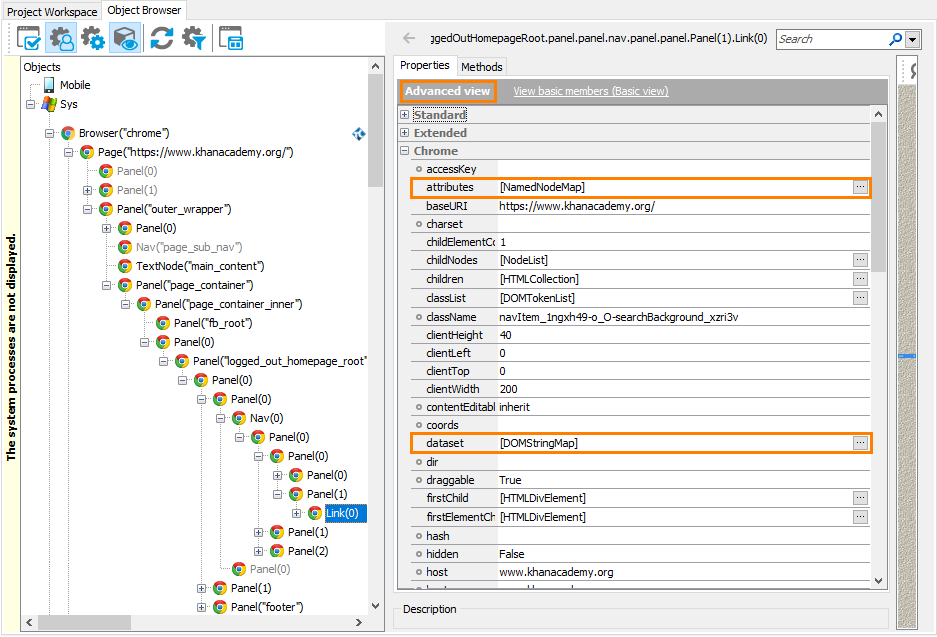
TestComplete provides access to attributes of web objects using the properties: attributes and dataset. You can view these properties in the Object Browser panel in the Advanced view mode.
Getting Attributes in the Script
Using the attribute property, you can access any attribute of the appropriate web object via the dot notation. The dataset property provides access to data custom attributes (data-*).
The following example illustrates how you can receive the data-original-title attribute of the web object:
<div class="progress-bar progress-bar-success" role="progressbar" data-toggle="popover" data-original-title="Automated: 74%" data-placement="auto" aria-describedby="popover351742">62</div>
JavaScript, JScript
function Test()
{
var element = Aliases.browser.pageWebTest.panel;
// Get the data-original-title custom attribute via the attributes property
var customAttribute = element.attributes.data_original_title;
// Get the data-original-title custom attribute via the dataset property
var customAttribute = element.dataset.originalTitle;
}
Python
def Test():
  element = Aliases.browser.pageWebTest.panel

  # Get the data-original-title custom attribute via the attributes property
  customAttribute = element.attributes.data_original_title
  # Get the data-original-title custom attribute via the dataset property
  customAttribute = element.dataset.originalTitle
VBScript
Sub Test
Dim element, customAttribute
Set element = Aliases.browser.pageWebTest.panel
' Get the data-original-title custom attribute via the attributes property
customAttribute = element.attributes.data_original_title
' Get the data-original-title custom attribute via the dataset property
customAttribute = element.dataset.originalTitle
End Sub
DelphiScript
procedure Test;
var element, customAttribute;
begin
element := Aliases.browser.pageWebTest.panel;
// Get the data-original-title custom attribute via the attributes property
customAttribute := element.attributes.data_original_title;
// Get the data-original-title custom attribute via the dataset property
customAttribute := element.dataset.originalTitle;
end;
C++Script, C#Script
function Test()
{
var element = Aliases["browser"]["pageWebTest"]["panel"];
// Get the data-original-title custom attribute via the attributes property
var customAttribute = element["attributes"]["data_original_title"];
// Get the data-original-title custom attribute via the dataset property
var customAttribute = element["dataset"]["originalTitle"];
}
As you can see, TestComplete transforms attribute names:
-
For attributes accessed using the
attributesproperty, hyphens are replaced with underscores. -
For attributes accessed using the
datasetproperty,data-are excluded from attribute names and names are converted to the camelCase notation.
Getting Custom Attributes in Keyword Tests
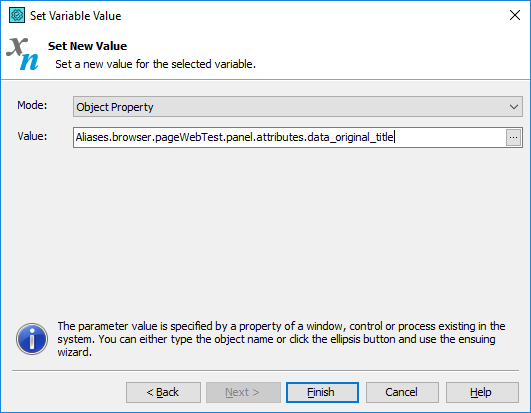
In keyword tests, you can retrieve custom attributes and save them to a test variable using the Set Variable Value operation:
You can also create checkpoints to verify the values of custom attributes.
Custom Attributes as Additional Name Mapping Criteria
Note: This section applies to web objects mapped in default mode (when the cross-platform web test mode is disabled).
To use custom attributes as additional Name Mapping criteria:
-
Determine what attributes uniquely identify the needed objects.
-
Add them to default predefined Name Mapping properties.
This approach allows you to use Name Mapping more "consciously", because you know your object structure and pre-define which attributes will be used for Object Mapping.
How to Add Custom Attributes as Name Mapping Criteria
-
Select Tools > Current Project Properties from the TestComplete menu.
-
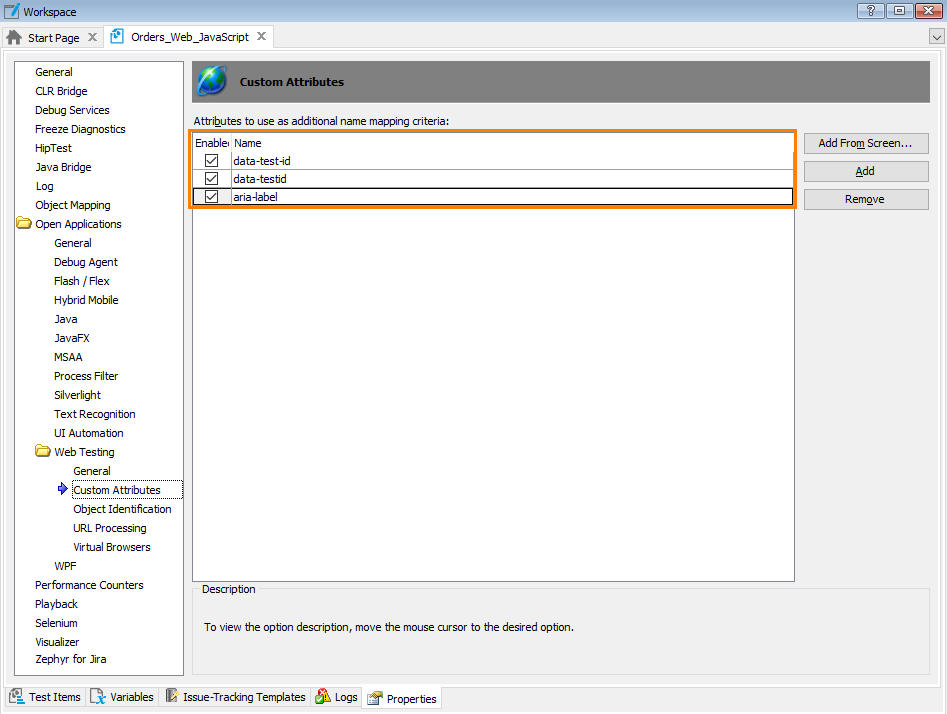
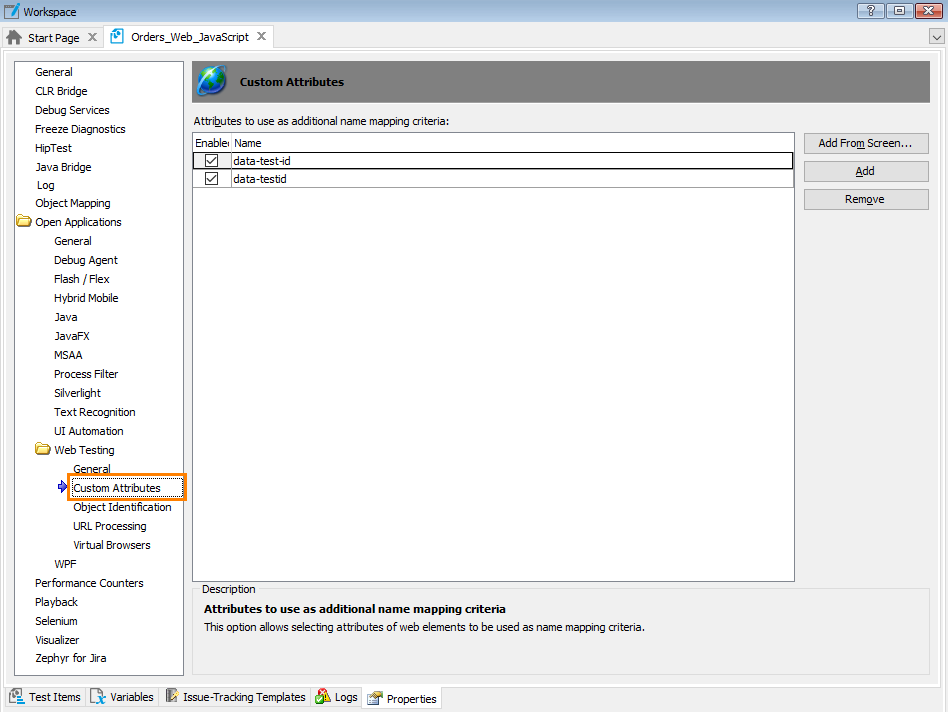
In the tree on the left of the project properties editor, select Open Applications > Web Testing > Custom Attributes.
By default, the list includes the
data-test-idanddata-testidattributes. These are the most commonly used attributes in applications created with the React framework. -
Add custom attributes that you want TestComplete to use as additional name mapping criteria. You can do it in one of the following ways:
-
Click Add on the Custom Attribute page and type a custom attribute name in a new line of the list.
– or –
-
Click Add From Screen and select the object, whose attributes you want to use, via the Add Web Element Attributes dialog.
-
Custom attributes added to this list will be used as additional name mapping criteria if it is required for the object identification.
To delete the selected custom attributes, click Remove on the Custom Attribute page. Alternatively, you can temporarily disable attributes as additional name mapping criteria by clearing the appropriate check boxes of attributes.
If you want to use the appropriate custom attributes for your newly created projects, specify the needed attributes using the Project > Open Applications > Web Testing > Custom Attributes option on the Default Project Properties page.
See Also
Classic Web Testing
Understanding Web Object Identification and Object Models
Name Mapping
Project Properties - Custom Attributes Option

 See instructions
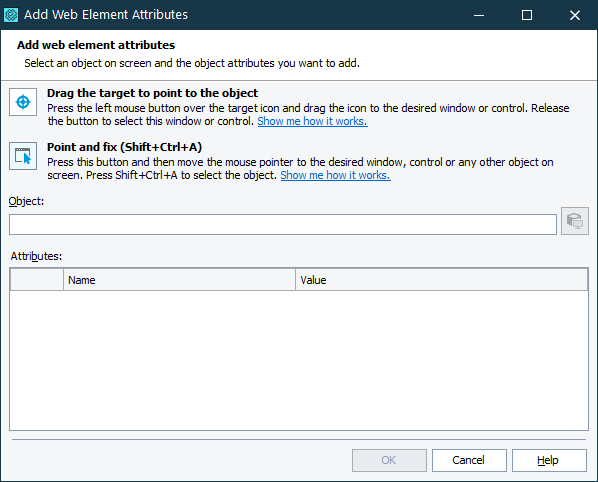
 ) to the desired onscreen object.
