Cascading List
Project Admins can create Cascading List User Defined Fields (UDFs) with a single level of parent-child hierarchy. These fields allow you to define dependent values, where the available child options depend on the selected parent value.
You can use Cascading List UDFs in Test Case, Test Suite, and Test Run (execution) fields.
Note
You need customization permissions to create or modify a cascading list. You also need the Customization Package enabled on your instance.
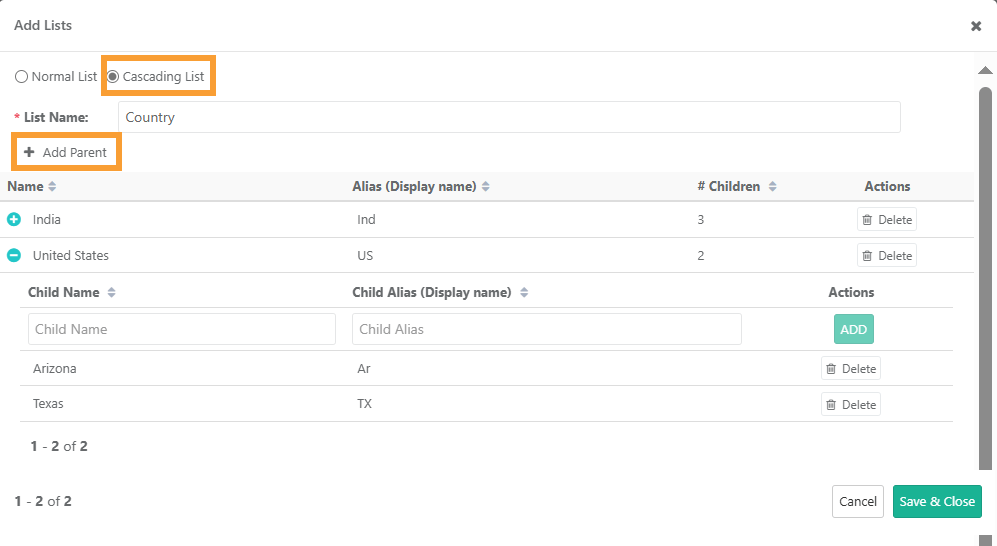
To create a cascading list, do the following:
Go to Customization and select Lists.
Click New.
Select Cascading List and enter the List Name.
Click Add Parent to enter Parent and Child Values.
Click Save and Close.
Note
Each parent must have at least one child.
If you do not add a child, the application adds the default child value No Value.
Cascading List Operations
You can share cascading list fields between projects. Cascading List UDFs are supported in the following operations within and across projects:
Copy
Move
Clone Project
Import
Export
Bulk Edit
Moving or copying test assets to another project includes cascading-type custom fields and their selected values, ensuring all data remains intact during these operations.
Cascading lists and their values can be copied or imported between projects, making list management easier for project administrators.
Note
The system preserves parent-child relationships of the cascading select list.
The system retains default values set for parent-child fields during operations within project.
You can copy or import cascading lists and their values between projects.
When you move or copy test assets to another project, the application includes cascading-type UDFs and their selected values.
When you copy assets between projects, the application creates any missing parent-child values in the target project.
For copying, you must have Customization Modify permission in both source and destination projects.
Using Cascading List UDFs with Automation
You can set Cascading List UDF values for Test Case, Test Suite, and Test Run fields when you import automation results through the REST API. For the REST API request, see Import Automation Results through REST API.
Pass cascading values in the request
Pass the parent value and then the child value as an array in the userDefinedFields object. Use the Field Name from Manage Fields as the key. The following table shows examples for a Cascading List UDF with the field name udf_cascd:
Parameter | Example value |
|---|---|
testcase_fields | {"userDefinedFields":{"udf_cascd":["USA","Jersey"]}} |
testsuite_fields | {"userDefinedFields":{"udf_cascd":["USA","Ohio"]}} |
testsuite_fields | {"userDefinedFields":{"udf_cascd":["India","Maharashtra"]}} |
Auto-create values
When the Auto-Create Values toggle is on for the project, QMetry creates list values that don’t exist when you import results. This applies to Lookup List, Multi-Select Lookup List, and Cascading List UDFs in Test Case, Test Suite, and Test Run fields.
If the parent value exists and the child value doesn’t, QMetry adds the child value under that parent.
If neither value exists, QMetry creates the parent value and the child value.
If the toggle is off, QMetry doesn’t create the values.
Jenkins, Maven, and other plugins
The QMetry plugins for Jenkins and Maven send the field values to the REST API as JSON, so they accept cascading values in the same format. You don’t need to update the plugins.
Limitations
Cascading lists aren’t supported for test cases created using BDD Import/Create.
Adding a List Value
You can add values when you create a list, or later when you edit it. For a cascading list, add parent and child values as described in Create a cascading list.
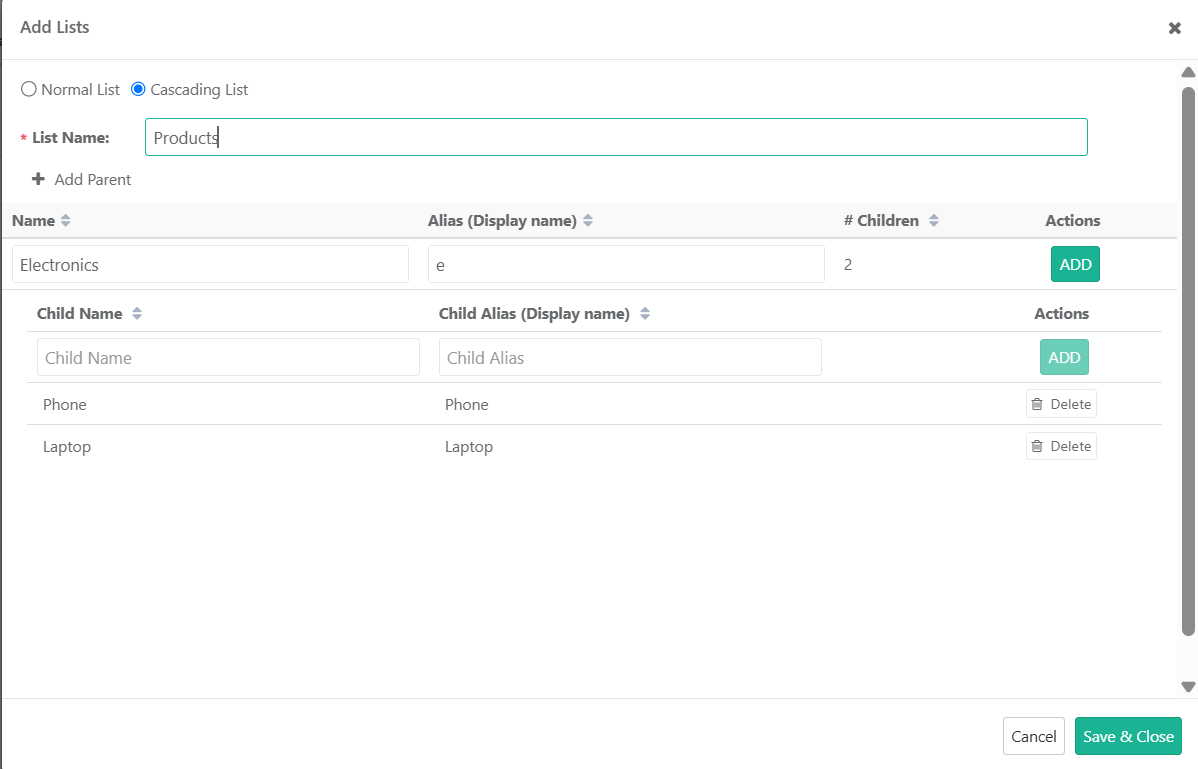
To add a list value, do the following:
On the Add List Screen, click Add New Value.
Add List Values and Alias and click Save.
Click Save and Close.
Note
List value name validation is case-insensitive. For example, if "None" is already present in the list value, you cannot add "none" as other value.
Use the Alias to tailor list values to your organization.
Editing a List
You can edit system lists and custom lists.
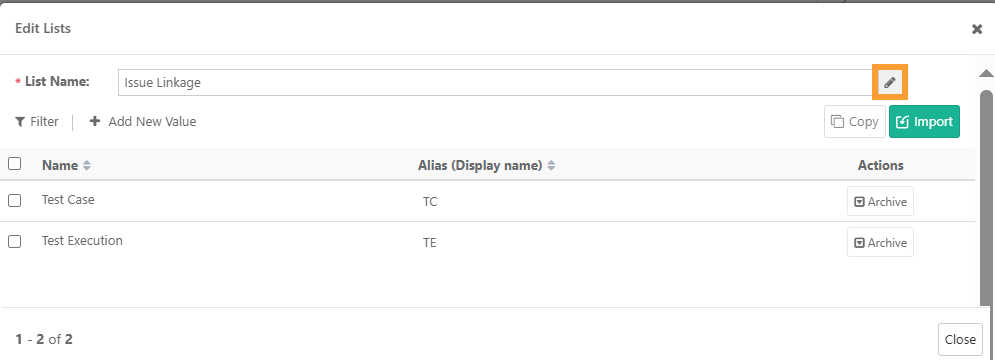
To edit a list, do the following:
Go to Customization and select Lists.
In the Actions column, click Edit.
Change the List Name or the Alias (Display name).
Archiving List Values
You can archive only custom list values.
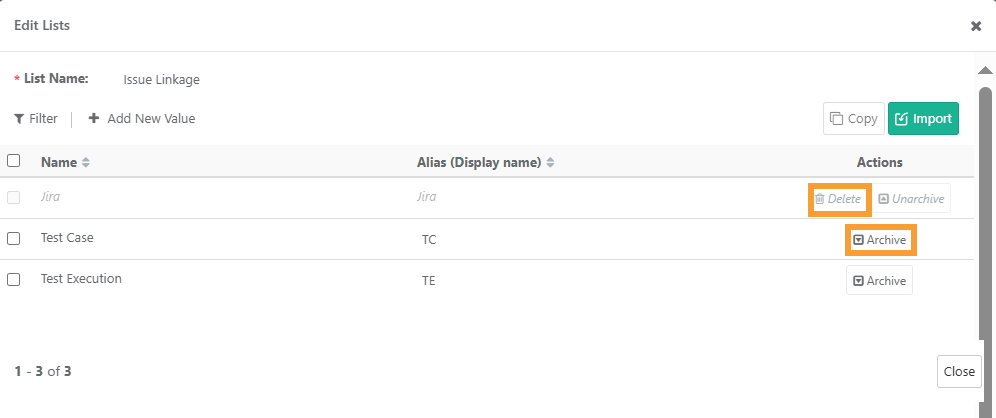
To archive a custom list value, do the following:
Go to Customization and select Lists.
Click Edit for the list. Select the values to archive.
In the Actions column, click Archive.
Note
In case of cascading lists:
Archiving a parent value automatically archives all its child values.
You cannot archive values that are set as default.
Remove or change the default setting before archiving.
When you archive a list value, executions that already use the value keep it. Testers can change the Test Run UDF to another value, but they cannot select the archived value again.
Deleting List Values
You can delete only custom list values. System-defined values cannot be deleted.
To delete a custom list value, perform the following steps:
Go to Customization in the main menu.
Select Lists.
Locate the list you want to delete and click Delete.
Click Yes to confirm.
Note
In case of cascading lists, deleting a parent value automatically deletes all its child values.
Sharing List Values
You can copy list values, both System and Custom, from a source project to one or more target projects to ensure consistency and avoid manual entry. All copy and import actions are recorded in the Audit Log Report.
Permissions
For creating or modifying lists you must have the following permissions:
Action | Permissions |
|---|---|
Modify list values in Source Project | “View” and “Modify” permissions for Project and Customization. |
Copy values to Destination Project | “View” access to Project and “View” and “Modify” permissions for Customization. |
Importing List Values
Note
Duplicate entities for name and alias will be ignored while importing.
To import list values from other projects, perform the following steps:
Go to Customization and select Lists.
Click Edit.
On the Edit Lists screen, click Import.
Next, select the project from the list.
Only projects that you have access to are available in the list.
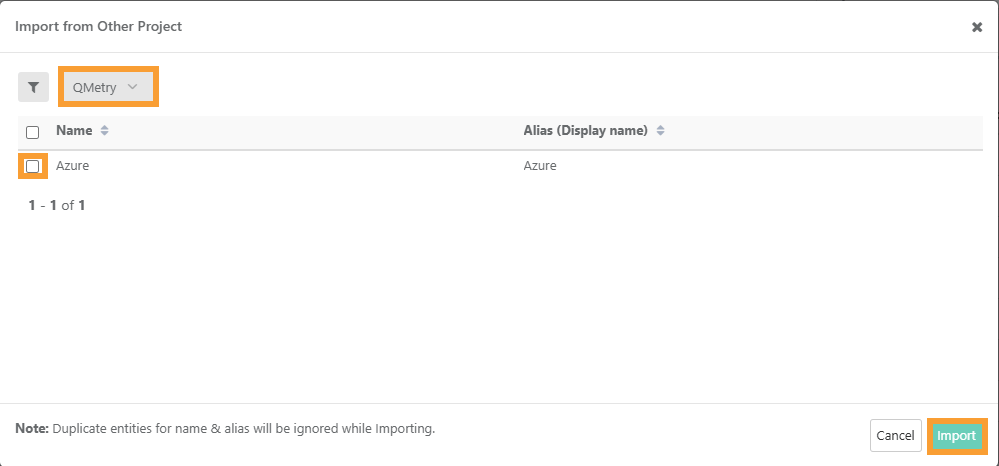
Select the list values and click Import.
Note
You can select a maximum of 100 list values at a time.
You can view the progress in the Scheduled Task section. The list values are imported to the destination project.
Copying List Values to Other Projects
To copy list values to other projects, perform the following steps:
Go to Customization and select Lists.
Click Edit.
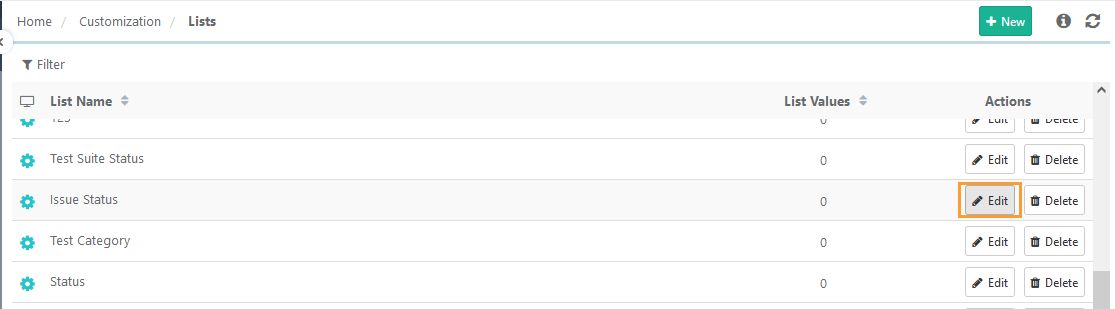
Select the values and click Copy.
Note
A maximum of 100 List values can be selected at a time.
On Copy to Other Projects dialog, select the target projects and click Copy.
The system copies the list values to the destination project. You can view the progress in the Scheduled Task section.
Deleting a List
Note
You can only delete user defined custom lists. System defined custom lists cannot be deleted.
To delete a Custom List, perform the following steps:
Go to Customization and select Lists.
Click Delete under the Actions column.
Select Yes to confirm Delete.