In QAComplete, you use tests to ensure complete coverage of your requirements (and defects). You store your tests in the Test Library and organize them into test sets to run them in a consistent, logical order. You can create manual tests (all actions in such tests are performed by an assigned person manually), or you can create automated tests (all actions in such tests are performed automatically by a script).
Let’s create a couple of manual tests for the created requirement:
-
Go to Test Management > Test Library.
-
Use the Release drop-down list to select the release, iteration, or build for which you want to create a test.
-
Click Add New.
-
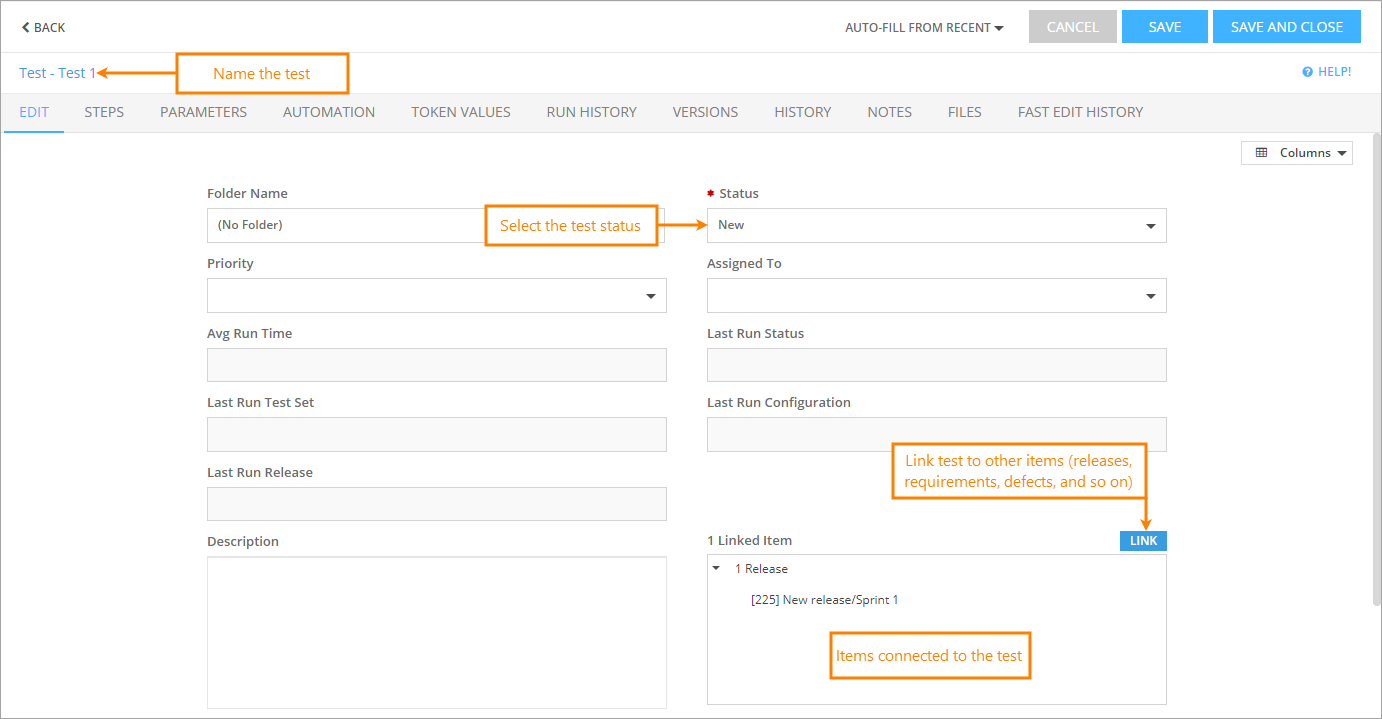
In the resulting Create Test form, enter the test title.
Specify other test fields if needed.
-
Let’s link the test to the created requirement:
-
Click Add on the Linked Items panel.
-
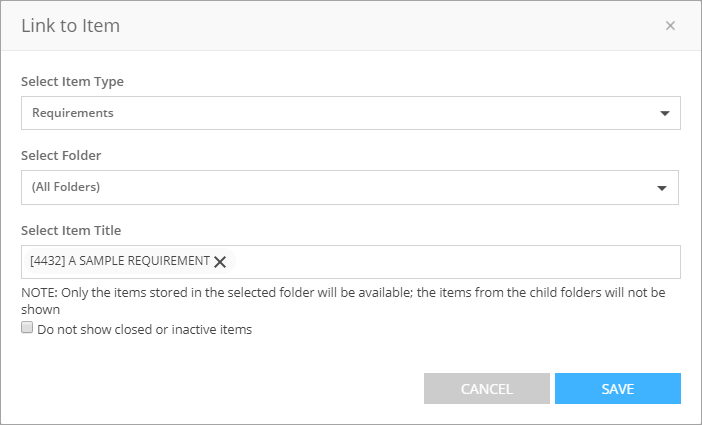
In the resulting Link to Item dialog, select Requirements from the Select Item Type drop-down list.
-
In the Select Folder drop-down list, select the folder, to which your requirement belongs, or select All Folders.
-
In the Select Item Title drop-down list, select the created requirement and click Save.
-
-
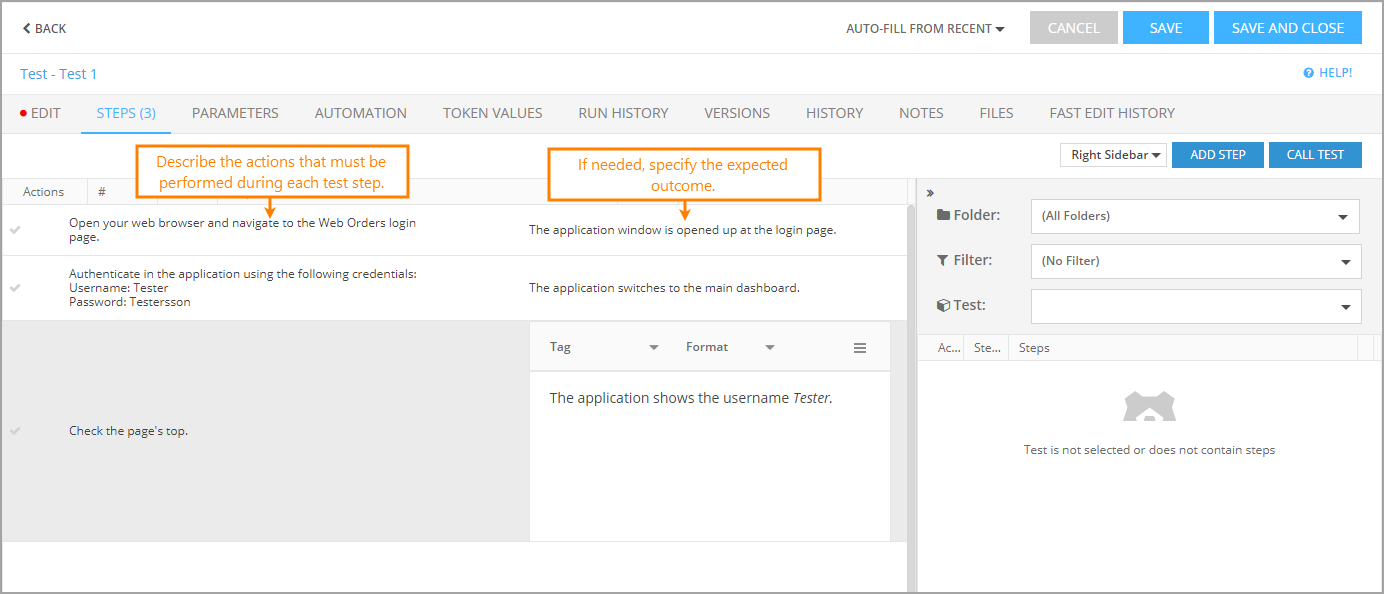
Switch to the Steps tab. On this tab, specify the actions to be performed during the test step-by-step. For each step, you can specify the expected outcome.
To mark a step as one that must pass for the whole test to pass, use the Critical check box. If a critical step fails, the whole test will fail.
-
Click Save and Close to save the changes and return to the Test Library.
The same way, create another test:
Now, let us create a test set and add created tests to it:
-
In the Test Library, click Create Test Set.
-
In the subsequent Create Test Set dialog, confirm that you want to create a test set using the test you have just created.
-
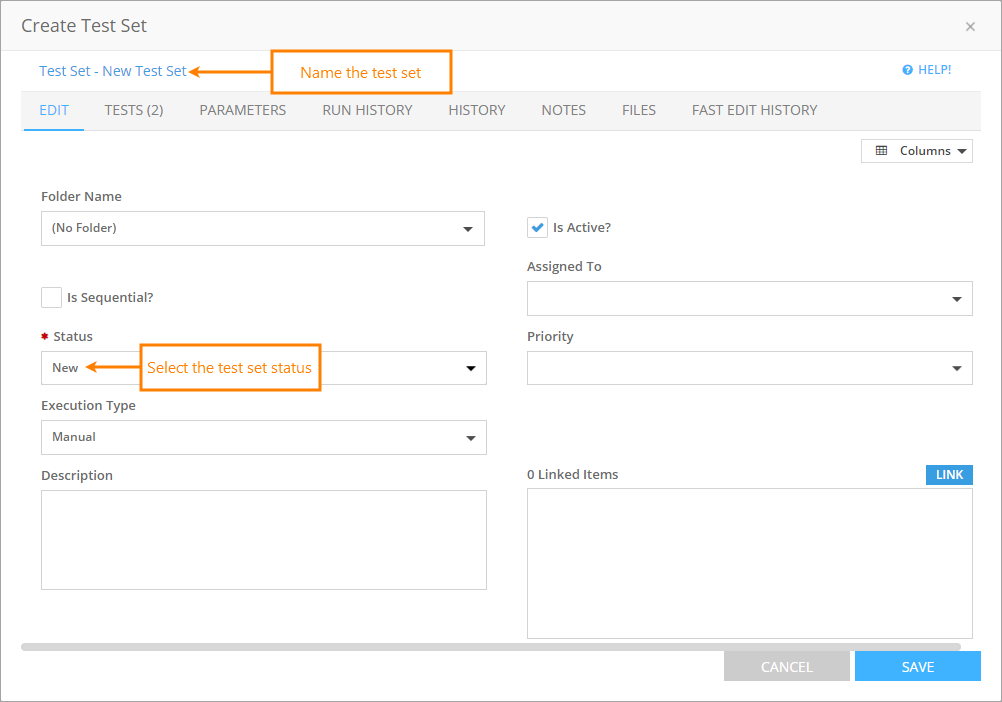
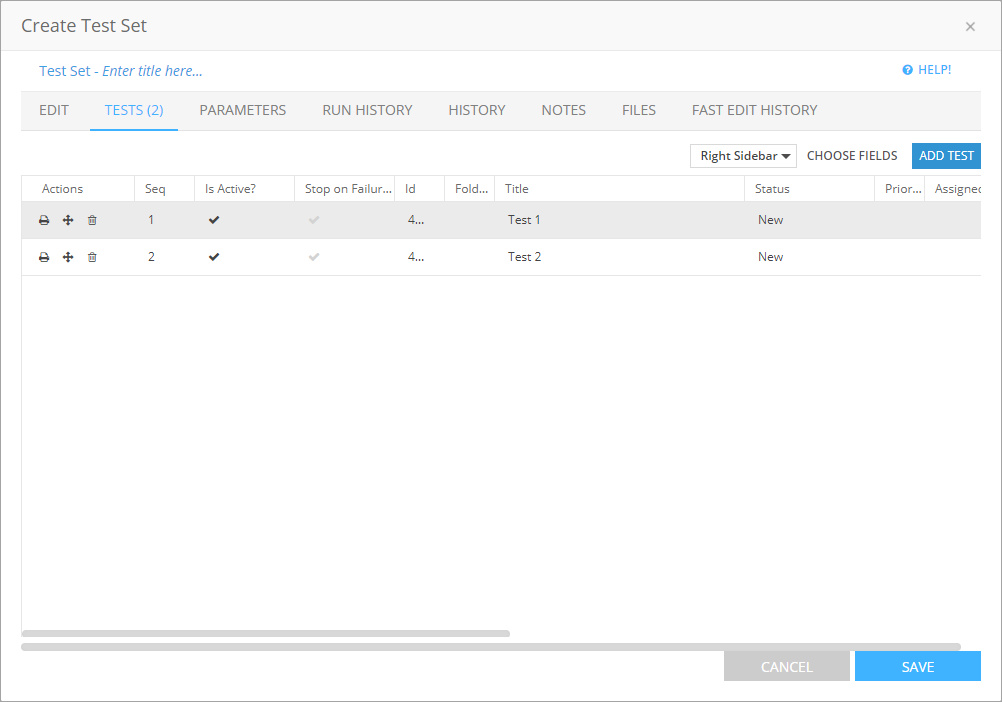
In the resulting Create Test Set form, enter the test set title. Specify other test set properties if needed:
-
Switch to the Tests tab. It already contains the tests you have created.
-
Click Save and Close. QAComplete will save the test set and return to the Test Library.
Now, let’s run the created test set.
See Also
3. Create a Release
7. Create a Defect (Bug)
Getting Started with QAComplete - User Tutorial



 Prev
Prev