Let’s run created tests:
-
On the Test Management > Test Sets screen, locate the created test set.
-
On the needed test set’s left, click Run Now to start the run:
-
If the tests are linked to a release, select an iteration or build, for which you want to run the tests, and click Run:
-
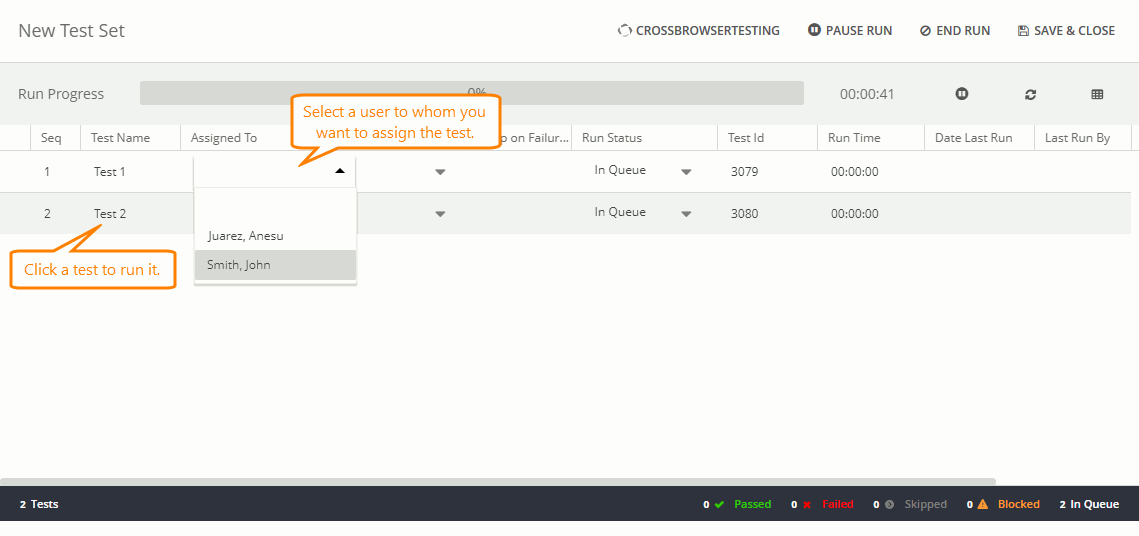
The Test Runner will show all the tests that belong to the test set, users to which those tests are assigned, the current test status, and other information:
-
Click the test to run it.
-
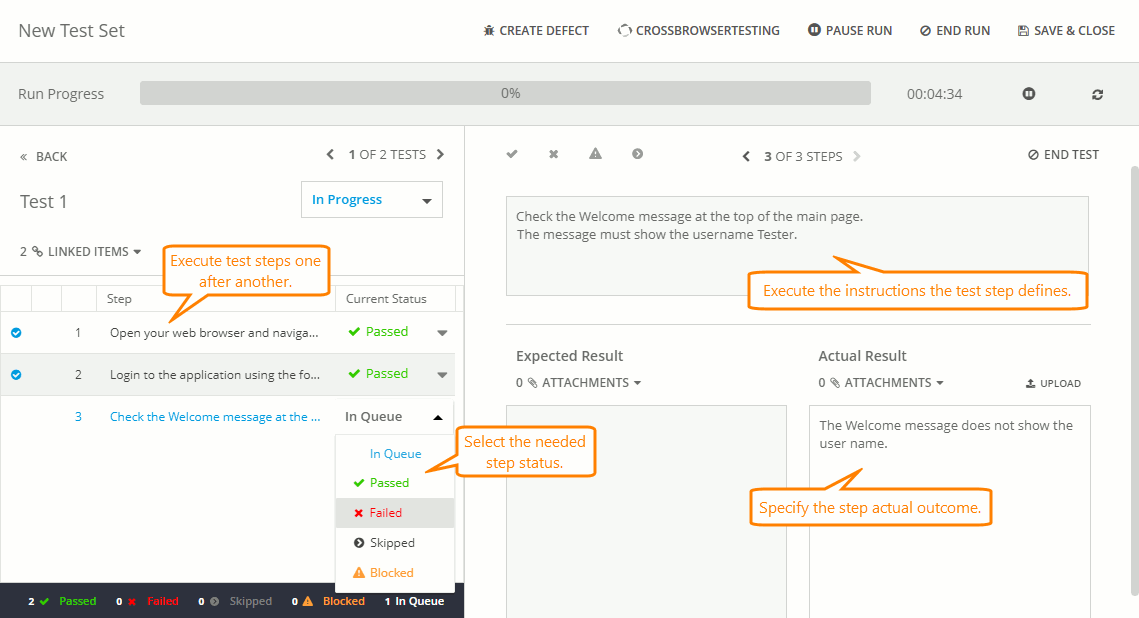
The Test Runner will open the test. Perform the test steps one after another. To specify a step result (whether the test was successful or not), select the needed status from the Current Status drop-down list or click an appropriate icon at the top of the step description panel.
If needed, you can specify the actual outcome of the action you performed during the test:
-
Click End Run to complete the test run. Specify how you want to mark tests and steps that were not run (if any).
-
If at least one step fails, the test will be considered failed. By default, QAComplete will suggest that you create a defect from a failed test:
-
Click Create in the Auto Create Defect dialog to create the defect.
-
In the Create Defect form, enter the defect details. Some of the details are already specified from the test data. In addition, the defect is linked to the test automatically:
-
Click Save to create the defect.
You also can create defects manually (see more further).
-
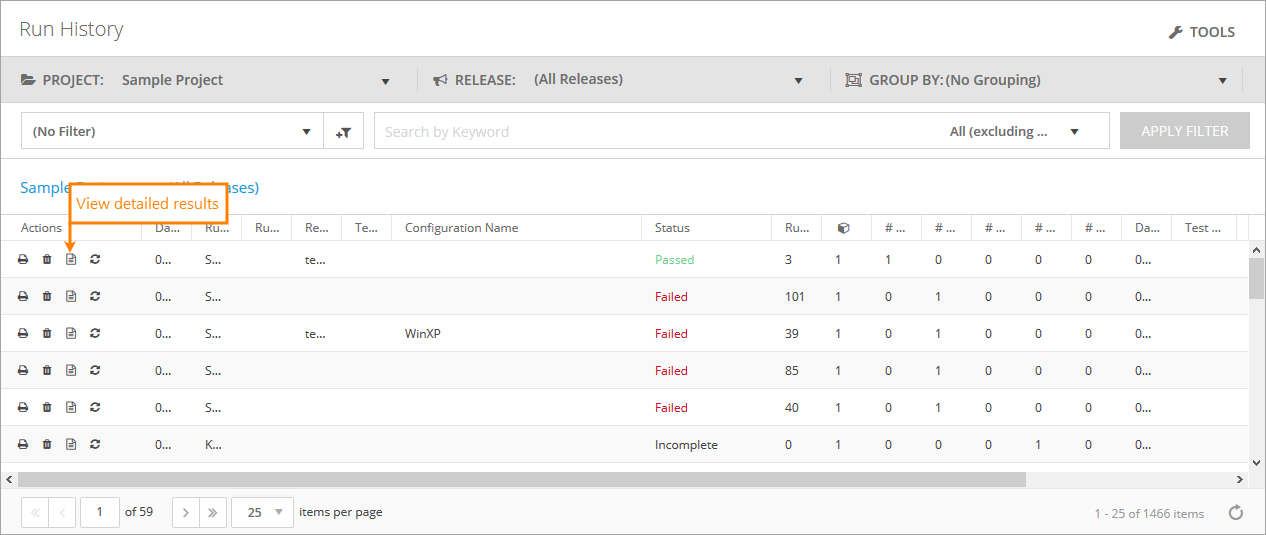
You can view the completed test runs on the Test Management > Run History page:


 Prev
Prev