To synchronize Jira issues with QAComplete defects and requirements, connect to Jira from QAComplete:
On Jira Server
-
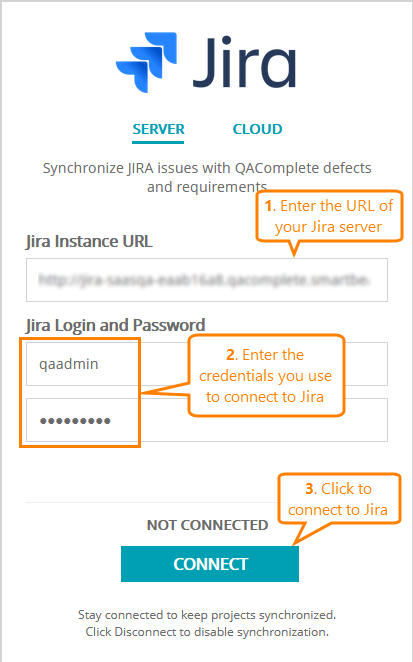
On the > Jira Integration page, switch to the Server tab.
-
In the Jira Instance URL field, specify the URL address of your server.
-
In the Jira Login and Password fields, specify the user name and password for the Jira account you will use to configure the synchronization.
Note: The account must have access to Jira projects containing the issues you will synchronize with QAComplete items. -
Click Connect.
QAComplete will connect to Jira using the data you have provided.
On Jira Cloud
-
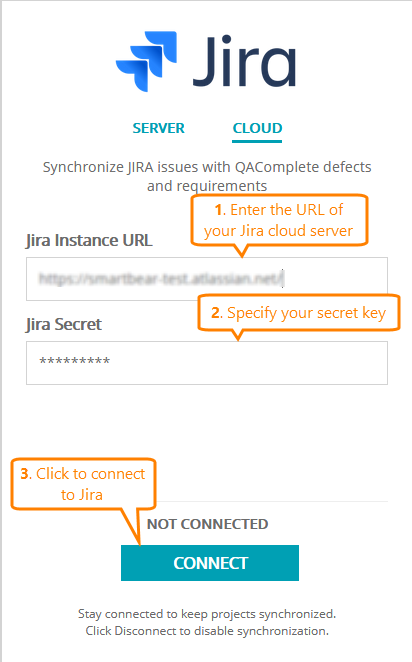
On the > Jira Integration page, switch to the Cloud tab.
-
In the Jira Instance URL field, specify the URL address of your cloud server.
-
In the Jira Secret field, enter your secret key.
Note: To learn how to get the secret key, see Getting the Secret Key. -
Click Connect.
QAComplete will connect to Jira using the data you have provided.
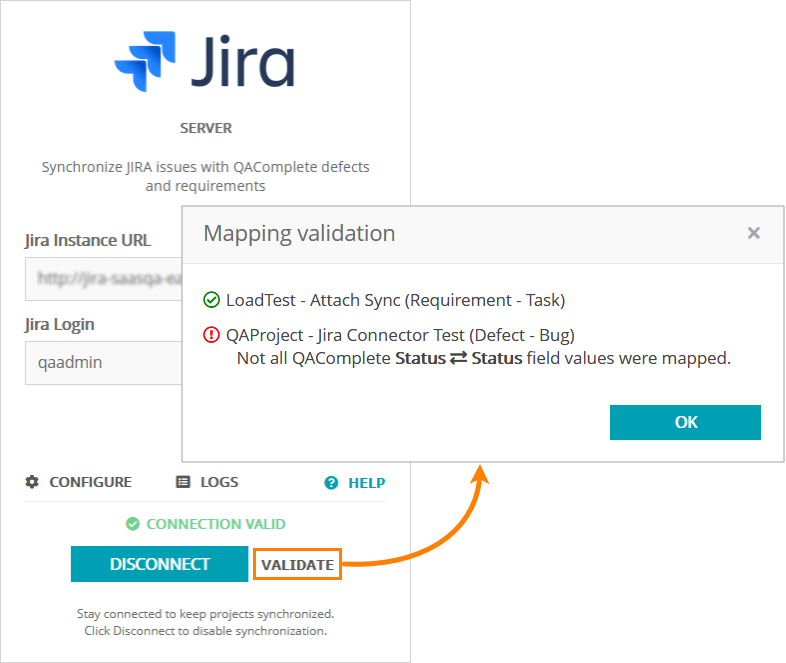
Note: Once you connect to Jira, the Validate button will become available. Click the button to check field mapping in all the projects. If there are some errors, QAComplete will display a list of them:
See Also
QAComplete Integration for JIRA Plugin
Getting the JIRA Cloud Secret Key
Requirements


