This topic explains how to attach databanks to API tests and how to map databank values to request parameters. For information on adding databanks to UI tests, see Attach Databanks to UI Tests. For information on the databank concept in LoadNinja, see Using Databanks in LoadNinja Tests.
1. Prepare the databank
Create a .csv or .txt file with the desired test data, using either commas or tabs as value delimiters. Use any text editor to create the file. Many spreadsheet applications such as Microsoft Excel, Numbers, and LibreOffice Calc also export data to CSV.
Tip: We recommend that the first line of the file contain descriptive column headers. In this case, the test will display the column names rather than indexes (1, 2, …).
2. Create an API test
You create API tests in the API test editor. See Create an API Test.
 It’s important to run the created test to ensure it works correctly.
3. Add a databank
-
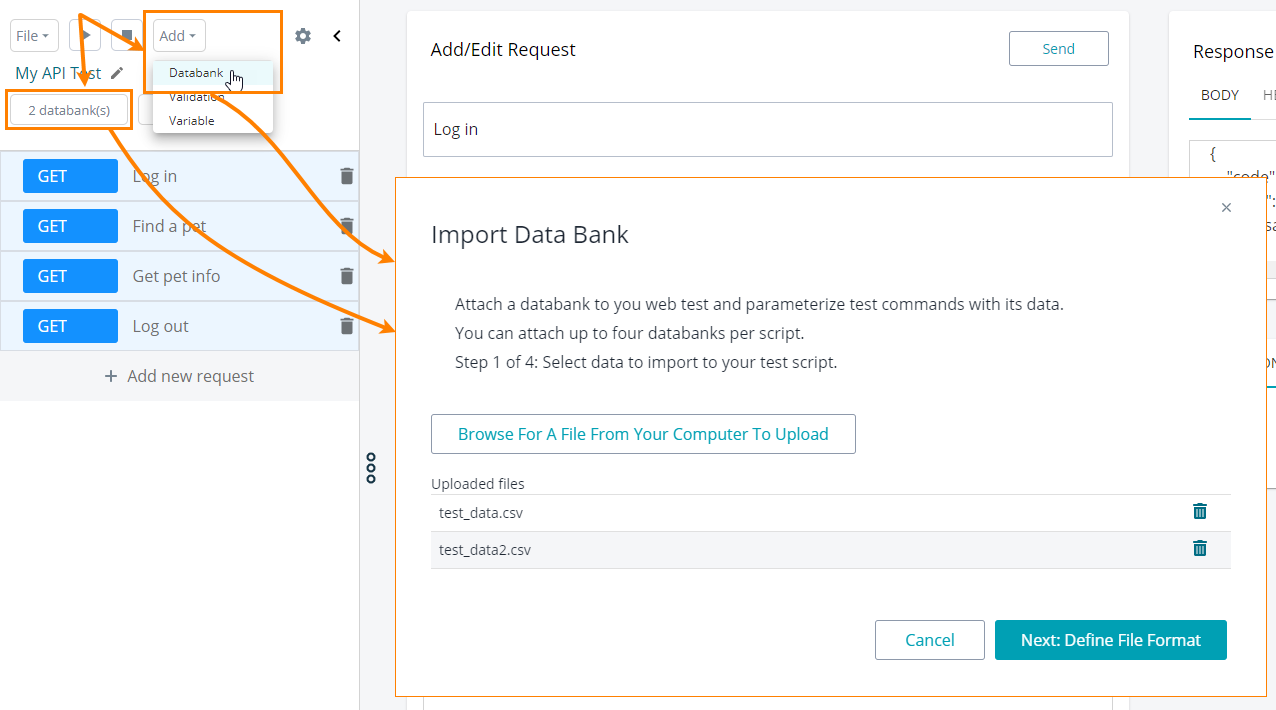
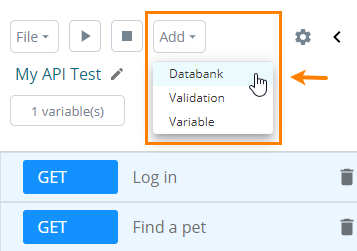
In the test editor, select the Add > Databank menu item:
-
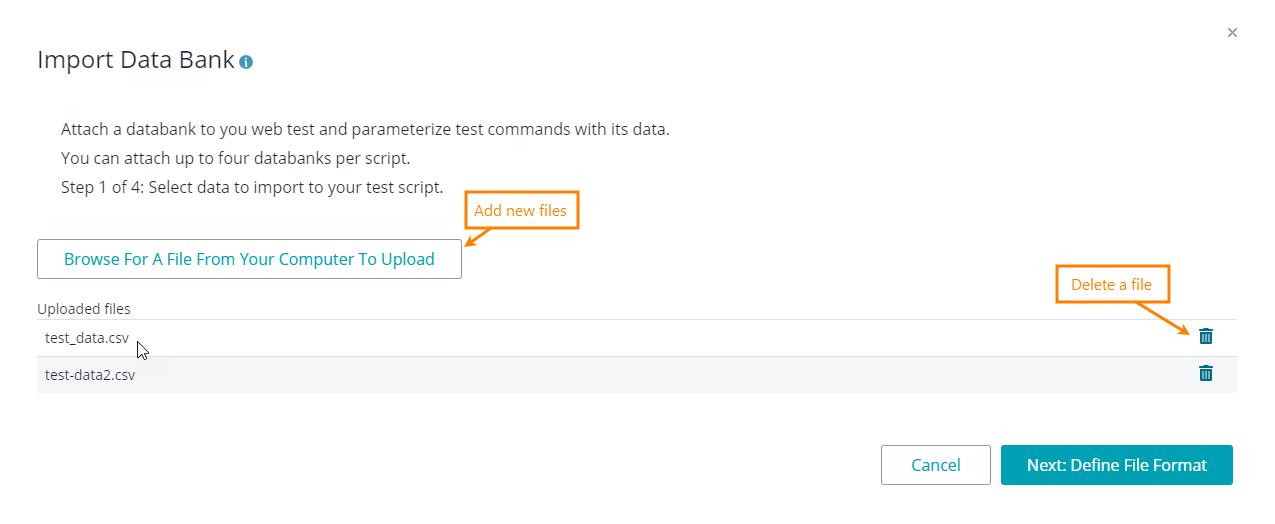
Click Browse and select one or multiple .csv or .txt files from your device you want to use as databanks.
To remove the file you added accidentally, click next to the file in the list.
Click Next: Define File Format to proceed.
-
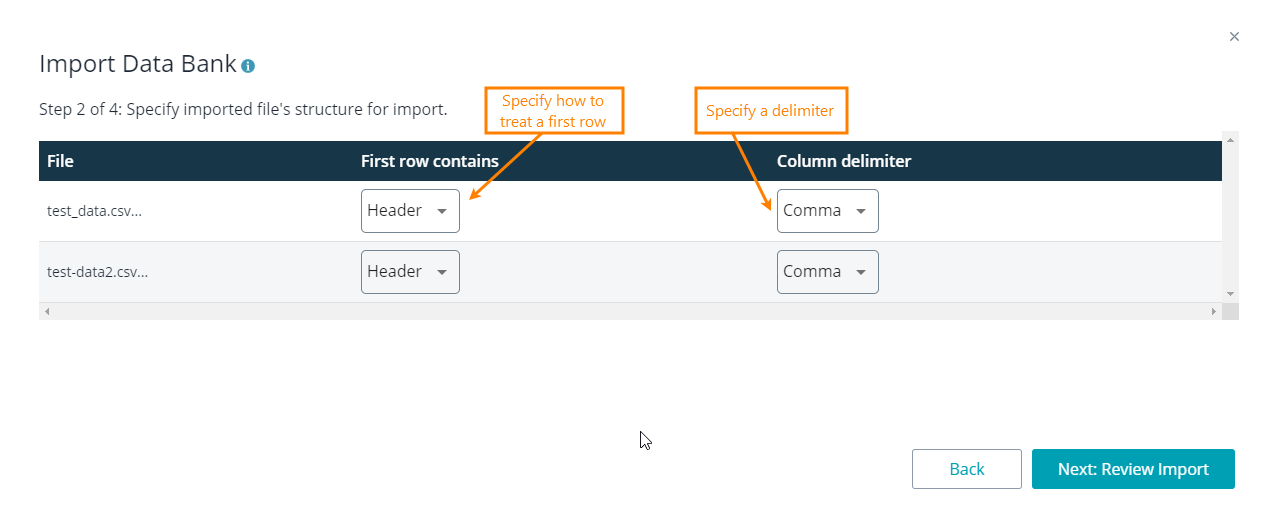
In First row contains, specify whether the first row of each file you have attached should be treated as a header or a data row. In the Column delimiter column, select the symbol that separates columns within your databank:
Click Next: Review Import. LoadNinja will try reading data from your files.
-
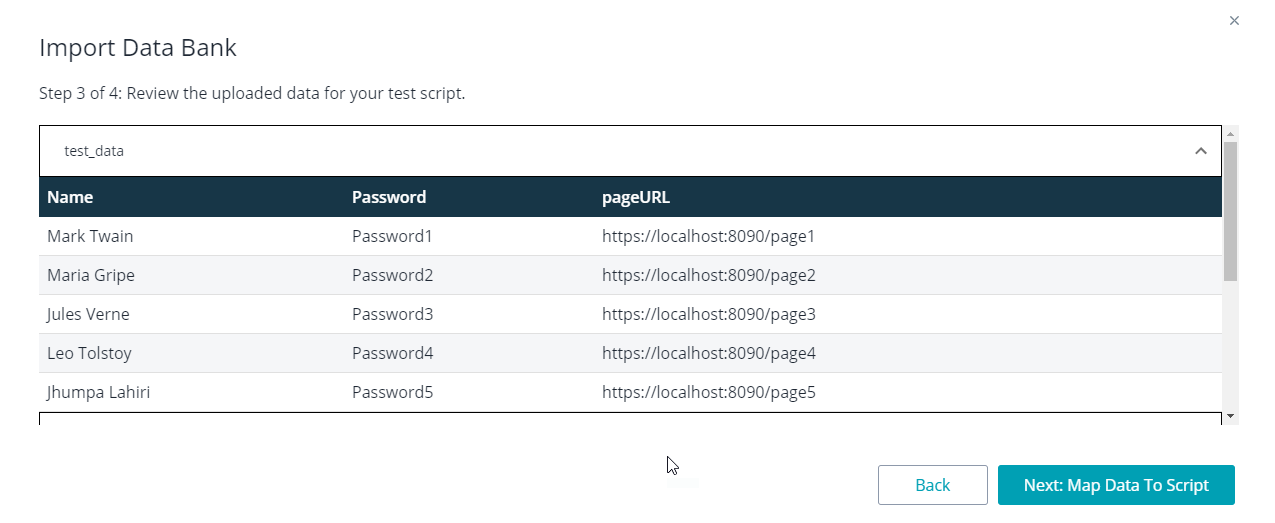
LoadNinja will display a preview of the data. If the data does not look right, click Back and change the parsing settings:
If LoadNinja loaded data correctly, go to the next page by clicking Next: Map Data to Script.
-
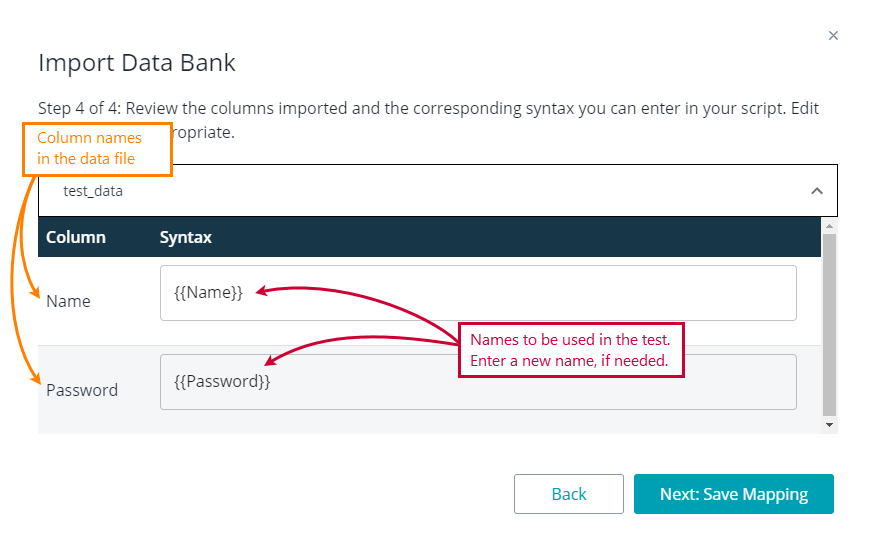
On the next page, you specify variables to which the test engine will store databank values during the test run:
You will need to assign these variables to request parameters later.
-
Click Next: Save Mapping to save the changes.
LoadNinja will upload your data file to the test. The test editor will also show a new NN databank(s) button. The number on it indicates the number of databanks your test uses (up to 4):
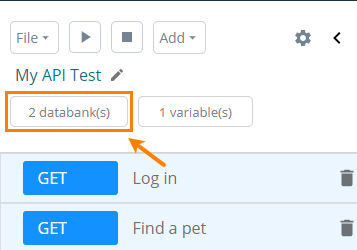
Clicking this button will open the Import Databank wizard described above.
4. Map databank values to request parameters
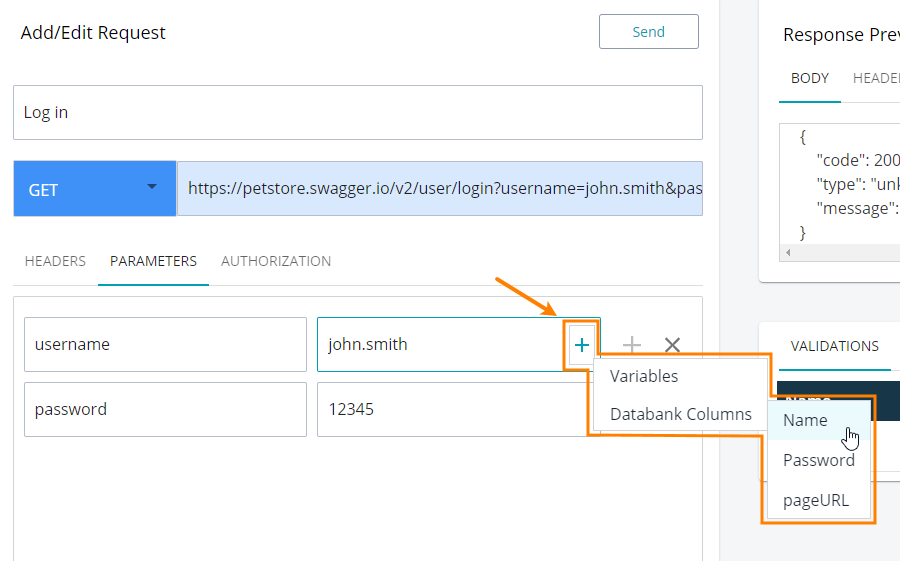
After you attached a databank to your API test:
-
Find the needed request. Click it to edit its parameters.
-
Click
+and select the desired databank value:
Update a databank
LoadNinja loads data from the databank when you attach this databank to your test. To update the data, you have to add the databank to your test as it was described above:
-
Do any of the following:
-
Click the NN databank(s) button.
– or –
-
Select Add > Databank.
-
-
Follow the instructions of the subsequent wizard. Save your changes.
-
If the databank has a new column (or other column names), update mappings for request parameters.
More
-
If needed, you can attach more databanks to your test. You do this in the way described above.
A test can have up to 4 databanks attached.
-
Databanks are not shared among tests. To use the same databank in another test, associate it with that test separately.
-
By default, the test engine extracts rows from the databank randomly. You can change this by configuring your test settings.
-
For complete information on databanks, see Using Databanks in LoadNinja Tests.
See Also
Attach Databanks to API Tests
Using Databanks in LoadNinja Tests

