
Before running tests from Jenkins, install the LoadComplete Jenkins plugin and configure your slave nodes.
 Requirements
Requirements
-
Jenkins version 2.121.1 or later.
-
One of the supported Windows versions installed on your Jenkins nodes.
-
LoadComplete version 4.95 or later installed on your Jenkins nodes.
-
A LoadComplete license must be available on your Jenkins nodes.
Note: You can use a Floating User or a Node-Locked license. Select a Floating User license if you use a dynamic testing environment. You will activate the license on a computer in your network (a license server) and configure LoadComplete instances on Jenkins nodes to connect to this server.
Installing LoadComplete Jenkins Plugin
Online installation
-
In Jenkins, go to Manage Jenkins > Manage Plugins.
-
Switch to the Available tab.
-
Find LoadComplete support plugin and click Install without restart.
Tip: Press Ctrl+F and search through the page for LoadComplete keyword to find the plugin faster.
Offline installation
-
Download a LoadComplete Jenkins Plugin .hpi file from the Jenkins Wiki page.
-
In Jenkins, go to Manage Jenkins > Manage Plugins.
-
Switch to the Advanced tab.
-
Click Choose File in the Upload Plugin section.
-
Select the plugin file on your device.
-
Click Upload.
When the installation is finished, switch to the Installed tab to make sure that the LoadComplete plugin was installed successfully:

Click the image to enlarge it.
Configuring Jenkins Nodes
Before running LoadComplete tests on slave computers, configure them as Jenkins nodes:
-
Create a new Jenkins node.
-
Connect to slave nodes. You can do it in one of the following ways:
-
Launching Jenkins Slave Agent via Java Web Start
-
Launching Jenkins Slave Agent as Windows Service on Slave
We recommend using Java Web Start to connect to slave nodes, because you may encounter a large number of issues when connecting them as a windows service.
-
 See instructions
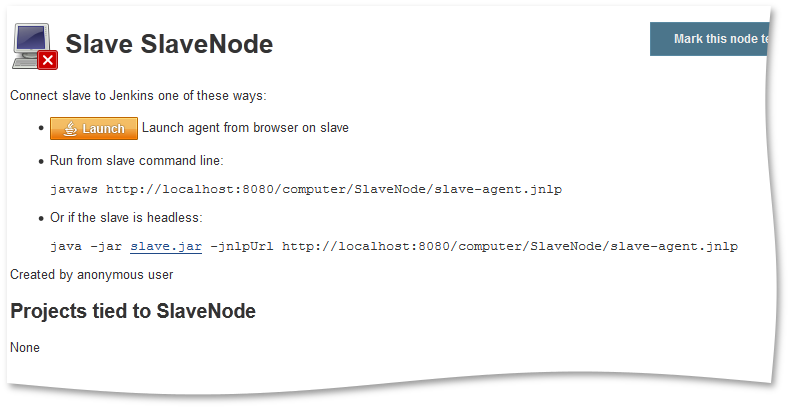

Known Issues
-
Currently, you may be unable to apply LoadComplete settings (those that differ from the default ones) if you started LoadComplete from Jenkins. This happens because LoadComplete launched by the LoadComplete Jenkins plugin is run by the SYSTEM account, but if you change the settings directly in LoadComplete, it will save them to the User account. As a workaround, you can replace the file containing LoadComplete settings on your Jenkins node with the file containing previously configured LoadComplete settings:
-
Open LoadComplete on any of the machines and configure it as needed.
-
Close LoadComplete to save the changes. The settings are saved automatically to the following file:
C:\Users\<User name>\AppData\Local\SmartBear\LoadComplete\4.0\tcSettings.xml
-
Replace the settings file on your Jenkins node with the settings file saved at the previous step.
The settings that LoadComplete uses being launched under the SYSTEM account reside at:
On a 64-bit version of Windows:
%SYSTEMROOT%\SysWOW64\config\systemprofile\AppData\Local\SmartBear\LoadComplete\4.0\tcSettings.xml
On a 32-bit version of Windows:
%SYSTEMROOT%\system32\config\systemprofile\AppData\Local\SmartBear\LoadComplete\4.0\tcSettings.xml
Note: You can do this manually, or you can add a build step to your Jenkins job that will do this automatically.
-
-
To get values of LoadComplete performance counters on your Jenkins node, the user account under which a Jenkins slave agent is running must have permissions to retrieve data on the monitored server. The data cannot be retrieved from performance counters if LoadComplete is running under the SYSTEM account.
See Also
Integration With Jenkins
Running Load Tests
Viewing LoadComplete Test Results in Jenkins