In LoadComplete, you can print test results to view them on paper or share with colleagues. You can print the entire Report data or individual graphs or data tables.
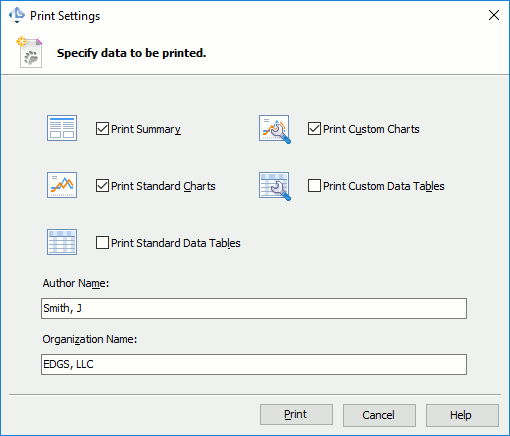
In the Print Settings dialog, you select test results data to print:
Before Printing a Report
Open the report you want to print. To do this, double-click the needed Report item in the Project Explorer. LoadComplete will open it in the Report panel.
 To print custom charts or data tables, first, switch to the Custom Charts page of the Report panel so that LoadComplete can generate them. Otherwise, LoadComplete will not generate them, and thus it will not be able to print them.
To Call the Dialog
Click Print on the Report panel’s toolbar.
Specifying Data to Print
-
Select the charts and data tables you wish to print:
-
Select Print Summary to include the Summary data in the printed report.
-
Select Print Standard Charts to include the Pass / Fail, Response Time, Infrastructure and Top 10 charts in the printed report.
-
Select Print Standard Data Tables to include the Pass / Fail, Response Time, Infrastructure and Top 10 data tables in the printed report.
-
Select Print Custom Charts to include Custom Charts in the printed report.
-
Select Print Custom Data Tables to include the data tables of Custom Charts in the printed report.
To print the whole report, select all the options.
-
-
If needed, specify your name and your company's name in the Author Name and Organization Name text boxes respectively.
Additional Metrics
If your load test includes user-defined transactions, the printed results will include the following additional metrics:
-
90th, 95th, 98th, 99th percentile completion time – The completion time value that covers 90%, 95%, 98% and 99% of the transactions respectively.
-
Standard deviation – The standard deviation of the transaction completion time values.
| Note: | These metrics are not available in the test logs you view in LoadComplete. |
Click Print to print the selected data. The dialog will call the Windows Print Preview dialog where you can adjust the appearance of the printed page and start printing.
To cancel printing, click Cancel.
See Also
About Test Results
Exporting Load Test Report
Working With Test Results

