VictorOps is a real-time incident management and collaboration platform for IT and DevOps teams. This guide will walk you through setting up integration between AlertSite and VictorOps so that monitor alerts can be sent into your VictorOps timeline and automatically trigger and resolve incidents.
There are two key points in getting the VictorOps integration to work:
-
Create alert templates for VictorOps.
-
Set up a recipient group containing VictorOps and these custom templates. (Simply adding VictorOps as a recipient is not enough.)
All the steps are explained in detail below.
| Note: | Private locations support VictorOps JSON alert integration starting from v. 2.1.2. If you use earlier versions of private locations, use VictorOps email integration instead. |
Configure VictorOps
REST endpoint URL
First of all, you need to enable the REST endpoint in VictorOps. This will allow alerts to be sent to VictorOps via HTTP requests. To do that:
-
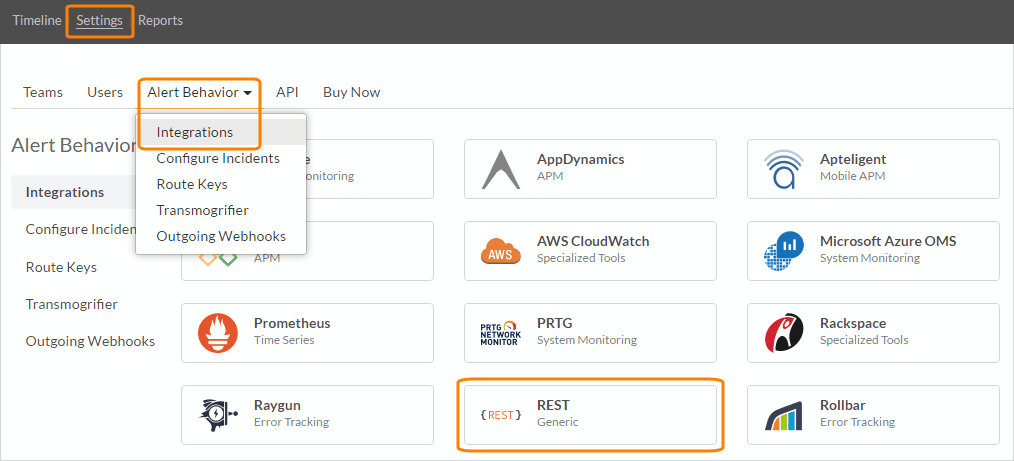
In VictorOps, go to Settings > Alert Behavior > Integrations.
-
In the list of integrations, click REST.
-
If the REST endpoint has not yet been enabled, click Enable Integration. This generates an URL where you can send alerts via an HTTP POST request. Copy this URL somewhere – you will need to specify it in AlertSite.
The URL looks like this:
https://alert.victorops.com/integrations/generic/20131114/alert/xxxxxxxx-xxxx-xxxx-xxxx-xxxxxxxxxxxx/$routing_key
If you use routing in VictorOps, replace $routing_key with the key of a team to route the alerts to. For example:
https://alert.victorops.com/integrations/generic/20131114/alert/xxxxxxxx-xxxx-xxxx-xxxx-xxxxxxxxxxxx/databaseteam
Team routing keys are configured in Settings > Alert Behavior > Route Keys. For details, see Routing Keys in the VictorOps knowledge base.
If you do not use routing, remove $routing_key and the trailing slash from the URL so that it looks like:
https://alert.victorops.com/integrations/generic/20131114/alert/xxxxxxxx-xxxx-xxxx-xxxx-xxxxxxxxxxxx
Transmogrifier rule
We recommend that you also create a Transmogrifier rule in VictorOps that will annotate incidents with a link to the monitor run results and custom alert notes.
-
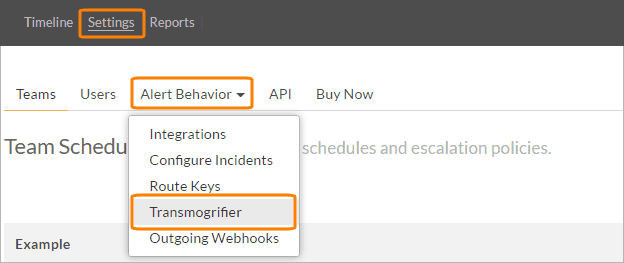
In VictorOps, go to Settings > Alert Behavior > Transmogrifier.
-
Click Add Rule.
-
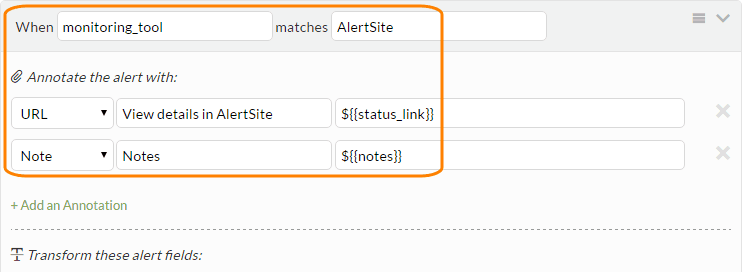
Configure the rule as follows:
When monitoring_tool matches AlertSite
Annotate the alert with:
URL View details in AlertSite ${{status_link}}
Then click Add an Annotation and add another annotation:
Note Notes ${{notes}}
-
Click Save.
Configure AlertSite
Alert templates
VictorOps REST endpoint accepts alerts via an HTTP POST request in JSON format. You need to create JSON alert templates compatible with VictorOps.
Let’s start with an “error” template:
-
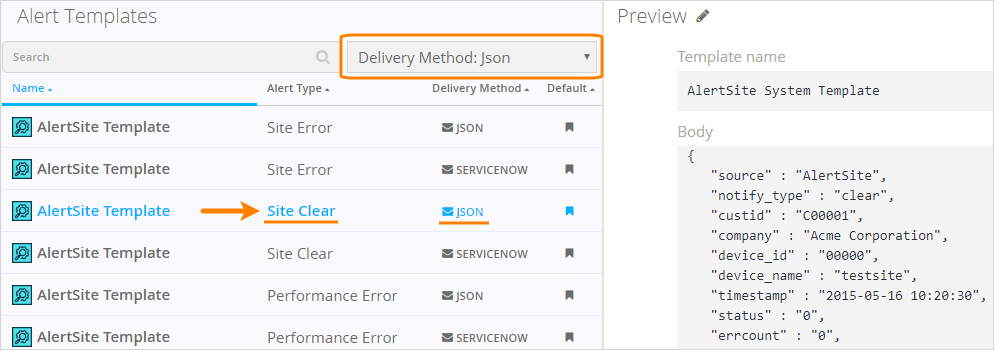
In AlertSite UXM, go to Alerts > Template Editor.
-
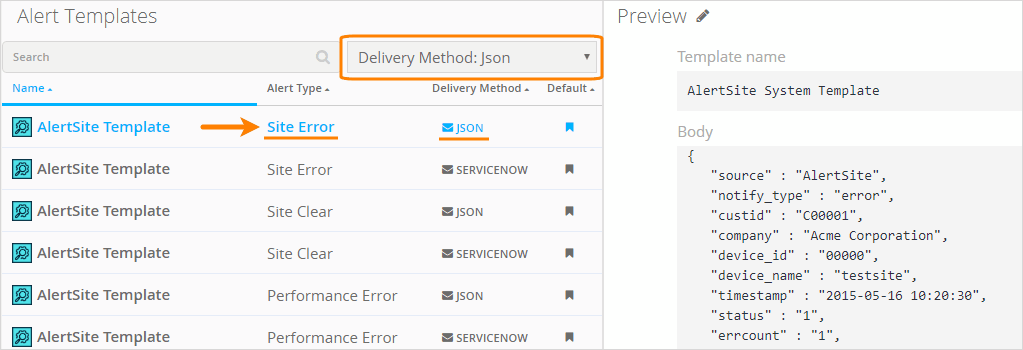
Filter the list by Delivery Method: Json.
-
Select an AlertSite Template for Site Error that is labeled as JSON in the Delivery Method column.
-
In the editor, click the template text to switch to the edit mode.
-
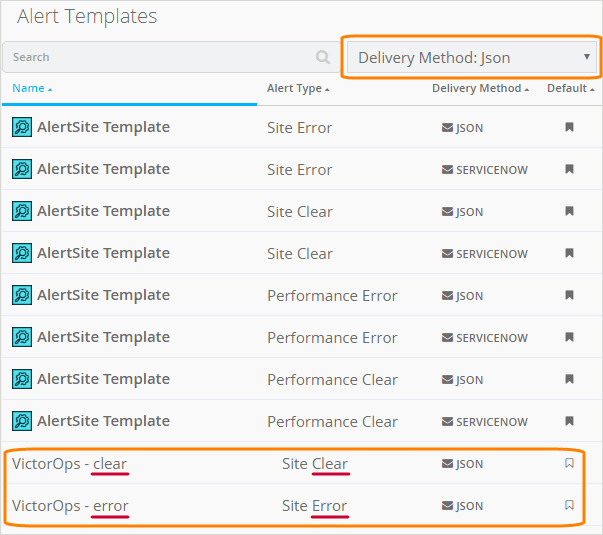
Change the template name to VictorOps - error.
-
In the Body field, paste the following template:
-
Click Save As.
Now, let’s add a “clear” template:
-
Select an AlertSite Template for Site Clear that is labeled as JSON in the Delivery Method column.
-
In the editor, click the template text to switch to the edit mode.
-
Change the template name to VictopOps - clear.
-
In the Body field, paste the following template:
-
Click Save As.
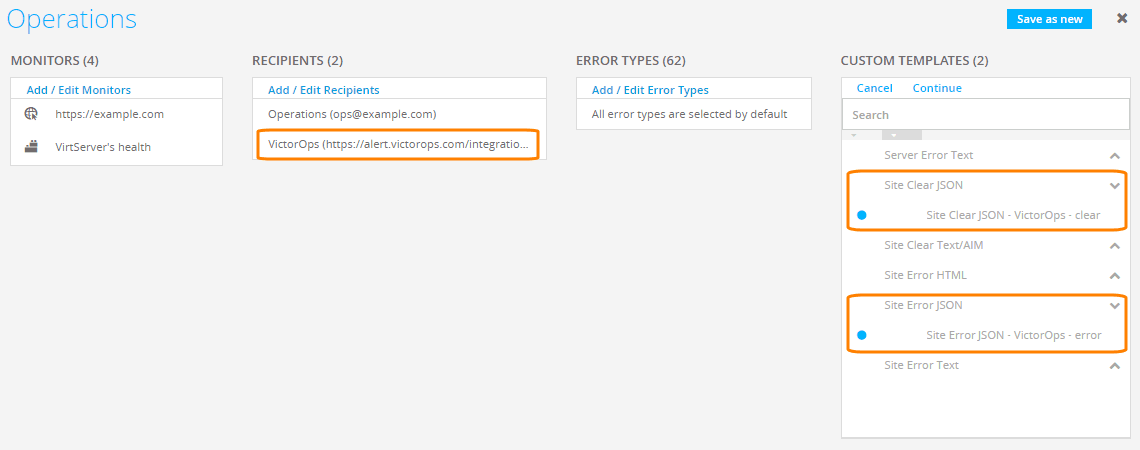
After completing these steps, you should have custom templates for errors and “clear” alerts:
Add VictorOps as alert recipient
-
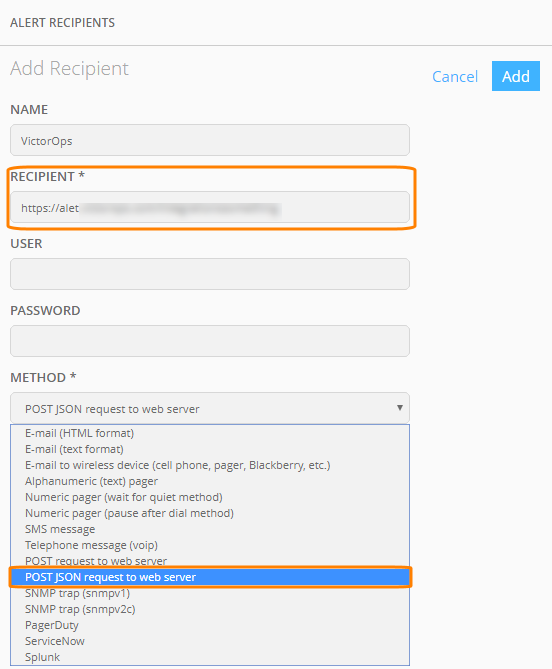
In AlertSite UXM, go to Alerts > Alert Recipients and click New Recipient.
-
In the dialog that appears, enter the following:
-
Name – any name, for example, VictorOps.
-
Recipient – your VictorOps endpoint URL that you generated earlier.
Note: Do not add a trailing slash at the end of this URL. -
Method – POST JSON request to web server.
Note: There are two similar recipient types, POST request to web server and POST JSON request to web server. Make sure to use the POST JSON one.
-
-
Click Add.
-
Click next to the needed recipient.
-
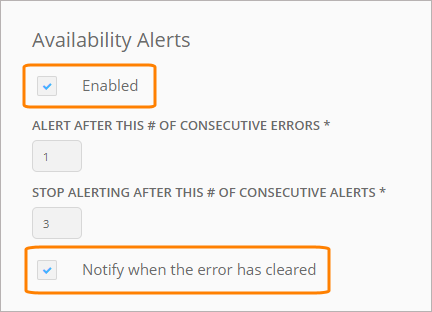
In the Availability Alerts column, select the Notify when the error has cleared check box. This is needed to automatically resolve incidents in VictorOps when an error clears in AlertSite.
-
Configure other options as needed. For a description of available options, see Recipient Properties - Availability Alerts.
-
Click Save.
Assign custom templates to VictorOps alerts
Finally, create a recipient group containing VictorOps, the alert templates, and the monitors whose alerts you wish to send to VictorOps. This is needed in order to apply the custom templates to outgoing alerts.
To create a recipient group:
-
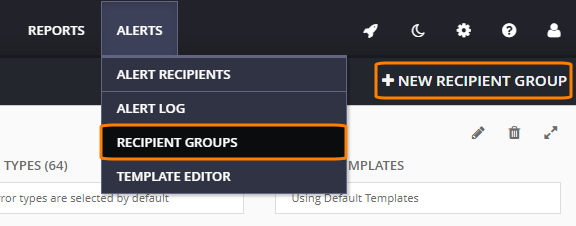
In AlertSite UXM, go to Alerts > Recipient Groups and click + New Recipient Group.
-
Enter a name for the group.
-
Under Monitors, add the monitors that should send alerts to VictorOps.
-
Under Recipients, add the VictorOps recipient and, optionally, other recipients for the selected monitors.
-
Under Custom Templates, add the VictorOps “error” and “clear” templates that you created earlier.
-
(Optional) Under Error Types, select specific error codes that should be reported to VictorOps. The default value is all errors.
-
Click Save as new.
The selected monitors will now send alerts to VictorOps.
Test alerts
To trigger a test incident in VictorOps from AlertSite:
-
In AlertSite UXM, go to Alerts > Template Editor.
-
Filter the list by Delivery Method: Json.
-
Select the VictorOps error template and click Send Test.
-
Enter your VictorOps REST endpoint URL (which you generated earlier), select a location and click Send.
-
Check your VictorOps timeline to make sure an incident is registered from AlertSite.
-
In a similar way, you can test the "all clear" template and verify that the test incident is resolved automatically.
View alerts in VictorOps
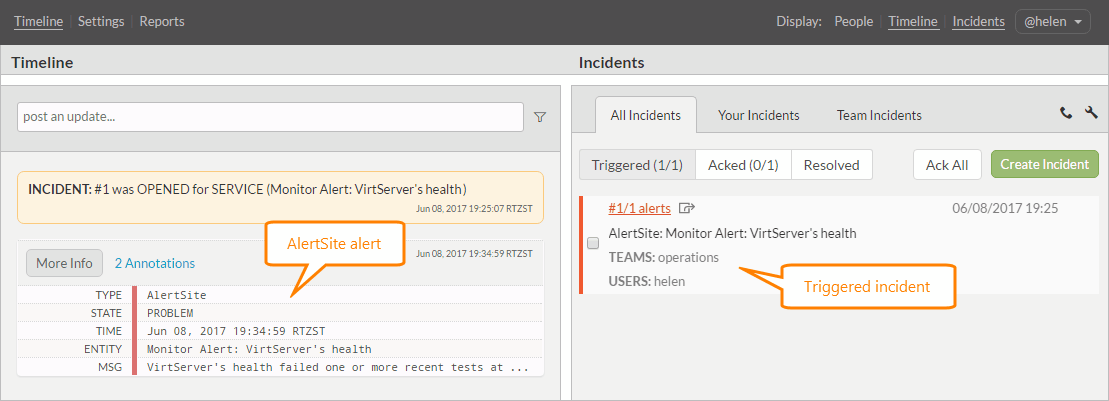
You can see AlertSite alerts in your VictorOps timeline:
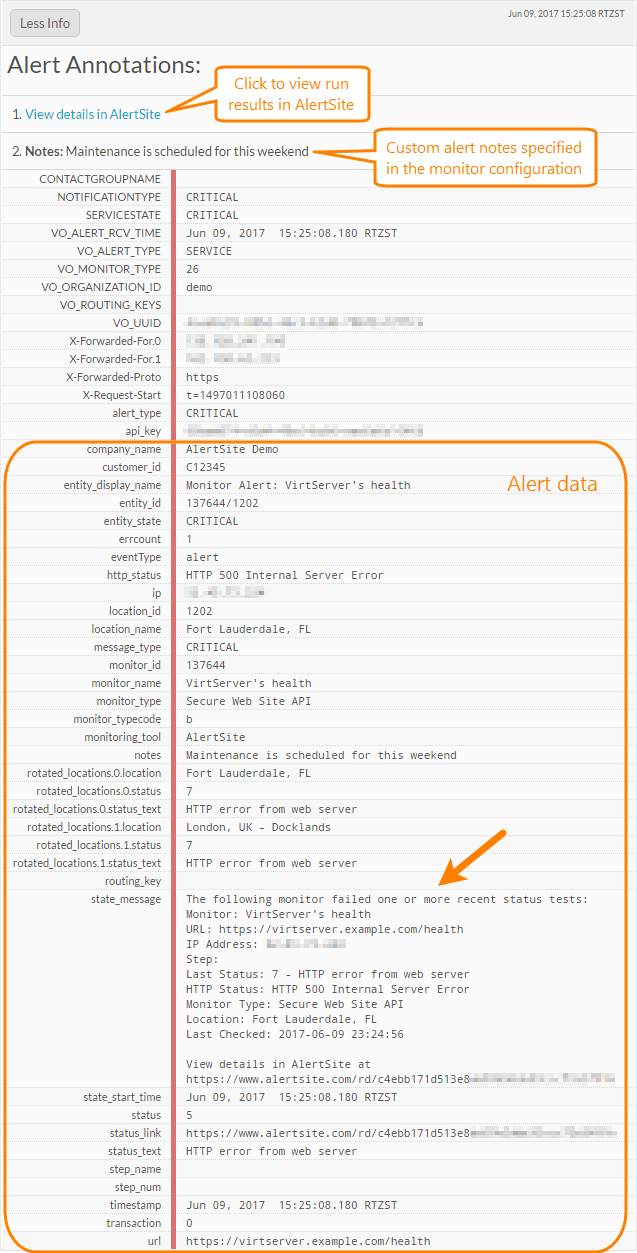
Click More Info to view the alert contents, including a link to the monitor run results in AlertSite. For a description of alert fields, see Alert Data Fields.
The team members can then acknowledge the incidents and take action to resolve them. The incidents will also be resolved automatically when a “clear” notification arrives from AlertSite.


 Error template