How to work with Test Cases
Clone a Test Case
Cloning a test case keeps scripts intact and clears all test results, comments, attachments, and defects.
Select any number of test cases you want to clone, then click More > Clone.
New test cases appear in the test-case list with "(cloned)" in the title. You can click/open a test case to rename it.
Archive Test Cases
Unused test cases can clog up the test library, so you can archive those you aren’t currently using to clean up the space. Archiving removes unwanted test cases from the test library without permanently deleting the testing data.
Note
You can move archived test cases back into the active test library at any time.
To archive unused test cases, select the test cases you want to move to the archive, then click Archive.
Confirm you want to archive when prompted, and the test cases move out of the test library and into the archive.
You can access archived test cases by clicking Archived Test Cases at the bottom of the Folders panel.
Unarchive Test Cases
You can move archived test cases back to the test library at any time.
Click Archived Test Cases while in the Tests view to access the archive, select the test cases you want to move to the test library, then click Unarchive.
Confirm you want to unarchive when prompted, and the test cases move back into the test library.
Delete a Test Case
Export Test Cases
You can export test cases to XLS or to XML.
In the Tests view, select the test cases you want to export.
Click More > Export to XLS or Click More > Export to XML.
The file downloads to your default location.
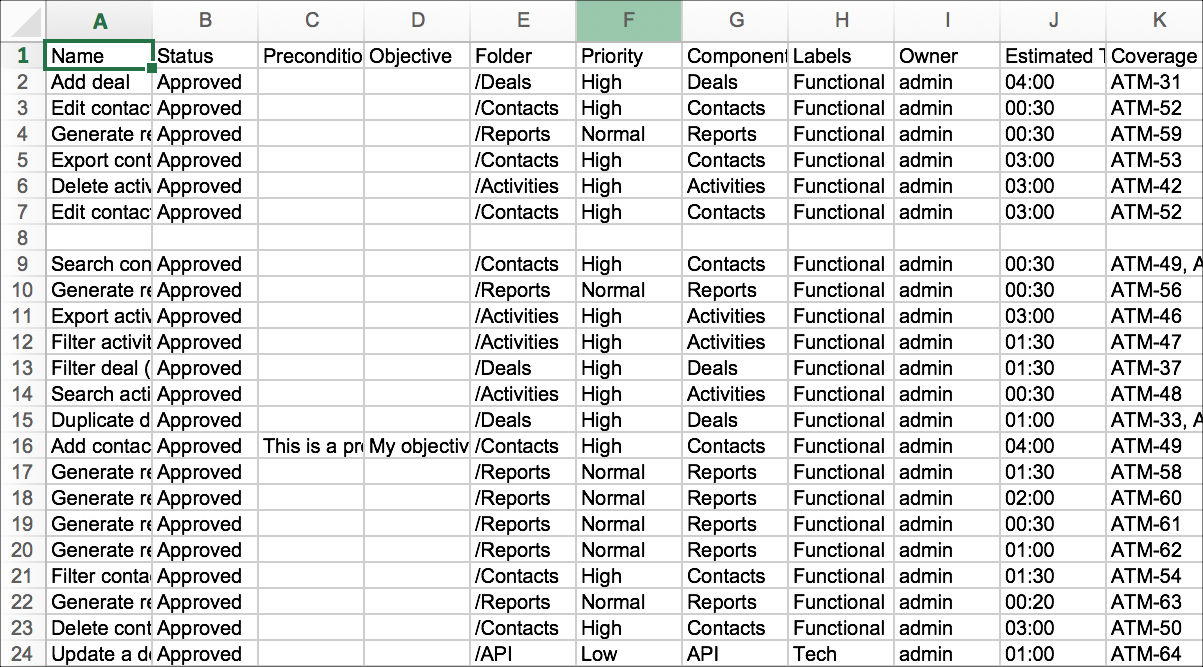
Example XLS file:
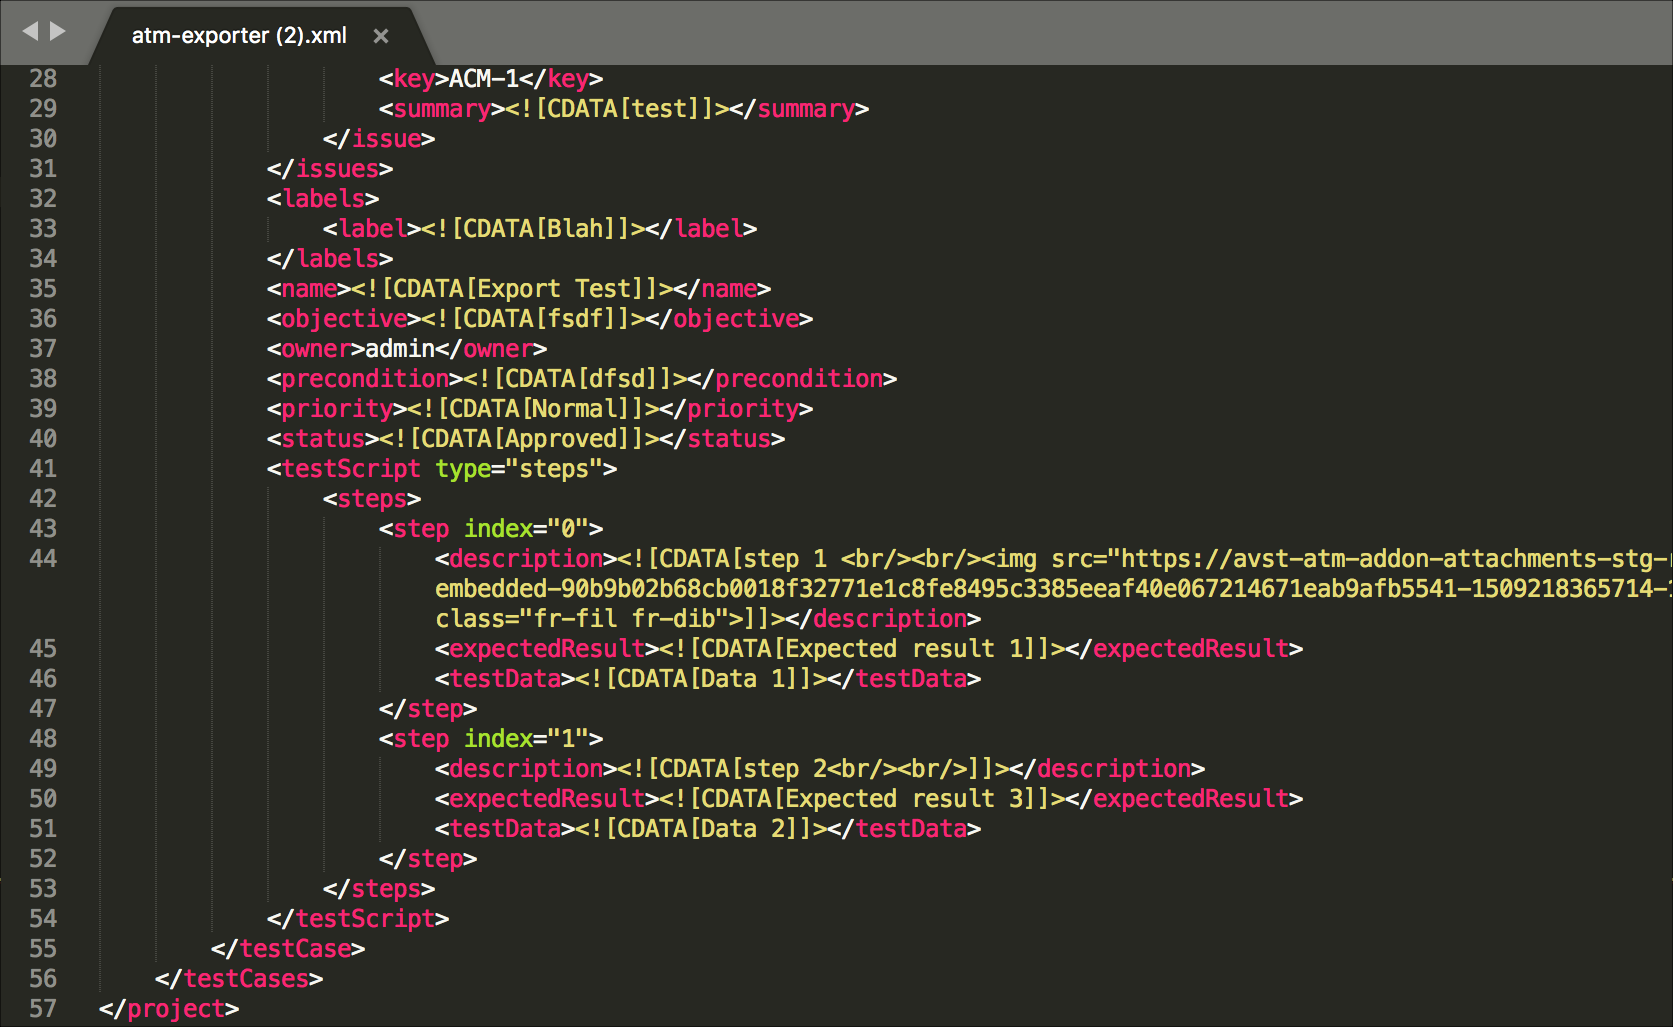
Example XML file:
Create Test Cases in Bulk
Click the Tests view.
Select the folder to which you want the new test cases added, or select All Test Cases if you don’t want to add the new test cases to a specific folder.
Click the ellipses and click Create Test Cases in Bulk.
The Create Test Cases in Bulk window appears.
Follow the instructions in the window, and enter one test-case name per line.
Fill out the common fields and create any labels you want the test cases to share.
Click Create.
Edit Test Cases in Bulk
Click the Tests view.
Select the folder that contains all of the test cases you want to bulk edit. If the test cases aren’t all in the same folder, select All Test Cases.
Select each of the test cases you want to edit in bulk.
Click More, then click Edit in Bulk.
The Edit Test Cases in Bulk window appears.
Select each field you want to edit in bulk and update or remove the value.
Click Confirm. The Update Test Cases confirmation message appears.
Click Confirm to complete the bulk-edit process.