You can include TestLeft test code into unit tests and run them by using various unit testing frameworks. This topic describes how to run TestLeft tests by using the JUnit framework.
About
You can include the TestLeft library to your test project, and create JUnit tests that include TestLeft test code. Then, you will be able to run those tests the same way you run native JUnit tests.
Requirements
-
Java 8 or later.
-
JUnit unit testing framework.
-
To create TestLeft tests, you will need the TestLeft library.
By default, the library is shipped with TestLeft and resides in the <TestLeft>\API\Java folder.
Note: You can create your tests on any computer that has access to the TestLeft library file, including those running under a non-windows operating system. However, the tests you create can run only under the Windows operating system. In addition, it's only on the Windows operating system that you can use the UI Spy, a TestLeft tool that allows exploring the internal hierarchy of a tested application. -
To run tests, you must have TestLeft installed.
Creating and Running a TestLeft Test
-
Open your test project and add the TestLeft library to it. By default, the library resides at –
<TestLeft>\API\Java\
The way to add the reference depends on your project type. For example, if you use Maven, add the following dependencies to your pom.xml file:
pom.xml
…
<dependencies>
…
<dependency>
<groupId>com.smartbear.testleft</groupId>
<artifactId>testleft</artifactId>
<version>15.40</version>
<scope>system</scope>
<systemPath>C:/Program Files/SmartBear/TestLeft 15/API/Java/testleft-15.40.jar</systemPath>
</dependency>
<dependency>
<groupId>com.google.code.gson</groupId>
<artifactId>gson</artifactId>
<version>2.8.2</version>
</dependency>
<dependency>
<groupId>org.apache.commons</groupId>
<artifactId>commons-compress</artifactId>
<version>1.15</version>
</dependency>
<dependency>
<groupId>org.apache.httpcomponents</groupId>
<artifactId>httpclient</artifactId>
<version>4.3.4</version>
</dependency>
…
</dependencies>
…These are the TestLeft library and the libraries that it requires to work correctly.
-
Make sure that your project includes references to the libraries of the unit testing framework you will use to run TestLeft tests. For example, JUnit:
pom.xml
…
<dependencies>
…
<dependency>
<groupId>junit</groupId>
<artifactId>junit</artifactId>
<version>4.12</version>
</dependency>
…
</dependencies>
… -
In your project, open a JUnit test to which you want to add TestLeft test code or create a new one.
-
Import the needed TestLeft packages to your test:
Java
import com.smartbear.testleft.*;
import com.smartbear.testleft.testobjects.*; -
Add the needed test instructions to tests. To learn how to create test instructions, see Creating TestLeft Tests.
-
Build the project and run the tests.
If you use Eclipse, IntelliJ IDEA, or NetBeans, you can run the tests directly from the IDE. For example, to run tests from IntelliJ IDEA IDE:
Note: To run JUnit tests from IntelliJ IDEA IDE, you must have the JUnit plugin installed and enabled (the plugin is shipped with IntelliJ IDEA by default). To learn more, see the IntelliJ IDEA documentation. -
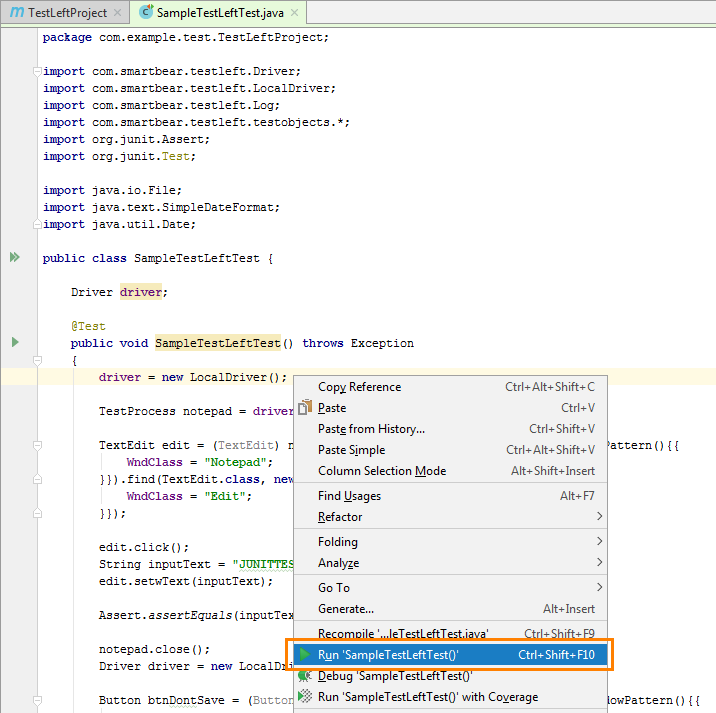
Open your test code for editing, right-click anywhere in the editor and then click Run:
– or –
-
Right-click the needed test class in the Project panel and then click Run.
– or –
-
Select Run > Run from the main menu and then select the needed test from the Run list.
– or –
-
If you use Maven, in the Maven Project panel, right-click the Lifecycle > test item and then click Run.
– or –
-
You can also compile your tests and run them from the command line. For example:
java -classpath "C:\Work Folders\TestLeftProject\target\test-classes;C:\Program Files\SmartBear\TestLeft 15\API\Java\testleft-15.40.jar;C:\gson\*;C:\apache\commons\commons-compress\*;C:\objenesis\*;C:\apache\httpcomponents\*;C:\apache\httpcomponents\httpcore\*;C:\commons-logging\commons-logging\*;C:\commons-codec\commons-codec\*;C:\junit\*;C:\hamcrest\hamcrest-core\*" org.junit.runner.JUnitCore com.example.test.TestLeftProject.SampleTestLeftTest
-
-
During the test run, TestLeft will execute the test instructions.
-
Information on all user actions that TestLeft simulates is stored to the test log. The TestLeft test log is stored separately from the TestNG native test log, in a temporary folder. By default, after the test run is over, TestLeft test log is deleted. You can add instructions to your TestLeft tests that will export the TestLeft results to an external file. To learn how to do it, see Saving Test Logs. After the test run is over, you can view the TestLeft log.
See Also
Running TestLeft Tests From Unit Testing Frameworks
Using TestLeft
Writing Test Code
 About
About