 |
Information in this topic applies to desktop and web applications. |
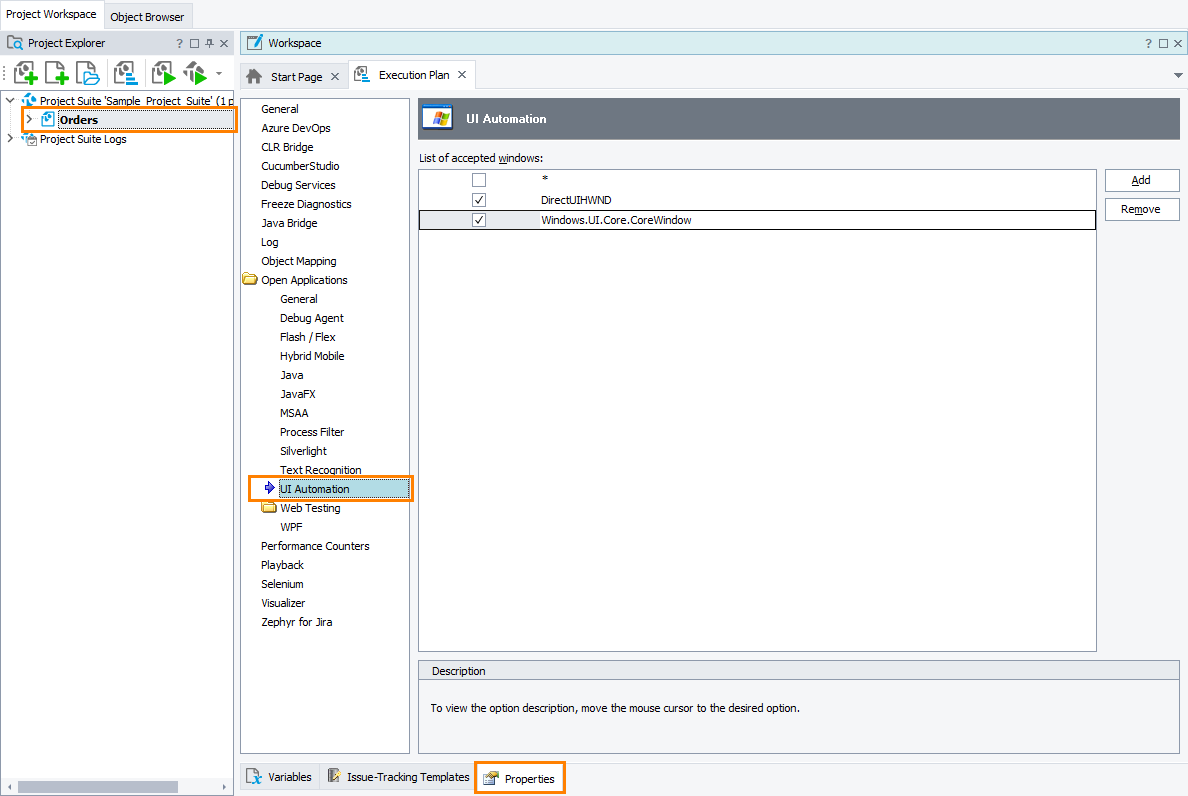
On the Open Applications > UI Automation page of project properties, you specify objects that TestComplete will recognize by their UI Automation information.
Requirements
The page is available if you have the UI Automation Support plugin enabled in TestComplete. The plugin is installed by default and is enabled if you have an active license for the Desktop module of TestComplete.
If the page is not available, make sure that you have an active license for the TestComplete Desktop module and that the plugin is enabled in the File > Install Extensions dialog.
To open the page
Open the Properties page of the project editor and then choose Open Applications > UI Automation in the list on the left of the page.
Available Properties
You can change the following properties –
- List of accepted windows - The list of class names of objects that TestComplete exposes by their UI Automation information.
Properties and methods of such objects are listed in the UI Automation group on the Properties page in the Object Browser.
To add a new window class name to the list, click Add and then specify the desired class name. Note that you can use wildcards (* and ?) in window class names.
By default, the list includes several classes to expose. The list also includes the * preset that corresponds to all classes. The preset is disabled by default. Enable it to command TestComplete to expose all the objects by using UI Automation information.

We do not recommend that you enable this preset. Exposing all the objects can take long for TestComplete and can slow down your test performance. See Enhancing TestComplete Performance. To modify an existing class name, click it twice (not double-click) or press F2.
To remove the selected class name from the list, click Remove.
Note: For a window, whose class name is cleared or not mentioned in this list, the UI Automation properties are not available. If you need to temporarily disable the UI Automation support for a window, you can simply clear the check box corresponding to its class name in the list rather than delete this class name.
You can specify default values of the UI Automation properties for new TestComplete projects in the Default Project Properties - UI Automation Options dialog.
See Also
Using Microsoft UI Automation Technology - Overview
Requirements
Default Project Properties - UI Automation Options

