A project suite holds one or more related TestComplete projects and stores information that lets you define the suite as a whole. For instance, if your application includes several executables, you can create an individual project to test each executable and then unite these projects into a project suite.
Project suites are analogues to Visual Studio solutions or Delphi project groups. A project suite allows you to --
-
Use the same instance of TestComplete to work with different projects.
-
Edit different projects and their elements using the same settings of TestComplete editors.
-
Run different test projects as a whole.
-
Share information among the suite’s projects using project suite variables (see below).
TestComplete automatically creates a project suite, when you are creating a new project. You can also create a blank project suite and then use TestComplete dialogs and editors to create and add new projects to the suite or add existing projects to the suite. See Creating Projects and Project Suites.
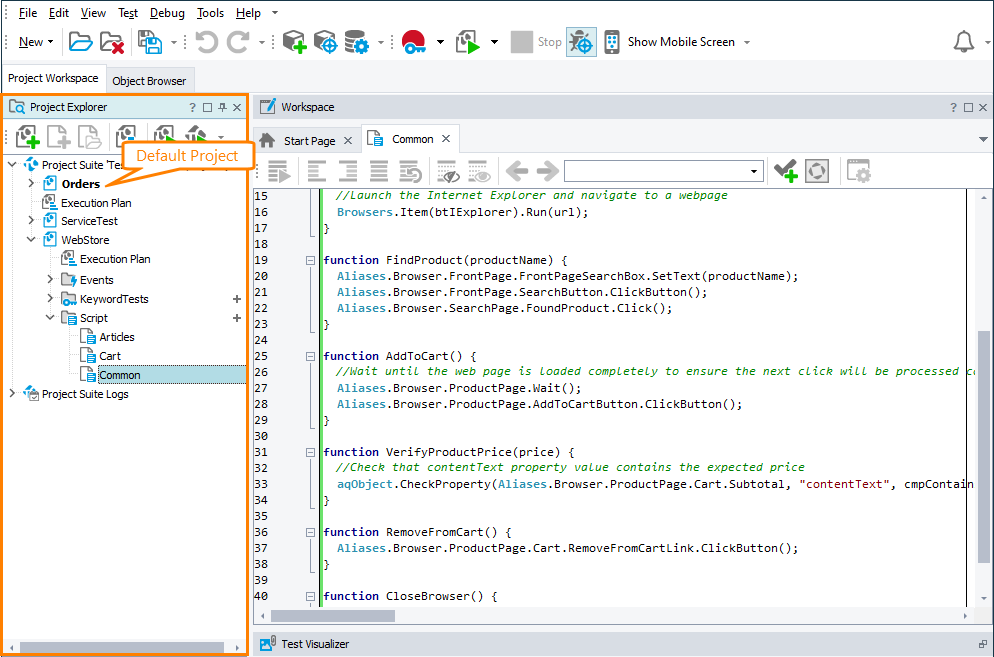
The contents of the current project and the project suite is shown in the Project Explorer panel:

Depending on your needs, a project suite may hold one or several projects. To simplify the project management, you can organize projects into logical folders (for more information on this, see Organizing Items Into Folders).
One of the projects that belong to the project suite is defined as the default project. The default project's name is shown in bold in the Project Explorer panel.
TestComplete uses settings of the default project to specify which information and in which format TestComplete panels should display. For instance, the default project is used to define the scripting language and the object tree model used by the Object Browser.
To set a project as the default project, right-click this project in the Project Explorer panel and then choose Set as Default Project from the context menu.
A project suite has a number of settings that specify the project hierarchy, declare local variables, specify the log location and so on. You can view and edit these settings in the project suite editor. To call the editor, double-click the project suite in the Project Explorer panel. TestComplete will show the suite’s properties in the Workspace panel. The properties are organized into the following pages:
- Test Items - Using this page you can specify the execution hierarchy and order of the projects that make up the suite. The columns on this page are similar to columns on the Test Items page of the project properties editor. See Test Items Page (Project Suite Editor).
- Variables - This page holds a list of project suite variables. For more information on them, see Local Variables.
- Properties - Holds a list of project suite properties. For more information, see Project Suite Properties Page.
There is an alternative way to opening the desired page of the project suite editor: right-click your project suite in the Project Explorer and select the name of that page (Test Items, Variables, Logs or Properties) from the Edit submenu of the context menu.
To work with the project suite from scripts, use the ProjectSuite program object. Using its properties you can obtain the name of and path to the project suite file and get access to the project suite variables. For more information, see description of the object.
See Also
Projects in TestComplete
Managing Projects, Project Suites and Project Items
Creating Projects and Project Suites
Deleting Projects
ProjectSuite Object
Project and Project Suite Files
