
You can add your un-versioned project suite with all its projects and tests to your Subversion repository directly from TestComplete.
-
Make sure that your test computer and TestComplete are prepared as described in Requirements and Prerequisites.
-
Open the project suite you want to add to your Subversion repository.
-
Select File > Source Control > Add Project Suite to Subversion from the TestComplete main menu.
– or –
Right-click your project suite in the Project Explorer and then click Source Control > Add Project Suite to Subversion.
– or –
Click
 Add Project Suite to Subversion on the Source Control toolbar (if the toolbar is hidden, right-click the toolbar area and then click Source Control).
 -
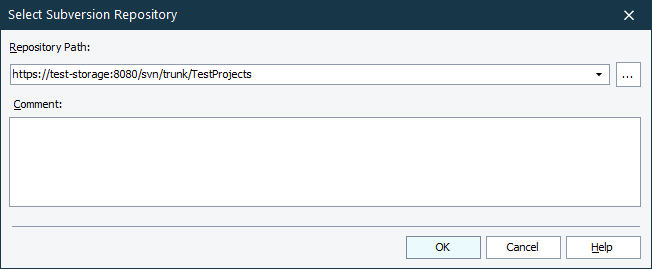
TestComplete will show the Select Subversion Repository dialog.
-
In the dialog, enter the path to the URL of your Subversion repository. You can click the ellipsis button and browse for the needed directory or branch in the repository.
-
Enter the commit message.
-
Click OK.
TestComplete will send your project suite and all its files and folders to the repository. Then, it will convert the folder on your computer, where the project suite is located, to the working copy of the committed project suite.
| Note: | If the Bind Visualizer frame to SCC option is enabled in your projects, TestComplete will commit Visualizer images associated with your tests to the repository.
To avoid performance issues, we recommend that you disable the Bind Visualizer frame to SCC option. For more information, see Visualizer Data and Source Control Systems. |
Related Tasks
 Unbinding Project Suite From the Subversion Repository
See Also
Integration With Subversion - Common Tasks
Integration With Subversion
Unbinding Project Suite From the Subversion Repository