
TestComplete lets you quickly create automated tests by recording actions in desktop, web and mobile applications. TestComplete can record data input, item selection, website navigation, form submission, mobile gestures and other user actions. You can also create checkpoints during test recording. By using TestComplete, you can record keyword tests, scripts, and low-level procedures.
After recording a test, you can review and improve it in TestComplete built-in editors.
 Starting, Pausing and Stopping Recording
Appending Recordings to the Current Keyword Test
Things That Can Be Done During Test Recording
Recording the Application Startup
Changing the Type of the Recorded Test
Default Names of Recorded Tests
Starting, Pausing and Stopping Recording
To start test recording, do any of the following:
-
Click
 Record Keyword Test or
  Record Script on the Test Engine toolbar.
 -
Select Test > Record > Record Keyword Test or Test > Record > Record Script from the TestComplete main menu.
-
Click
Record New Test on the toolbar of the Keyword Test editor. -
Click
 Record Test on the Start Page.
 -
Press Shift+F1.
If no project is open, TestComplete will show the Record Test wizard that will guide you through creating and configuring a project for your test. Then TestComplete will start recording.
TestComplete will show the Recording toolbar where you control the recording process.
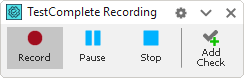
To pause recording, click  Pause on the Recording toolbar or press Shift+F10.
To resume recording, click Record on the Recording toolbar or press Shift+F1.
To stop recording, click  Stop on the Recording toolbar or press Shift+F2.
| Tip: | You can change the shortcuts in the Global Shortcuts dialog. |
Appending Recordings to the Current Keyword Test
If you use keyword tests, you can append the recorded operations to existing tests instead of recording new tests.
To append them to the end of a test:
-
Open the test in the Keyword Test editor.
-
Click
 Append to Test on the editor’s toolbar.
-
If a message appears asking where to append the recorded operations, select To End.
To append the recorded operations after a specific operation:
-
Enable the Specify the position to append the operations to test option in Tools > Options > General > Show Again Flags > Keyword Testing.
-
Open the test in the Keyword Test editor.
-
Select the operation after which you want to add the recorded operations.
-
Click
Append to Test on the editor’s toolbar. -
In the message asking where to append the recorded operations, select To Current Position.
After Recording Has Started
When you start recording, TestComplete:
-
Switches to the Recording mode and displays the Recording toolbar.
-
Minimizes the TestComplete main window (this depends on the Minimize TestComplete option, which is enabled by default).
-
Saves the changes made to the current project (this depends on the Save before recording option, which is enabled by default).
-
Creates a new script routine or keyword test where the test actions will be saved.
-
Turns off the Caps Lock key. TestComplete also turns off the Caps Lock key when starting a test run. This ensures that TestComplete will correctly simulate keystrokes.
-
Starts the tested applications that have the Autorun application on recording option enabled.
-
Displays the Mobile Screen window. This window is used when testing mobile applications (this depends on the Automatically display Mobile Screen when recording option, which is disabled by default).
Things That Can Be Done During Test Recording
Besides recording actions in your tested application, you can do the following during test recording:
-
When recording tests for desktop and web applications, create quick property checkpoints:

-
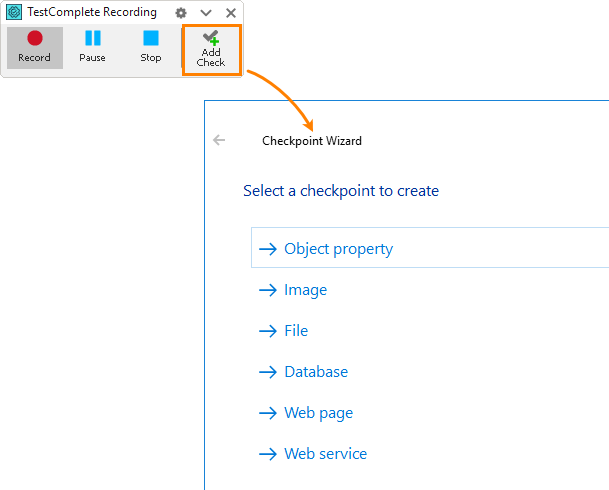
Create various checkpoints using the Create Checkpoint wizard:
-
Record multi-touch gestures on Android device. For instructions, see Recording Gestures (Multi-Touch Events).
-
Launch applications that you added to the Tested Applications collection.
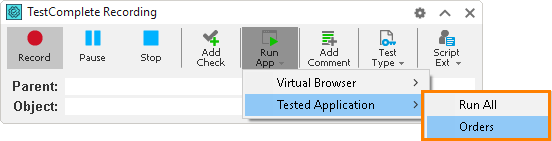
You can also run applications in a usual way - by using a desktop shortcut, Start menu and so on. TestComplete can trace the application startup and record the appropriate commands (see below).
-
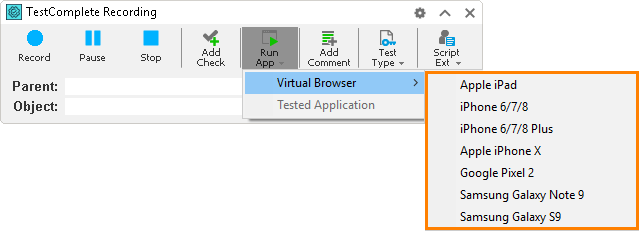
Launch a mobile browser emulator for mobile web testing.
-
Switch between keyword test, script and low-level recording (see below).
-
Insert comments into the recorded tests using the
 Add Comments button on the Recording toolbar.
 -
Call custom record-time actions:

Recording the Application Startup
TestComplete traces the start of applications during the recording. After the recording is over, TestComplete may add test actions that will automatically start these applications. Depending on the application’s type, this is done in different ways:
 See details
Changing the Type of the Recorded Test
TestComplete can record tests as –
- Keyword tests
- Scripts
- Low-level procedures (for desktop and web applications only).
You start recording either a keyword test or a script, but you can switch to another test type at any time during recording. To do this, use the corresponding buttons on the Recording toolbar.

When you switch to another recording mode, TestComplete inserts a call to the new test into the previously recorded test so that these tests can be played back in sequence. For example, if you switch from keyword test recording to low-level recording, TestComplete will insert a call to the low-level procedure into the keyword test.
Default Names of Recorded Tests
TestComplete automatically names new keyword tests and scripting routines. The name of a newly recorded test or routine looks like TestN, where N is a number. TestComplete generates a name that does not coincide with the names of the existing keyword tests or other routines in the scripting unit.
You can change the default name any time later. To rename a keyword test, use the Project Explorer. To rename a script routine, change its name in the Code Editor.
Recording Different Types of Tests
For information about recording different types of tests, see:
Recording Options and Specifics
TestComplete has options that affect the recording process. To view or change them, you can do any of the following:
-
At design time, select Tools > Options from the TestComplete main menu and then select the Engines > Recording category.
-
During the test recording, click
 on the Recording toolbar.
For a full list of the options, see Recording Options Dialog.
For specifics of recording tests for different types of applications and UI elements, see Recording Specifics.