
The Visualizer Frame window shows a full-scale preview of images captured by Test Visualizer during test recording. To open it, do any of the following:
-
Double-click an image in the Test Visualizer panel.
-
Right-click an image in the Test Visualizer panel and select View or Insert On-Screen Action from the context menu.
Desktop
Web (Classic)
Mobile
 About Test Visualizer
About Test Visualizer
Test Visualizer captures screenshots for user actions (mouse clicks, keypresses, menu item selections and so on) during test recording or playback and associates the captured images with appropriate test commands. These images help you to understand what actions the test commands perform better.
To learn more about Test Visualizer, see About Test Visualizer.
About Frame Window
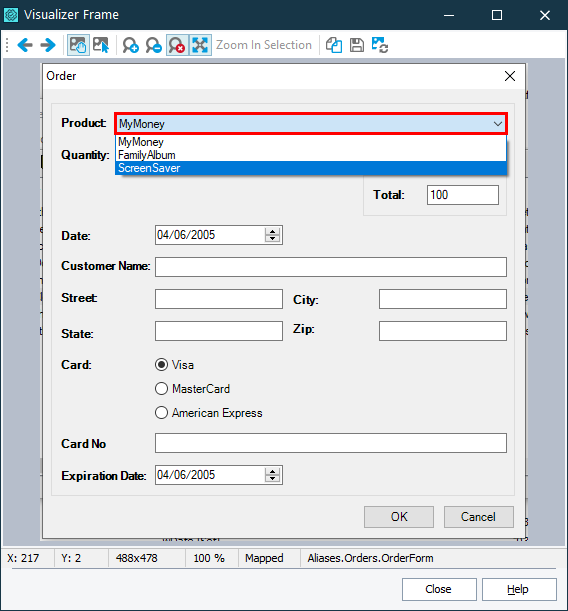
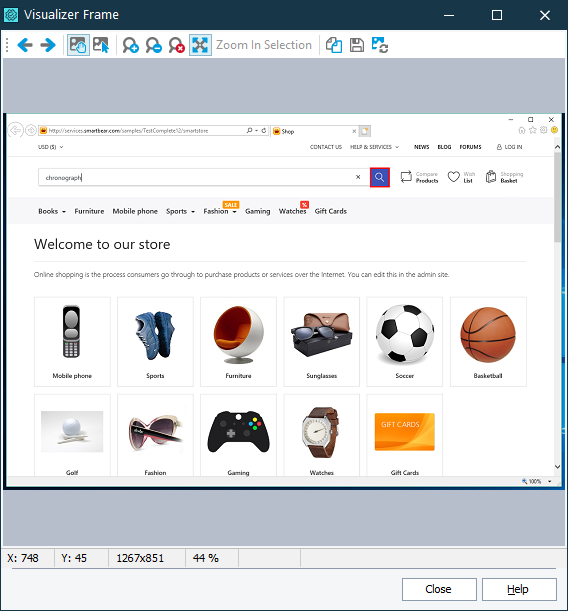
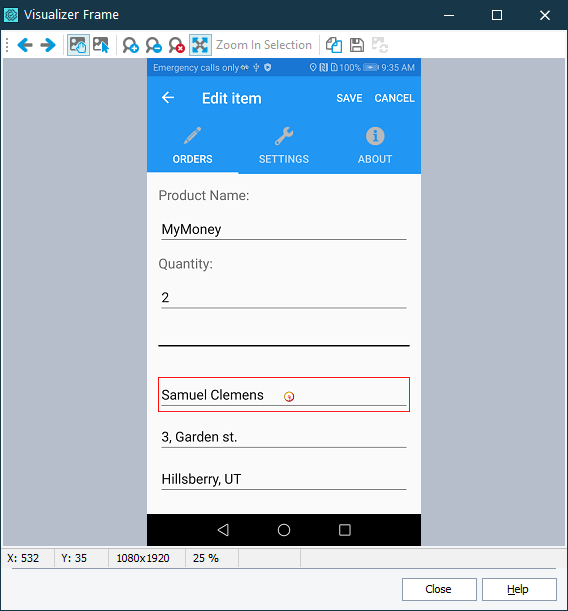
An image (frame) shows the entire desktop or an active window, for which the test command was recorded, depending on the Test Visualizer capture style. The target object of the test command is highlighted with a red frame. (If you edited the recorded test, the image may have no marked object.)
If the Visualizer images contain object data, TestComplete will highlight individual objects as you move the mouse over the image and will show information on them.
The status bar shows the following information:
-
Mouse coordinates (X and Y) within the image.
-
The image width and height.
-
Current zoom level.
-
In the
 scroll mode, if the image was captured with object data:
-
Whether the selected object is in the Name Mapping repository.
-
The full name of the selected object.
-
-
In the
 select mode:
-
The coordinates and size of the selection.
-
Frame Window Toolbar
| Command | Keyboard Shortcut | Description |
|---|---|---|
 Previous Previous Next Next |
Left Right |
Shows the previous and the next Visualizer image, respectively. |
| Scroll Mode |
Ctrl+1 | Activates the mode in which TestComplete highlights objects under the mouse pointer. |
| Select Mode |
Ctrl+2 | Lets you select an arbitrary area in the image by dragging the mouse. You can then copy the selection to the clipboard or save it to a file. |
 Copy Copy |
Ctrl+C | Copies the image or selection to the clipboard. |
 Save To File Save To File |
Ctrl+S | Saves the image or selection to a PNG or BMP file. |
 Update From Screen Update From Screen |
Ctrl+U |
Updates the image and object data from the application. For more information, see Updating Visualizer Frames.
Notes:
|
 Zoom Default (100%) Zoom Default (100%) |
Num / | Sets the zoom level to 100%. |
 Best Fit Best Fit |
Num * | Makes the image fit the size of the Visualizer Frame window. |
| Zoom slider | Num + Num - |
Zooms the image in or out. |
Working With Objects
To copy the object name to the clipboard
-
Move the mouse pointer to the needed object in the image. The object will be highlighted with a selection frame.
-
Right-click the object and select Copy Object Name from the context menu
Working With Objects in Desktop and Web Applications
To check if an object is mapped
Move the mouse pointer to the needed object in the image (the object will be highlighted with a selection frame) and see what the status bar says.
To add an object to the Name Mapping repository
-
Move the mouse pointer to the needed object in the image. The object will be highlighted with a selection frame.
-
Right-click the object and select Map Object from the context menu
TestComplete will map the object using the default identification properties.
To view an object’s identification properties in the Name Mapping repository
-
Move the mouse pointer to the needed object in the image. The object will be highlighted with a selection frame.
-
Right-click the object and select Show Object in Name Mapping Editor from the context menu.
TestComplete will close the image, then will open the Name Mapping editor and select the corresponding object.
To add a keyword test operation for an object
-
Move the mouse pointer to the needed object in the image. The object will be highlighted with a selection frame.
-
Right-click the object and select
 Insert On-Screen Action from the context menu
For more information, see Creating Test Commands From Visualizer Frames.
Working With Objects in Black-Box Applications
| Note: | This is supported only for Android applications. |
To add the Image Touch operation to a keyword test
-
Move the mouse pointer to the needed object in the image. The object will be highlighted with a gray frame.
-
Right-click the object and select
 Insert Image Touch from the context menu.
For more information, see Creating Test Commands From Visualizer Frames.
To add an object’s image to the Image Repository
-
Move the mouse pointer to the needed object in the image. The object will be highlighted with a gray frame.
-
Right-click the object and select Add to Image Repository from the context menu.
Possible Issues
Sometimes, TestComplete cannot identify objects in Visualizer images. This may happen if the application has a specific UI layout. In this case, use the test editors to add operations to your test.
See Also
About Test Visualizer
About Test Visualizer
About Test Visualizer Panel
Updating Visualizer Frames
Creating Test Commands From Visualizer Frames