Electron applications are cross-platform applications created with web technologies (for instance, JavaScript, HTML, CSS). This tutorial explains how to test Electron applications with TestComplete. It assumes that you are familiar with general principles of automated testing and have minimal knowledge of the TestComplete IDE.
 If you are new to TestComplete, we recommend that you first go through the Getting Started tutorial to get familiar with the tool.
In this tutorial, we are going to prepare an Electron application for testing and create and run a simple test for it. The test will simulate a click in the application window and verify the text the application window shows.
 1. Prepare the Electron application for testing
 2. Expose the Electron application to TestComplete
Requirements
-
An active license for the TestComplete Web Module.
-
The following plugins must be enabled in TestComplete:
-
Web Testing
-
Chromium Embedded Framework Support
These plugins are installed and enabled automatically as part of the TestComplete Web module. You can check if these plugins are active in File > Install Extensions (you can find them in the Web group).
-
-
The sample Electron application must be compiled as a binary executable file.
In this tutorial, we will use a Quick Start sample application. It is the application used in the Quick Start tutorial in the Electron documentation. You can get the application’s source files there:
 https://github.com/electron/electron-quick-start
The instructions on how to compile the application as a binary executable are available further in this tutorial. You can also find them in the Electron documentation.
1. Prepare the Electron application for testing
TestComplete can only test Electron-based applications distributed as Windows-compatible executables. To make the sample Quick Start application available for testing, we will run it by using Electron prebuilt binaries:
-
Get the Quick Start sample application’s source files from the Electron repository:
-
Get the Electron prebuilt binaries from the Electron repository:
-
Unpack the Electron prebuilt binaries.
-
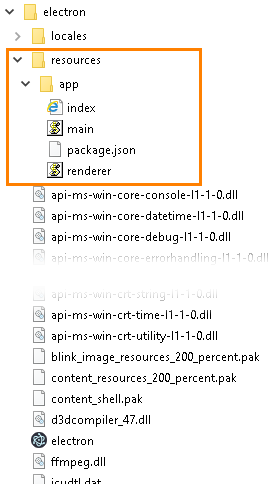
Place the Quick Start application files you have downloaded from the repository (package.json, web pages, scripts, and other files) to the resources/app folder of the unpacked Electron binaries:
-
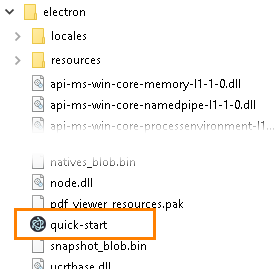
(Optional.) If you want to, rename the downloaded electron.exe binary to fit your tested application name, for example, quick-start.exe:
-
Launch the resulting binary. Electron will start your application:
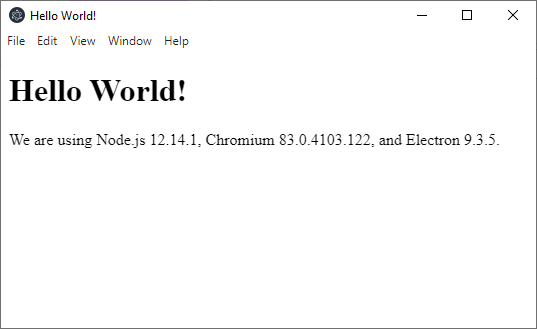
To learn more about packaging and distributing Electron applications, see the Electron documentation.
2. Expose the Electron application to TestComplete
To access the internals of a tested Electron application and simulate user actions over it, TestComplete uses the Chrome DevTools Protocol (CDP). For the tested application to communicate with the test engine by using this protocol, launch the application in one of the following ways:
-
By using the
--remote-debugging-port=<port_1>and--inspect=<port_2>command-line parameters.
– or –
-
From TestComplete, with the
-cdpAutoSetPortcommand-line parameter.
In this tutorial, we will use the second approach, as it is easier and frees you from selecting the debugging port.
-
Close any project or project suite opened in TestComplete.
-
From the TestComplete main menu, select File > New > New Project. This will open the Create New Project wizard.
-
Follow the wizard instructions. Specify the project name and location. You can select any language for your project.
You can skip the step of specifying the tested application because we will do it later.
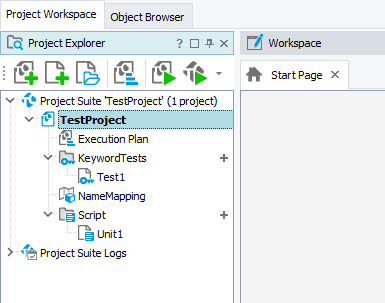
TestComplete will create a new project and open it:
-
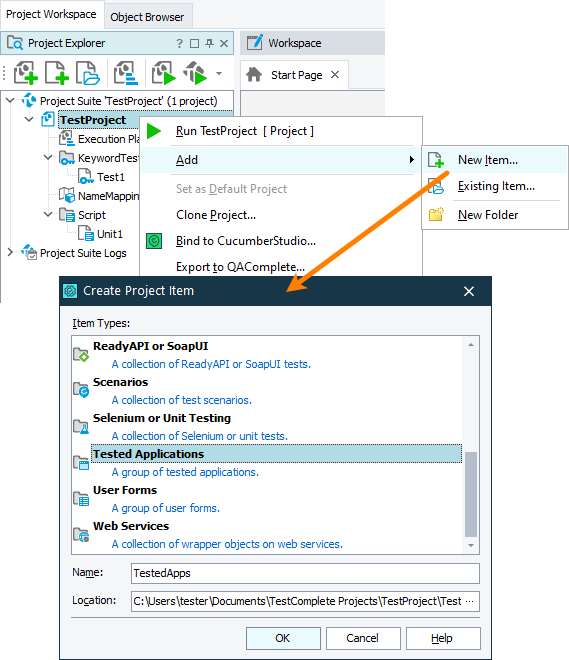
In your created project, add the Tested Applications collection:
-
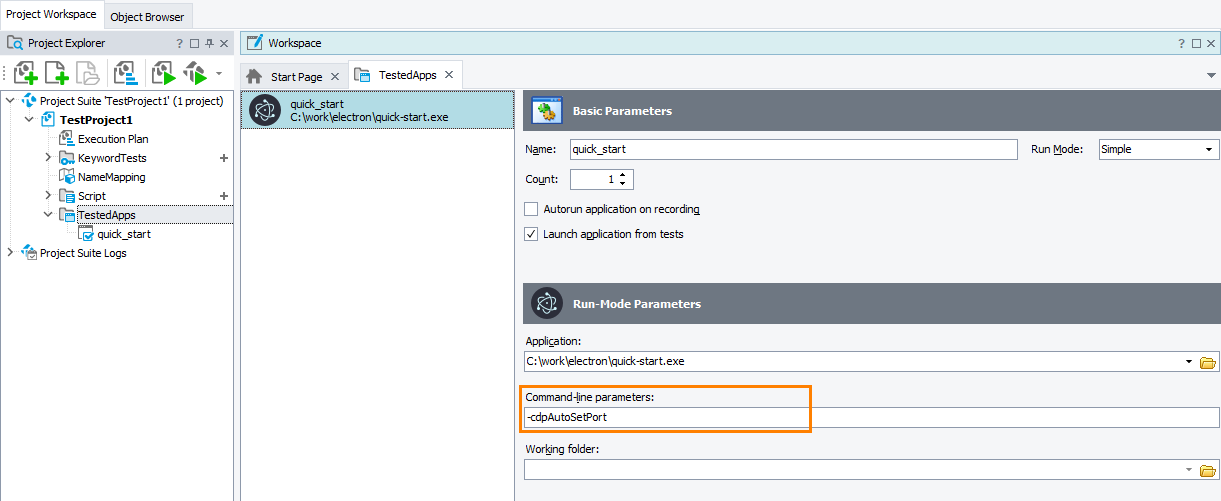
Add the Electron binary prepared on the previous step to the Tested Application collection. Add it as a generic Windows application:
-
In Project Explorer, double-click the TestedApps node.
-
Right-click anywhere within the Tested Apps editor and then click
 Add Application.
 -
In the resulting dialog, click Generic Windows application.
-
On the next page of the wizard, specify the path to the tested application’s executable.
-
-
Add
-cdpAutoSetPortto the application’s command-line parameters: -
Save the changes in your project.
3. Record and run a test for an Electron application
The easiest way to create a test is to record a sequence of user actions over the application:
-
If your tested Electron application is running, close it.
-
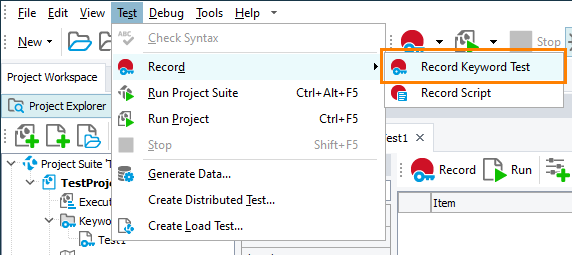
To start recording, from the TestComplete main menu, select Test > Record > Record Keyword Test:
-
Important: Expand the Recording toolbar, click Run App, and then select your tested Electron application:
 If you run your tested application not from TestComplete, but in any other way (for instance, from the command line), make sure to specify the remote debugging port for it, as described above.
 -
TestComplete will launch the tested application:

-
Click anywhere within the main page of the application.
-
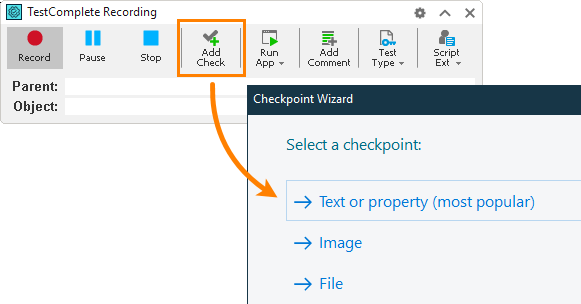
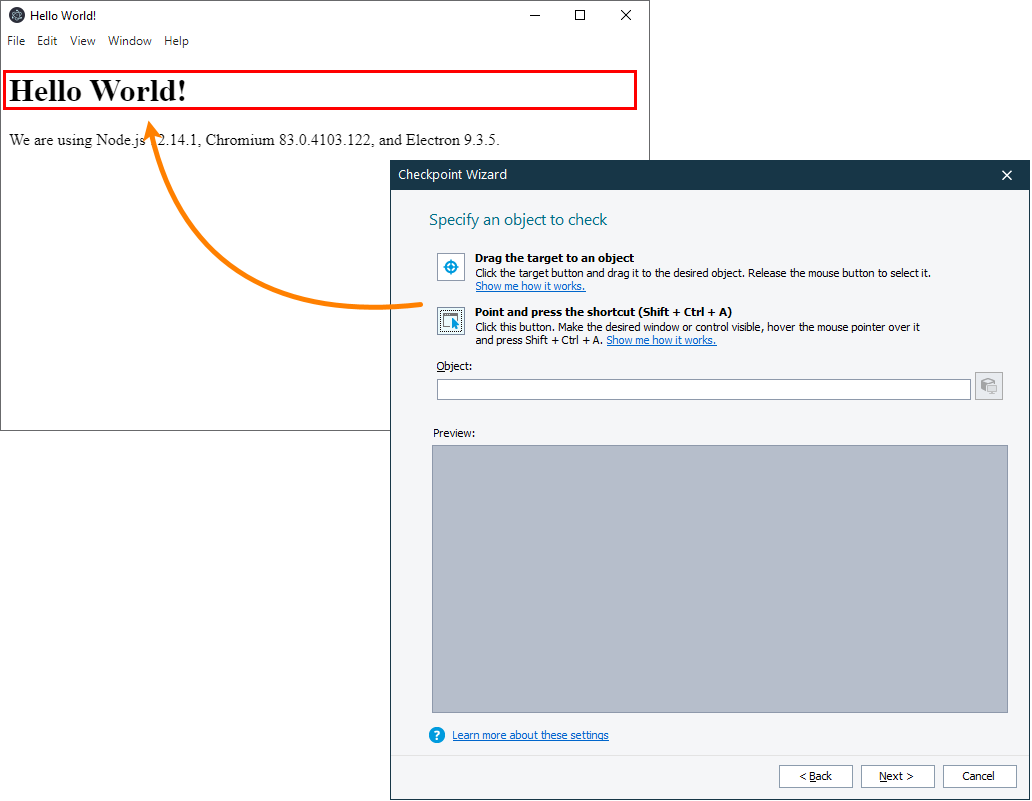
Create a property checkpoint that will verify the text that the application window shows:
-
On the Recording toolbar, click
 Add Check. In the resulting Checkpoint wizard, click Object property:
 -
Select the Hello World! text on the main page. To select the text, you can:
-
Press
 , drag the target glyph to the text, and then release the mouse button.
– or –
-
Click
 , move the mouse pointer to the text, and then press the Select object shortcut (by default, SHIFT+CTRL+A).
-
-
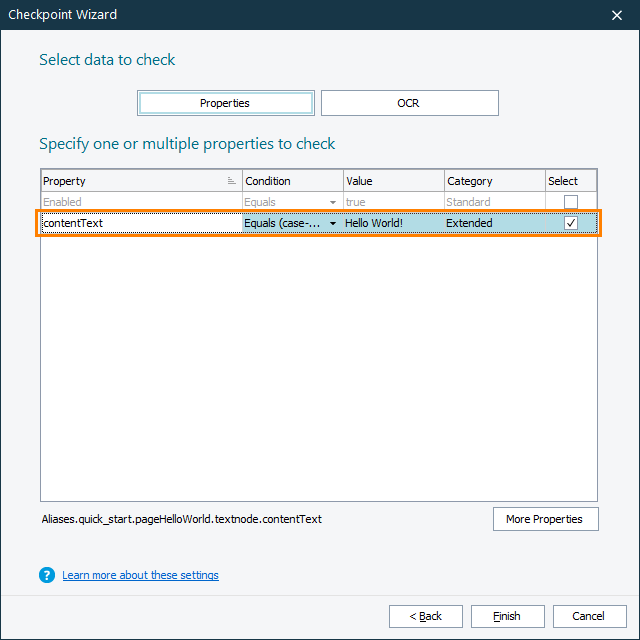
On the next page of the wizard, select the
contentTextproperty (selected by default): -
Click Finish.
-
-
Close your tested application and click
 Stop on the Recording toolbar.
TestComplete will stop the recording and open the recorded test:
To run the recorded test for your Electron application, click  Run on the Keyword Test editor toolbar:
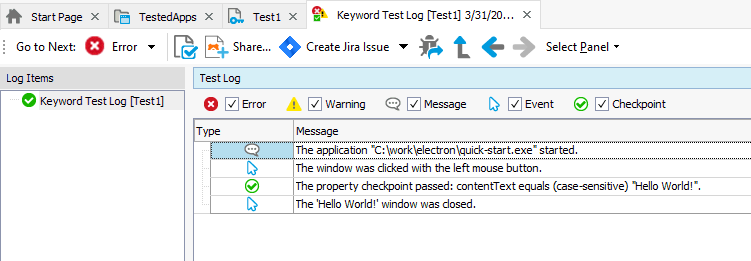
TestComplete will launch your tested application and play back all the recorded user actions. After the test is over, you can view test results:
Where to go next
For further information on creating automated tests for web pages, see the following sections:
See Also
Testing Electron Applications
About Testing Electron Applications With TestComplete
Testing Web Applications - Tutorial

