 |
The information below concerns legacy mobile tests that work with mobile devices connected to the local computer. For new mobile tests, we recommend using the newer cloud-compatible approach. |
In this tutorial, we use the Orders application that has two versions: for Android and for iOS. We will demonstrate how to modify a test recorded for an iOS application and run it on an Android device.
-
Prepare your Android device for testing and connect it to the computer where TestComplete is installed. To learn how to do that, see Preparing Devices, Emulators and Virtual Machines (Legacy) and Connecting TestComplete to Android Devices (Legacy).
-
Add an Android Xamarin.Forms application to the current project:
-
Right-click the TestedApps project item in the Project Explorer and select Edit from the context menu.
-
Right-click somewhere within the TestedApps editor and select
 Add Application from the context menu. This will invoke the Add Tested Application wizard.
 -
On the first page of the wizard, choose Android Application.
-
In the wizard, click the
 button next to the Android application package file edit box and browse for the Android Xamarin.Forms Orders package file:
C:\Users\Public\Public Documents\TestComplete 15 Samples\Mobile\Xamarin.Forms\Orders\Android\bin\Orders.Orders.Orders-Signed.apk
Note: Some file managers display the Public Documents folder as Documents. -
Select the Deploy to the device on start check box to install the application on the device every time you launch the application from TestComplete.
-
Clear the Keep the data and cache directories on removal check box. This will guarantee the same initial state of the tested application.
-
Click Next, and then Finish to close the wizard. TestComplete will add the Android Xamarin.Forms application to the list of tested applications.
-
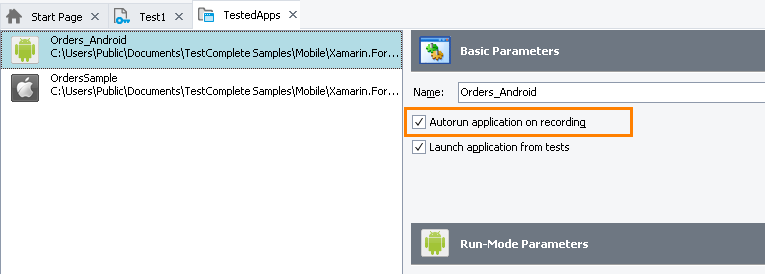
Enable Autorun application on recording for the added Android Xamarin.Forms application.

-
-
Modify your project to recognize the Android Xamarin.Forms application:
-
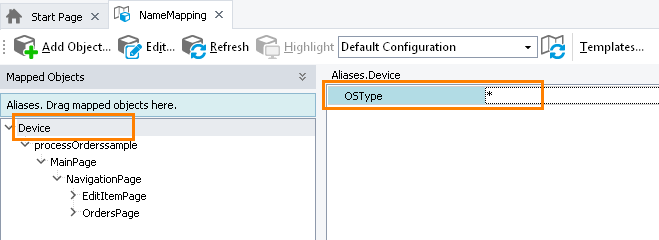
In the Name Mapping repository, configure the recognition criteria of the
Deviceobject to match your Android device. Replace the value of the OSType property (iOS) with an asterisk (*) to make the alias of theDeviceobject platform-independent:
-
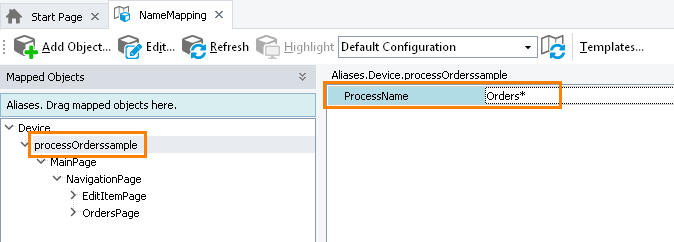
Configure the recognition criteria of the
Processobject to match the Orders process running on your Android device:
-
Make sure that the object hierarchy of the Orders application is the same both for the Android and for the iOS versions of the application. If needed, modify the recognition criteria.
If you do not use Name Mapping in your tests, modify the recognition criteria you use in your tests to access the needed objects manually.
-
-
Modify the test you want to run on the Android device:
-
Modify the
Select Deviceoperation to set your Android device as current:
-
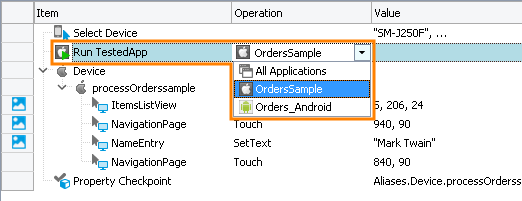
Modify the
Run TestedAppoperation to run the Android Xamarin.Forms application instead of the iOS application:
-
-
Save the changes in your project.
Now your test is ready for running on the Android device.
See Also
Testing Xamarin.Forms Applications - Tutorial (Legacy)
About Xamarin.Forms Application Testing (Legacy)

 Prev
Prev