Quick Start Guide with Github Actions
WELCOME TO THE QUICK START GUIDE
This guide shows you how to integrate your development workflow.
To set up an integration within the Swagger Studio UI see the Swagger Studio integration guide.
GUIDES
These testing guides will help provide describe each step in more detail and should serve as a handy reference point
Agenda
In this workshop, you will get to see the full development workflow in action. Following the scenario below, we will simplify it for demonstration by using GitHub to fork the example repositories and use GitHub actions to run the CI pipelines
-
Create and document an API using OpenAPI Specification
-
Publish the provider contract (an OpenAPI document) to Swagger Contract Testing
-
Write the API consumer
-
Write tests for an API client using tools such as Mountebank,Nock,Wiremock,Nock,Cypress and Mock-Service-Worker or traditional Pact .NET to mock the API, and convert those mocks into a consumer contract
-
Publish the consumer contract to Contract Testing
-
Learn about Contract Testing’s breaking change detection system.
Pre-requisites
Get a Swagger Studio subscription
- Get a subscription on the Swagger page.
Caution
WHERE IS MY EMAIL?
Did not receive an email? Don’t forget to check your spam folder.
Get a GitHub account
All our examples run on Github Actions CI pipelines.
- Create a GitHub account here.
Get a Swagger Contract Testing account
The Bi-Directional Feature is only supported by Contract Testing, so you need an account.
-
I’ve got a company account (see below).
-
I’ve already got one!
Using a shared company Contract Testing account?
You can use a shared company Contract Testing account, but it will make things a bit fiddly, as you’ll need to change the identifiers of the various resources that get created so that they don’t clash with those from other workshop participants. We’ve found from past experience running workshops that it’s much simpler if everyone has their own account.
You have got your Contract Testing account, and are successfully logged in.
Caution
WHERE IS MY EMAIL?
Did not receive an email? Don’t forget to check your spam folder; otherwise reach out to support.smartbear.com.
Provider side
Design the API
Create and document an API using OpenAPI.
As we are following a specification or design first approach to API development, we start by creating an OpenAPI description document, that describes how our API should work.
Authoring an OAS document is beyond the scope of this tutorial, but you can find plenty of resources on the internet (such as at swagger.io).
Our products reference the OpenAPI spec is here
-
POST /products- create a new product -
GET /products- gets all products -
GET /products/:id- gets a single product
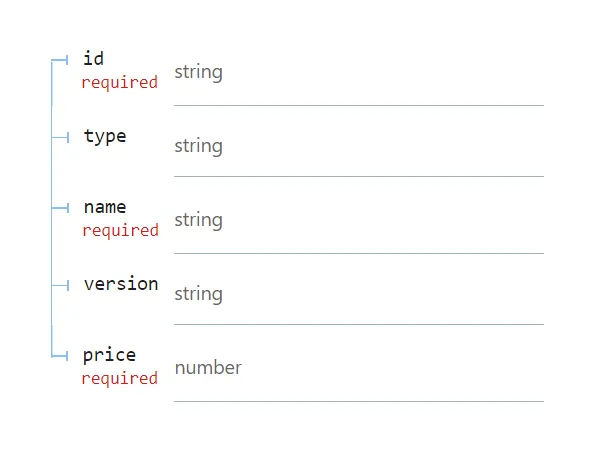
The product schema is as follows:
-
Create an OpenAPI Document in Swagger Studio
-
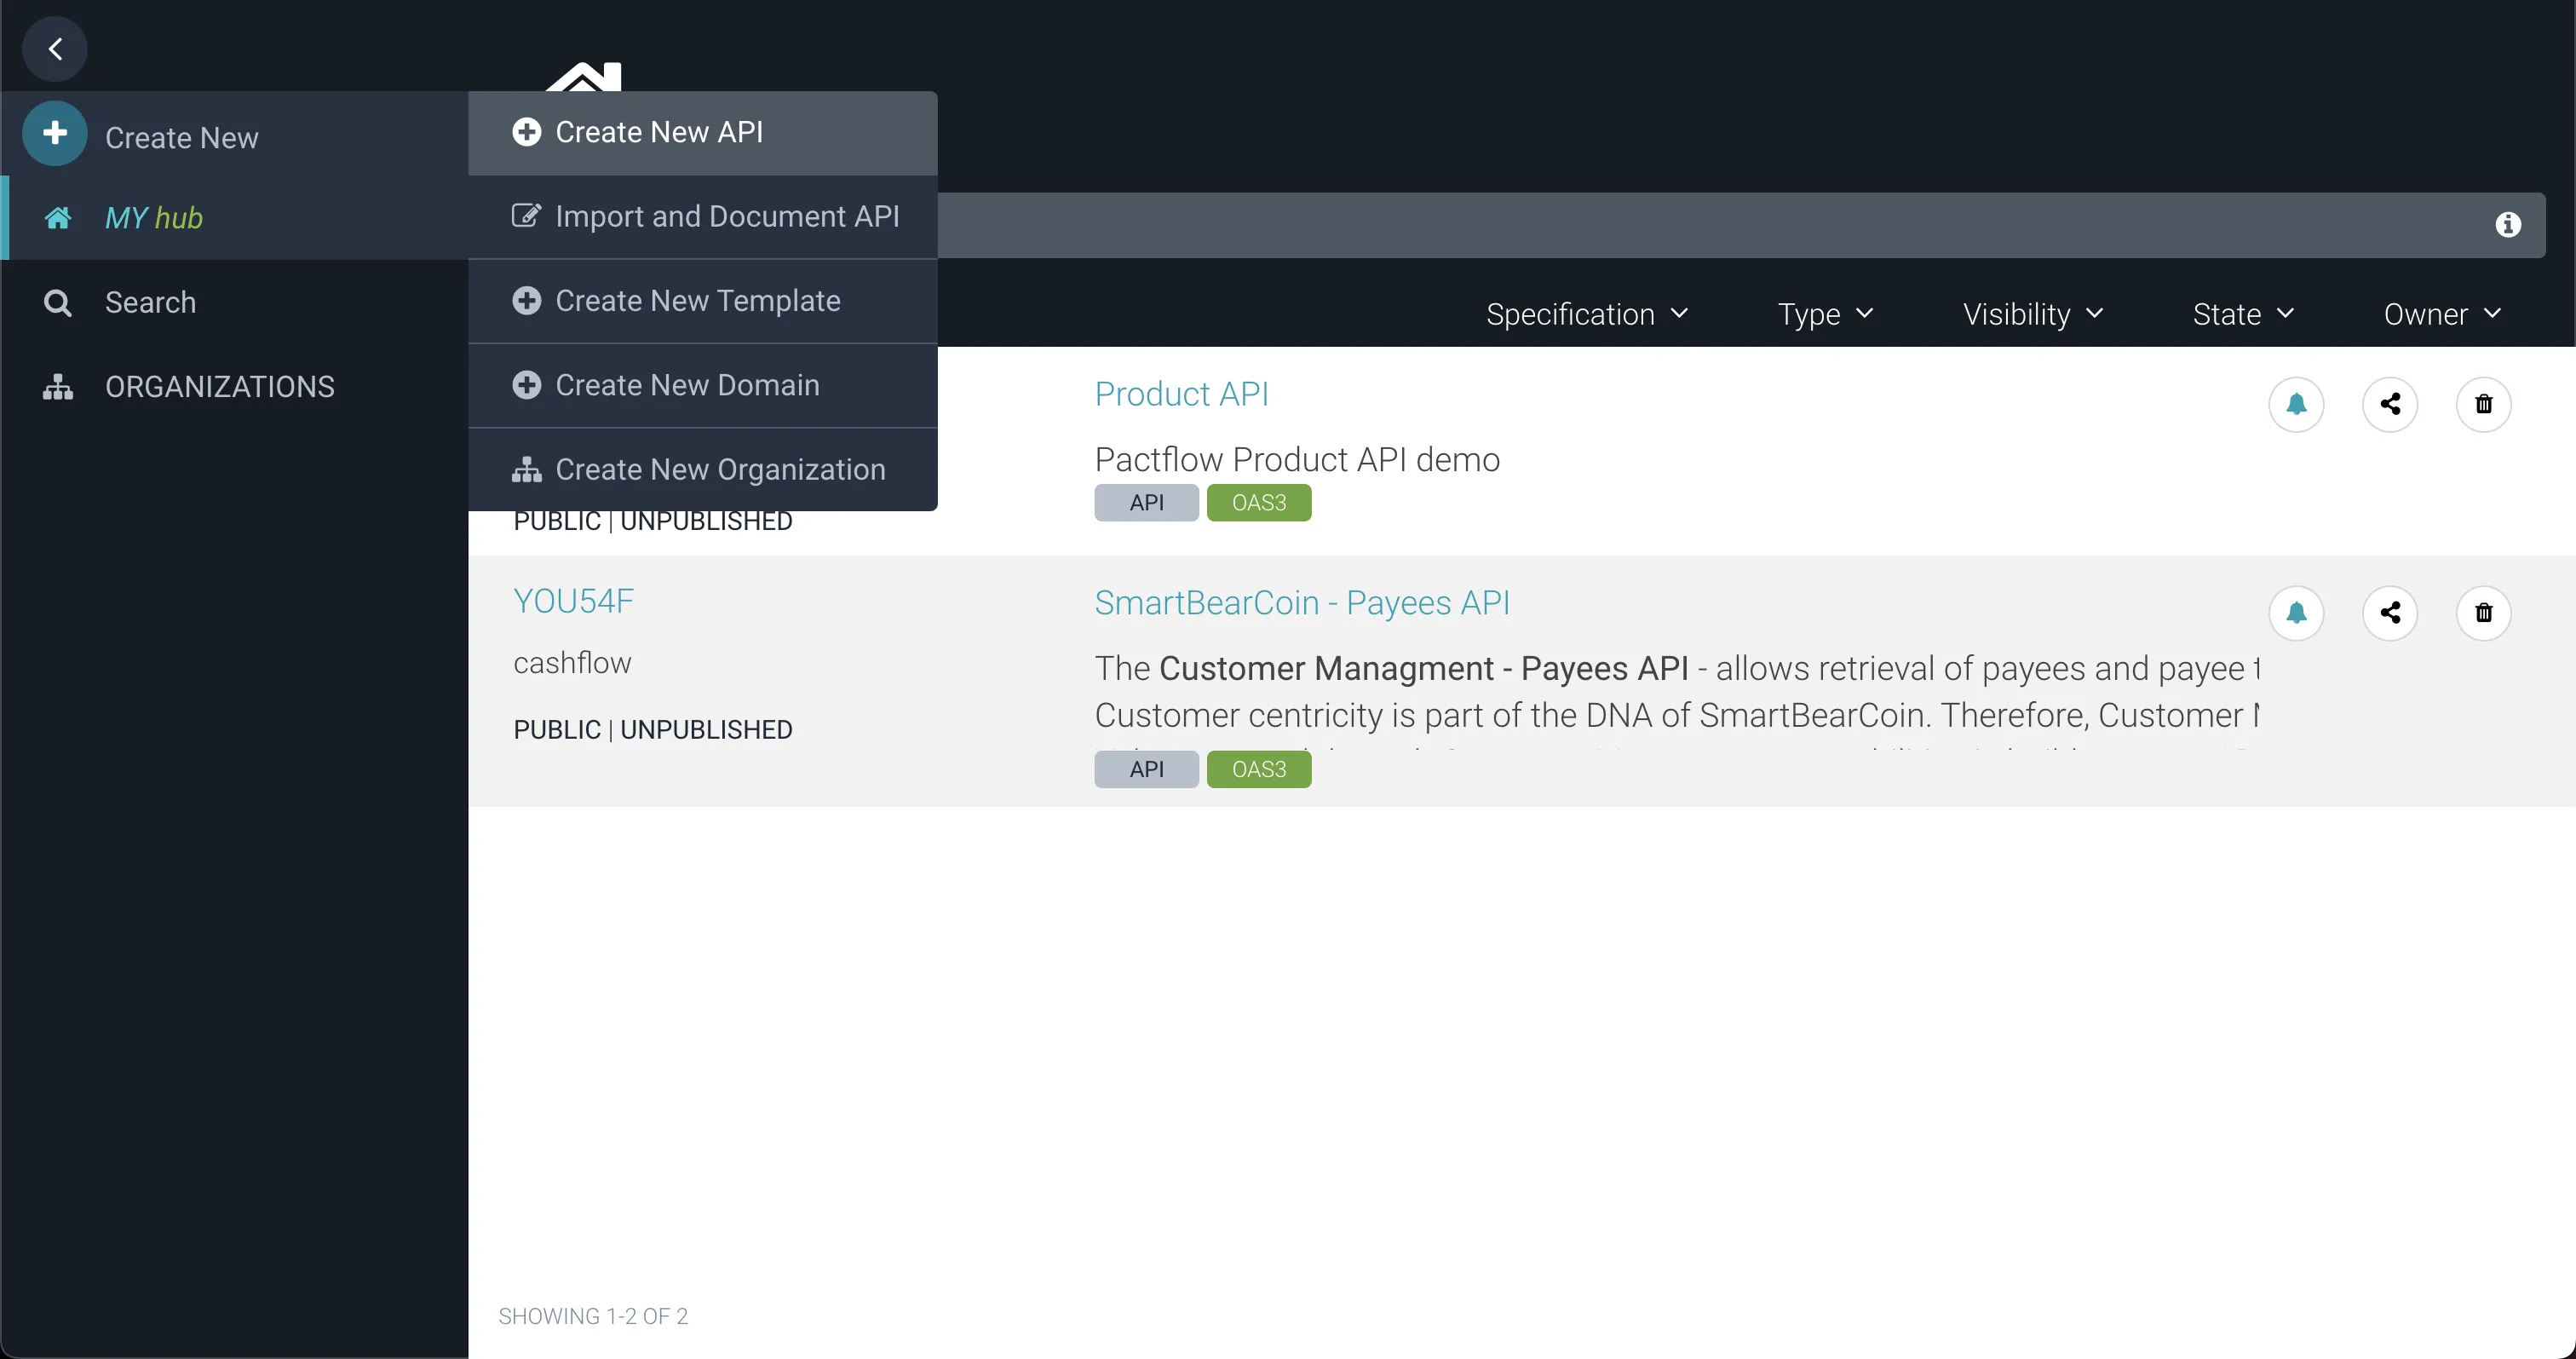
Select
Create New- >Create New API -
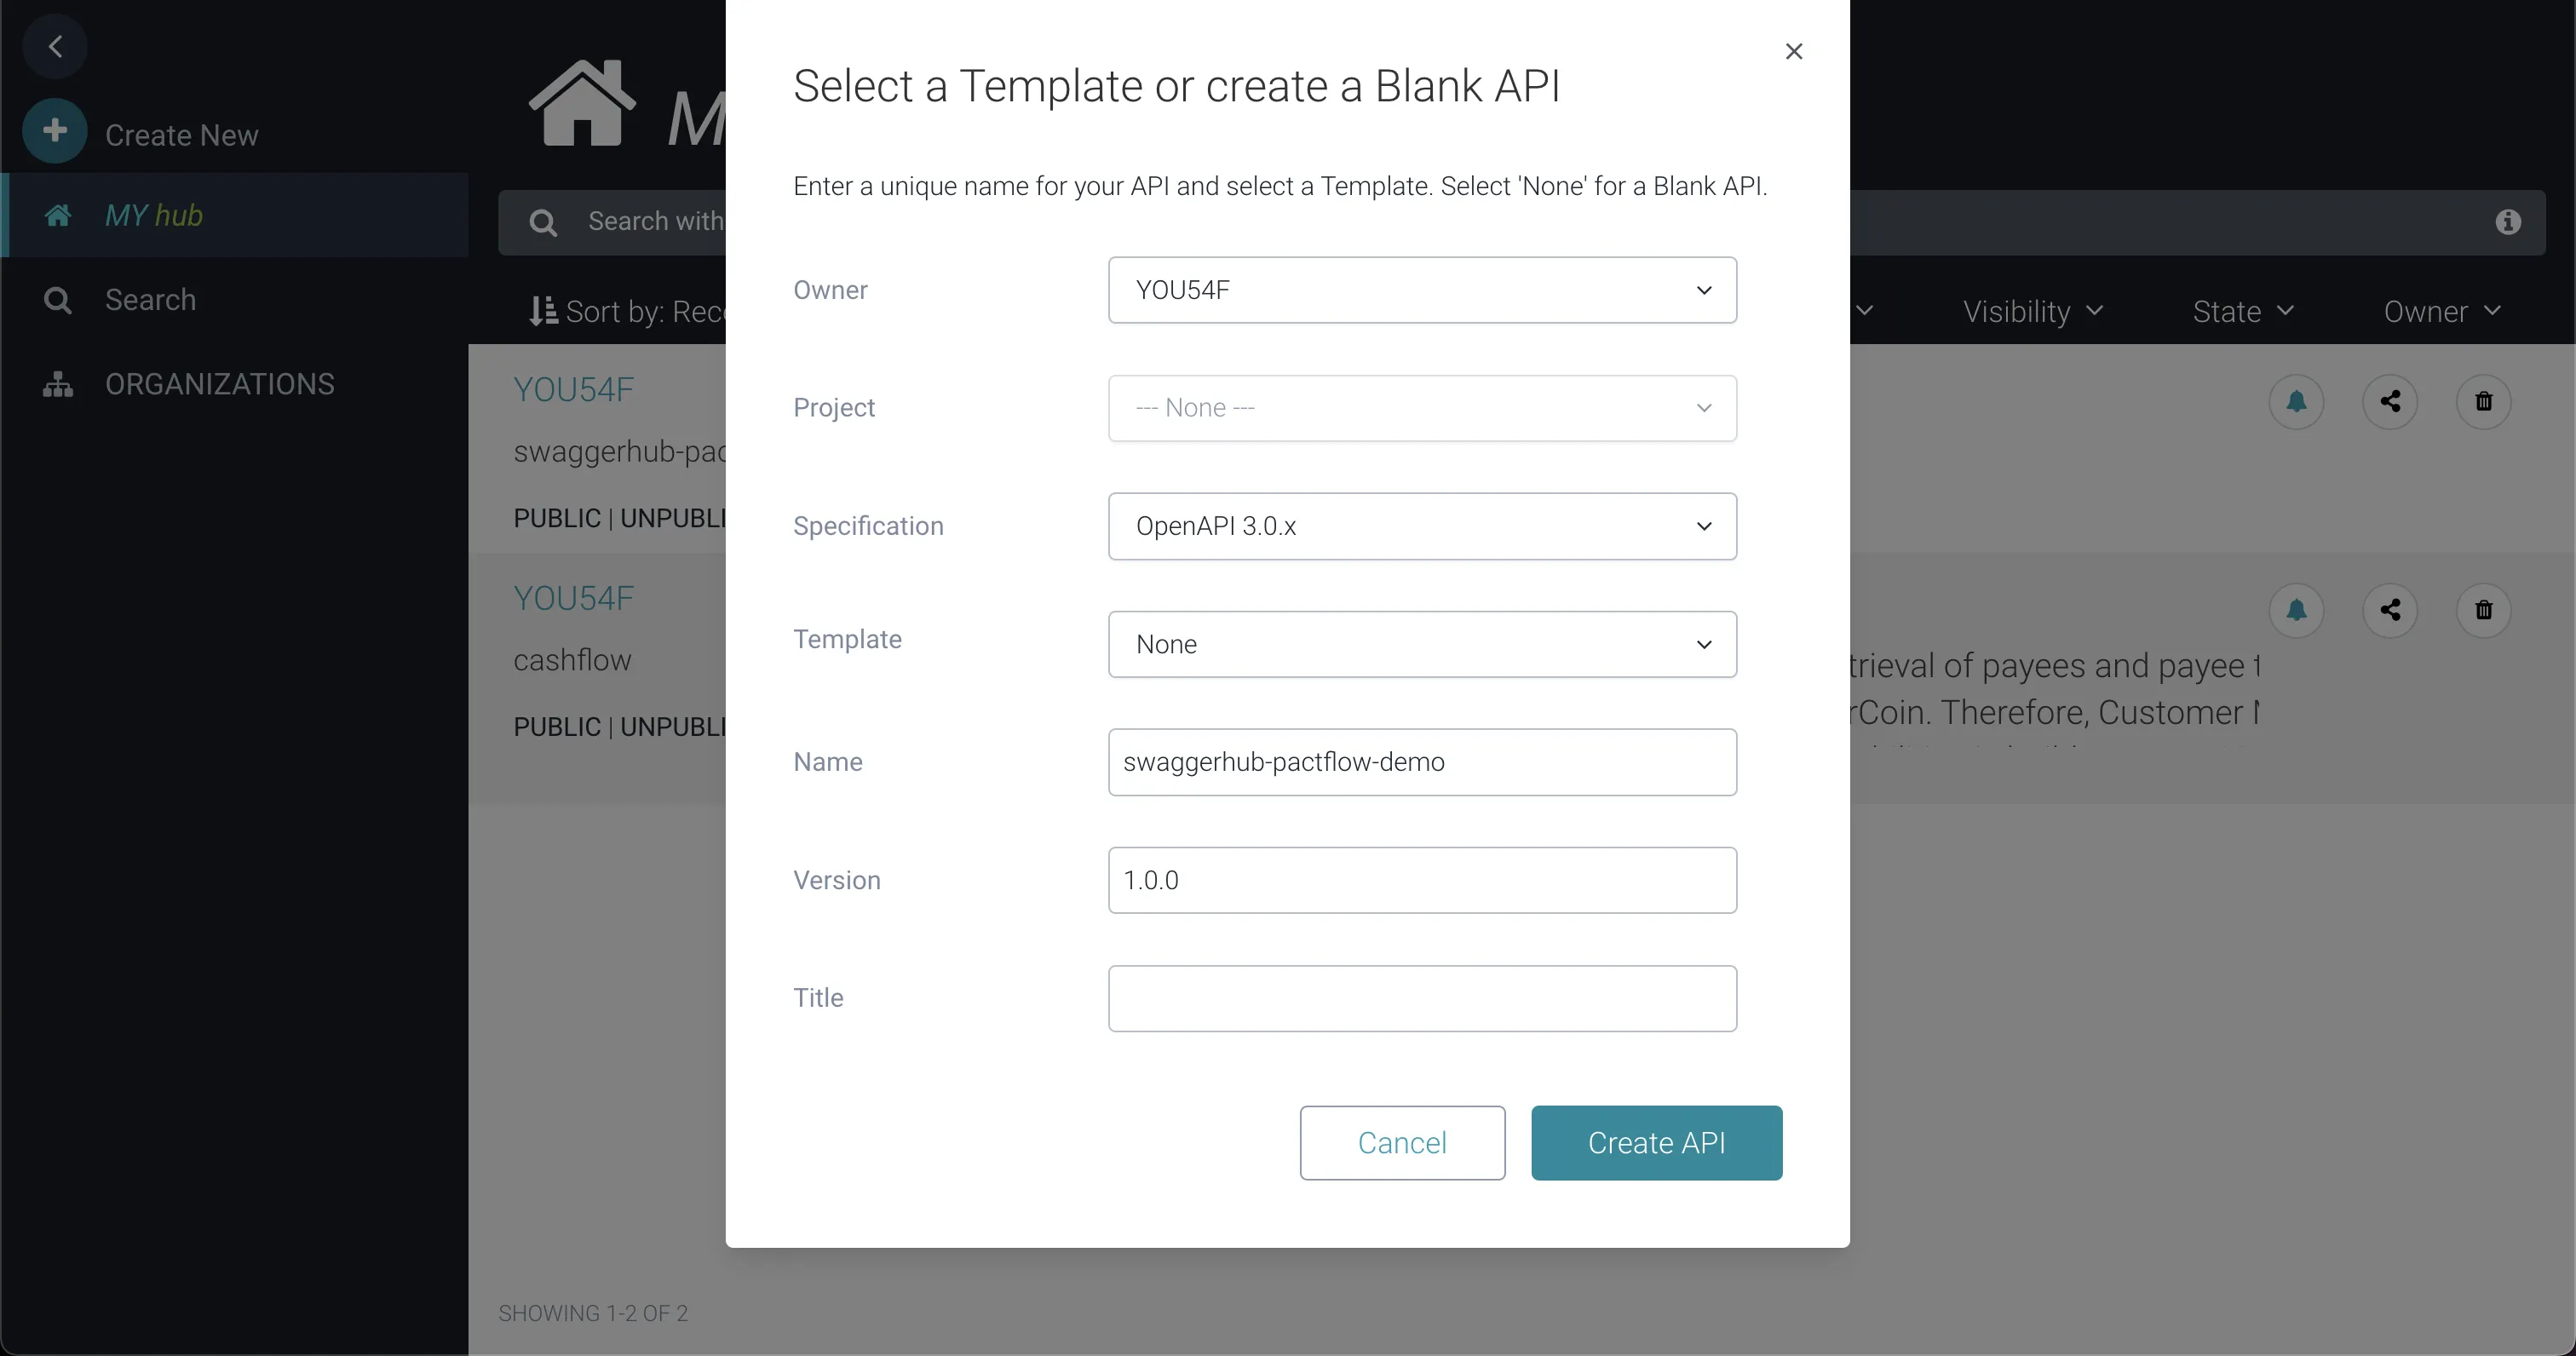
Select
Owner -
Select
Specification:OpenAPI 3.0.x -
Select
Template:--None-- -
Select
Name:Enter the name of your API here -
Select
Version:1.0.0 -
Select
Auto Mock API:off -
Select
Create API -
Paste the contents of the reference OpenAPI specification
-
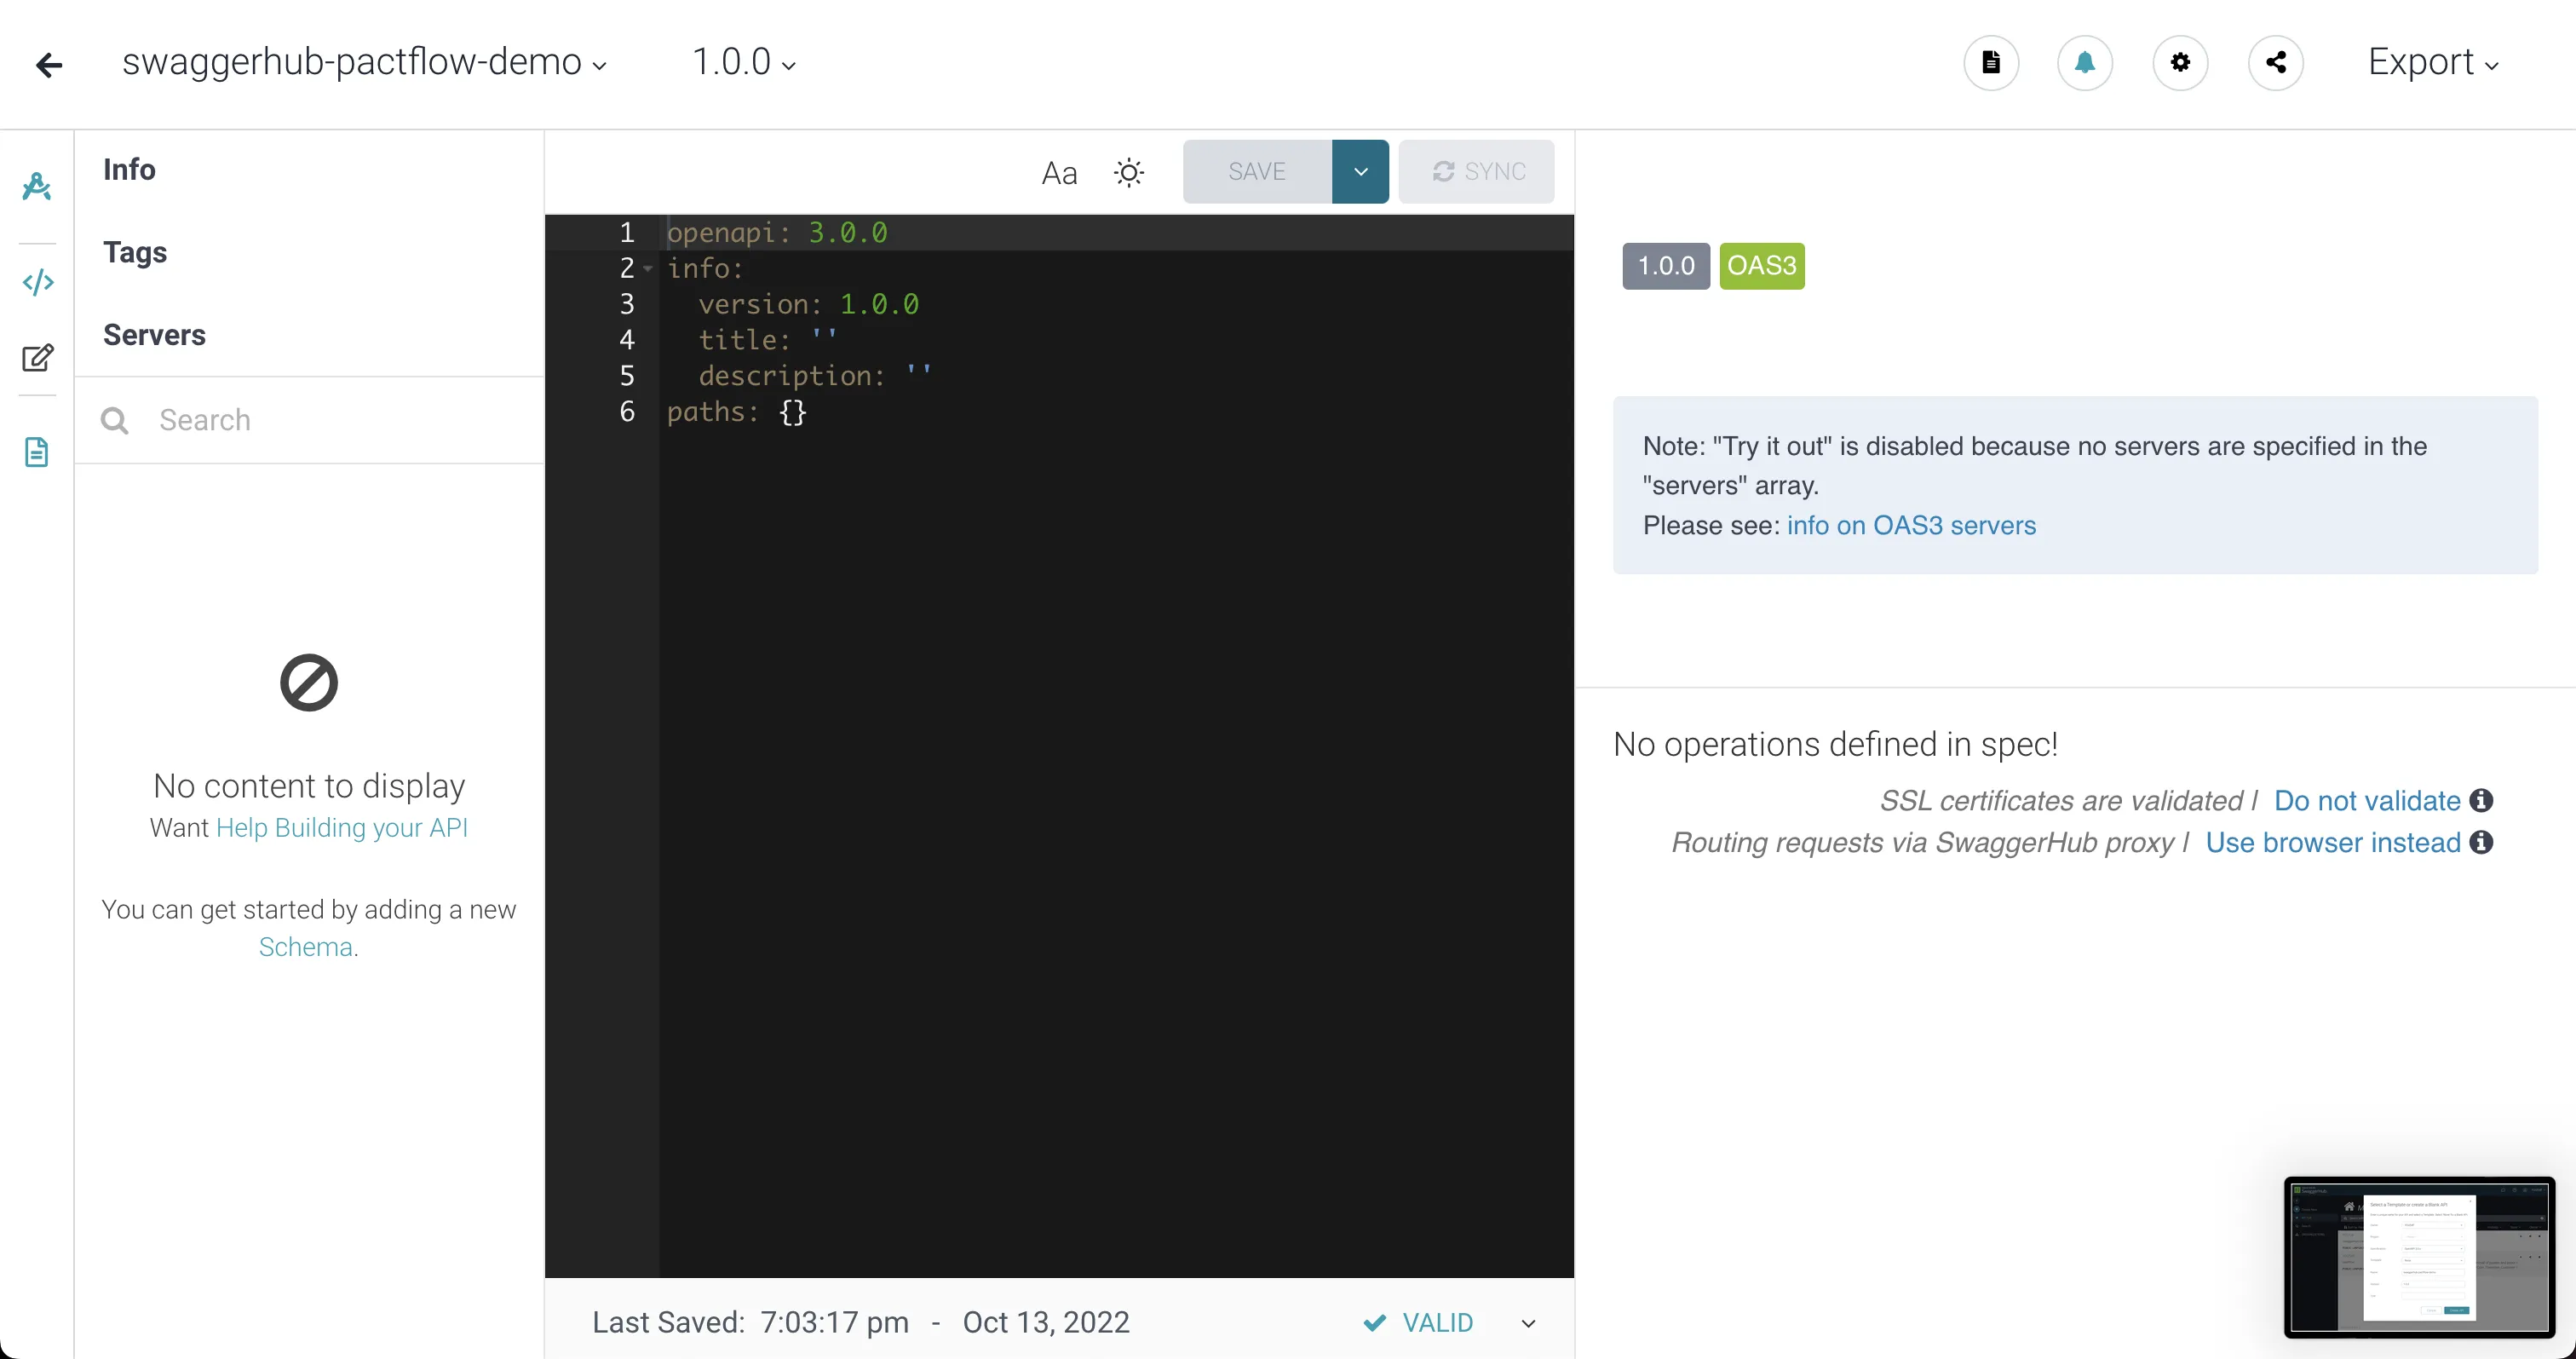
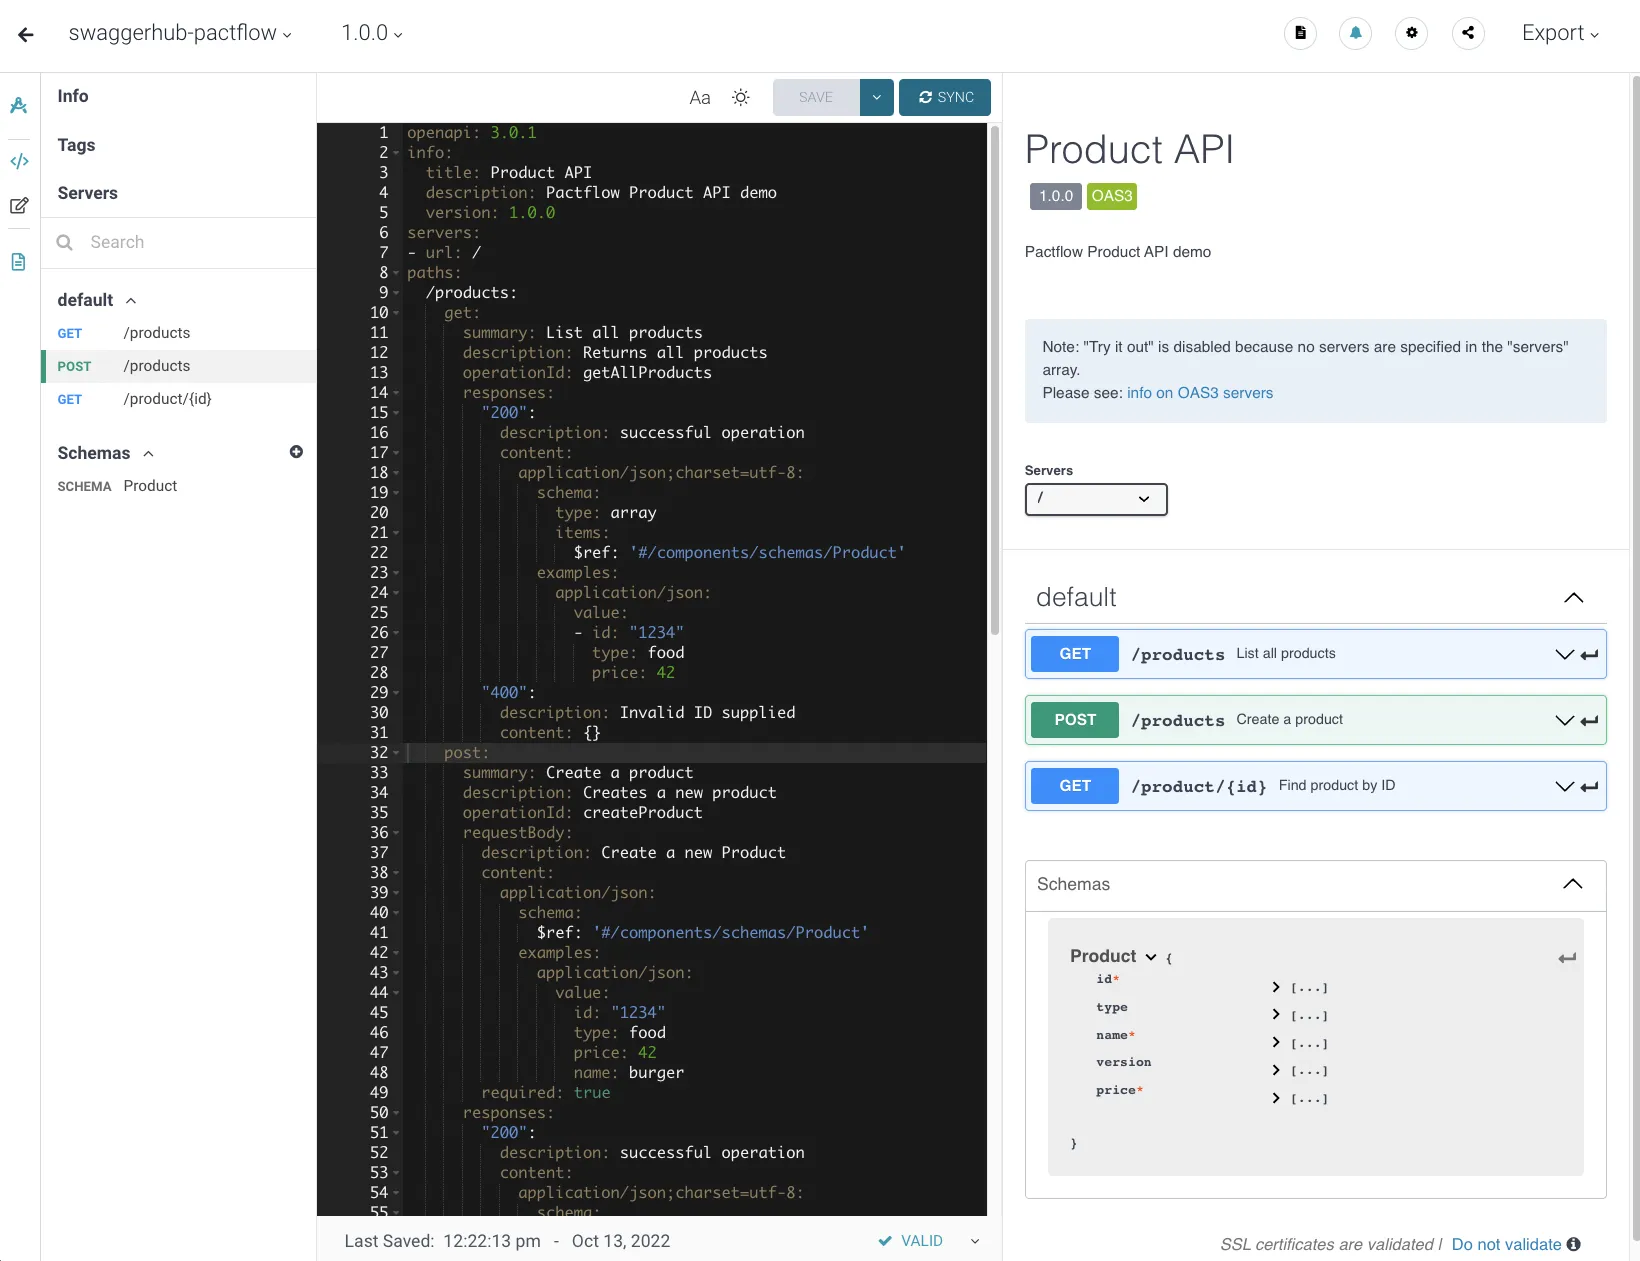
SUCCESS
You should have created your first API definition in Studio. For fuller information on Studio Authoring - Follow this guide to create your first API in Studio.
Publish your provider design spec to Contract Testing
See our Publishing contracts docs for more information.
Now that we have created our provider specification, we need to share it to our consumers. This is where Contract Testing comes in to the picture. This step is referred to as “publishing” the provider contract.
The publishing step takes two key components:
-
The provider contract itself (in our case, the OAS document)
-
The test results (in our case, we will use our OAS document, as we are just testing the design, we will use a separate flow to test our implementation when it is created)
This information will be helpful later on, when we need to check compatibility with its consumers.
-
Fork the example provider projects in to your own Github account (click the ‘Fork’ button in the top right).
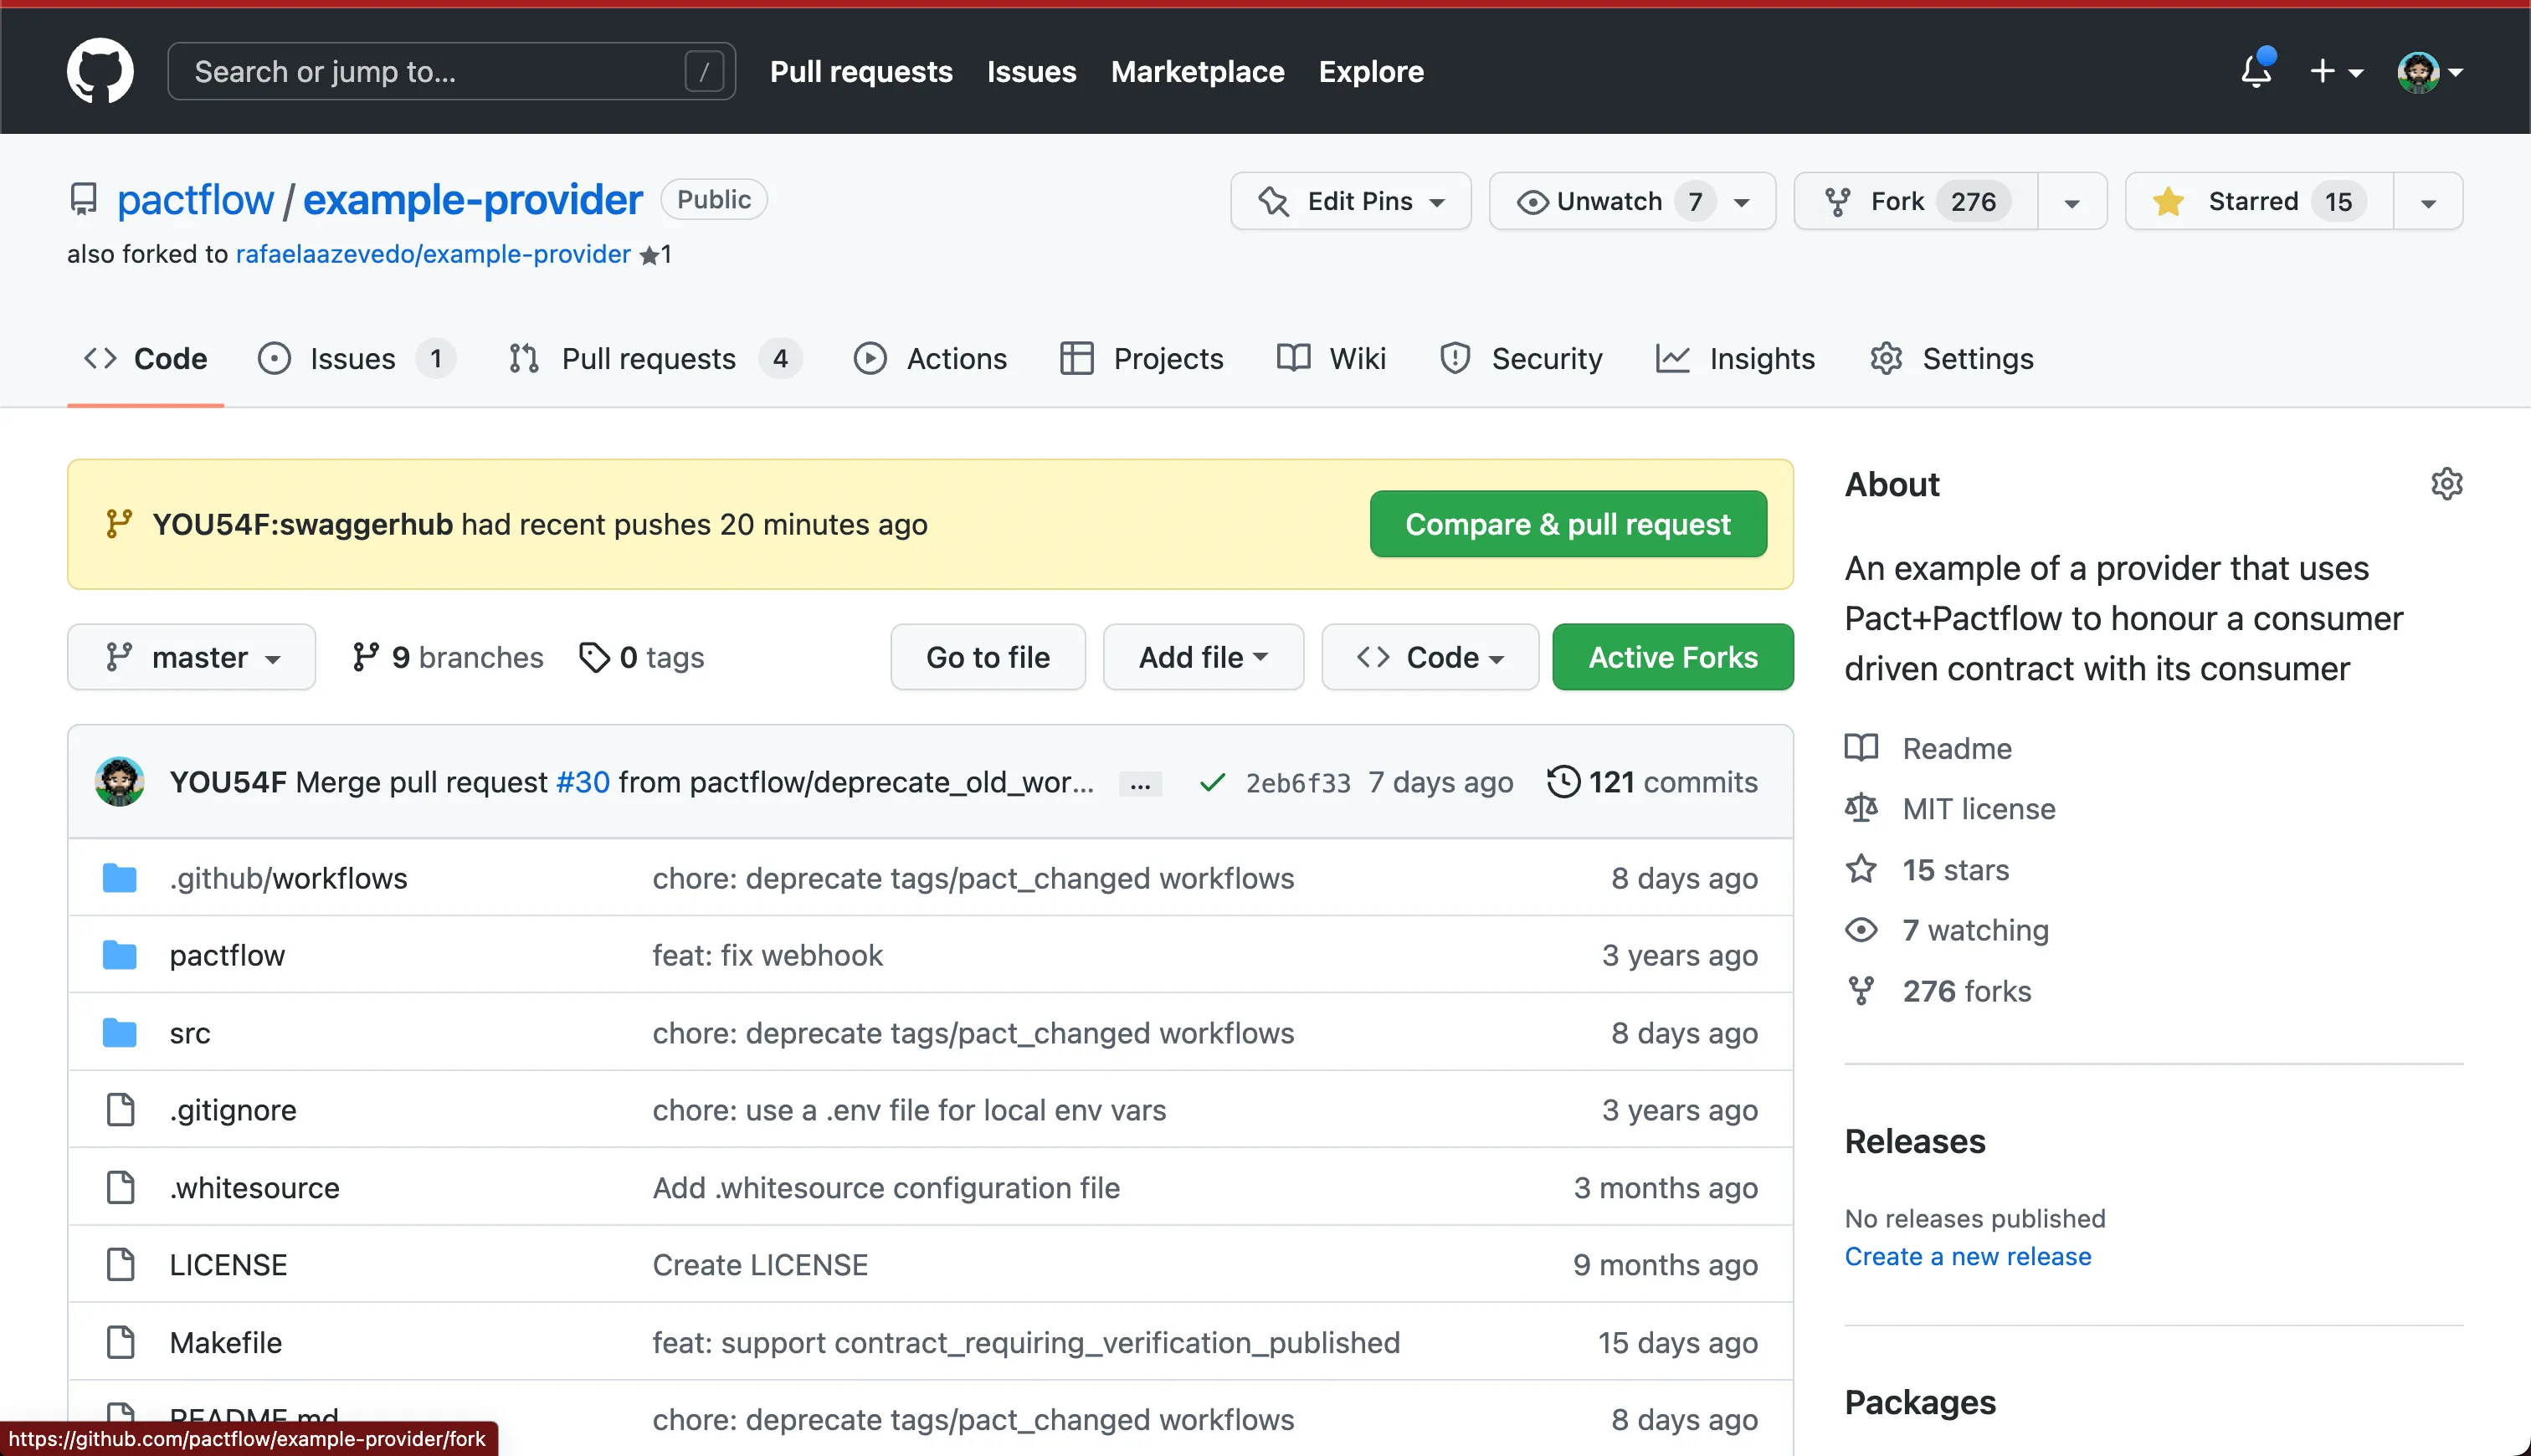
-
Open your forked
example providerproject (https://github.com/<your-username>/example-provider) -
Open
.github/workflows/ProviderDesignFeedback.yml -
In the upper right corner of the file view, click 🖊️ to open the file editor.
-
Update the value of
PACT_BROKER_BASE_URLto the base URL of your own Contract Testing account. You can easily get this by clicking the COPY PACTFLOW BASE URL button on the API Tokens page in Contract Testing.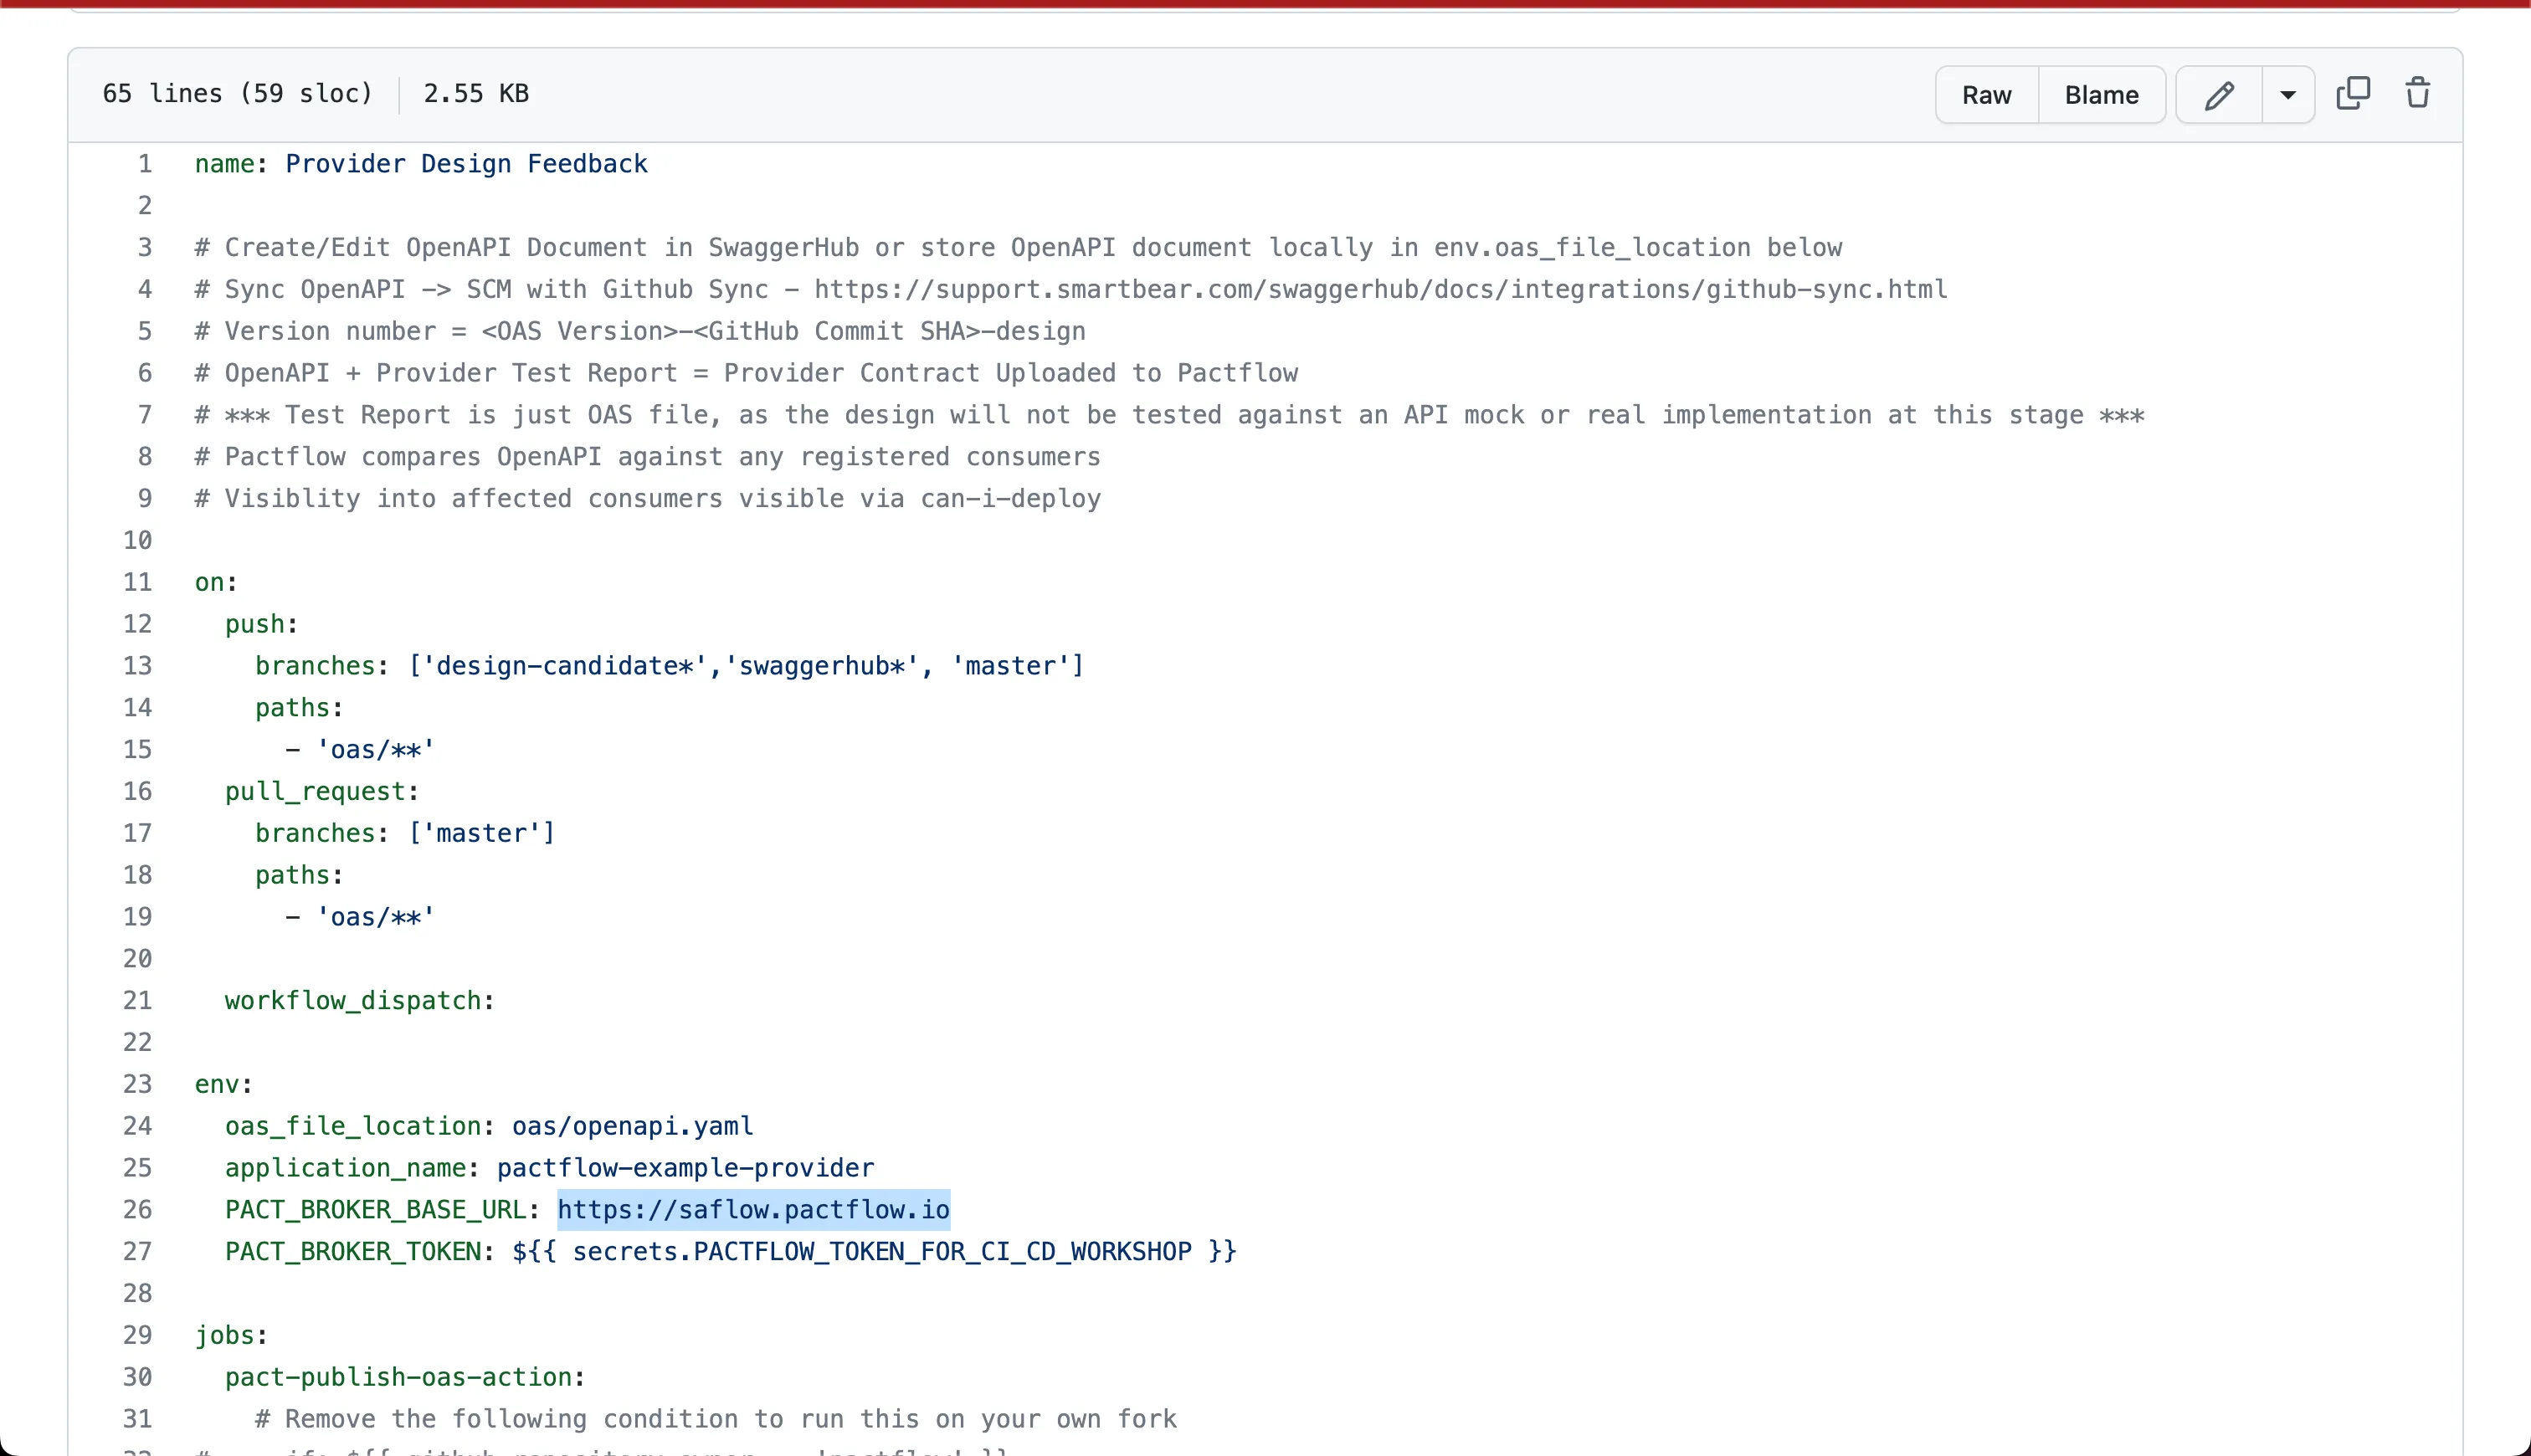
-
Remove the line
if: ${{ github.repository_owner == 'pactflow' }} -
Press the green
Commit changesbutton
-
-
Create a Github Secret to store your Contract Testing API token in.
-
In Contract Testing:
-
Log in to your Contract Testing account (
https://<your-subdomain>.pactflow.io) and go to Settings > API Tokens - See here for the docs. -
Click the Copy button for the read/write CI token (make sure it’s the read write one, not the read only one).
-
-
In Github:
-
In your forked
example providerproject (https://github.com/<your-username>/example-provider) -
Click on the
Settingstab -
Select
Secretsfrom the side menu. -
Click
New repository secret(the button is to the right of the “Actions secrets” heading) -
Set the name of the secret to
PACTFLOW_TOKEN_FOR_CI_CD_WORKSHOP -
Paste in the Contract Testing API token value you copied in the previous step.
-
Click
Add Secret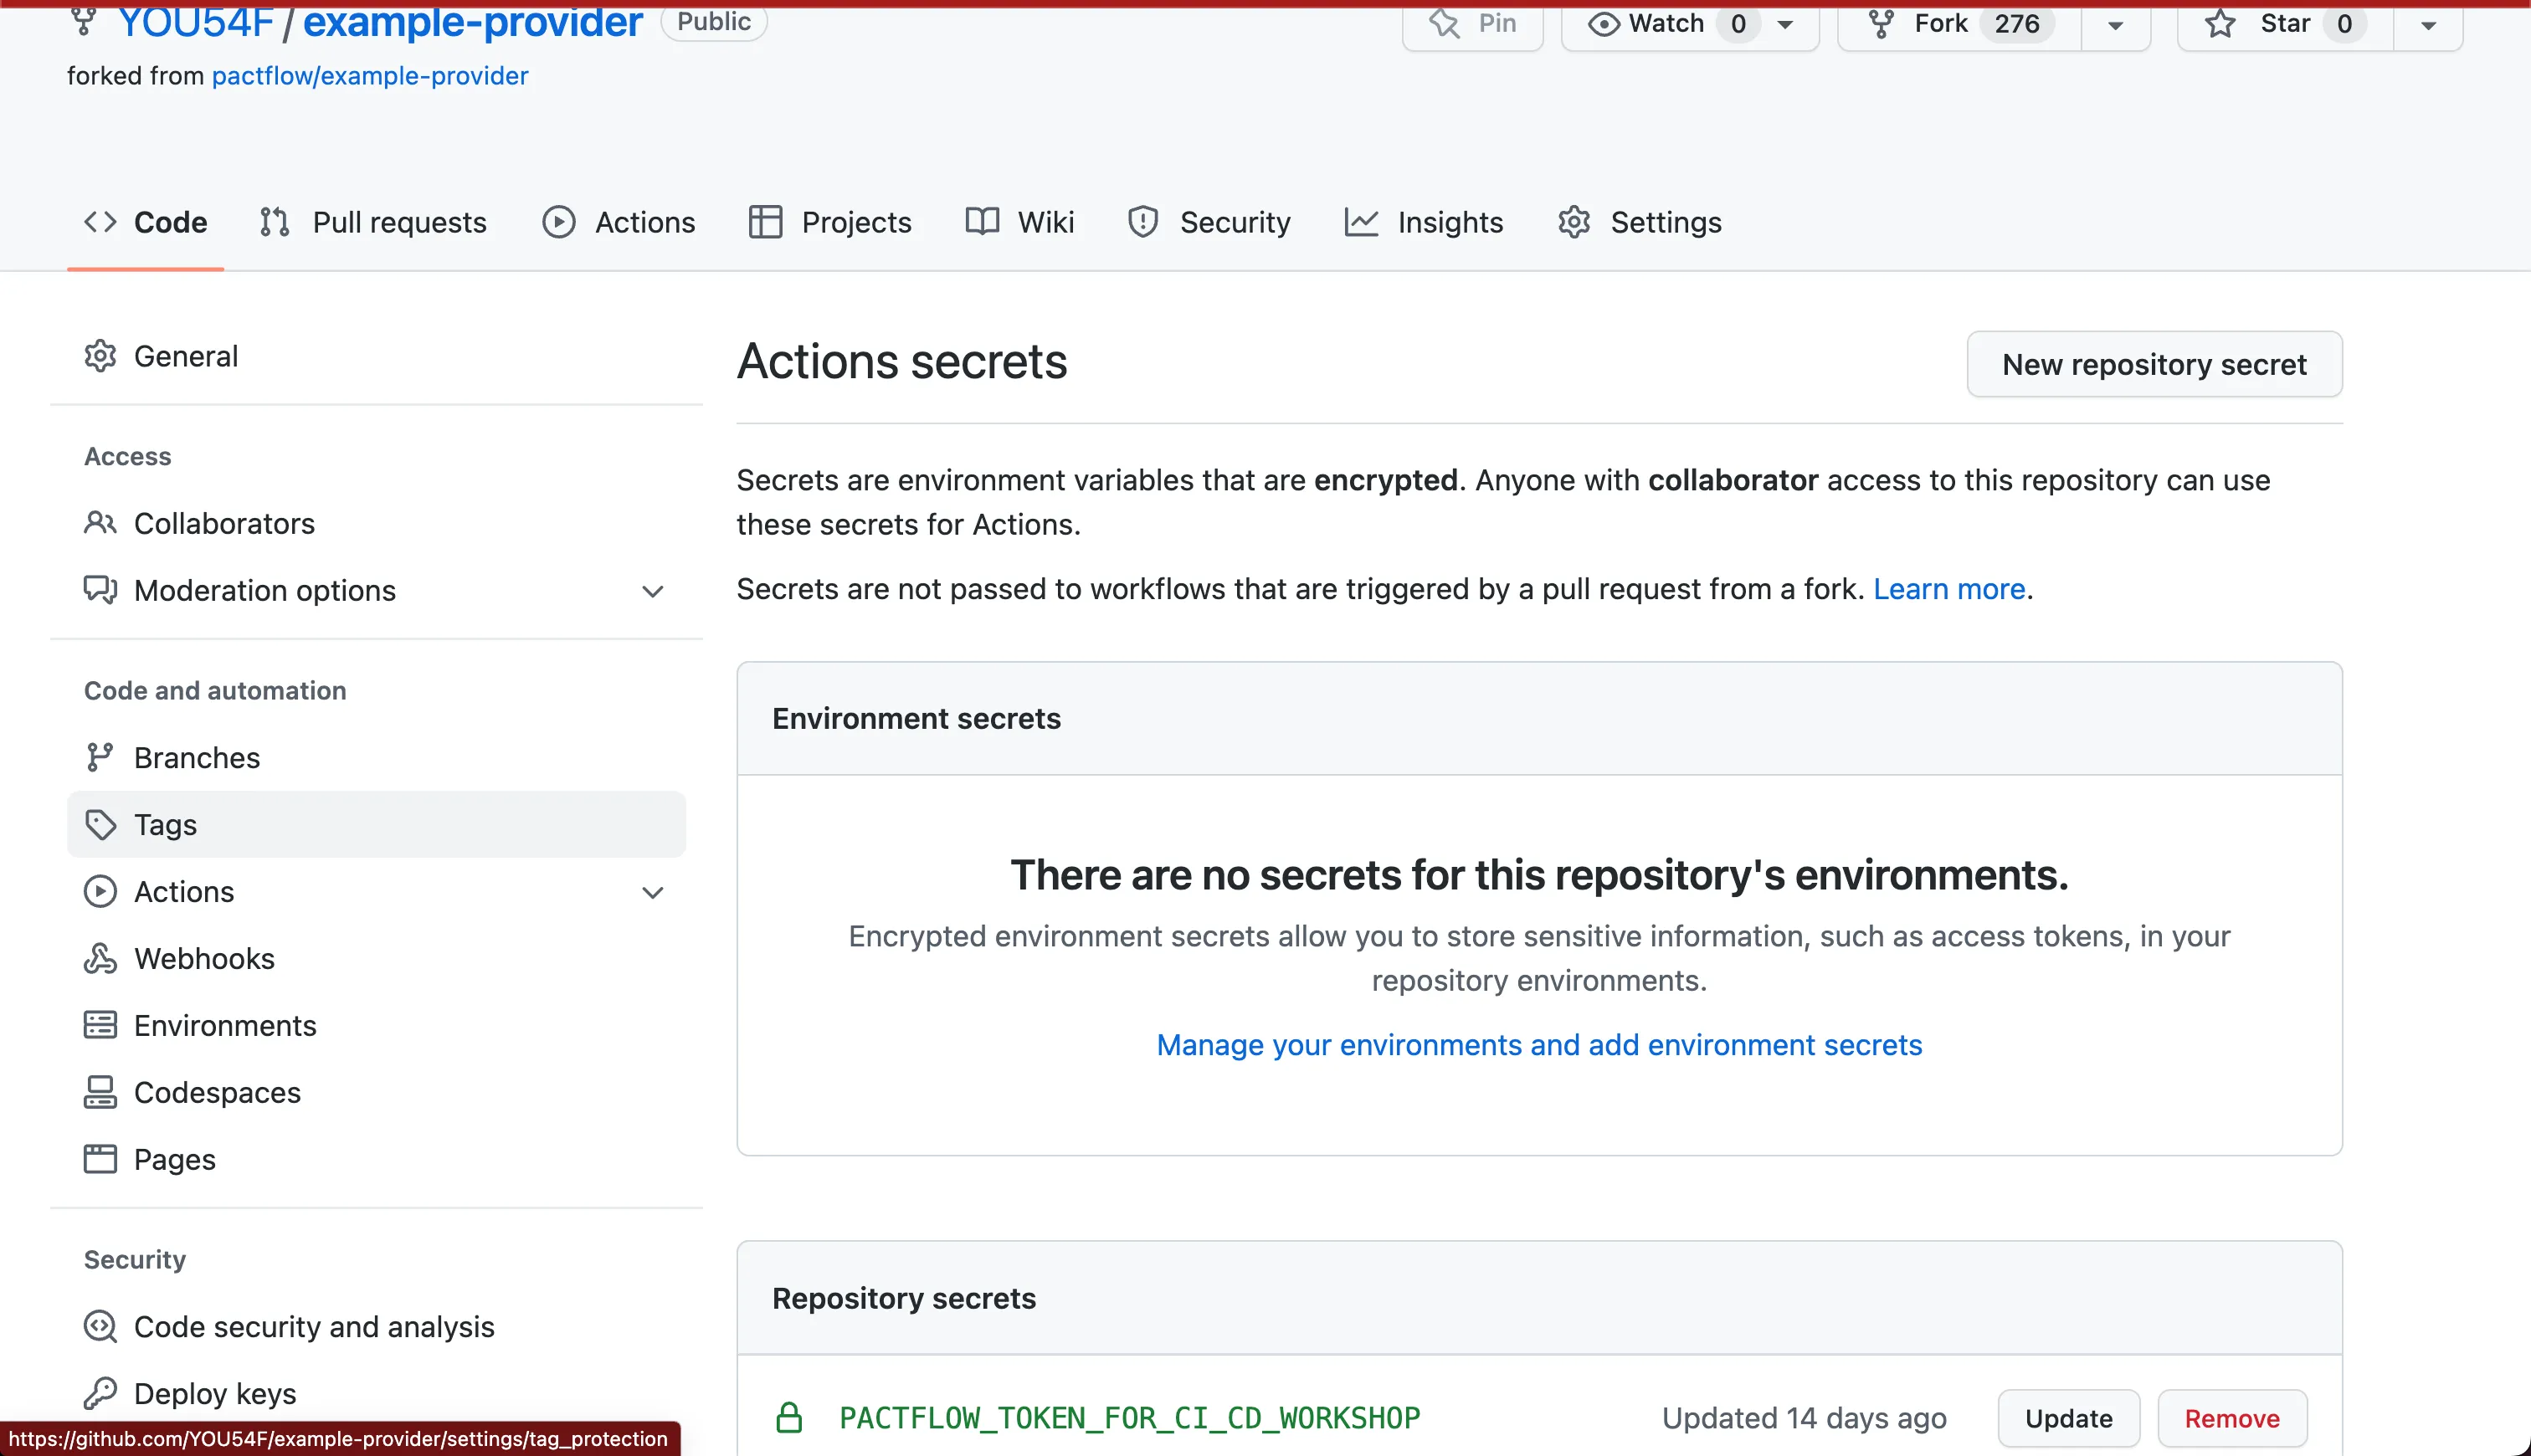
-
-
-
Click on the
Actionstab -
Click the button with the text “I understand my workflows, go ahead and enable them”
-
Sync OpenAPI - > SCM with Github Sync -
https://support.smartbear.com/swaggerhub/docs/integrations/github-sync.html
-
Open the API page in Swagger Studio.
-
Click the API name, switch to the Integrations tab, and click Add New Integrations:
-
Select GitHub Sync.
-
In the subsequent dialog, specify the integration parameters:
-
Name – Required. A display name for the integration.
gh-design-to-pactflow -
GitHub Token – Required. The GitHub access token that Swagger Studio will use to access the target GitHub repository.
-
The easiest way to get the token is to click Connect to GitHub and allow Swagger Studio to retrieve information from your GitHub account:
-
Click Next in the GitHub Token edit box to continue. Swagger Studio will validate the token and then display other parameters.
-
Repository Owner – Select you GitHub user or organization that owns the repository you created in the previous step
-
Repository – Select the repository you setup earlier to push the code to
-
-
Sync Method – Select the synchronization type:
Basic Sync -
Branch – Required. The repository branch to push the code to. If this branch does not exist, it will be created based on the repository’s default branch. Choose
swaggerhub -
Generated API Code – Required. Select what you want to generate:
YAML(Resolved) -
Output Folder - Select
oas -
Output File - Select
swagger.yaml -
Click
Create And Execute- >Done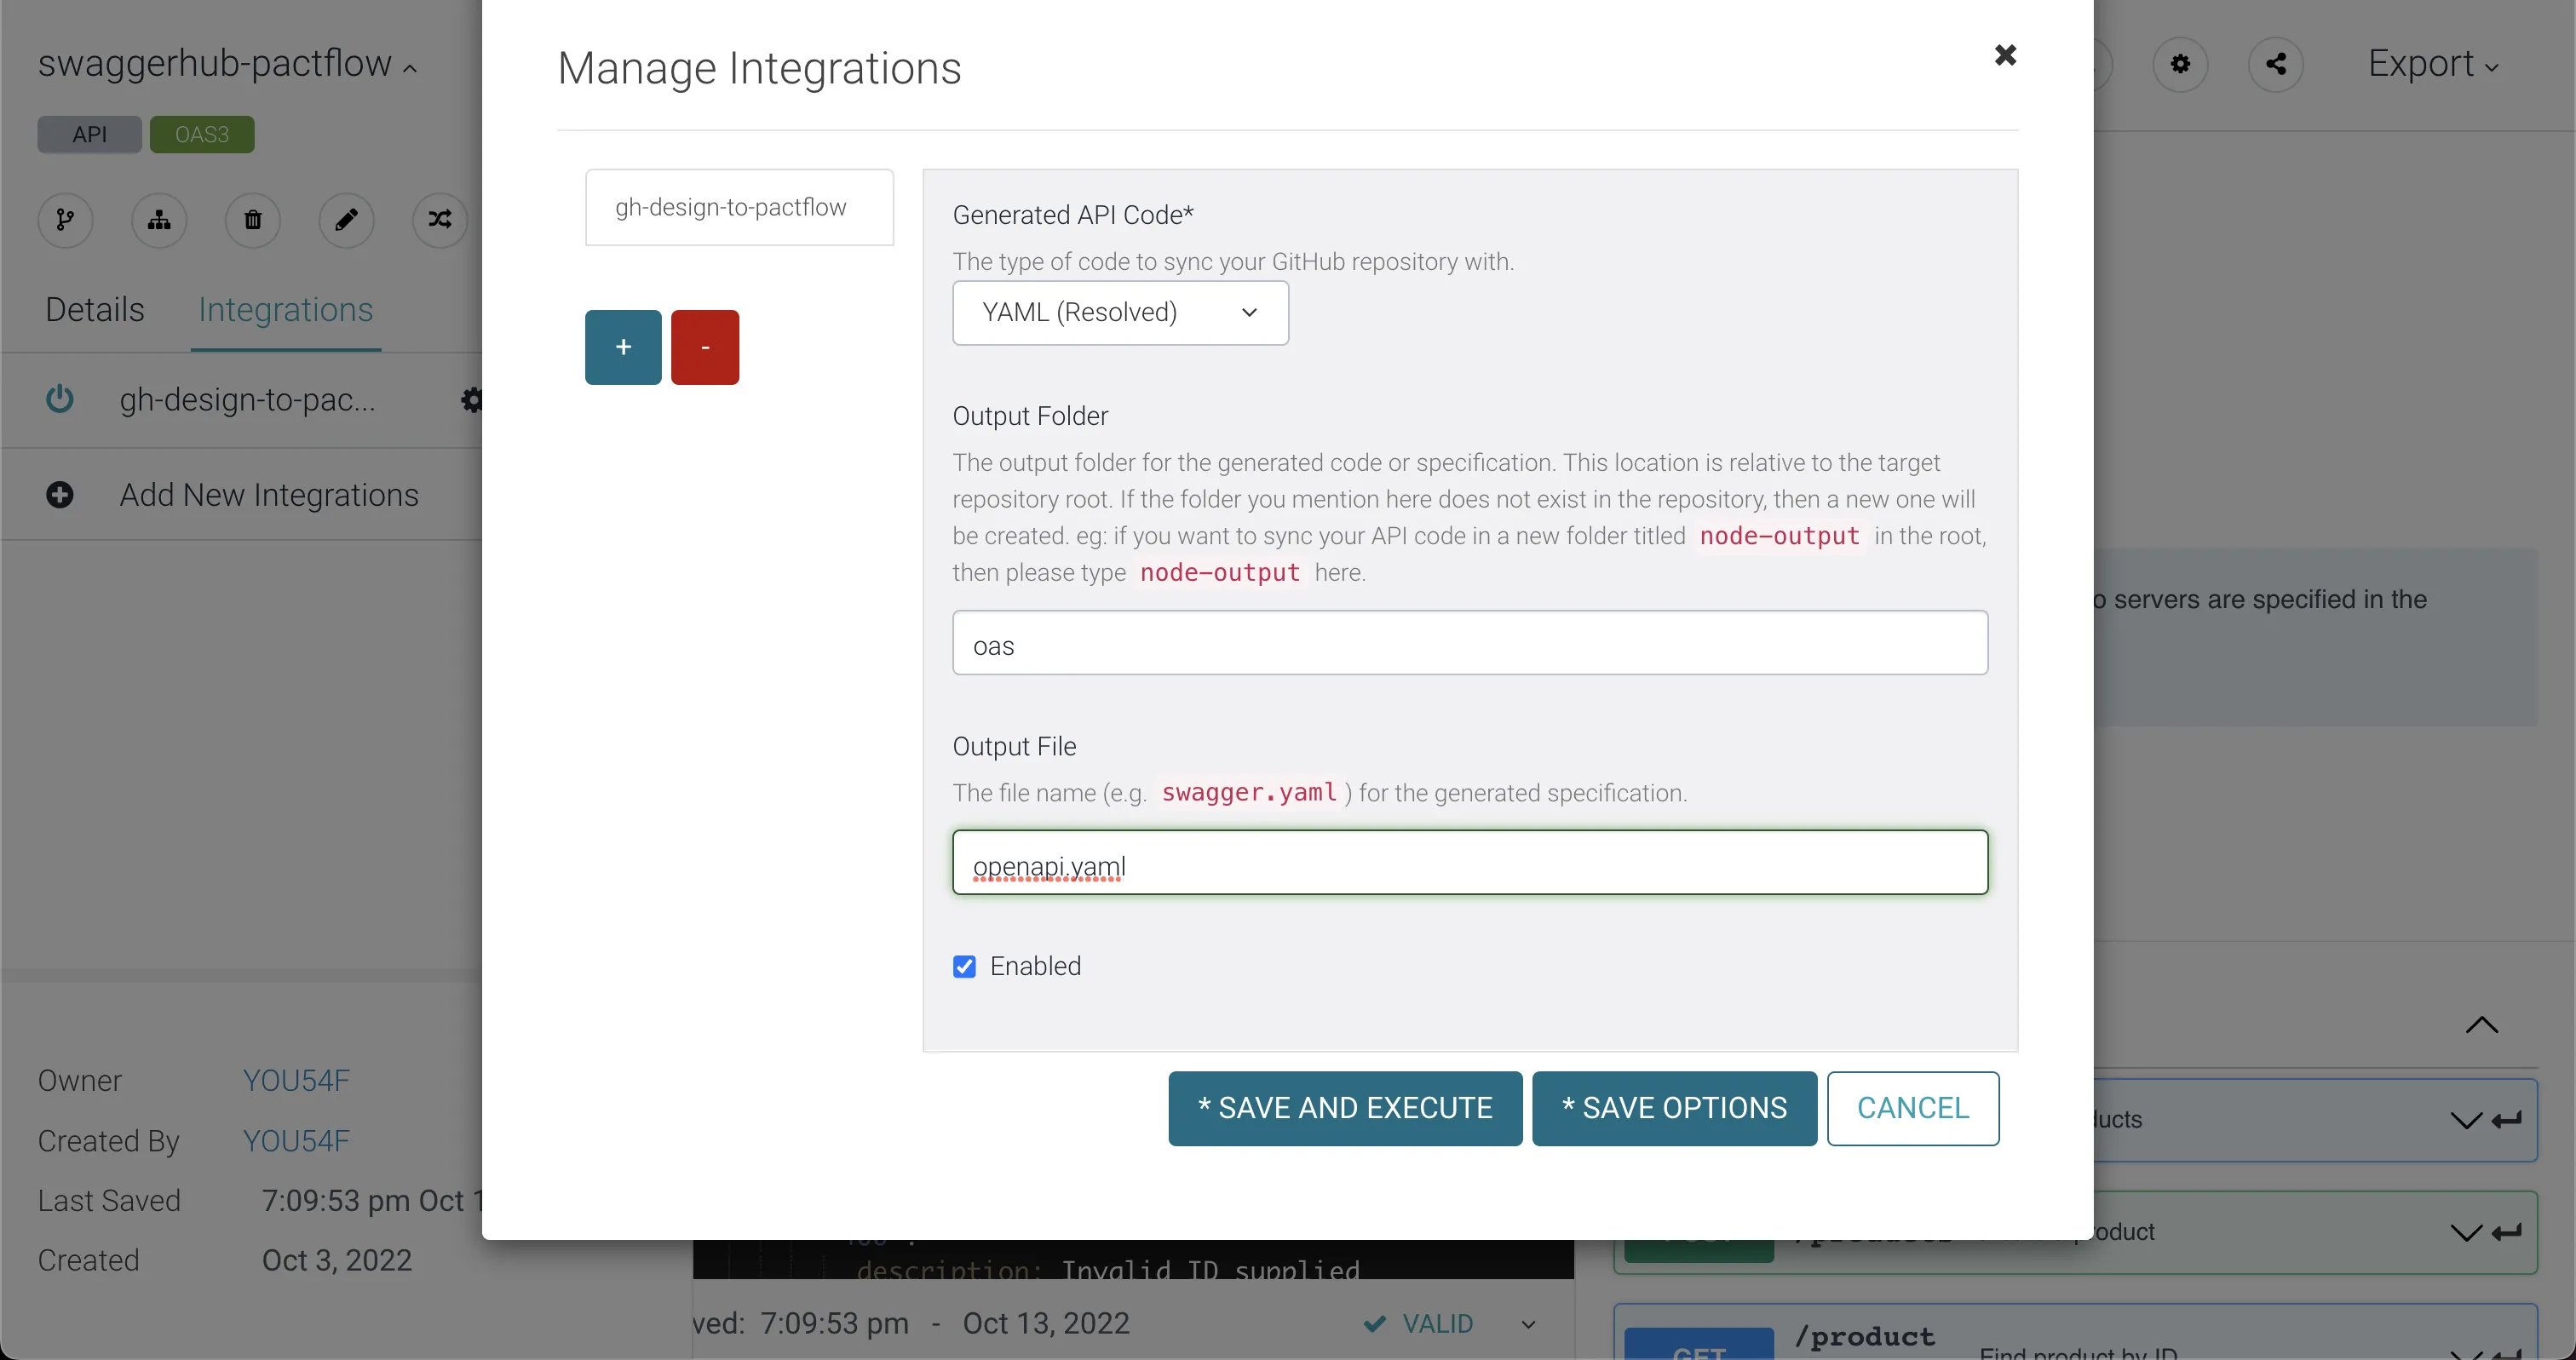
-
After you run through the process your dashboard should look like this:
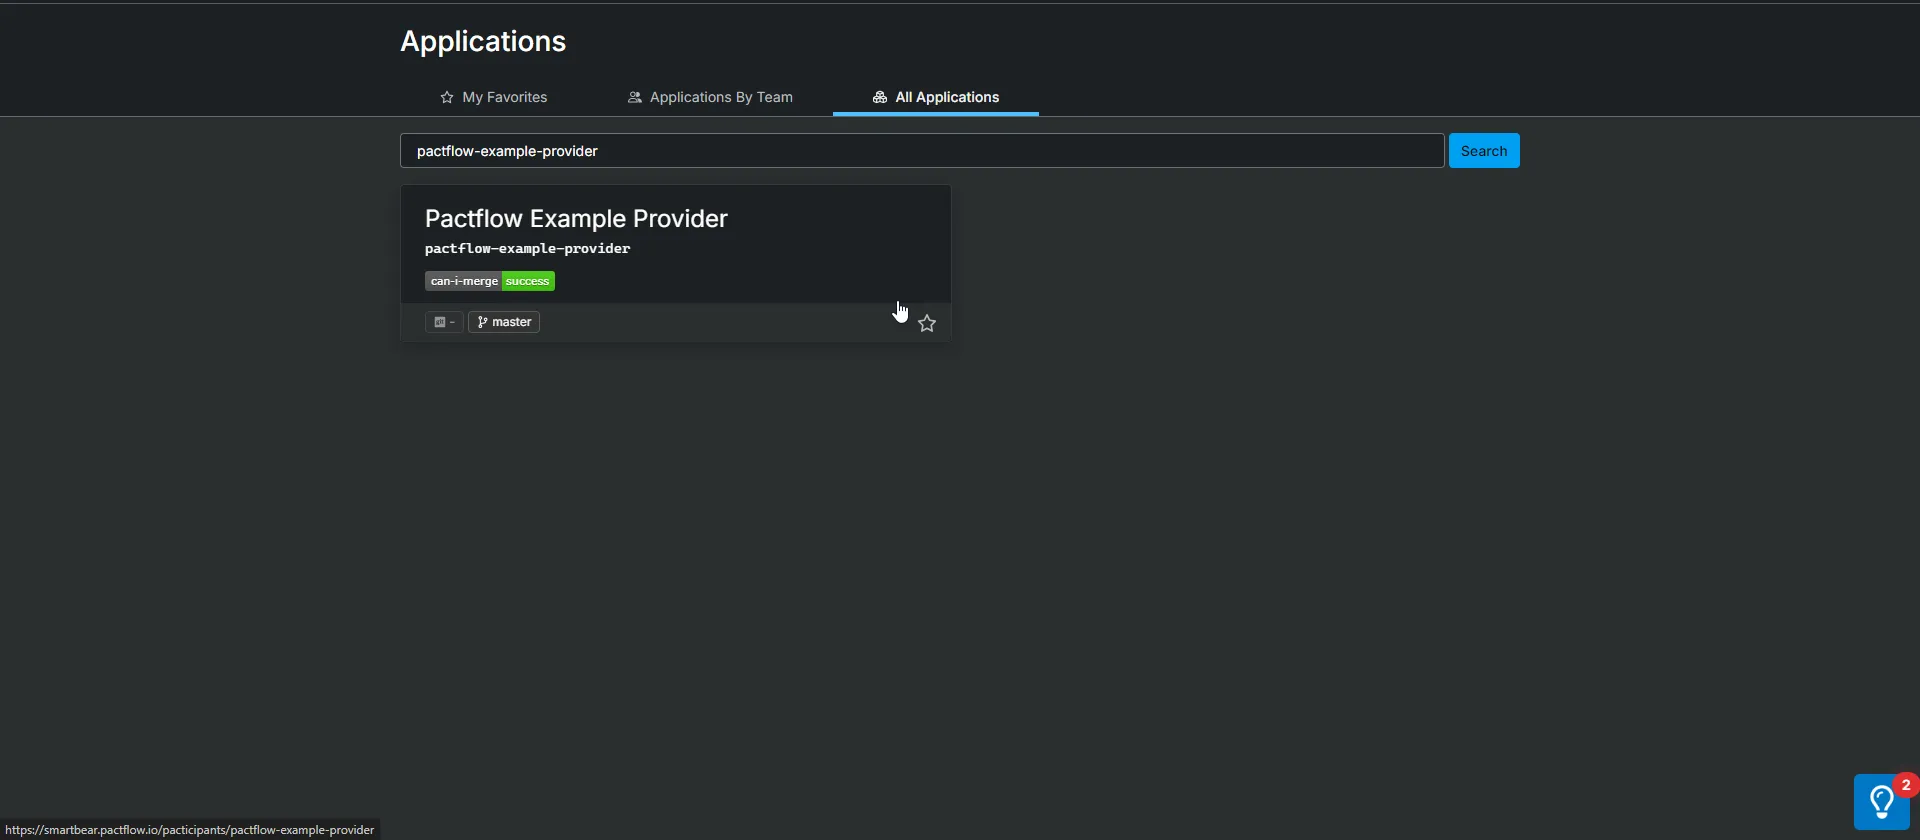
SUCCESS
Your should have uploaded your first API definition to Swagger Contract Testing.
Check if we could deploy our design candidate safely to production
Now that we have designed our provider specification and published our provider contract, we can check if we deploy the application to production.
Whilst we don’t currently have any consumers to worry about, we want to be prepared for when we do. Contract Testing has a tool called can_i_deploy to help us.
The can-i-deploy command is an important part of a CI/CD workflow, adding stage gates to prevent deploying incompatible applications to environments such as production.
This diagram shows an illustrative CI/CD pipeline as it relates to our progress to date:
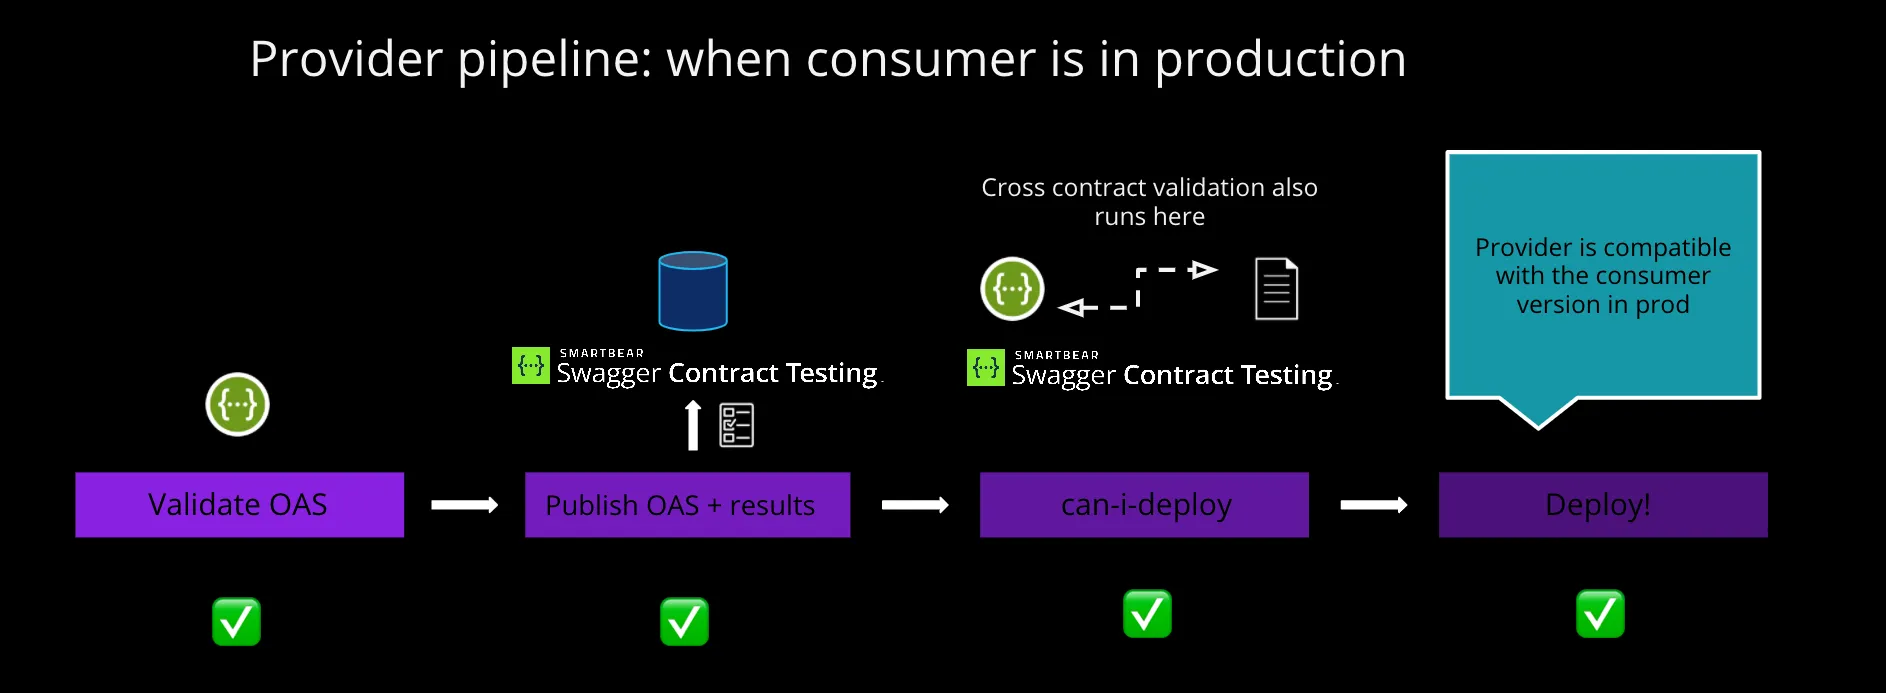
Check if it is safe to deploy the provider to production
We run the command:
can-i-deploy
This should pass, because as we discussed above, there are no consumers:
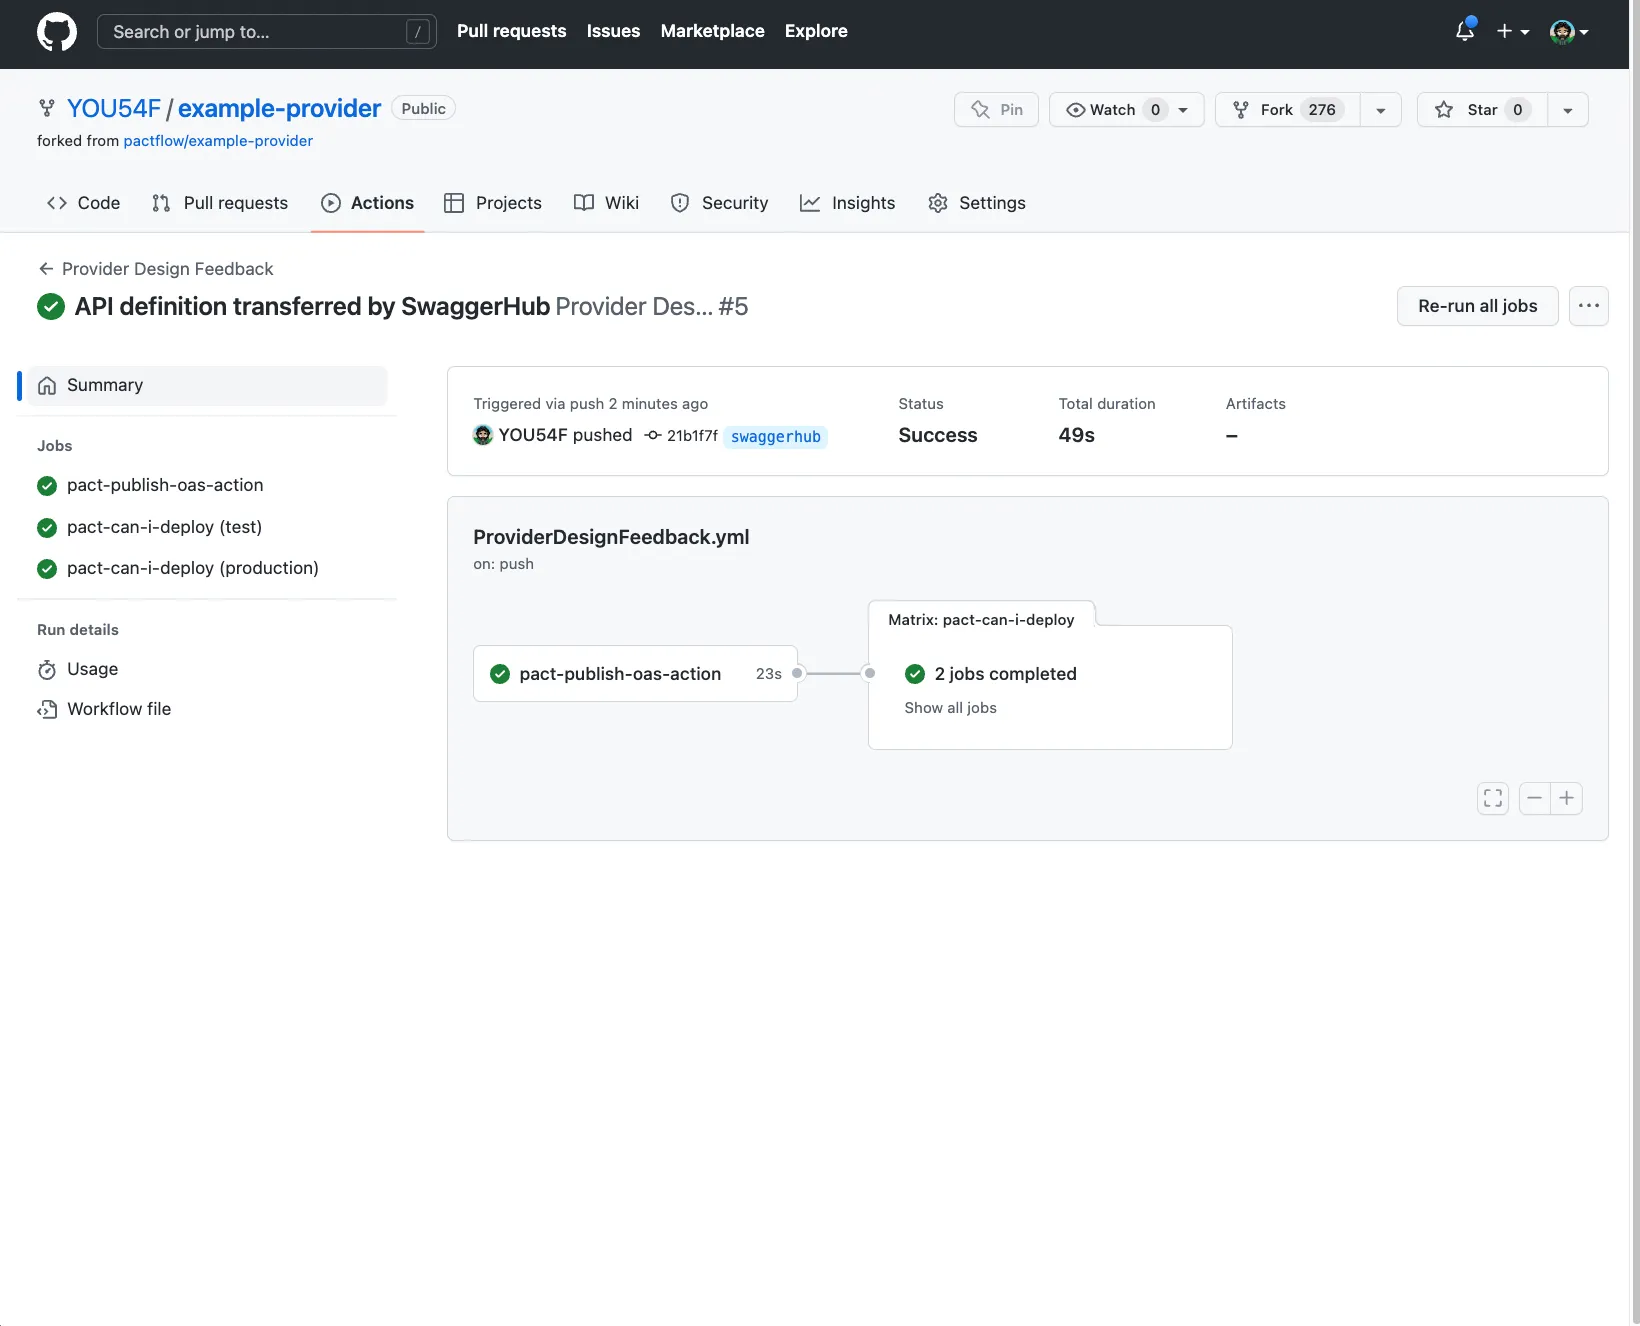
$ pact-broker can-i-deploy --pacticipant pactflow-example-consumer --version="1.0.0-21b1f7fdf6428bfb0f583e151d9893c230a1c555-design" --to-environment production Computer says yes \o/ There are no missing dependencies
Later on, when consumers start to use our API, we will be prevented from releasing a change that results in a backwards incompatible change for our consumers. Consumers will also use this command to ensure they are compatible with the Provider API in the target environment (in this case, production).
If this was our actual implementation, this is where we would deploy our provider to production. Once we have deployed, we would Contract Testing know that the new version of the Provider has been promoted to that environment, allowing Contract Testing to communicate to any future consumers of the provider, that the OAS associated with this version of the provider is supported in production. If a consumer adds functionality that uses a subset of the OAS, they will be free to deploy safely!
By using the can-i-deploy against our design, we will be able check that our future design candidate changes will be compatible with any of the future consumers that are deployed or released. Giving us visibility and feedback, at the earliest opportunity.
Expected state by the end of this step
- The provider build is passing and can-i-deploy states it is free to be deployed to production ✅.
Consumer side
Setup and trigger the example consumer project
-
Fork the [example-consumer] [https://github.com/pactflow/example-consumer\] project in to your own Github account (click the ‘Fork’ button in the top right).
-
Open your forked
example-consumerproject (https://github.com/<your-username>/example-consumer) -
Create a Github Secret to store your Contract Testing API token in.
-
In Contract Testing:
-
Log in to your Contract Testing account (
https://<your-subdomain>.pactflow.io), and go to Settings > API Tokens - See here for the docs. -
Click the Copy button for the read/write CI token (make sure it’s the read write one, not the read only one).
-
-
In Github:
-
In your forked
example-consumerproject (https://github.com/<your-username>/example-consumer) -
Click on the
Settingstab. -
Select
Secretsfrom the side menu. -
Click
New repository secret(the button is to the right of the “Actions secrets” heading) -
Set the name of the secret to
PACTFLOW_TOKEN_FOR_CI_CD_WORKSHOP -
Paste in the Contract Testing API token value you copied in the previous step.
-
Click on the
Actionstab. -
Click the button with the text “I understand my workflows, go ahead and enable them”.
-
Open
.github/workflows/Build.yml -
In the upper right corner of the file view, click 🖊️ to open the file editor.
-
Update the value of
PACT_BROKER_BASE_URLo the base URL of your own Contract Testing account. You can easily get this by clicking the COPY PACTFLOW BASE URL button on the API Tokens page in Contract Testing. -
Press the green
Commit changesbutton.
-
-
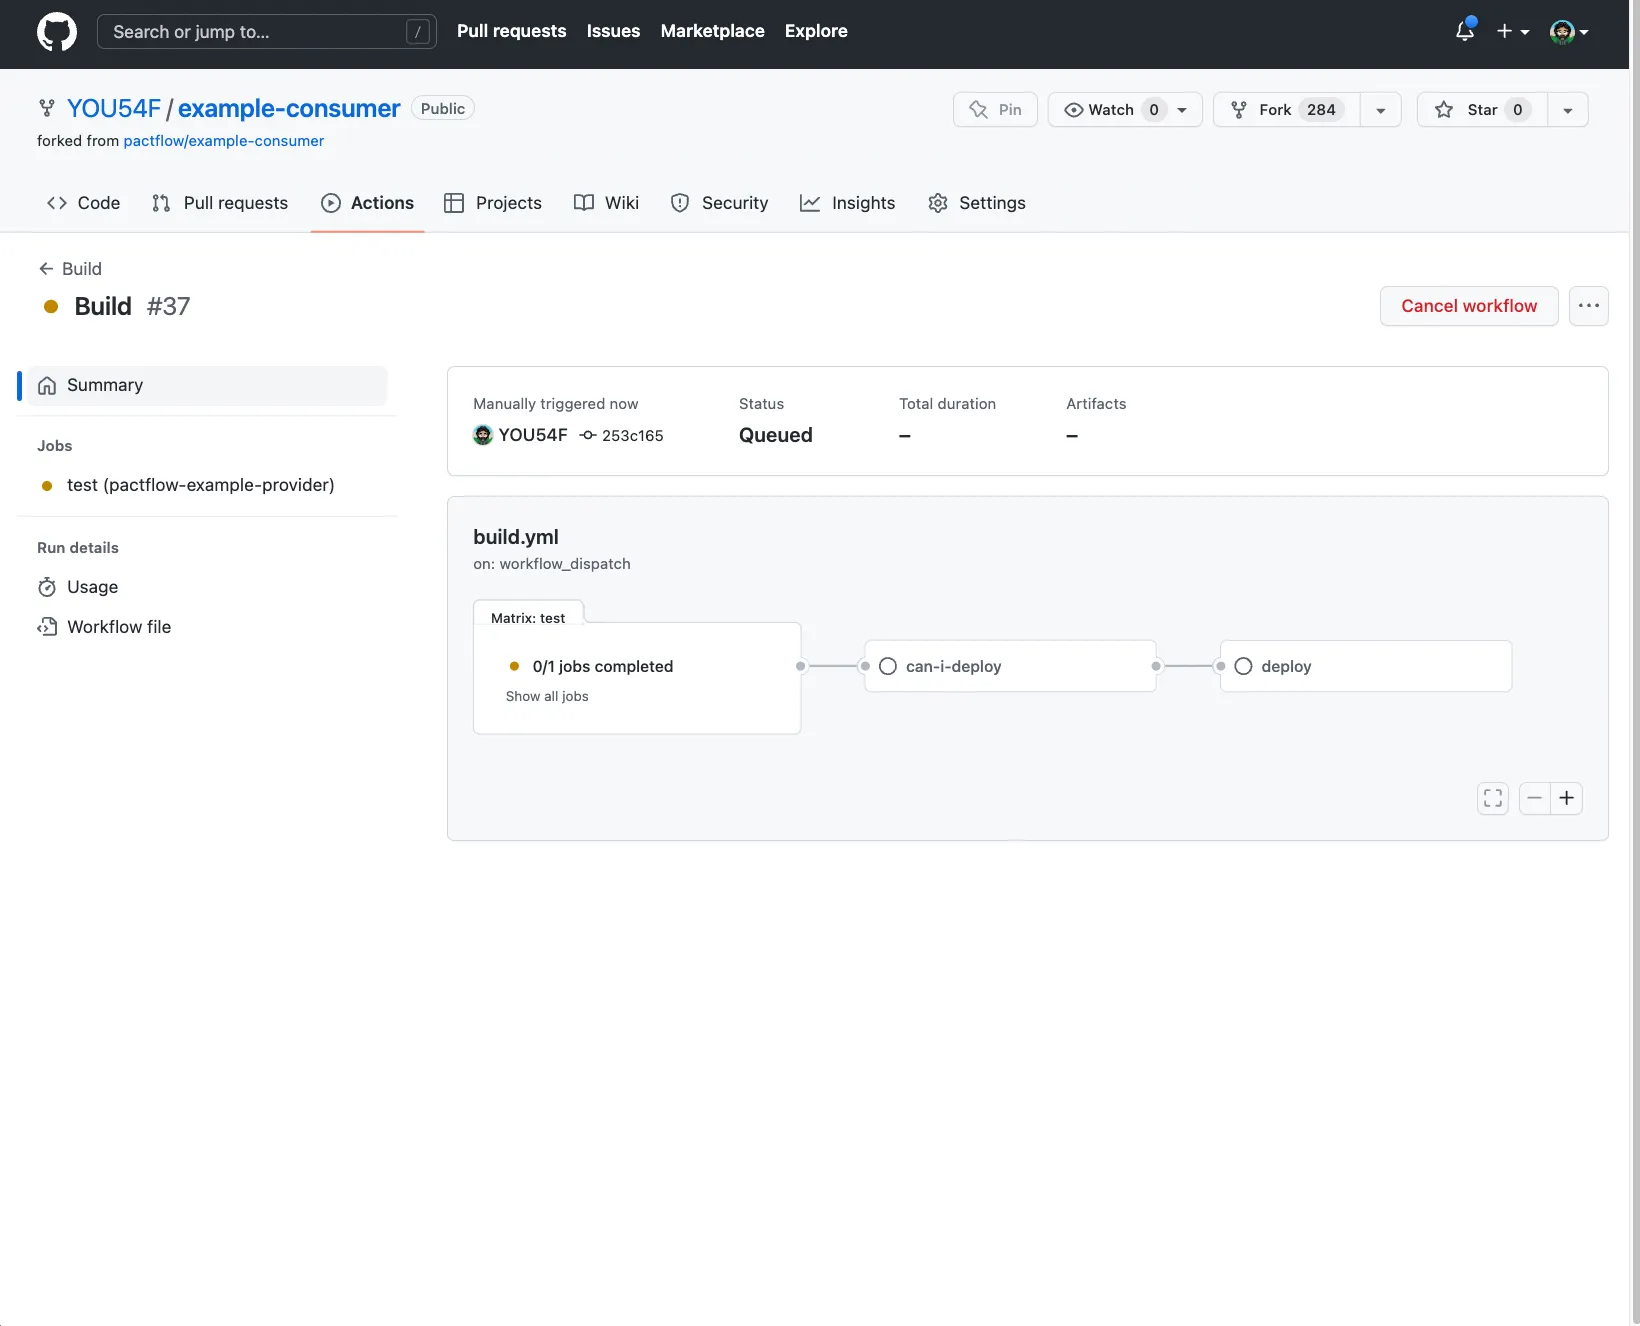
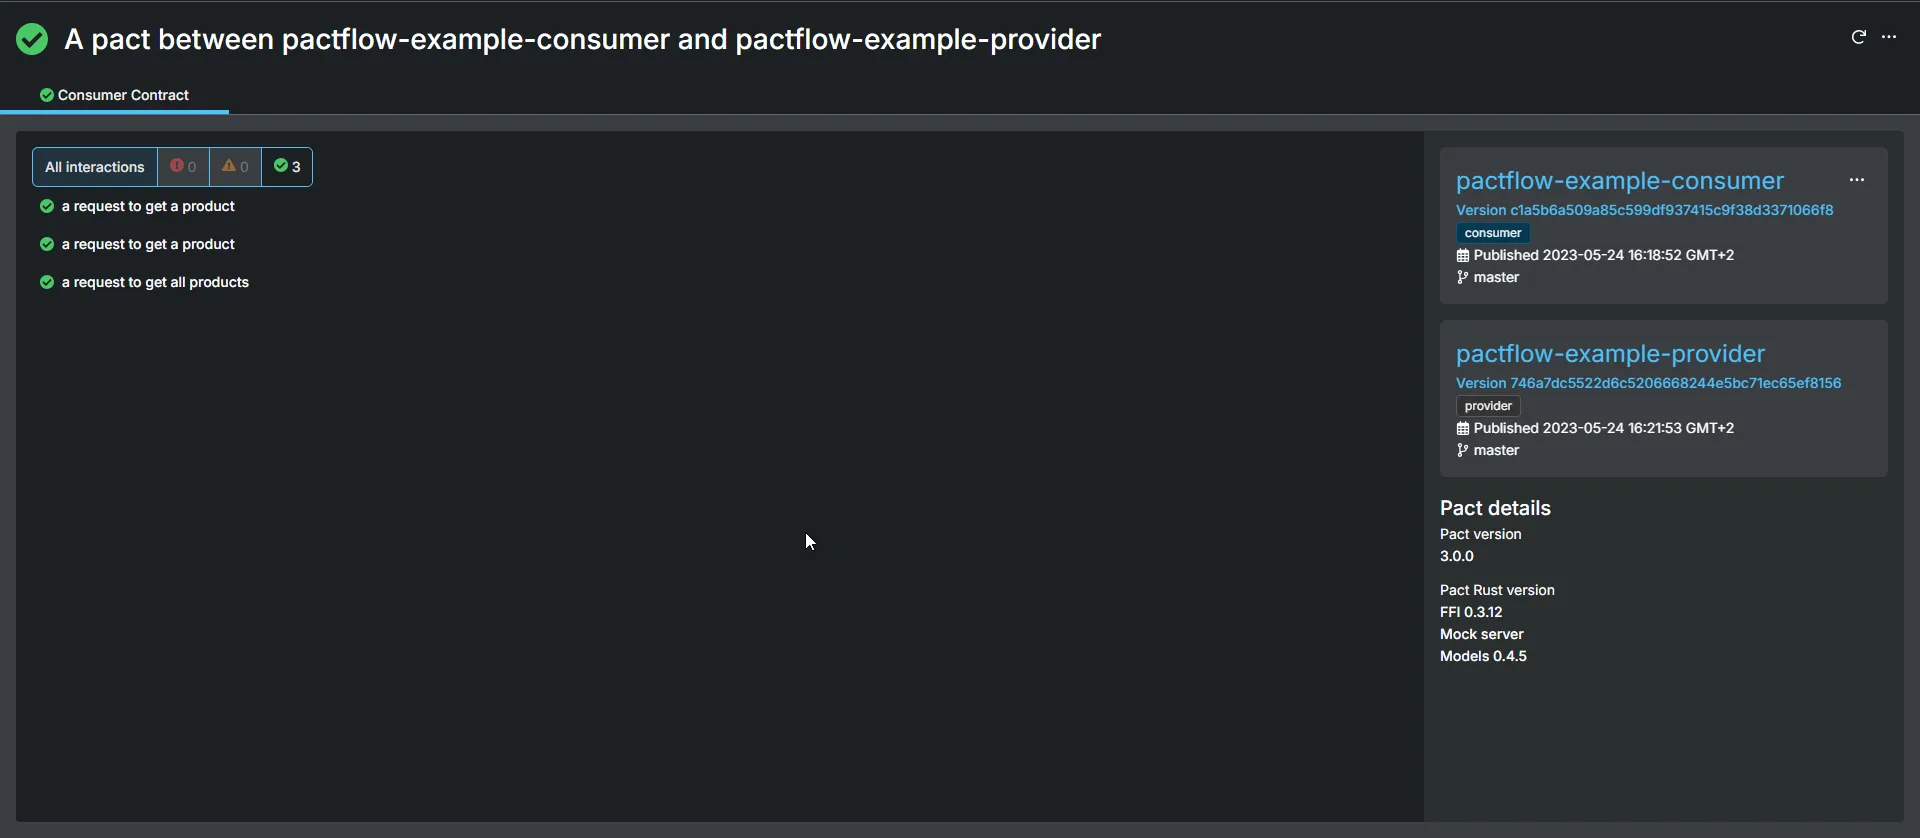
Build triggered
The consumer build will trigger
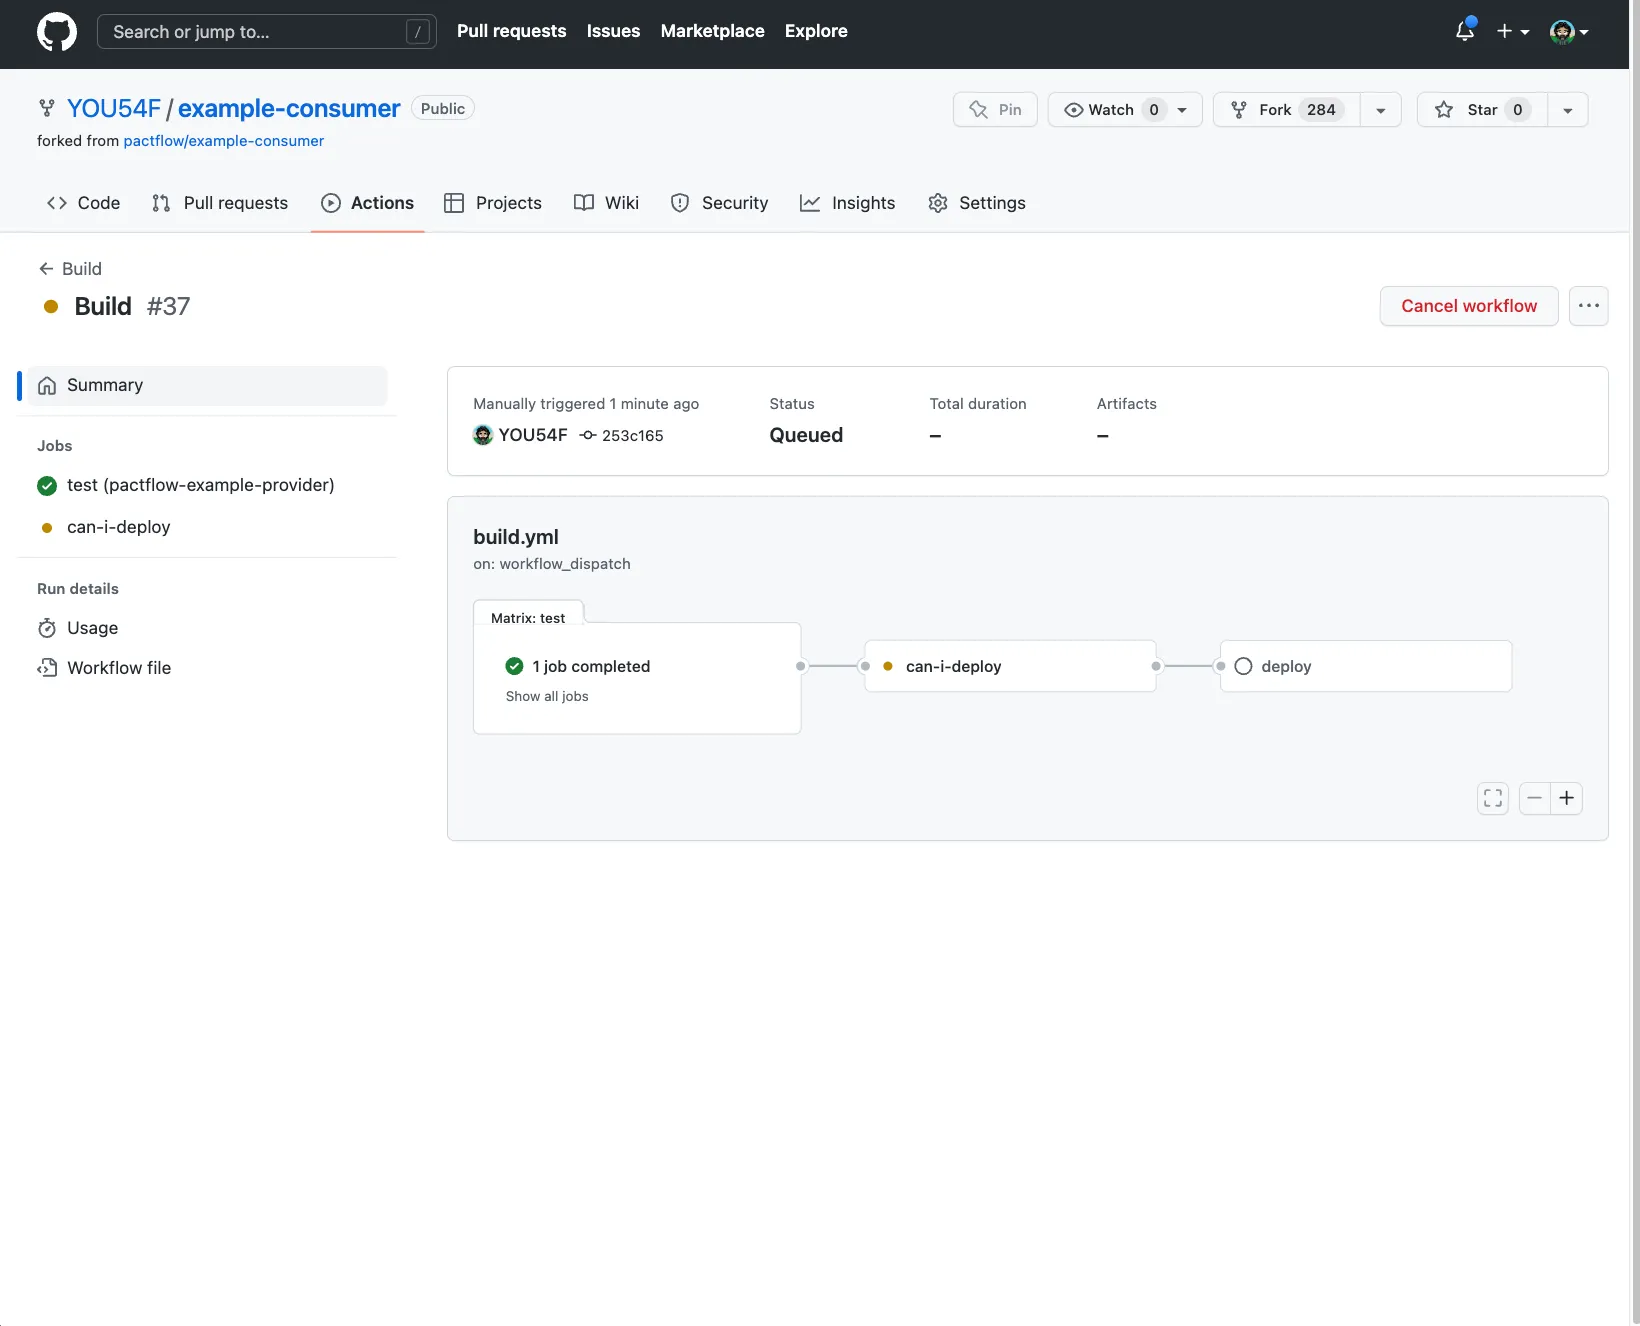
Pact Contract Tests passed
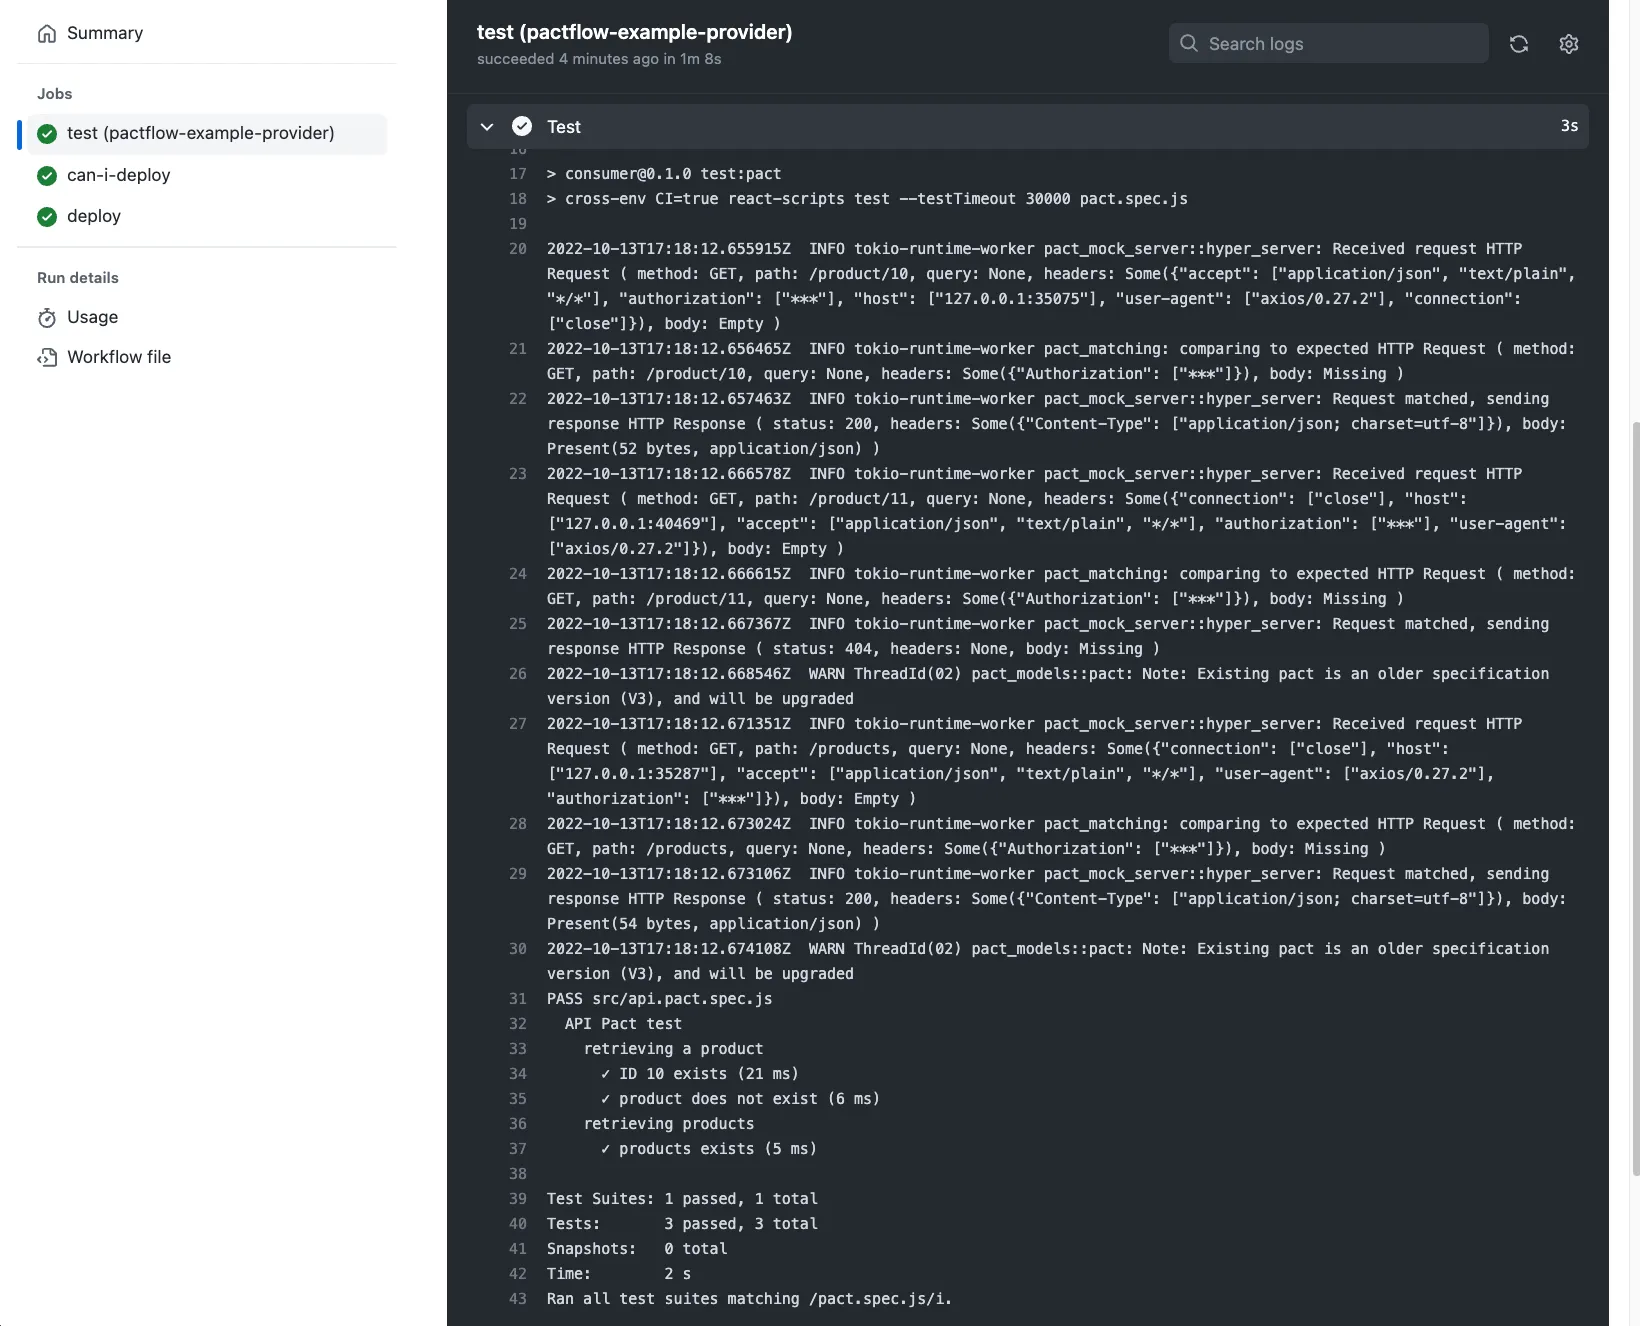
The consumers unit tests will pass
You can click into the build job to see the output
Pact Contract files uploaded
The pact files are uploaded to the Contract Testing Broker
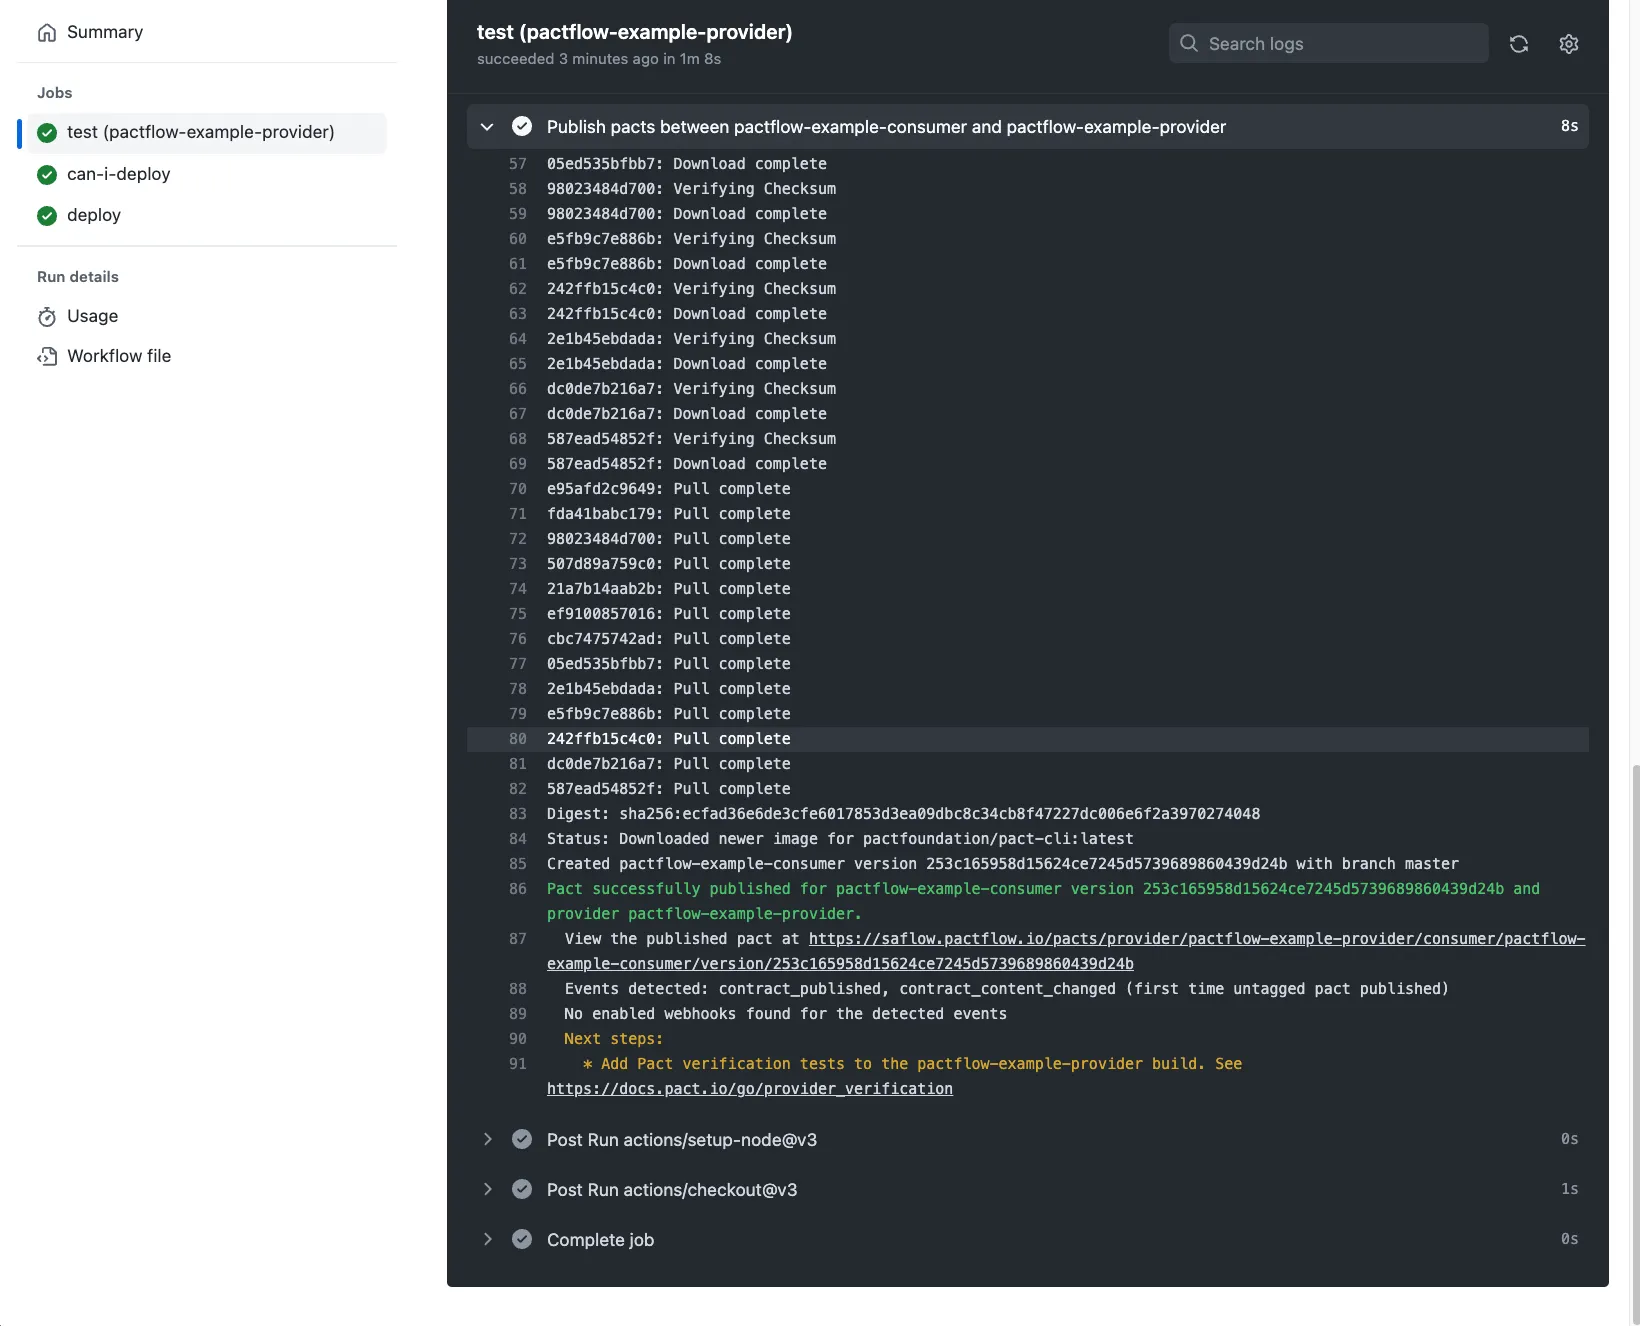
Pact successfully published for pactflow-example-consumer version 253c165958d15624ce7245d5739689860439d24b and provider pactflow-example-provider.
  View the published pact at https://saflow.pactflow.io/pacts/provider/pactflow-example-provider/consumer/pactflow-example-consumer/version/253c165958d15624ce7245d5739689860439d24b
  Events detected: contract_published, contract_content_changed (first time untagged pact published)
  No enabled webhooks found for the detected events
  Next steps:
    * Add Pact verification tests to the pactflow-example-provider build. See https://docs.pact.io/go/provider_verification
Consumer can-i-deploy check
It will then call the can-i-deploy command before it tries to deploy, it passes. This is because the consumers pact is a valid subset of the OpenAPI specification.
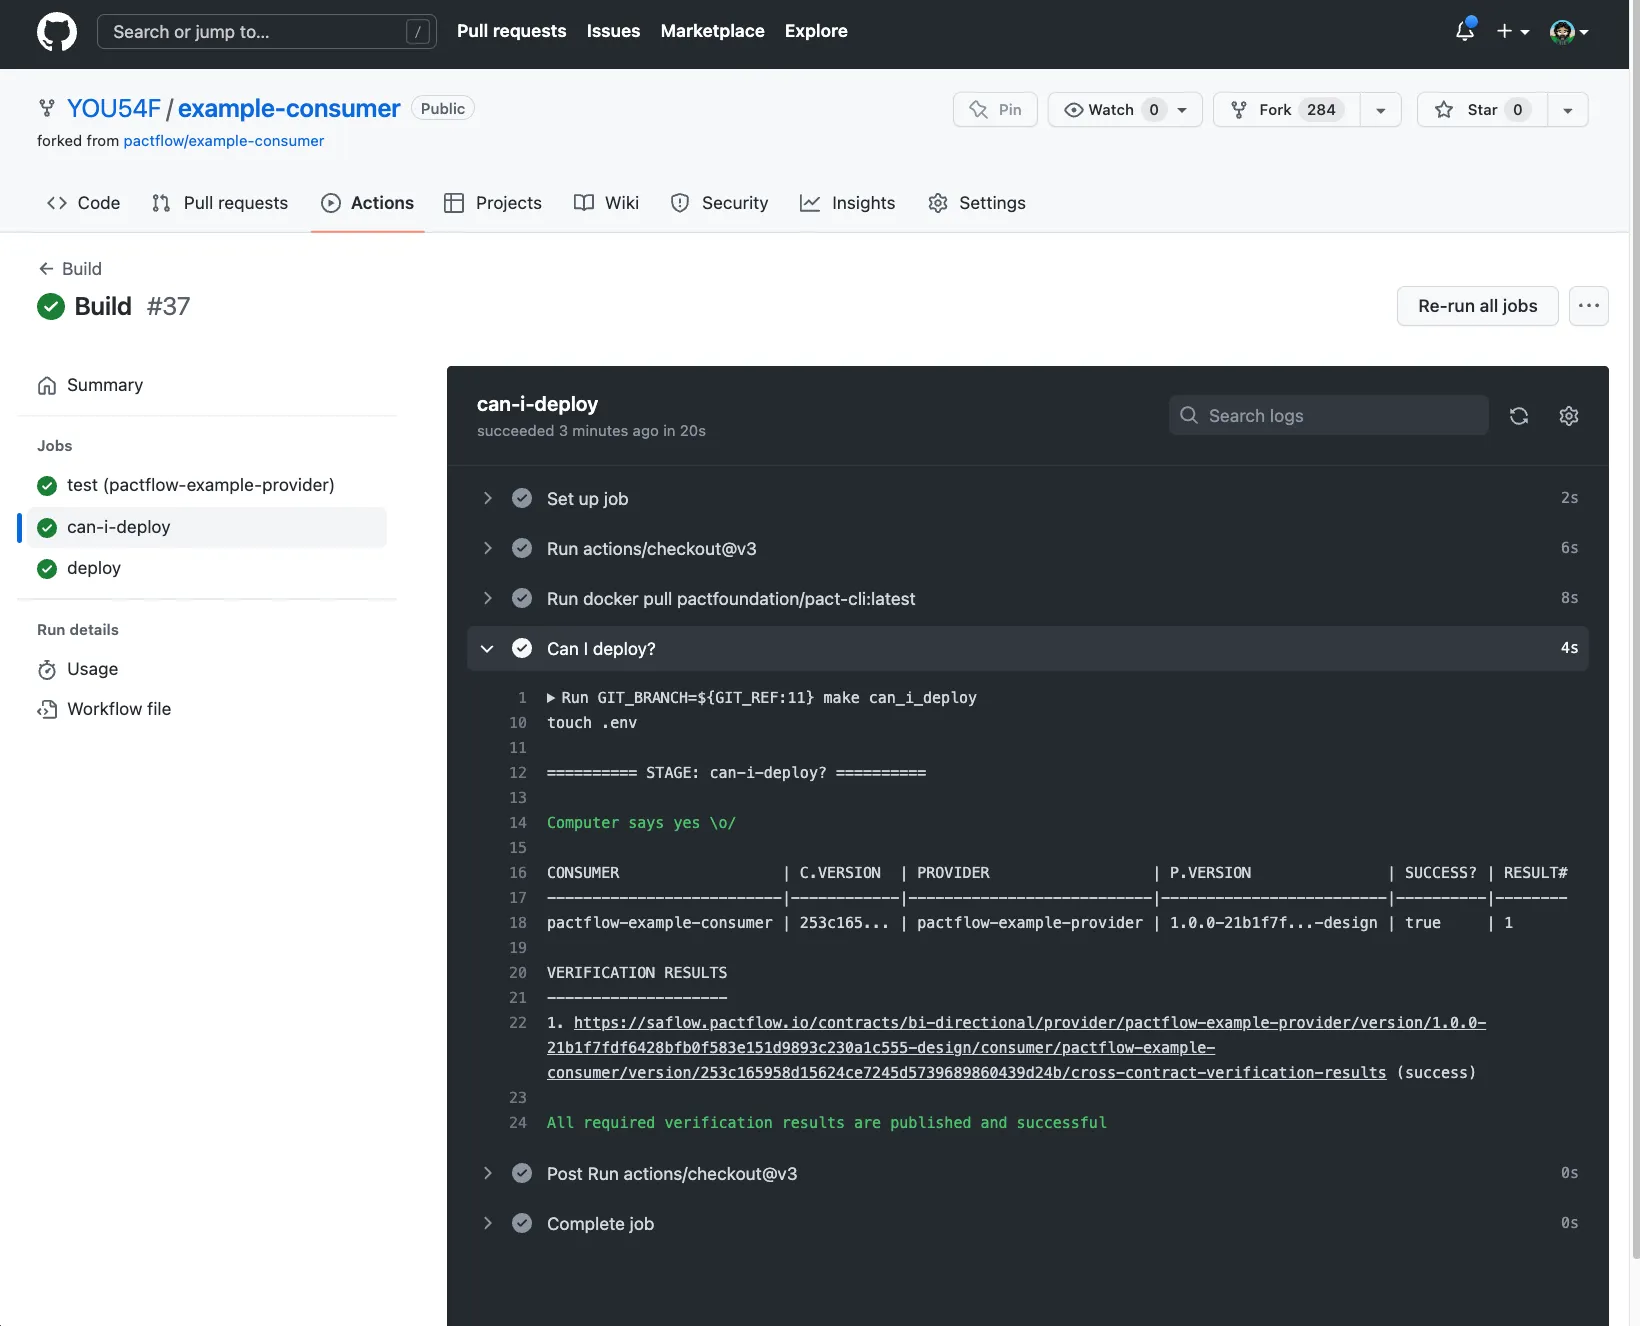
========== STAGE: can-i-deploy? ==========

Computer says yes \o/

CONSUMER                  | C.VERSION  | PROVIDER                  | P.VERSION               | SUCCESS? | RESULT#
--------------------------|------------|---------------------------|-------------------------|----------|--------
pactflow-example-consumer | 253c165... | pactflow-example-provider | 1.0.0-21b1f7f...-design | true     | 1

VERIFICATION RESULTS
--------------------
1. https://saflow.pactflow.io/contracts/bi-directional/provider/pactflow-example-provider/version/1.0.0-21b1f7fdf6428bfb0f583e151d9893c230a1c555-design/consumer/pactflow-example-consumer/version/253c165958d15624ce7245d5739689860439d24b/cross-contract-verification-results (success)

All required verification results are published and successful
Consumer record deployment
can-i-deploy is successful, so we can deploy our consumer, once complete, we record the consumers application version as deployed to the production environment.
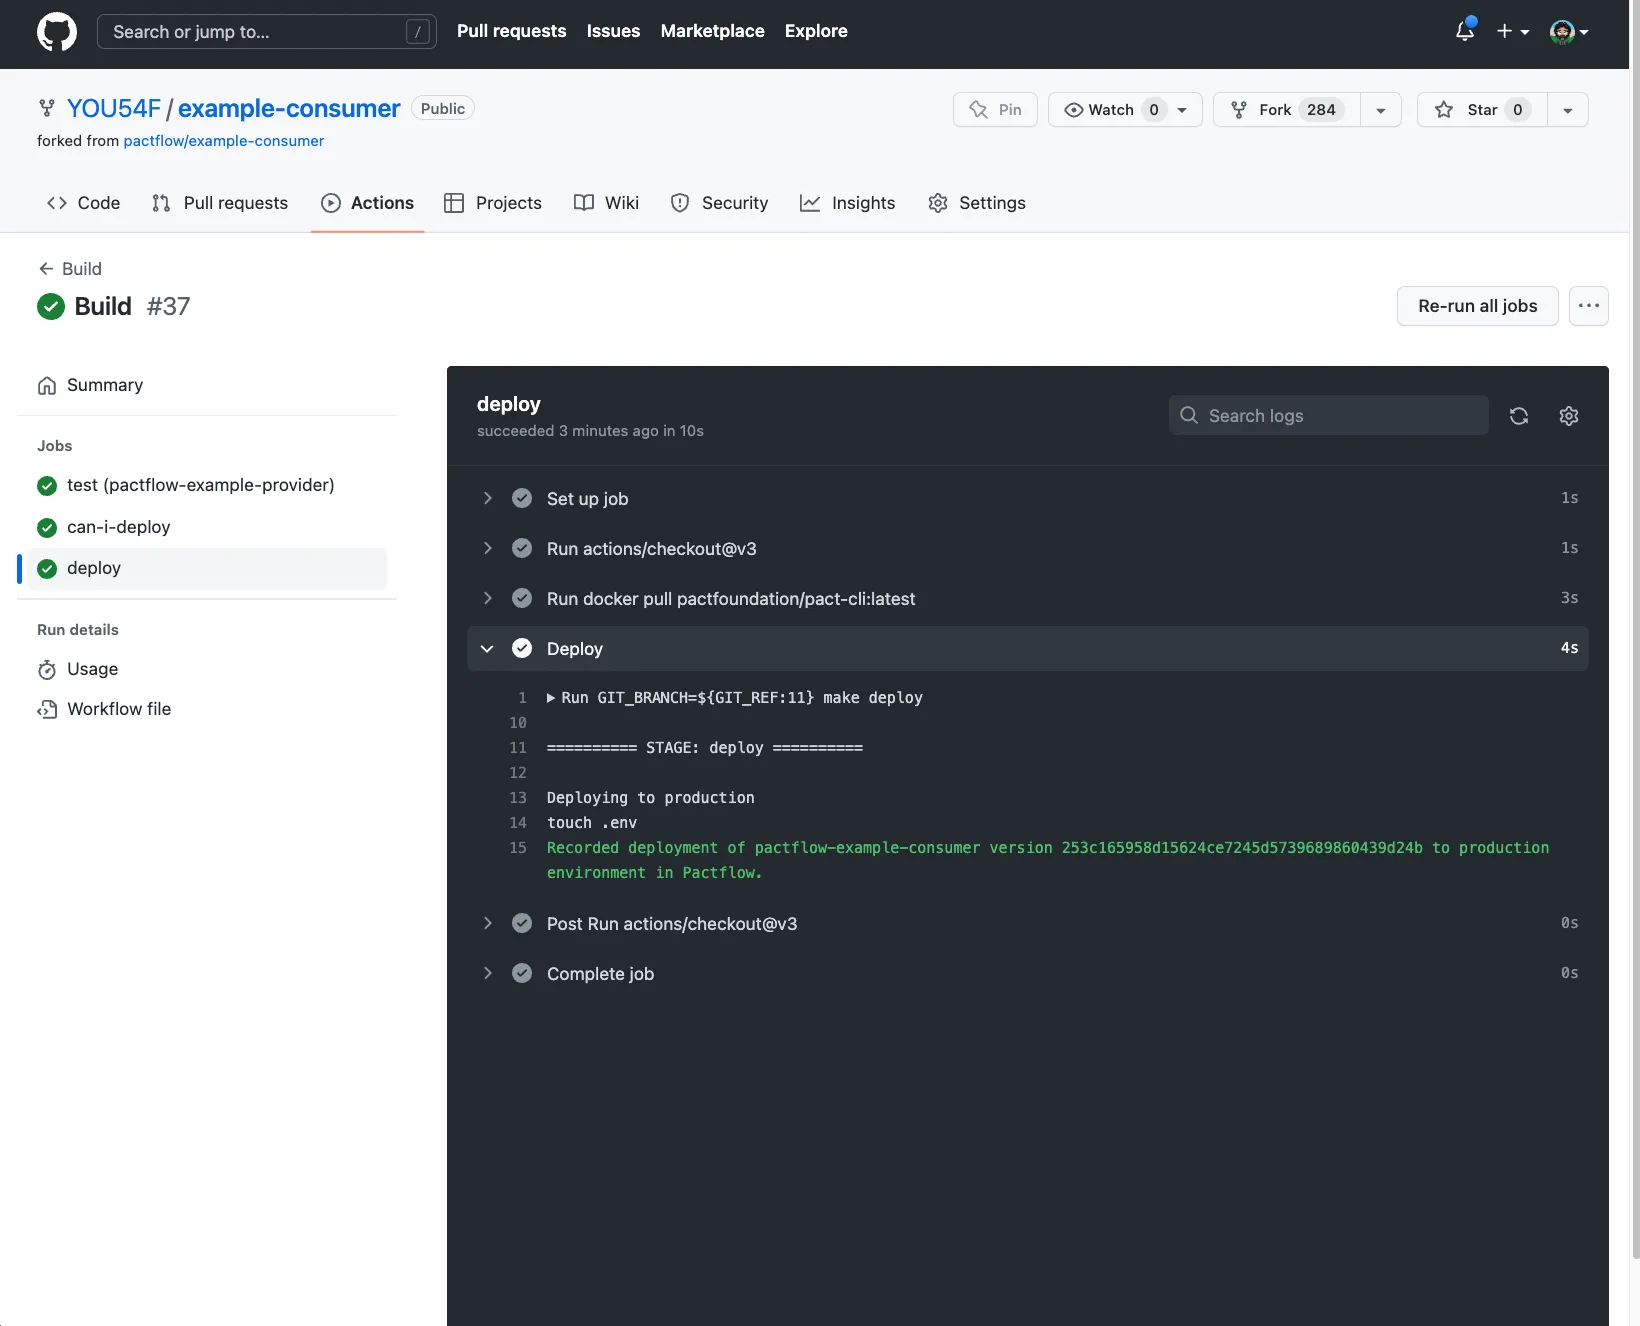
========== STAGE: deploy ==========

Deploying to production
touch .env
Recorded deployment of pactflow-example-consumer version 253c165958d15624ce7245d5739689860439d24b to production environment in Swagger Contract Testing.
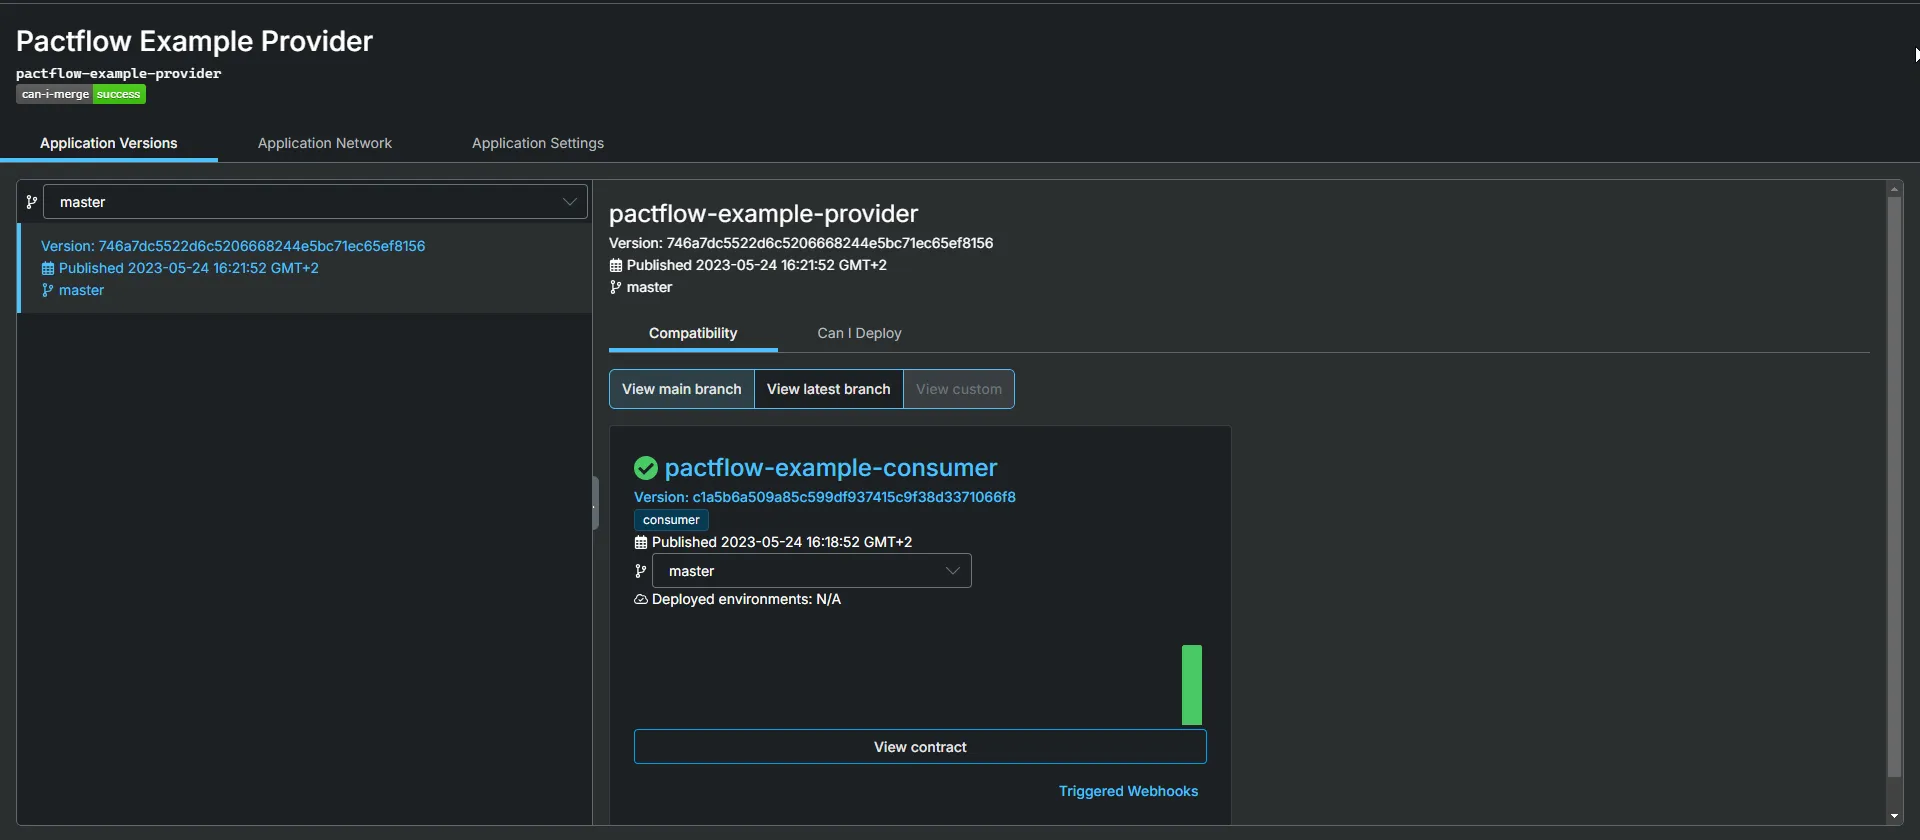
Expected state by the end of this step
-
Both consumer and provider builds passing ✅
See a breaking change in action
Let’s go a bit deeper and introduce a breaking change into the system. Breaking changes come in two main ways:
-
A consumer can add a new expectation (e.g., a new field/endpoint) on a provider that doesn’t exist.
-
A provider might make a change (e.g., remove or rename a field, or change an endpoint) that breaks an existing consumer.
Contract Testing will detect such situations using the can-i-deploy ool. When it runs, it performs a contract comparison that checks if the consumer contract is a valid subset of the provider contract in the target environment.
Remove a field the consumer requires
As we are concentrating on our design specification, we will propose 2 changes in Swagger Studio. One will be an unsafe operation that renames a field the consumer requires.
Let’s see it in action.
-
In Swagger Studio:
-
Open your API definition we created earlier
-
We are going to update the
namefield in theProductschema to thefirstName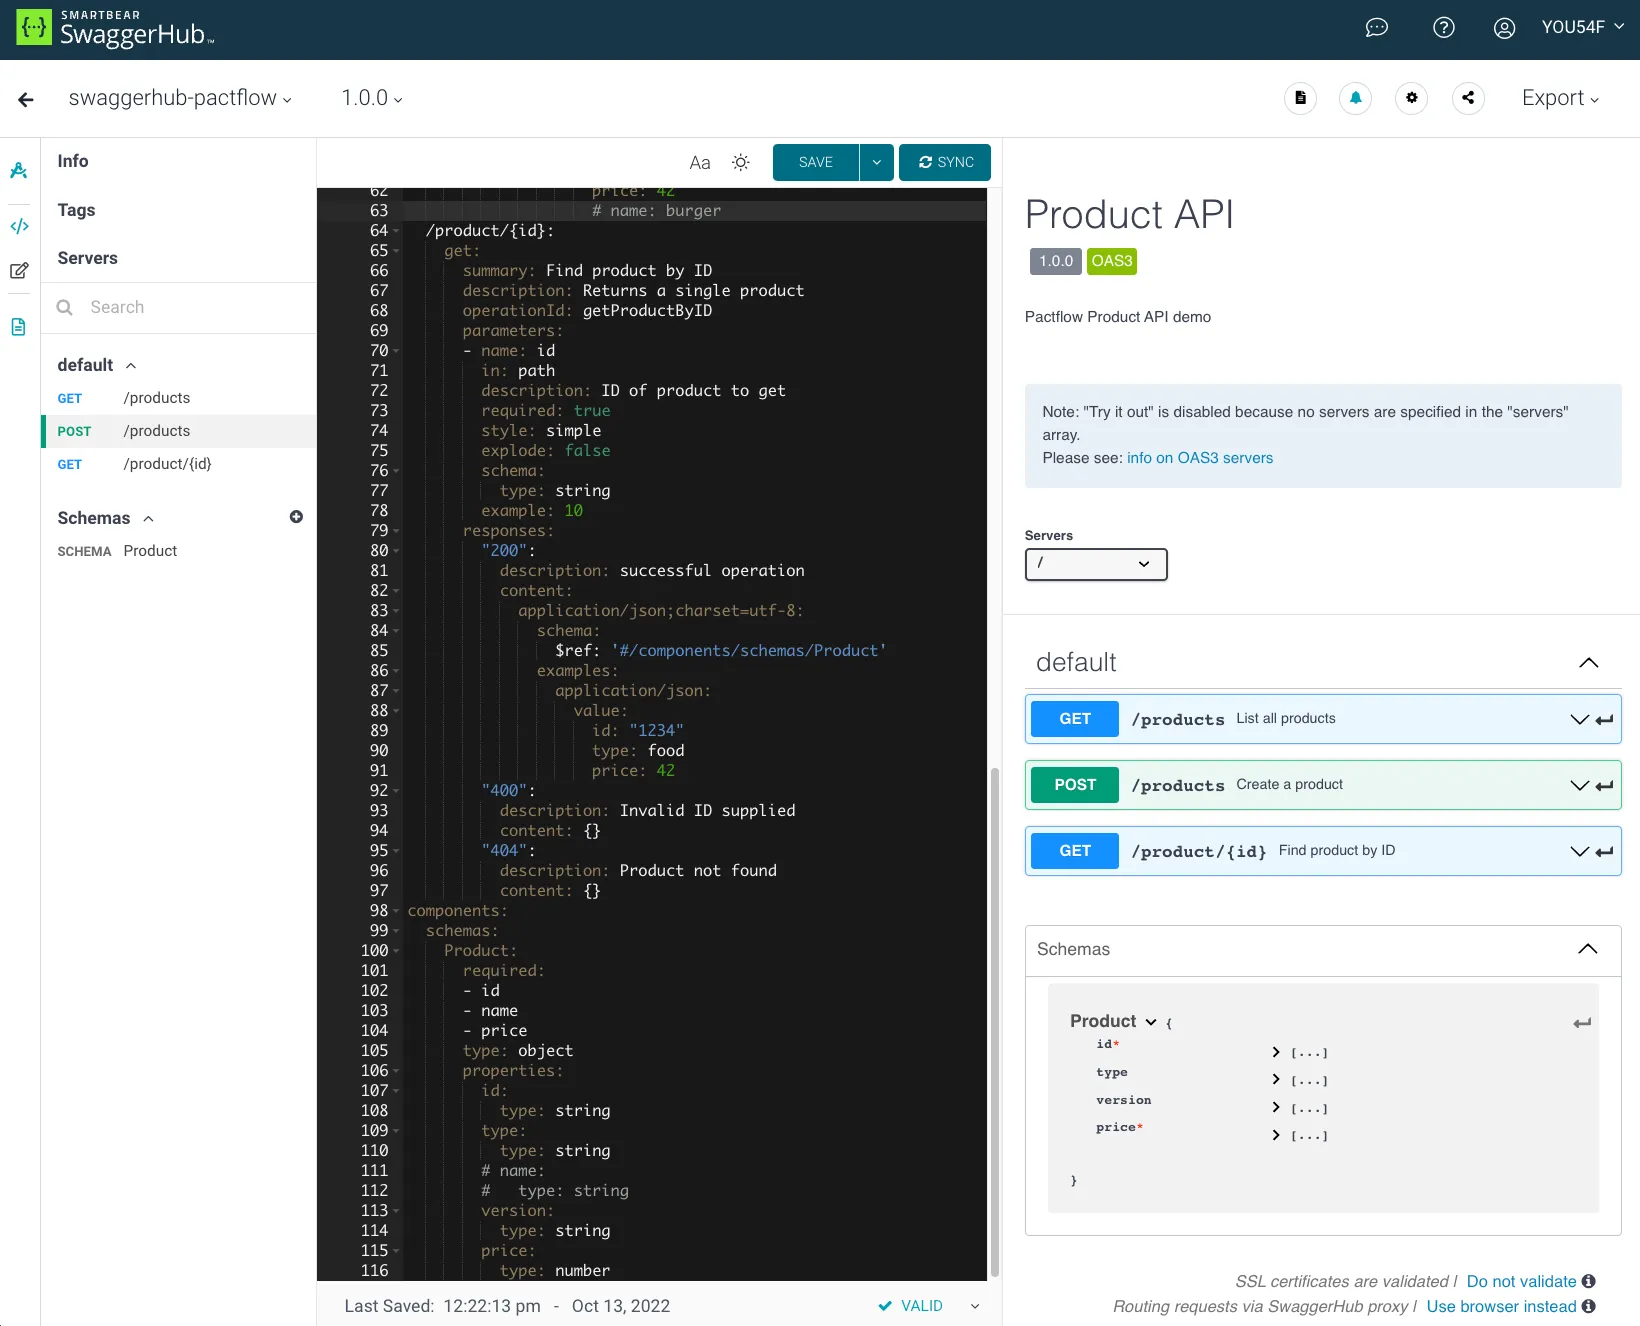
-
Click
Save -
Click
Sync -
Update the commit message
feat: removing name field -
Press
Push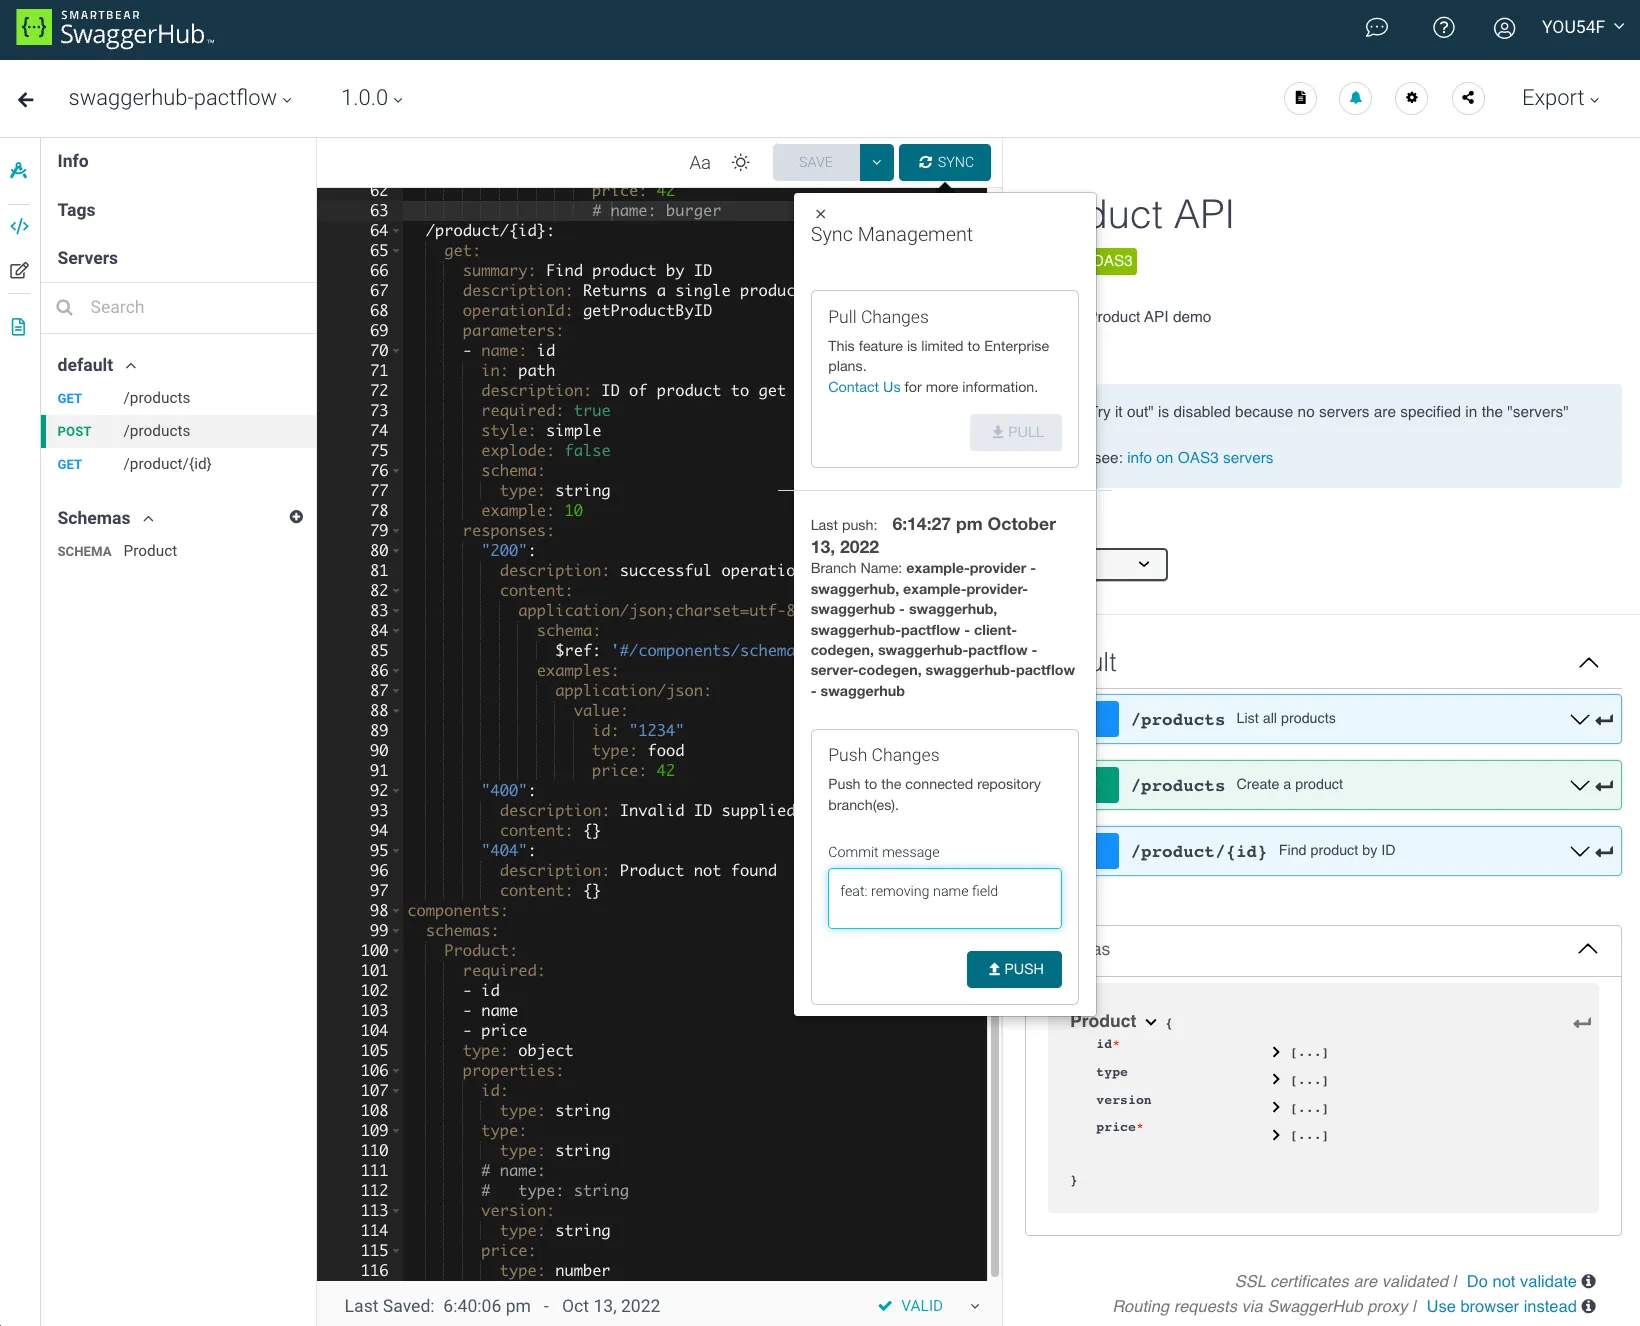
-
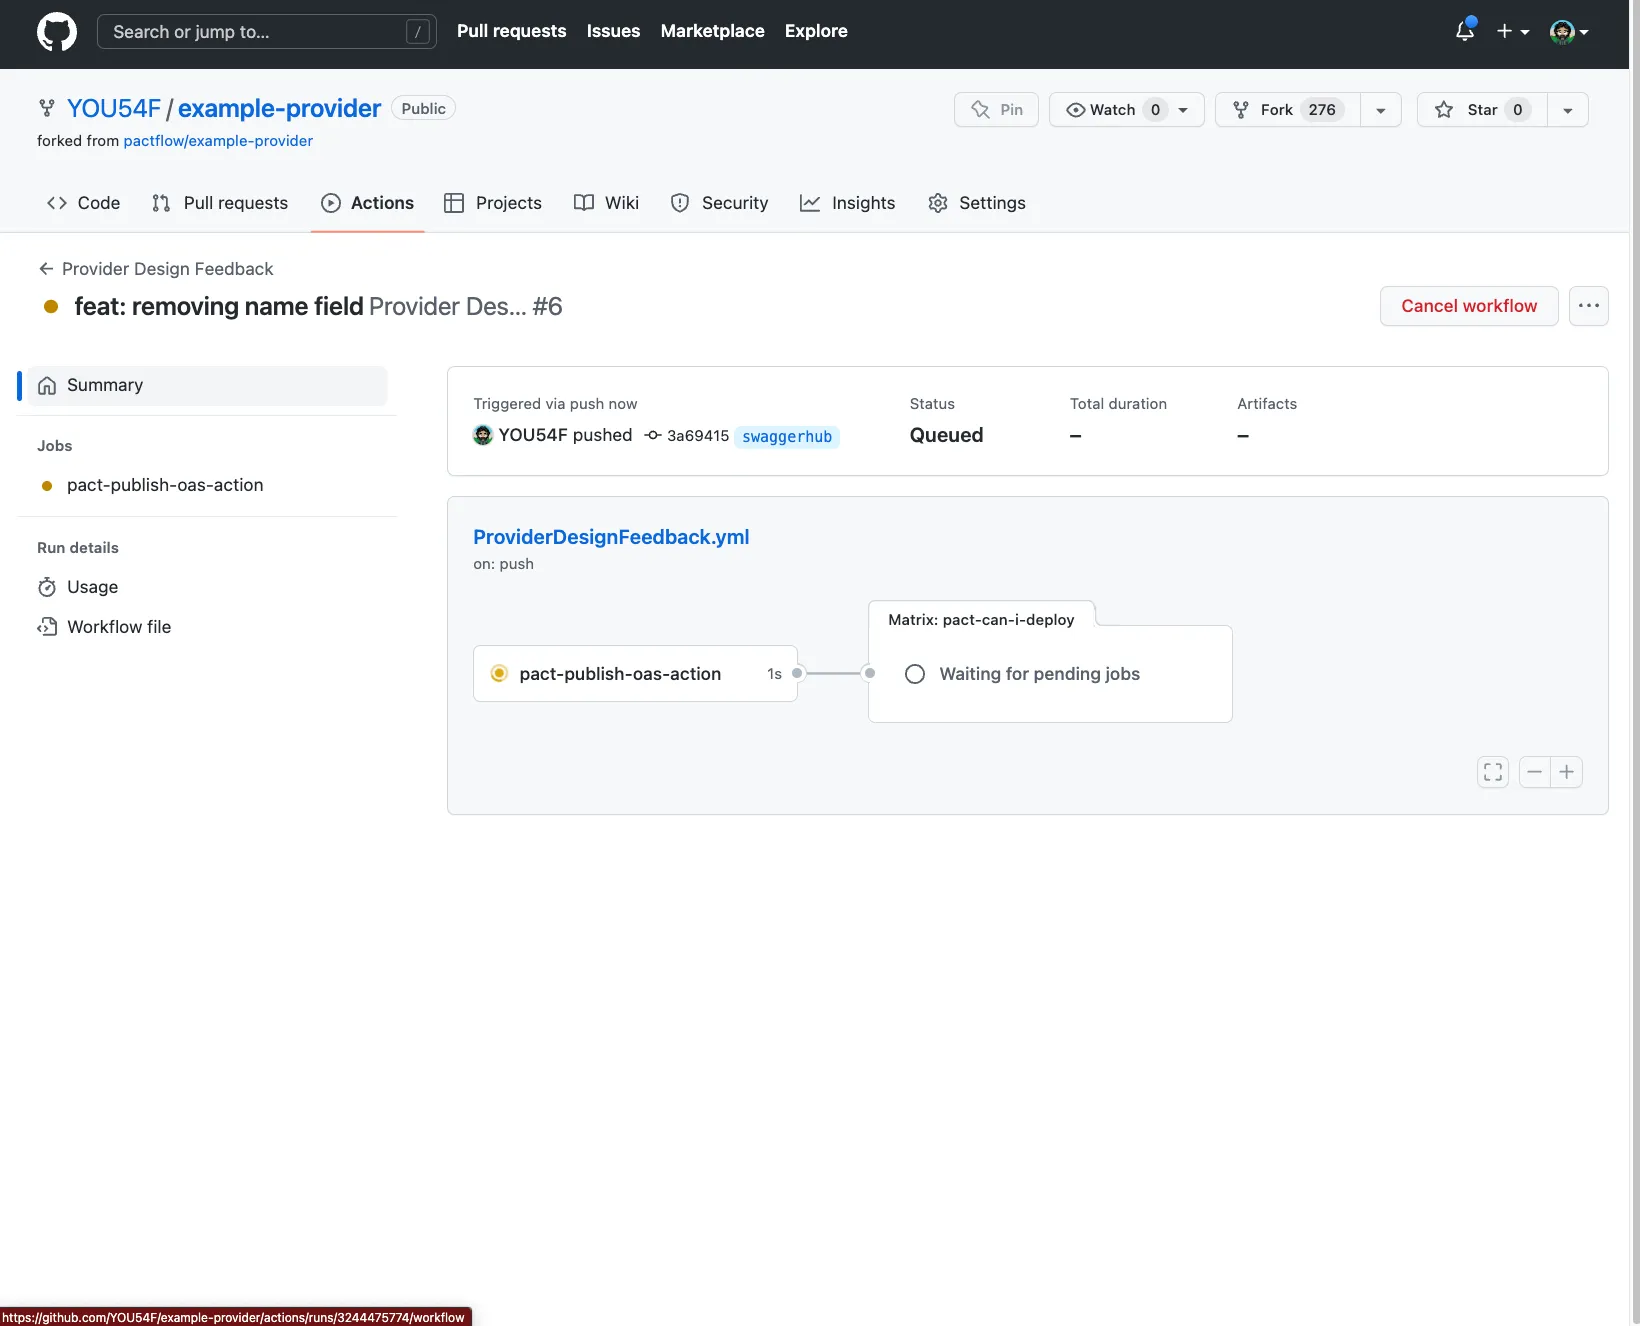
Run pactflow/actions/publish-provider-contract@v1.0.1
Successfully published provider contract for pactflow-example-provider version 1.0.0-3a694151f8837a8f38ed80124e9d81530d614dde-design to Swagger Contract Testing
Breaking change prevention with Swagger Contract Testing
can-i-deploy fails
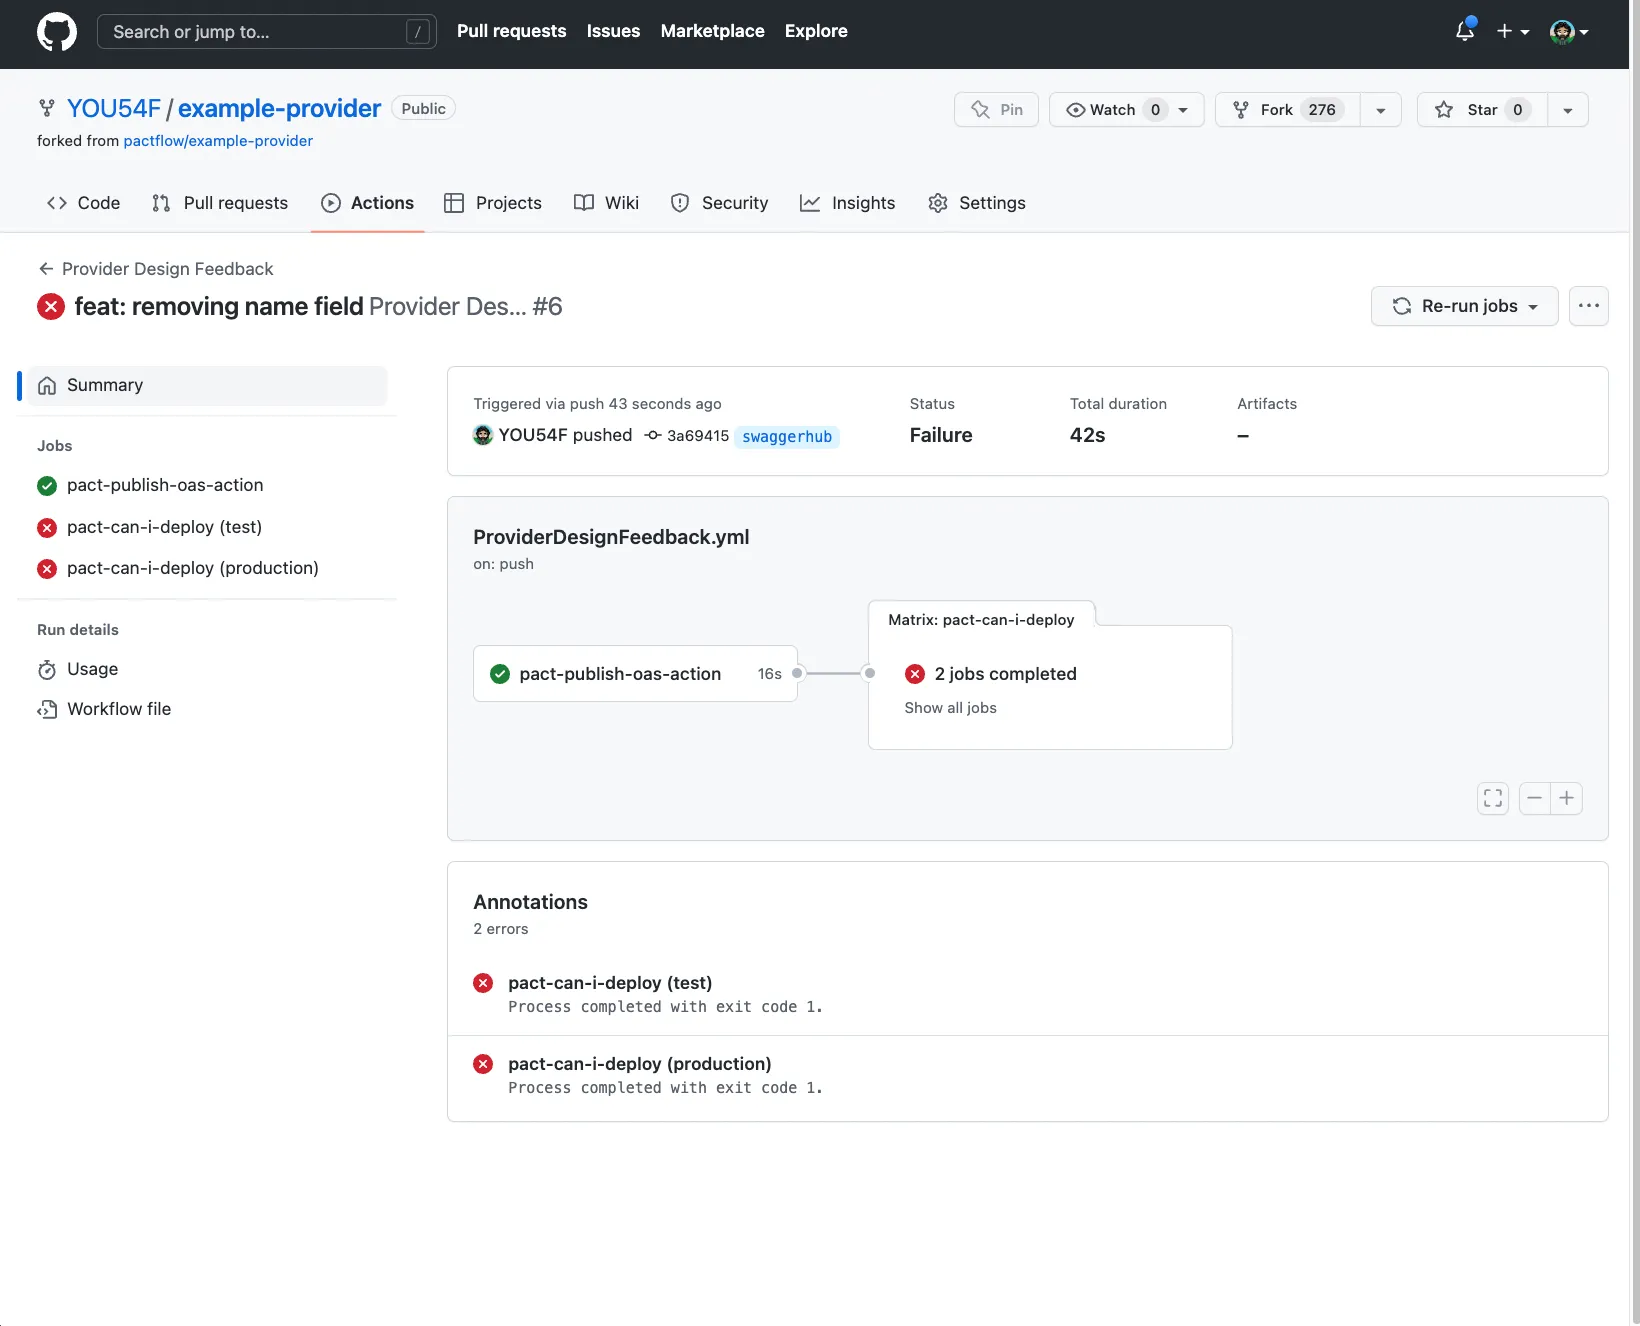
pact-broker can-i-deploy --pacticipant pactflow-example-provider --version="1.0.0-3a694151f8837a8f38ed80124e9d81530d614dde-design" --to-environment production

Computer says no ¯_(ツ)_/¯

CONSUMER                  | C.VERSION  | PROVIDER                  | P.VERSION               | SUCCESS? | RESULT#
--------------------------|------------|---------------------------|-------------------------|----------|--------
pactflow-example-consumer | 253c165... | pactflow-example-provider | 1.0.0-3a69415...-design | false    | 1

VERIFICATION RESULTS
--------------------
1. https://saflow.pactflow.io/contracts/bi-directional/provider/pactflow-example-provider/version/1.0.0-3a694151f8837a8f38ed80124e9d81530d614dde-design/consumer/pactflow-example-consumer/version/253c165958d15624ce7245d5739689860439d24b/cross-contract-verification-results (failure)

The cross contract verification between the pact for the version of pactflow-example-consumer currently deployed or released to production (253c165958d15624ce7245d5739689860439d24b) and the oas for version 1.0.0-3a694151f8837a8f38ed80124e9d81530d614dde-design of pactflow-example-provider failed
DANGER
This build will fail, Contract Testing knows all of the consumers’ needs down to the field level.
If you head into the Contract Testing UI and drill down into the “contract comparison” tab, you’ll see the output from comparing the consumer and provider contracts. It’s alerting us to the fact that the consumer needs a field, but the provider doesn’t support it.
Read more about how to interpret failures.
Graceful change
Let’s see a non-breaking change in action, we want to rename the name field to firstName. We are going to use the expand and contract pattern, where we support our consumers using the name field, until they have changed their code to use firstName. We will do this by adding both properties into the Product schema.
-
In Swagger Studio:
-
Open your API definition we created earlier
-
We are going to add the
namefield back in theProductschema, so it should contain bothnameandfirstName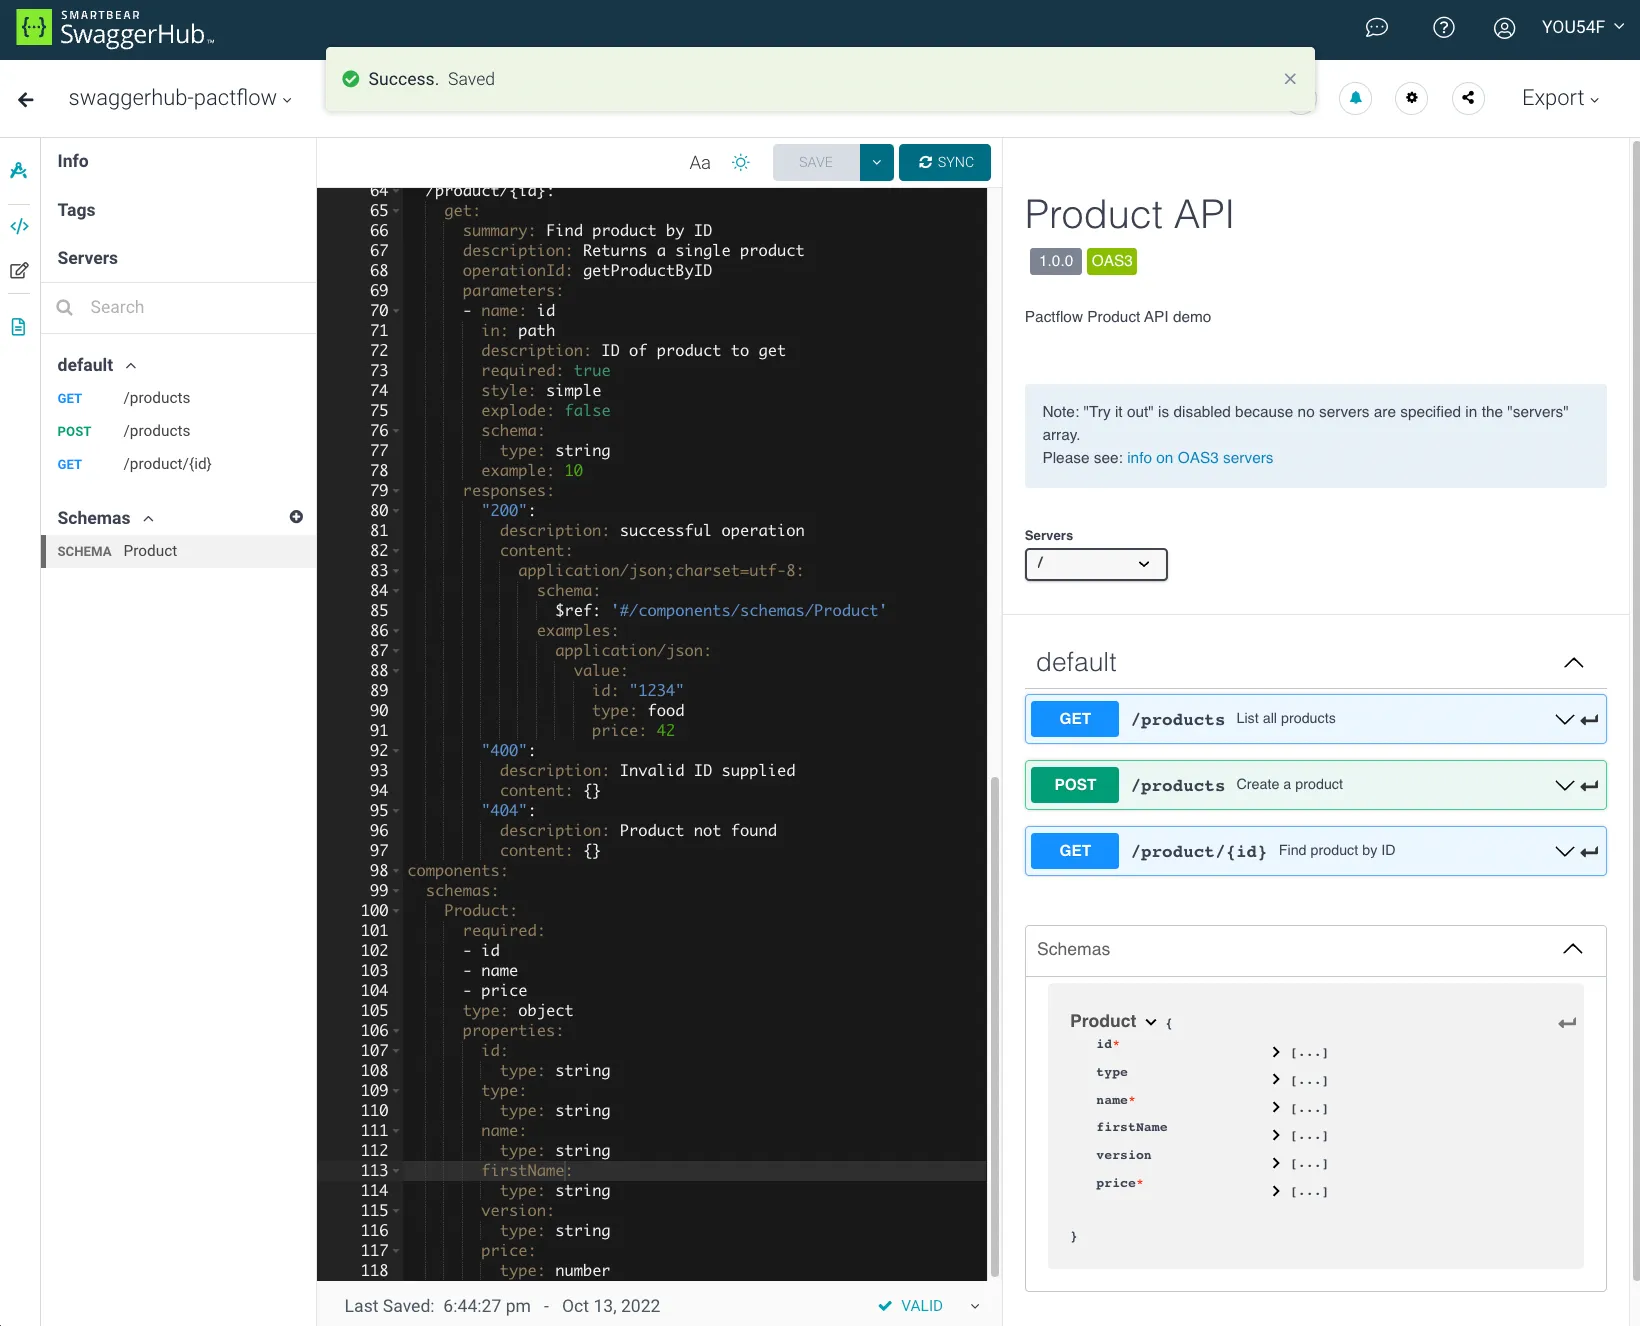
-
Click
Save -
Click
Sync -
Update the commit message
feat: adding firstName field -
Press
Push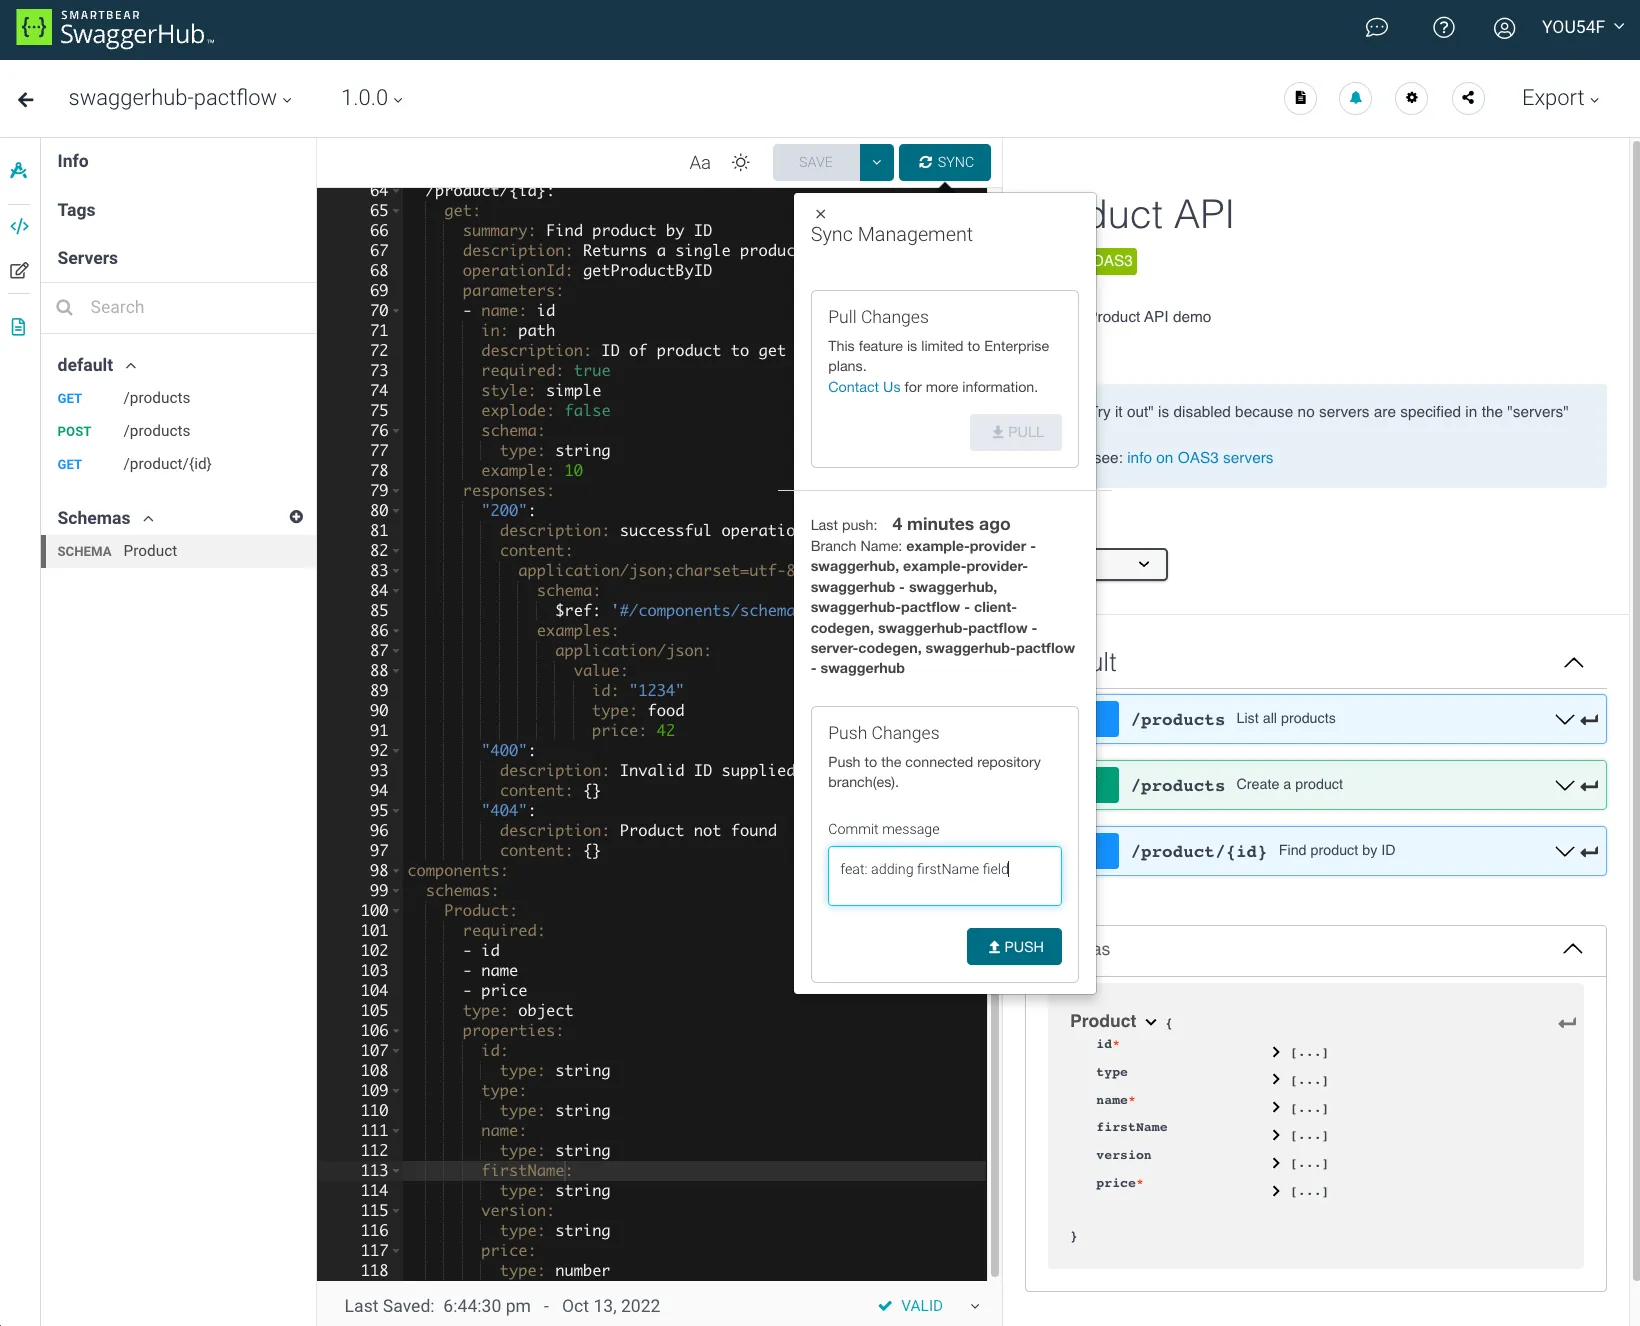
-
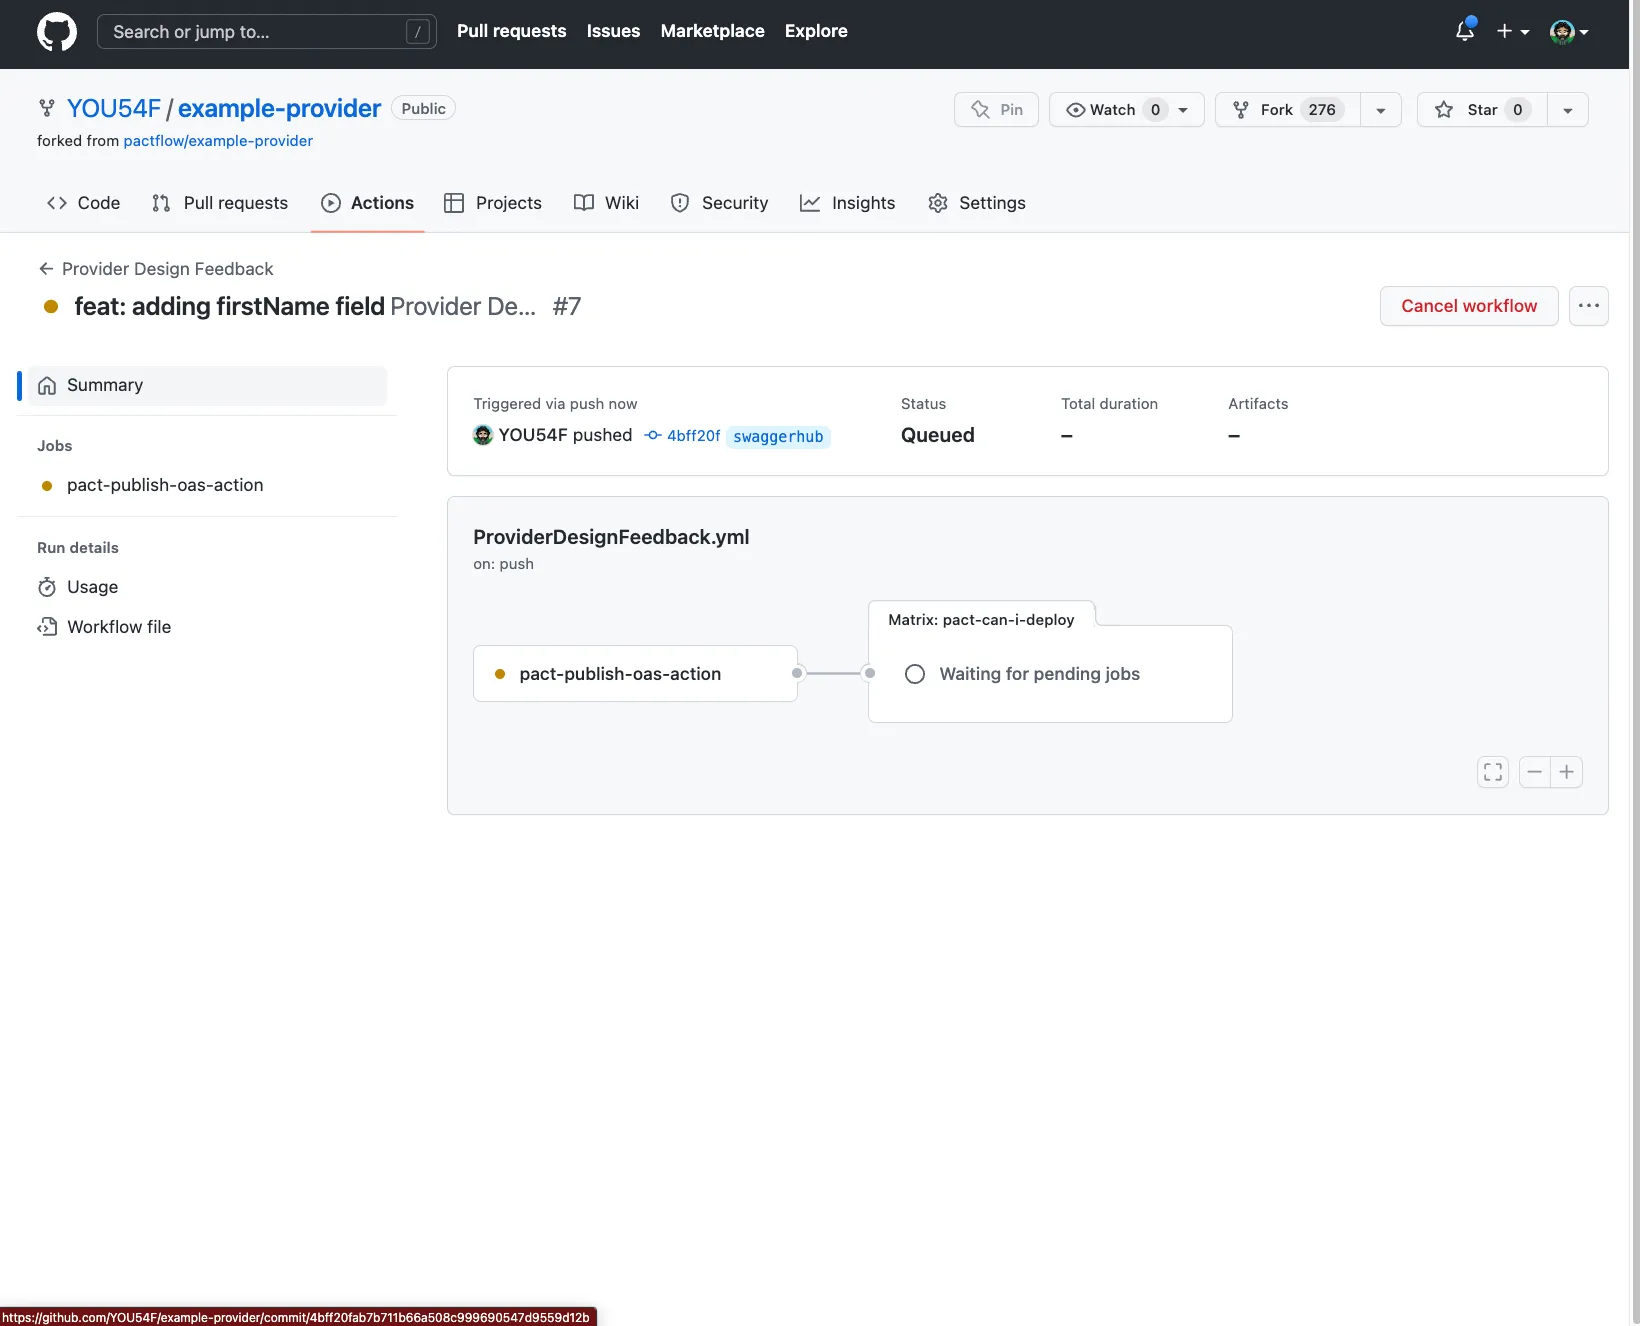
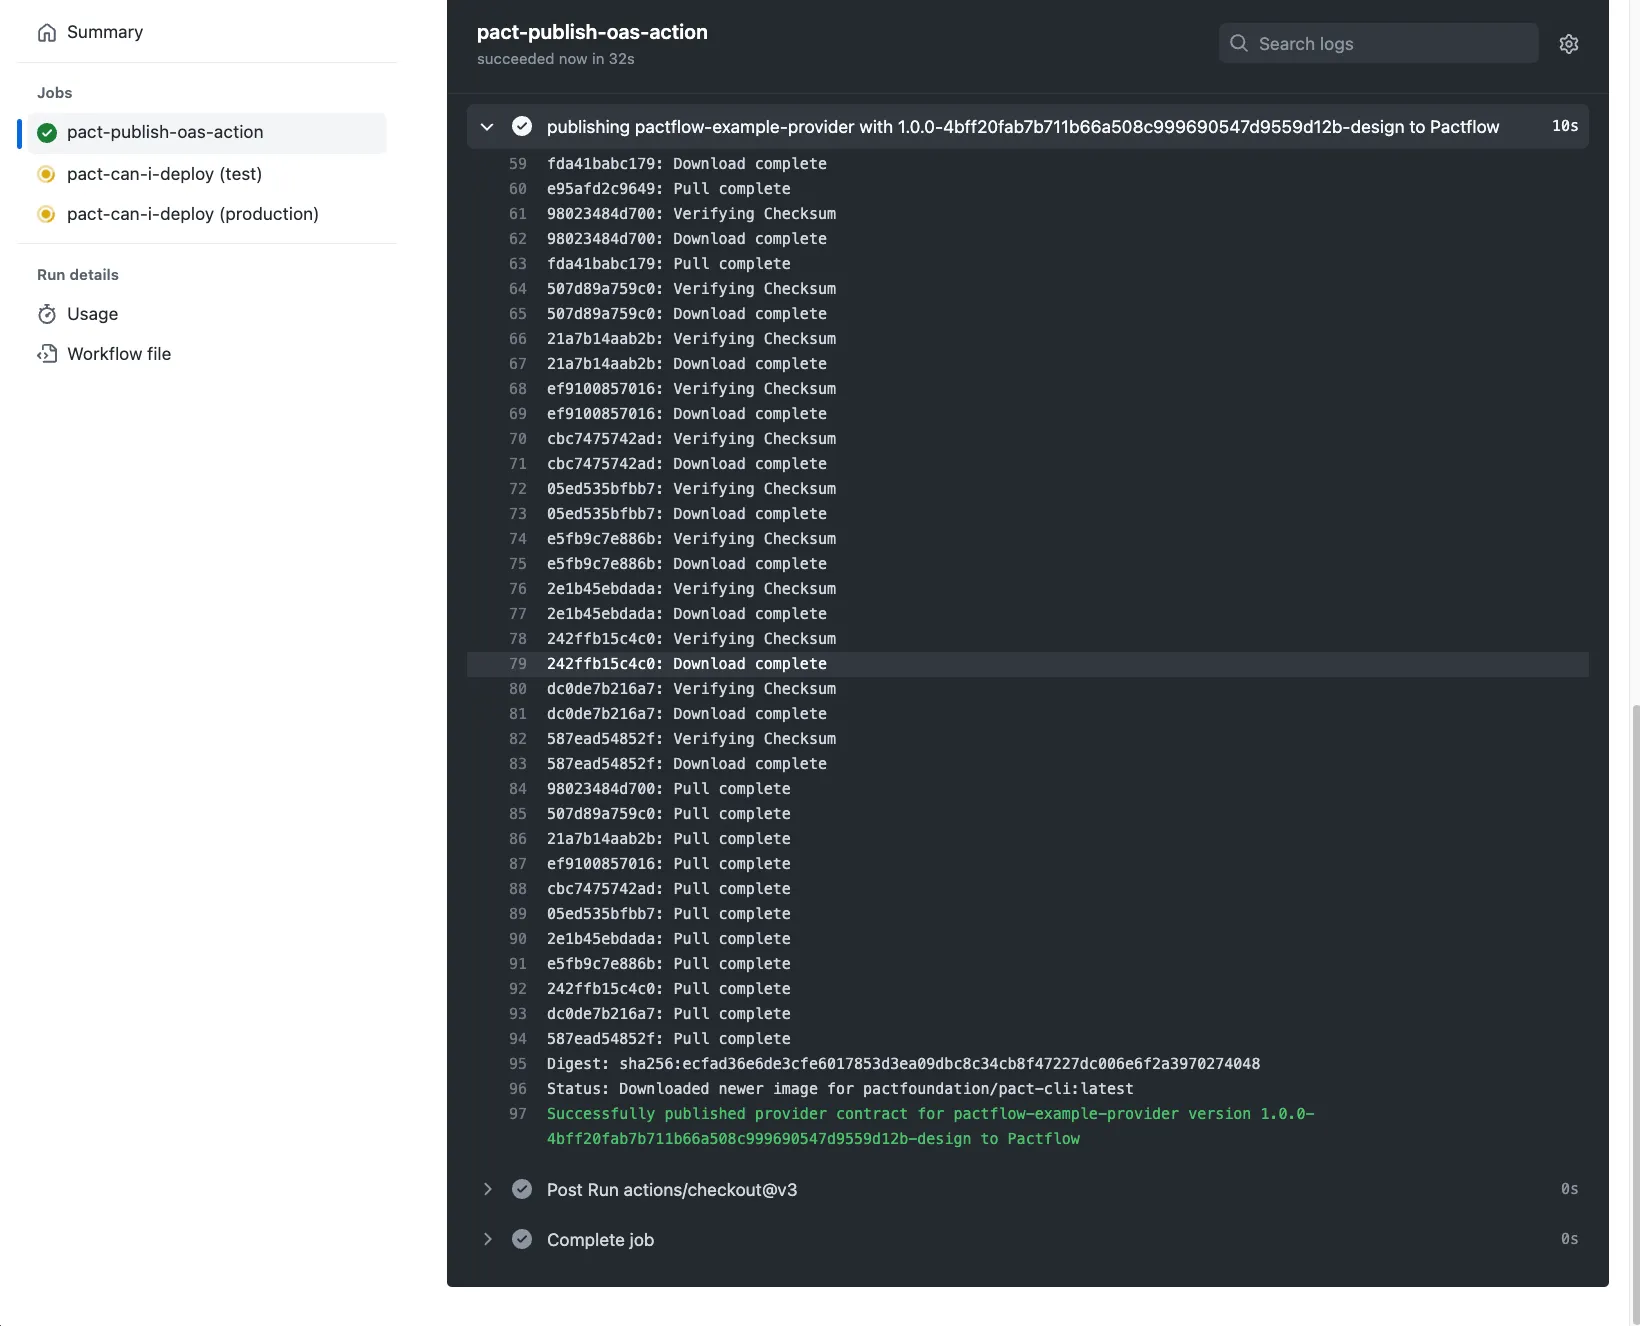
Run pactflow/actions/publish-provider-contract@v1.0.1
Successfully published provider contract for pactflow-example-provider version 1.0.0-4bff20fab7b711b66a508c999690547d9559d12b-design to Swagger Contract Testing
Design verified as compatible (expand & contract)
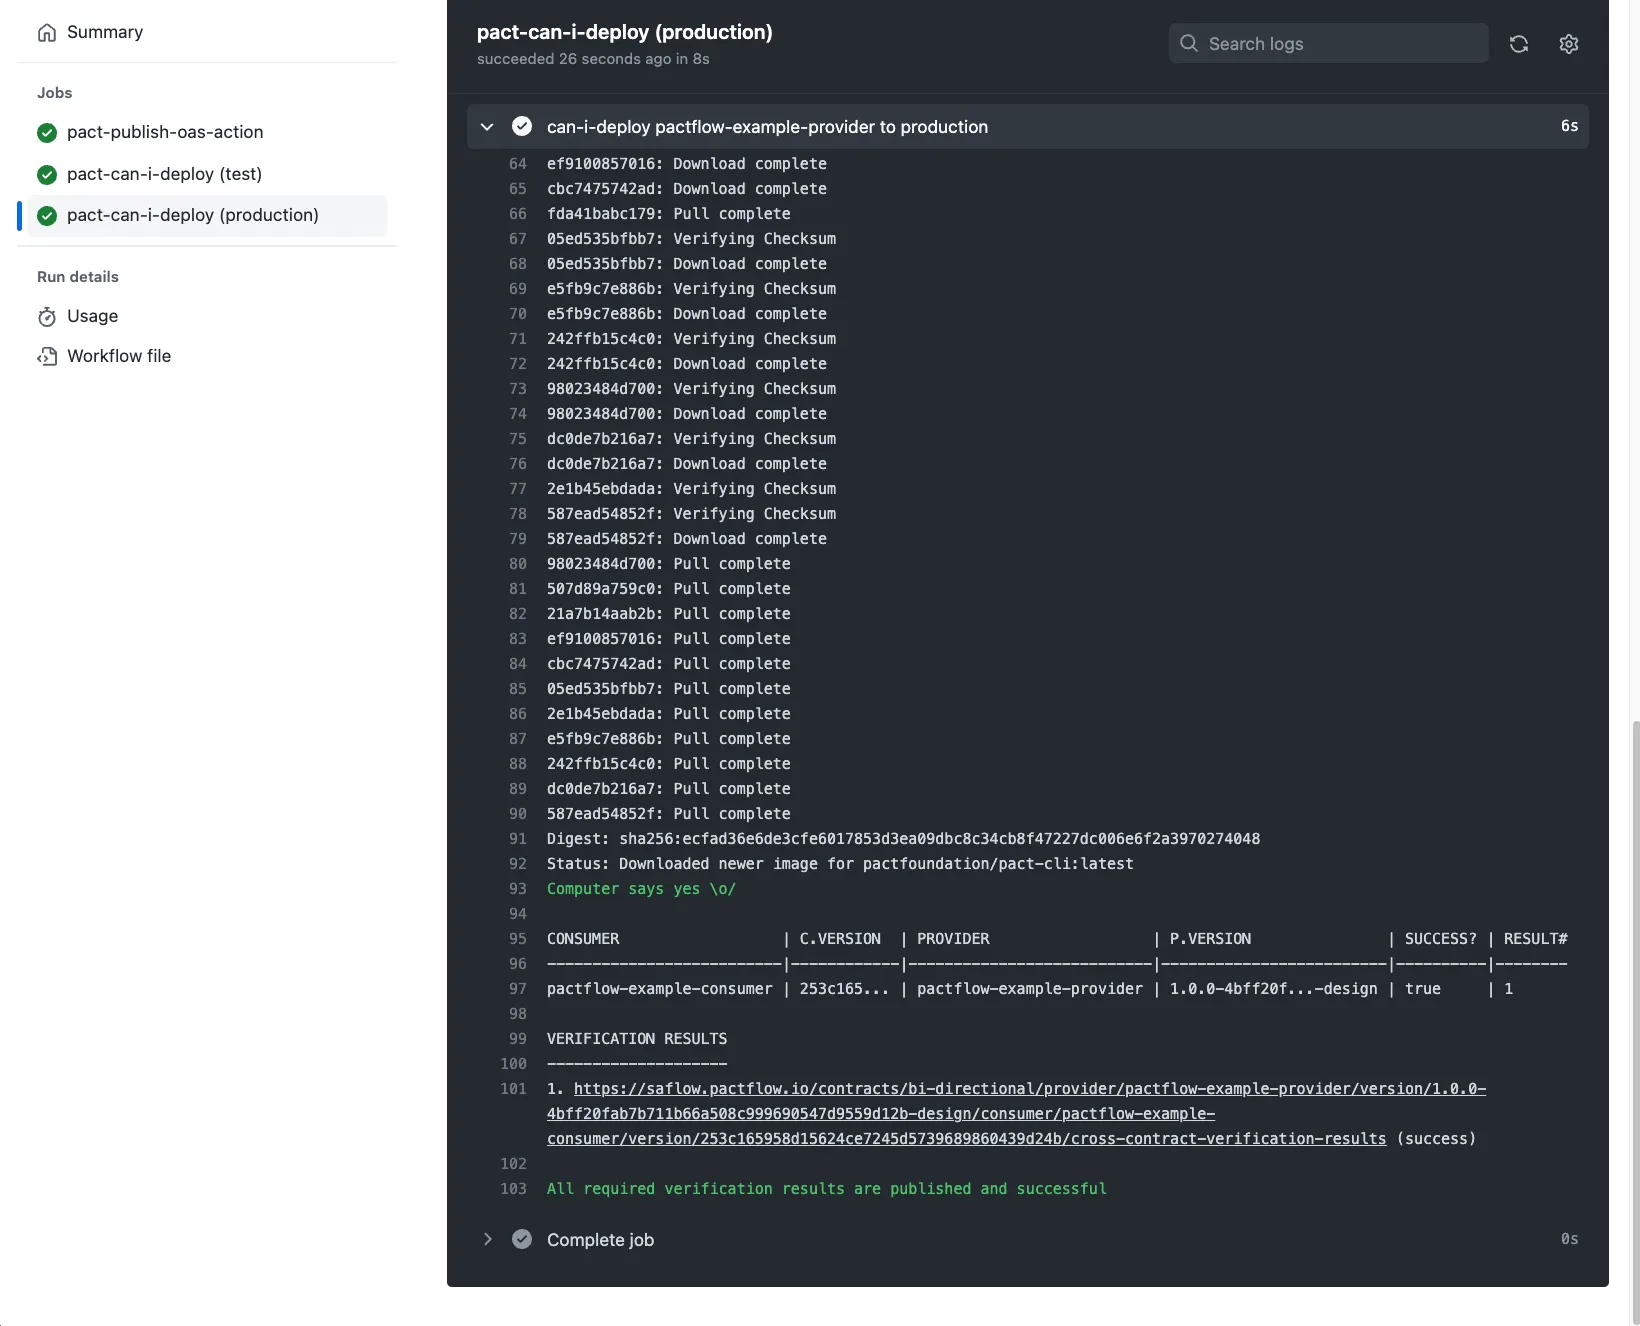
pact-broker can-i-deploy --pacticipant pactflow-example-provider --version="1.0.0-4bff20fab7b711b66a508c999690547d9559d12b-design" --to-environment production
Computer says yes \o/

CONSUMER                  | C.VERSION  | PROVIDER                  | P.VERSION               | SUCCESS? | RESULT#
--------------------------|------------|---------------------------|-------------------------|----------|--------
pactflow-example-consumer | 253c165... | pactflow-example-provider | 1.0.0-4bff20f...-design | true     | 1

VERIFICATION RESULTS
--------------------
1. https://saflow.pactflow.io/contracts/bi-directional/provider/pactflow-example-provider/version/1.0.0-4bff20fab7b711b66a508c999690547d9559d12b-design/consumer/pactflow-example-consumer/version/253c165958d15624ce7245d5739689860439d24b/cross-contract-verification-results (success)

All required verification results are published and successful
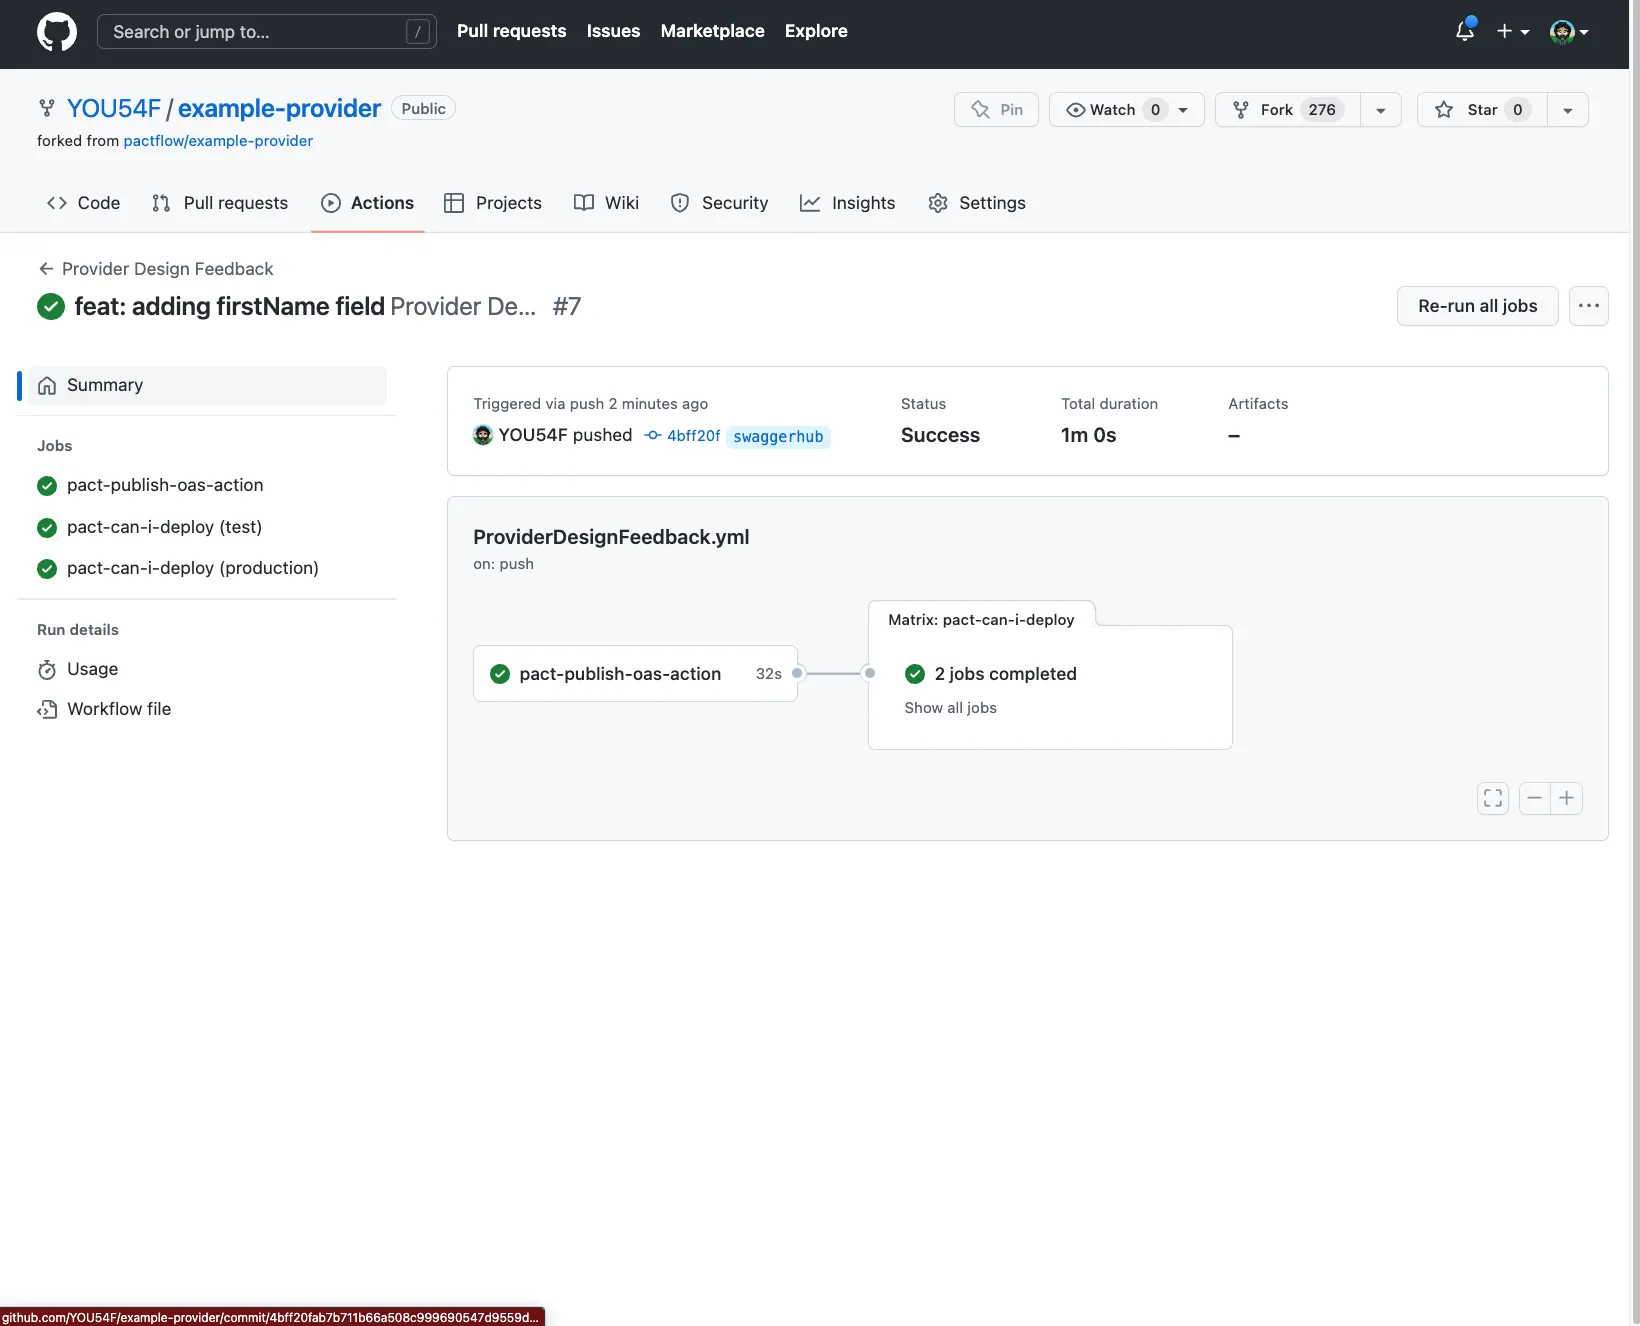
This build should pass, Contract Testing knows all of the consumers needs down to the field level. Because the consumers request is a subset of the product schema, this is a safe operation.
We could now update our consumer code to use firstName, allowing the consumer to deprecate the name field.
WHAT HAVE WE LEARNED?
-
It is always safe to remove a field from a provider, if no consumers are currently using it
-
It is not safe to remove a field/endpoint from a provider, if an existing consumer is using it, and Contract Testing will detect this situation.
-
Contract Testing will prevent a consumer from deploying a change that a Provider has yet to support
🚀 If you’ve made it this far, you should now have a good understanding of how Swagger Studio -> Swagger Contract Testing’s bi-directional contract testing feature works to make it safe to release software into production quickly and reliably.
You may be interested in one of: