In QAComplete, there is a built-in Rich Text editor, which you can use to describe your items, provide additional information on your project to other users, and so on.
By default, you can access the Rich Text editor when specifying text in large text fields like Description.
Options
In the Rich Text editor, the following options are available:
| Option | Description |
|---|---|
| Tag | Use this drop-down list to insert the current date, your initials or name into the text field. |
| Format | Use this drop-down list to apply one of the predefined formatting templates to the selected text - for example, when creating a heading. |
| Font | Use this drop-down list to select a font for your text. |
| Bold | Click to type bold text, or select a text fragment and click the button to make the text bold. |
| Italic | Click to type italic text, or select a text fragment and click the button to make the text italic. |
| Underline | Click to type underlined text, or select a text fragment and click the button to underline the text. |
| Align text left | Select a text fragment and click the button to align the text to the left. |
| Center text | Select a text fragment and click the button to center the text. |
| Align text right | Select a text fragment and click the button to align the text to the right. |
| Size | Select a value to type text using the specified font size, or select a text fragment and select a value to change the font size. |
| Font Color | Use this drop-down list to select a color for the text. |
| Highlight Text | Use this drop-down list to highlight the selected text fragment. |
| Insert unordered list | Select a text fragment and click the button to create a bullet list. |
| Insert ordered list | Select a text fragment and click the button to create a numbered list. |
| Indent | Click to indent the selected text fragment. |
| Insert Hyperlink | Click to call the Insert Hyperlink dialog. |
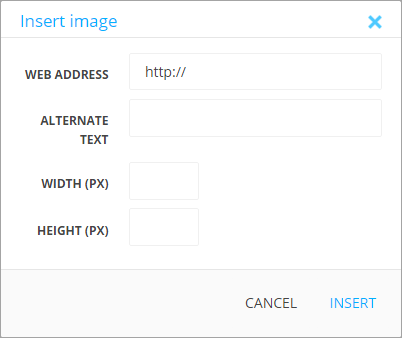
| Insert Image | Click to call the Insert Image dialog. |
| Create Table | Click to start table creation. |
| View HTML | Click to view the text and formatting in the HTML format. |
| Clean Formatting | Click to remove formatting from the selected text fragment. |
| Toggle Fullscreen | Click to display the editor in full screen mode. |
Tip: If some of the options cannot be displayed due to the editor width, they will be hidden in a drop-down menu. To call the menu, click the More Options icon. You can also toggle the full screen mode: in this case, all the options will be displayed on the editor toolbar.
| Option | Description |
|---|---|
| Tag | Use this drop-down list to insert the current date, your initials or name into the text field. |
| Font | Use this drop-down list to select a font for your text. |
| Bold | Click to type bold text, or select a text fragment and click the button to make the text bold. |
| Italic | Click to type italic text, or select a text fragment and click the button to make the text italic. |
| Underline | Click to type underlined text, or select a text fragment and click the button to underline the text. |
| Grow Text | Click to type text using bigger characters, or select a text fragment and click the button to make the characters bigger. |
| Shrink Text | Click to type text using smaller characters, or select a text fragment and click the button to make the characters smaller. |
| Font Color | Use this drop-down list to select a color for the text. |
| Text Highlight Color | Use this drop-down list to highlight the selected text fragment. |
| Align text left | Select a text fragment and click the button to align it to the left. |
| Center text | Select a text fragment and click the button to center the text. |
| Align text right | Select a text fragment and click the button to align it to the right. |
| Hyperlink | Click to call the Insert Hyperlink dialog. |
| Numbered list | Select a text fragment and click the button to create a numbered list. |
| Bullet list | Select a text fragment and click the button to create a bullet list. |
| Source Edit | Click to view the text and formatting in the HTML format. |
| Paste Text | Click to paste the text from the clipboard without formatting. |
| Indent | Click to indent the selected text fragment. |
| Outdent | Click to outdent the selected text fragment. |
| Toggle Fullscreen | Click to display the editor in full screen mode. |
| Undo | Click to discard the recent change. |
| Redo | Click to perform the canceled action once again. |
| Note: | You can paste formatted text from a word processor directly to the needed field, and the Rich Text editor will try to preserve your formatting. Please keep in mind that not all the formatting options are available in the editor. |
Insert hyperlinks
To insert a hyperlink:
-
Select text.
-- OR --
Click somewhere within the editor. -
Click Insert Hyperlink.
-
In the subsequent dialog, specify the address of the target resource.
-
Confirm your changes.
The new QAComplete UI also includes additional features. You can:
- Specify the hyperlink text
- Create hyperlink tooltips
- Decide if you want the hyperlink to open in a new tab of the browser
Insert images
 |
This feature is available only in the new QAComplete UI. |
To insert an image:
-
Click somewhere within the editor.
-
Click Insert Image.
-
The Insert Image dialog will appear.

In the Web Address field, specify the image location.
-
(Optional) In the Alternate Text field, specify the text to be displayed if the image cannot be loaded for some reason.
-
(Optional) In the Width (PX) field, specify a width value for the thumbnail (in pixels).
-
(Optional) In the Height (PX) field, specify a height value for the thumbnail (in pixels).
-
Once done, click Insert to add the image.
 |
Currently, it is impossible to insert images from the clipboard using Ctrl+V. Use the dialog instead. |
Create tables
 |
This feature is available only in the new QAComplete UI. |
There are two possible ways to create a table in the Rich Text editor.
Automatically
-
Click somewhere within the editor.
-
Click Create Table.
-
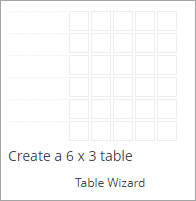
In the subsequent dialog, select the needed table size.

A new table will appear in the editor.
With the wizard
To create a table using the table wizard:
-
Click somewhere within the editor.
-
Click Create Table.
-
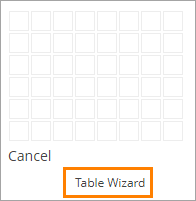
In the subsequent dialog, click Table Wizard.

-
The table wizard will appear. Use it to configure your new table.
-
Once done, click OK to create the table.


