You can run manual tests directly from the Test Library or you can run them as part of a test set.
To run an individual test from the Test Library:
-
Go to Test Management > Test Library.
-
Click the Run button on the row of the needed test.
To run a test as part of a test set:
-
Go to Test Management > Test Sets.
-
Select an existing test set or create a new one.
-
Add your test to the test set. To learn how to do this, see Add and Edit Test Sets.
-
On the Test Sets screen, click the Run button on the row of the needed test set.
If the test is linked to a release, iteration, or build, select the needed item. If the test is linked to a configuration, select the check box next to the needed configuration, then click Run:
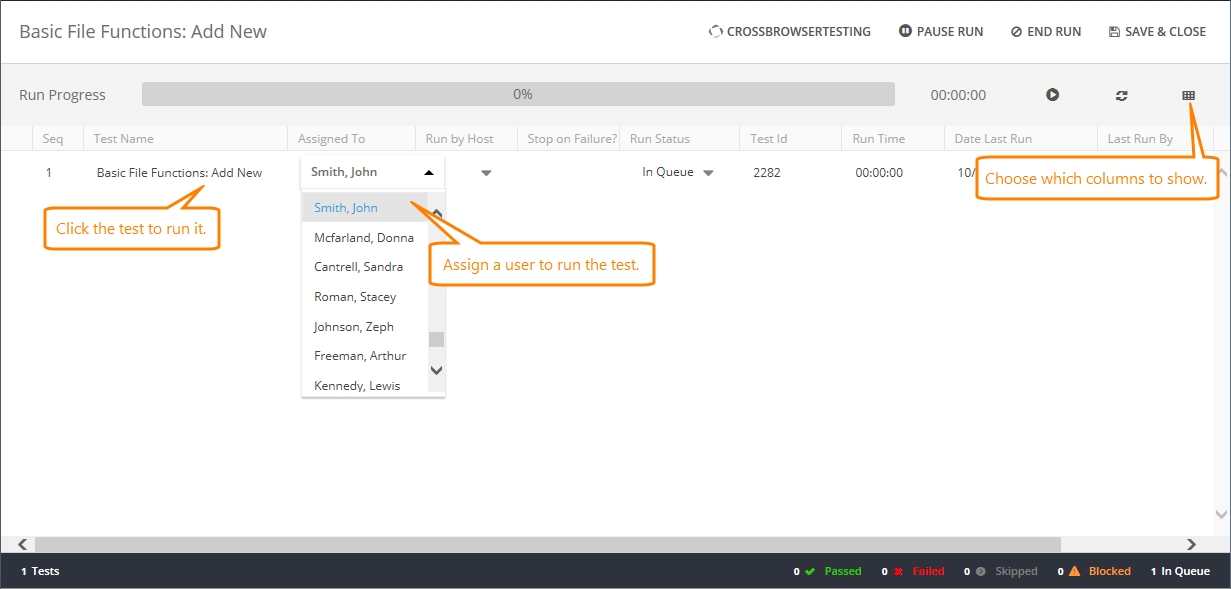
The Test Runner screen will appear:
On this screen, you can see information on your test or all the tests of your test set in a table view. You can click Choose Fields to choose which columns to display.
The Assigned To column shows the user to whom the test is assigned. To change the user, select the needed one from the Assigned To drop-down list.
| Note: | Assigned To is not a required field. It is for reference only. Any team member with the appropriate permission can run a test, and the Test Runner will assign the user who actually ran the test. |
Click the test to start the run.
| Note: |
When you start a test run, the Test Runner takes a snapshot of your tests. If another team member changes your test, the changes will not be applied until you run the test again. If you run a test set, and another team member changes it, the changes can be applied to your test set immediately during the run. To learn more, see Modify Active Test Sets. |
When you start a test run, the Test Runner starts tracking the time it takes to complete the run. You can view that value in the test run history. If the test belongs to a test set, the test progress bar shows the test percentage completion.
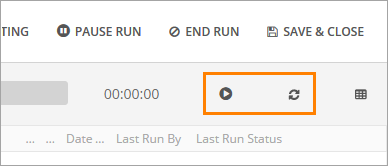
You can use the buttons to the right of the progress bar to work with the test run timer:
-
Click to start or restart the timer.
-
Click to pause the timer.
-
Click to set the timer to zero.
Run a test and record results
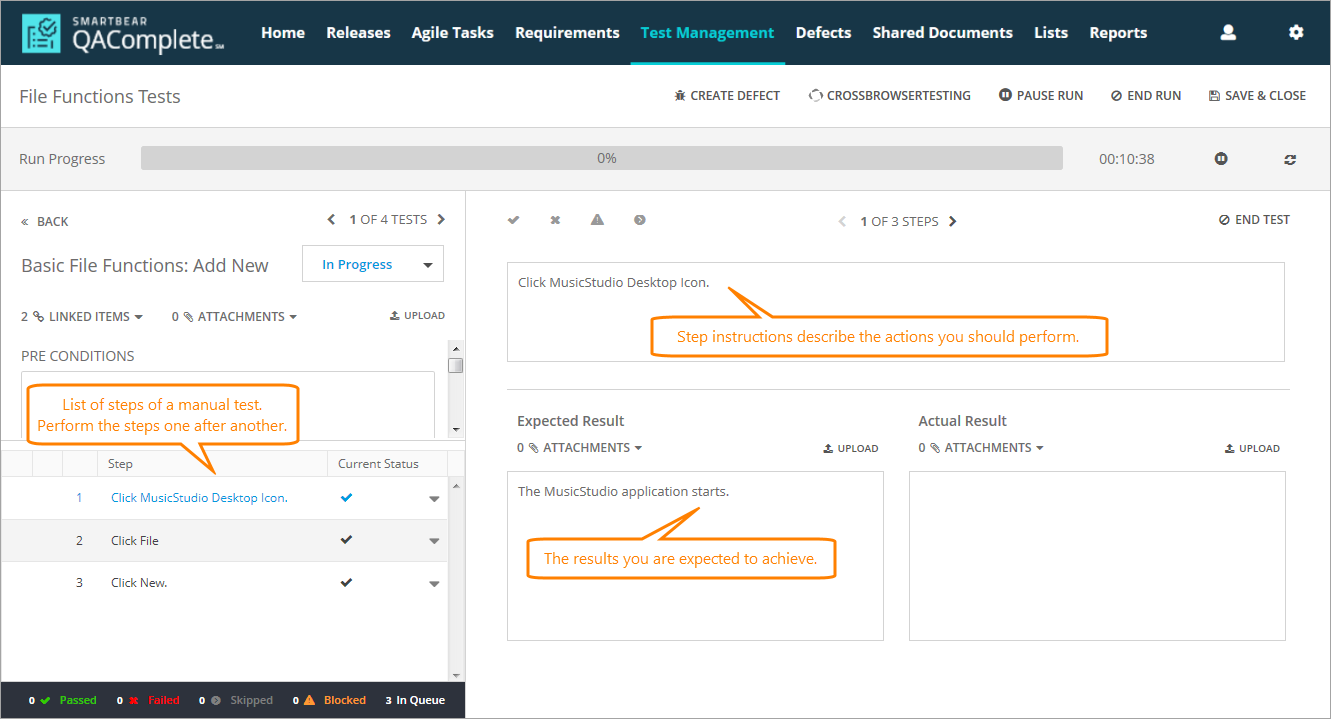
When you run a manual test, the Test Runner shows a list of steps the test contains. Typically, a step gives detailed instructions on what actions should be performed. It can also specify the results you expect to achieve:
You perform the steps manually one after another in the order they are listed in the test and specify step results (for example, whether the step was successful or not).
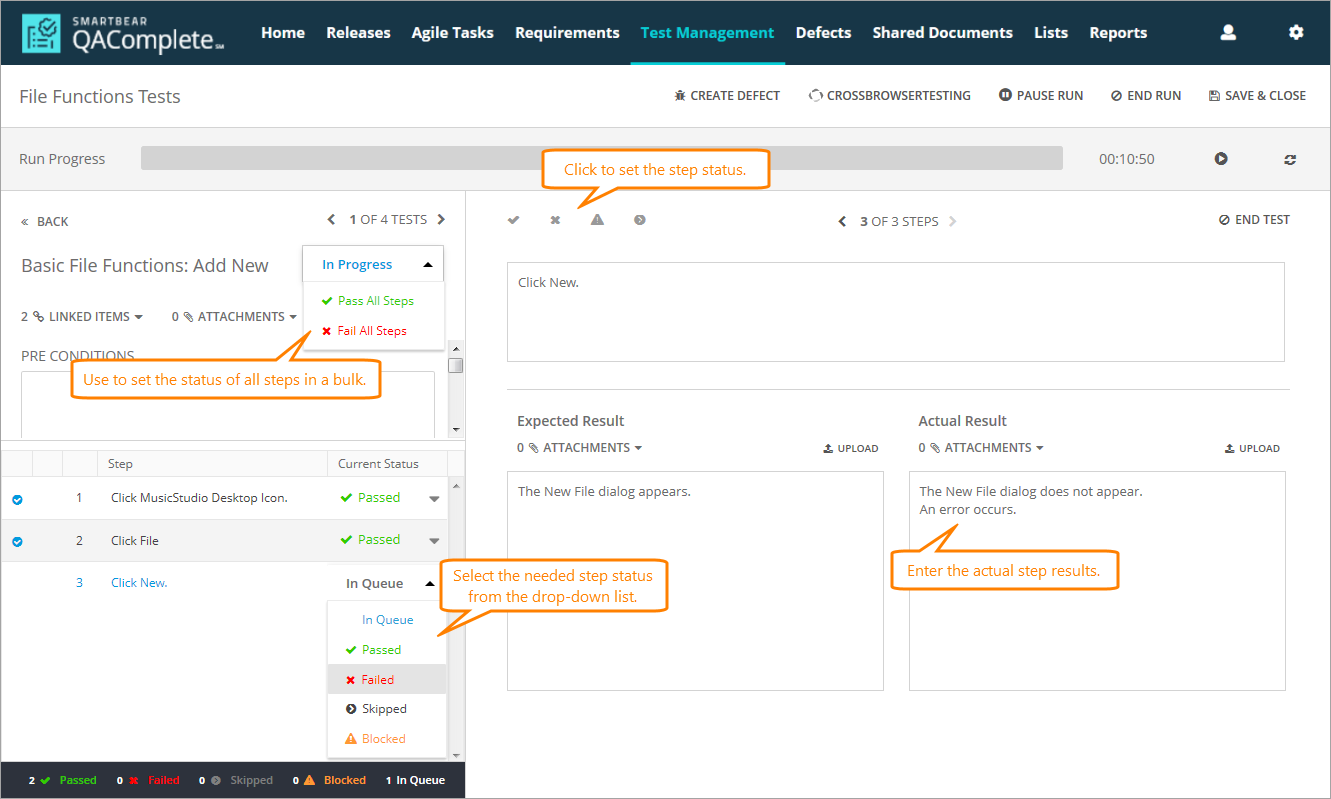
To specify a test step result, select the needed status in the Current Status column of the step or click the appropriate icon above the step description. To change the status of all the steps, select the needed status from the drop-down list next to the test name. If needed, you can also provide a detailed description of the actual test results:
| Note: | You can set the step status in any order. However, if you set the step status before setting the status of the previous steps, QAComplete will automatically mark the previous steps as passed. |
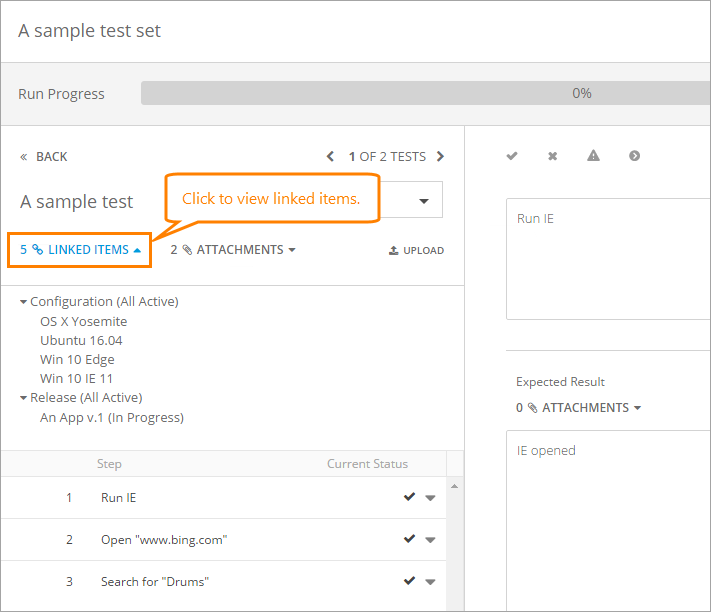
If there are some items linked to your test (for example, a defect), you can click Linked Items to view them:
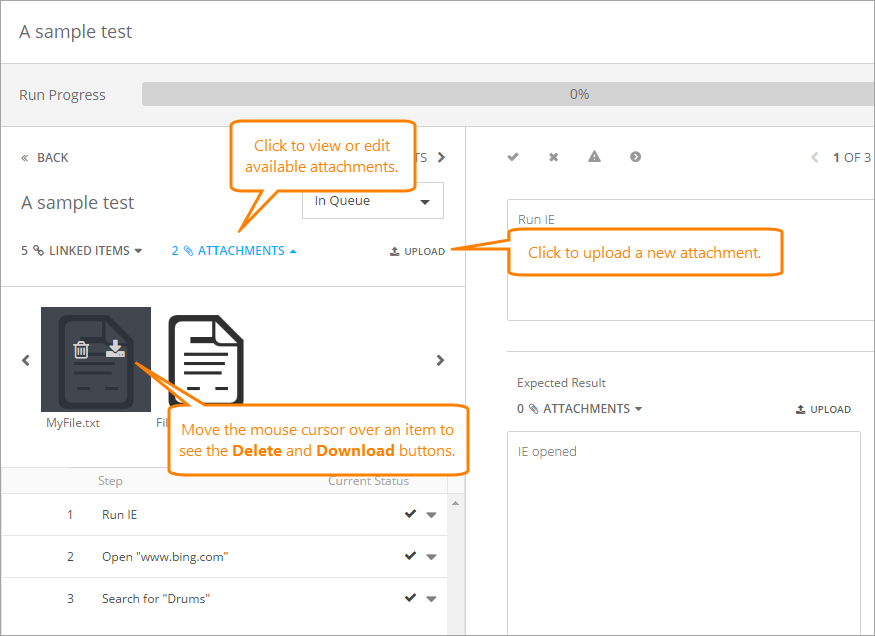
If there are some files attached to your test, click Attachments to view a list of the attached files. To upload a new attachment, click Upload:
| Note: | If you add new attachments in the Test Runner, these attachments will also be added to the test item in the Test Library. |
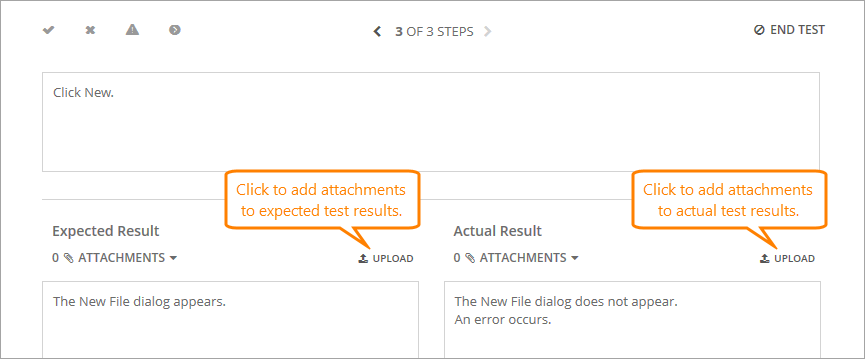
You can also attach files to a test, to its excepted results or actual results:
| Note: | To attach files to the Expected Result field, your security group must have the required permissions, or this option will be blocked. |
Once you finish all test steps, move to the next test with arrows or click End Test.
End or pause the test run
To pause the run, click Pause Run. The last run status of this test will be In Progress. To save the test run state and leave the Test Runner, click Save & Close:
You or another team member can continue the test run later.
To end an individual test run, click End Test. The following dialog will appear:
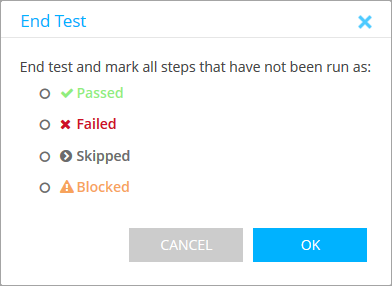
In the dialog, select the status you want to assign to the test steps that were not run.
| Note: |
If all the steps of the test are Skipped, the test will have the Skipped status. The steps in a blocked test that did not pass or failed will have the Blocked status. |
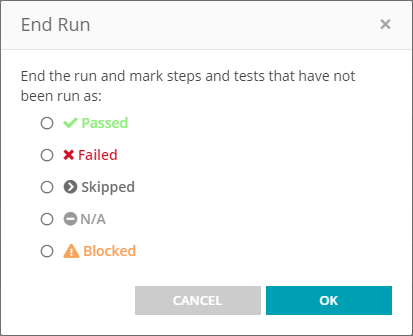
To end the whole test run, click End Run. If you run a test set, the run of all the tests in it will be stopped. In the resulting dialog, select the status you want to assign to the tests and test steps that were not run:
-
Passed – The last run status of the test set depends on the status of the tests that belong to the test set. If all the tests have the Passed status, the test set status will be Passed as well. If any of them has the Failed status, the test set status will be Failed too.
-
Failed – The last run status of the test set will be Failed.
-
Skipped – The last run status of the test set will be Skipped. All incomplete tests and test steps will be Skipped.
-
Blocked – The last run status of the test set will be Blocked. All the tests that have not completed or started yet will have the Blocked status. The steps of the blocked test that did not pass or failed will have the Blocked status.
Once the test run is complete, you cannot continue it. However, you can rerun it – to learn more about it, see Rerun Tests.
Continue the paused test run
When the test run is paused or is paused and blocked, you or another team member can continue the run:
-
Go to Test Management > Run History.
-
Find the run you want to continue and click
 Continue Run.
- OR -
-
On the Test Library or Test Sets screen, find the test or test set you want to continue to run.
-
In the Run History column, click the number of test runs:
-
On the resulting Run History screen, find the needed run and click Continue Run.
Automatically create a defect from a failed test
If any of steps in the test run is failed, the Auto Create Defect dialog will appear after the test run end.
To learn more about that dialog and options you have there, see Create Defects From Tests.
Edit steps during the run
You can edit test steps during the test run if the security settings allow you to do so.
| Note: | If your security group does not have necessary permissions to edit tests during the run, editing buttons will not be available to you. |
Click the test in the Test Runner table to edit it.
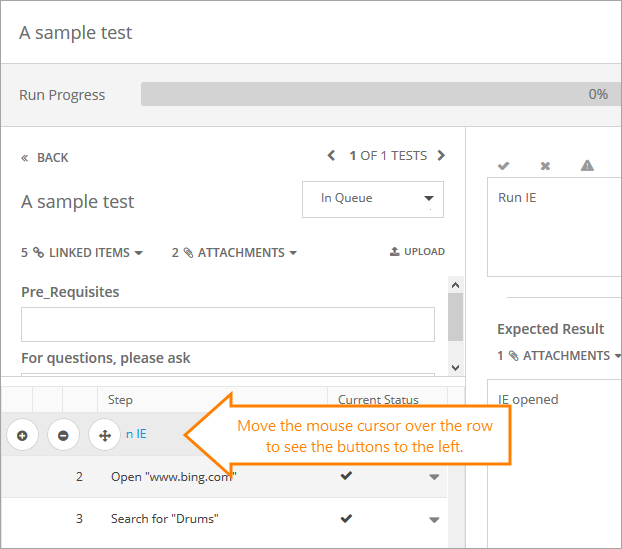
Move the mouse cursor over a test step in the table. The edit menu will appear.
-
Click Add Step Below to add a new step to the test.
In the dialog, type in the description and the expected result for the step. Use markup buttons if needed. Select Stop on Fail if you want the test to stop after an error occurs during this step. Click OK to add the newly created step to the test.
Note: If the test does not contain any steps, you cannot add new steps with the Test Runner editor. -
Click Delete Step to delete a step from the test, then confirm this action in the dialog.
-
Click the Reorder button and hold it. Move the step to the needed position in the test. Release the mouse button.
The Test Runner will ask you whether you want to push changes you have made to the test in the Test Library:
-
Click OK to update the original test in the Test Library.
-
Click No to keep the changes only for this particular test run.


