If you were using an earlier version of QAComplete or ALMComplete, you may still be using the legacy Test Cases screen instead of Test Management. This module provides basic test case management features only, without the full functionality of Test Management available in release 9.7.0 and higher.
You can migrate from Test Cases to Test Management, then, in security settings, turn off the Test Cases main toolbar item when you no longer need it.
Organize test cases
Software Planner allows you to organize your test cases in any way you wish. For example, you may consider organizing test cases by a software release, agile sprint, and so on. You can also organize them by a product line, component, or functional area.
For more information on organizing your data, see Navigation, Folders and Grouping.
Use the Test Library in test cases
You can re-use test cases from release to release by organizing them into release folders by using Fast Edit to copy them to new folders for each release. In this scenario, you may need to store master versions of your test cases in the Test Library folder, separated by a functional area.
To do that:
-
Create a folder for your test cases.
-
Organize your test cases into subfolders as needed.
-
Use Fast Edit to copy test cases from the Test Library into the release folders.
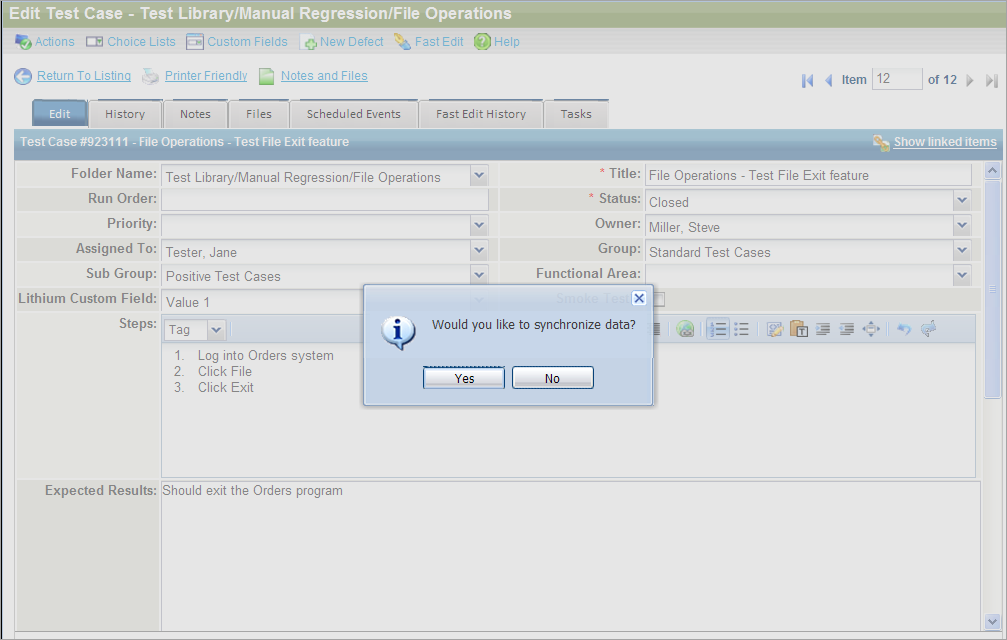
Tip: If you need to apply changes to steps or expected results in the Test Library, Software Planner will recognize which test cases in the release folders are related to the Test Library items and ask you whether you want to synchronize. -
Click Yes.
The list of related test cases will appear.
-
On the list, the test case ID is a clickable link which redirects you to the printer-friendly version of the test case. You can review the test case details if you need.
Select any or all of the test cases to synchronize.
-
Click Submit.
The test case steps and expected results will be updated with your changes to the original test case on the Test Cases screen.
Organize regression test cases
If your team is using manual test cases for regression, it is good practice to create a set of regression test cases that can be used from release to release. To do this, simply create a folder named Regression Template in Test Cases and store your regression test cases there. At the end of each release, it is good practice to review test cases for new features that were added in the subsequent release and convert test cases from that release to your regression set.
Below is an example of how your regression template might look:
Maintain test cases
-
To add a new test case, go to Test Management > Test Cases and click Add New on the Test Cases toolbar.
-
To update an item, click Edit this record in the Actions column on the row of the needed item, apply your changes, and click Submit.
-
To delete an item, click Edit this record, scroll to the bottom of the Edit form and select the Delete this record check box, then click Submit.
-
To attach files (for example, test plans), click Edit this record, switch to the Files tab, then click Add New.
-
To create a comment on the item, click Edit this record, switch to the notes tab, then click Add New.
Test case Traceability
When developing test cases, it is important to ensure that you are prepared to fully test all features of a specific requirement. The traceability term is used to define the process when you link a test case to such a requirement.
Software Planner offers several ways to ensure that traceability is configured for your test cases:
Link Test Cases to Requirements
-
Link test cases to requirements. For that purpose, go to Requirements > Traceability.
-
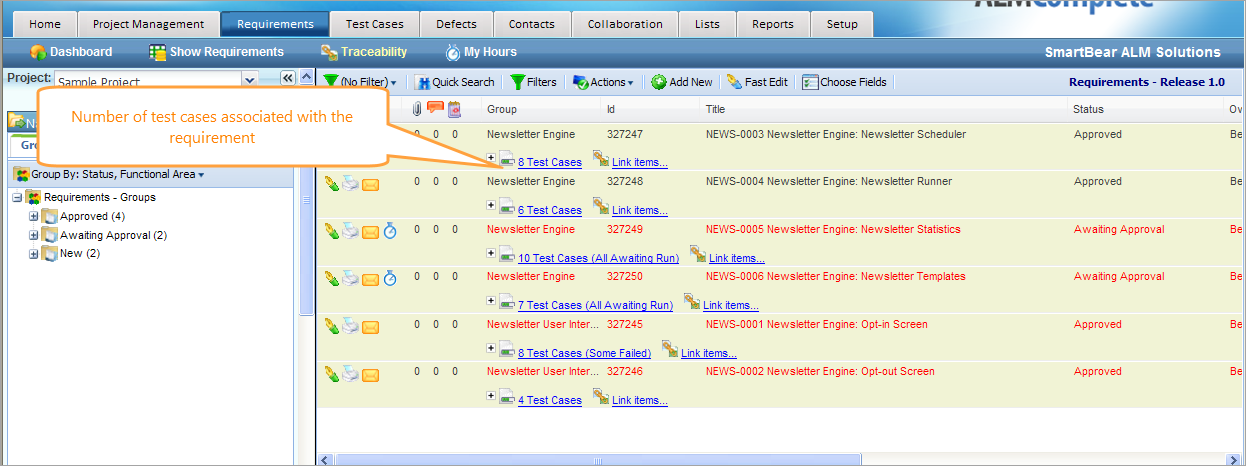
Linked test cases are organized into folders.
Click the plus icon next to Test Cases to view how many test cases are in each folder.
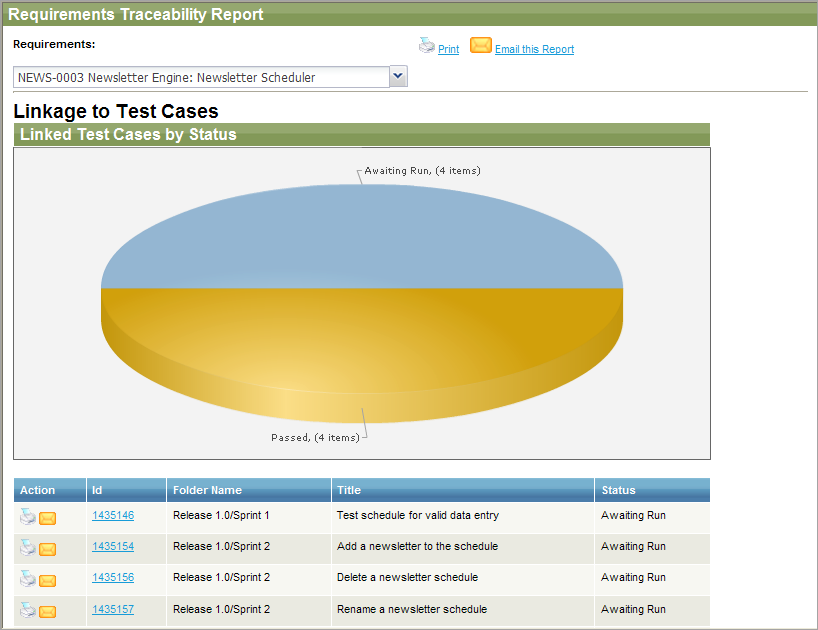
Use this screen to analyze the test case coverage for the requirement.
-
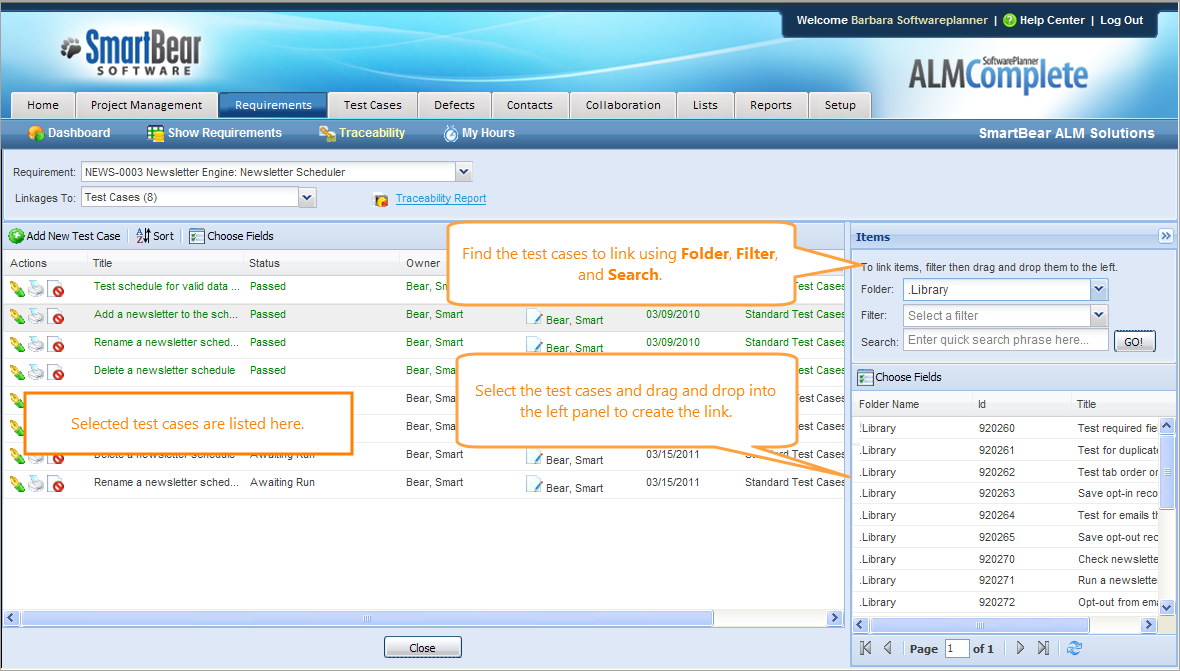
To link a test case, click Link Items.
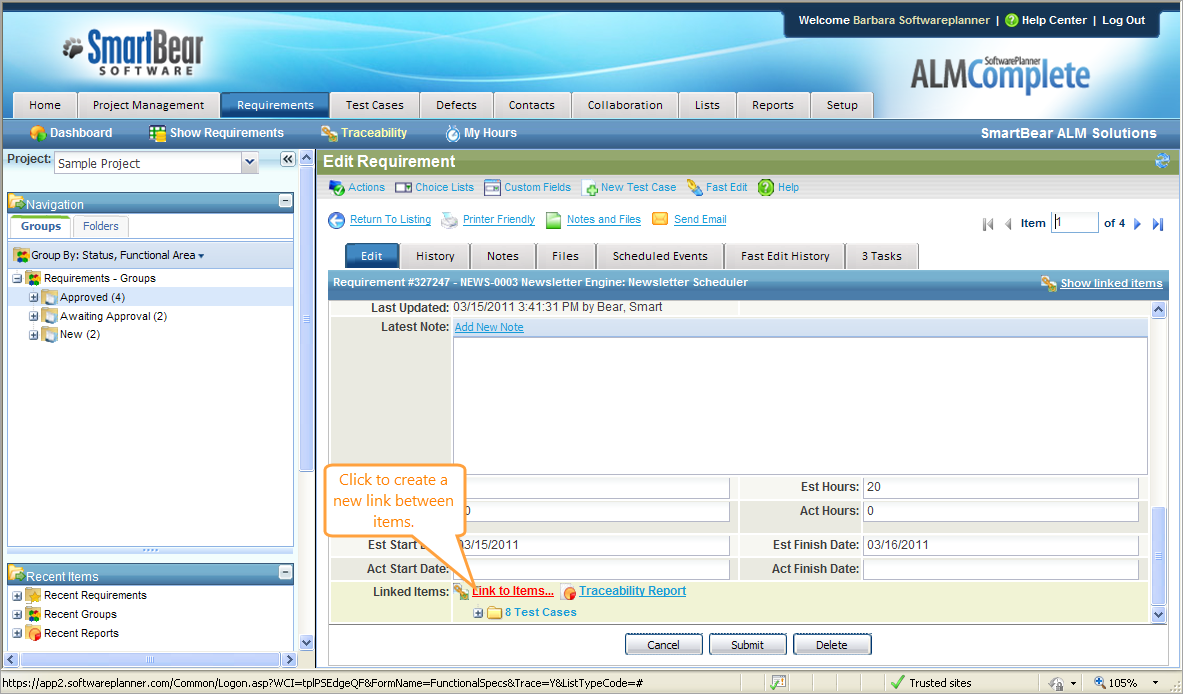
Tip: You can also open the Edit Requirement form and click Link to Items there.
-
You can also command QAComplete to generate a traceability report for a specific requirement. To do that, open the Edit Requirement form and click Traceability Report.
Generate the test case traceability report
-
Go to Reports > Legacy Reports.
-
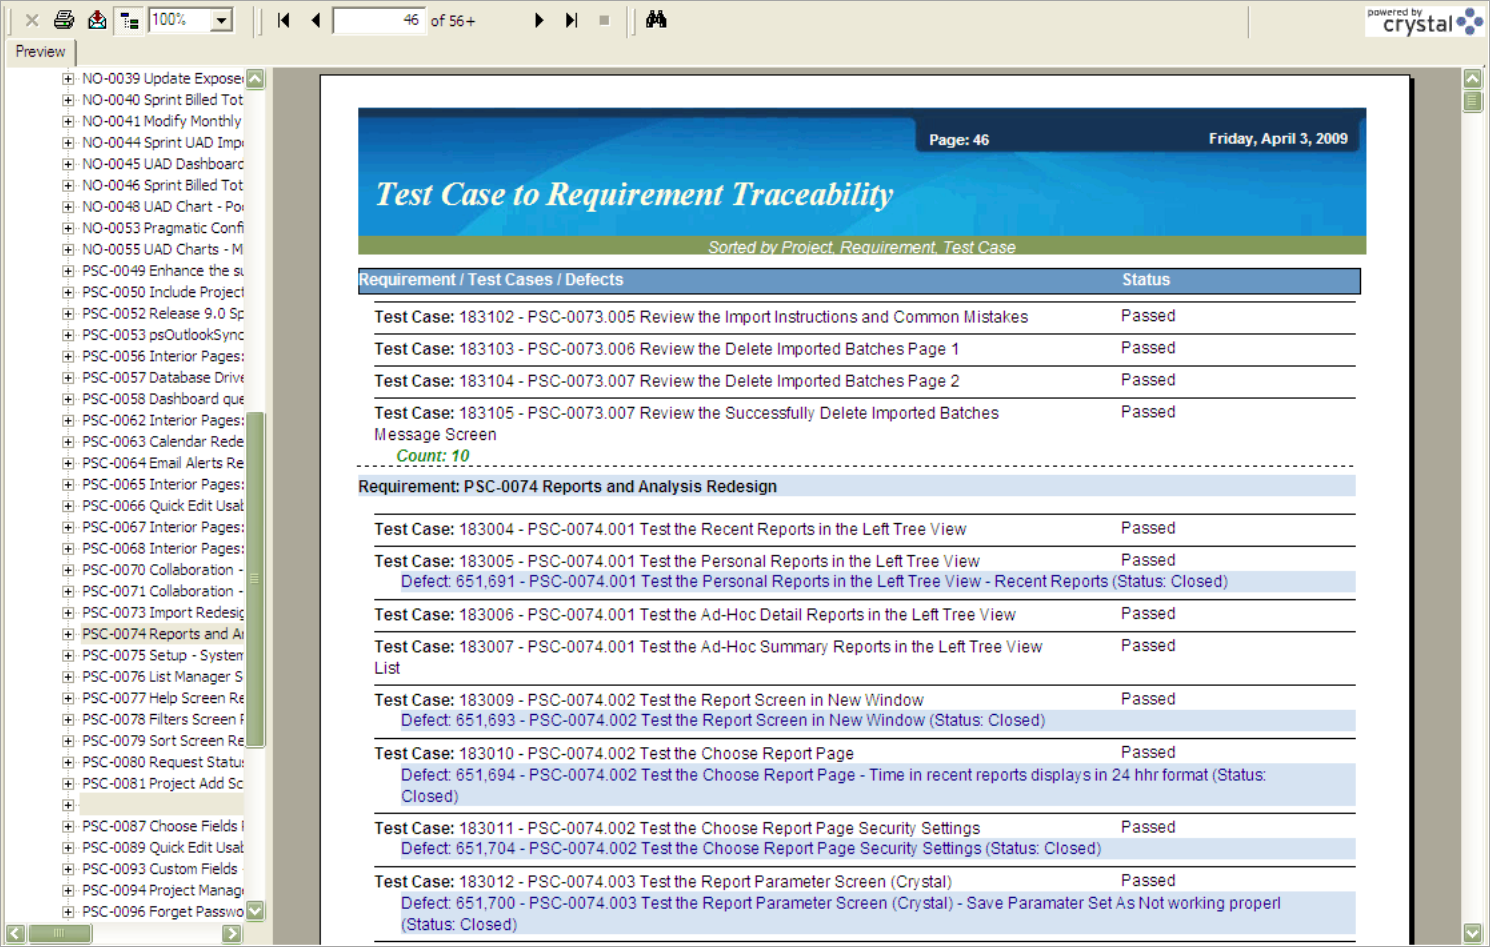
In the Test Cases section, click Test Case to Requirement Traceability report.
This report lists each requirement and all the associated test cases, including the current status of these.
On the Legacy Reports screen, there are also other reports for test cases that can help you review traceability:
-
Requirements Missing Test Cases Traceability – Shows each requirement that has no associated test cases.
-
Requirements Missing Test Cases Traceability by Folder – Shows each requirement that has no associated test cases, grouping these by folders.
Automatically create defects from failed test cases
Software Planner can automatically generate defects when test cases fail. To implement this, do the following:
-
Edit the test case and change its status to Failed.
-
Select the Automatically Generate Defect Upon Failed Test Case check box.
After that, a defect will be created automatically with such details as steps to reproduce and expected results based on the test case data.
Once you select or remove the selection from the check box and a test case fails, the default values will be set for the next time you edit that test case.
The link between the failed test case and the associated defect will be created automatically. When the defect is closed, the test case will automatically be passed.
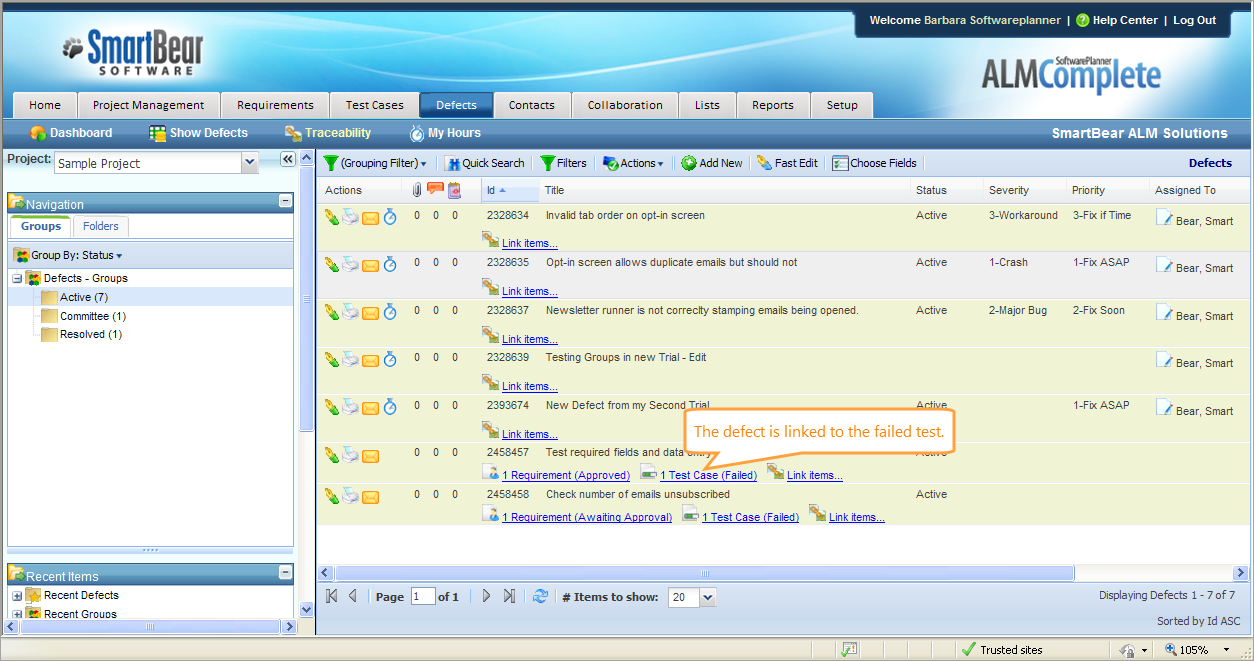
You can view which defects were linked to test cases on the Defects > Traceability screen. You can also use it to drill into the list of test cases by clicking the link:
You can also link a test case to a defect manually. To do that, open the Edit form for a test case, then click New Defect at the top of the screen. Also, you can automatically create a test case from an existing defect on the Edit Defect form by clicking New Test Case.
Traceability – Defect to requirement
A defect can be automatically linked to a requirement if it is associated with a test case linked to the requirement.
First, link your test cases to a requirement.
When you run tests, use Automatically Generate Defect Upon Failed Test Case. When the test case fails, Software Planner searches for a link between the test case and requirement. If it finds a linked requirement, it links the defect not only to the test case, but also to the requirement.


