Prior to release 9.9.0, the legacy automation bridge provided a method of posting TestComplete test results to QAComplete and ALMComplete Automation.
 |
The following information applies to release 9.8.7.1 and earlier, and is for reference only. |
About the automated testing bridge
The legacy automation bridge was used to post TestComplete test run results to the Automation Runs screen in Test Management. From Automation Runs, the schedules for tests can be configured to run TestComplete projects without user interaction.
Install and configure the TestComplete integration
On your machines with TestComplete installed, after you download the automation bridge, the automation plugin will be enabled for TestComplete.
-
Start TestComplete.
-
Open a project.
-
Click the Automation Bridge Registration icon on the toolbar.
-
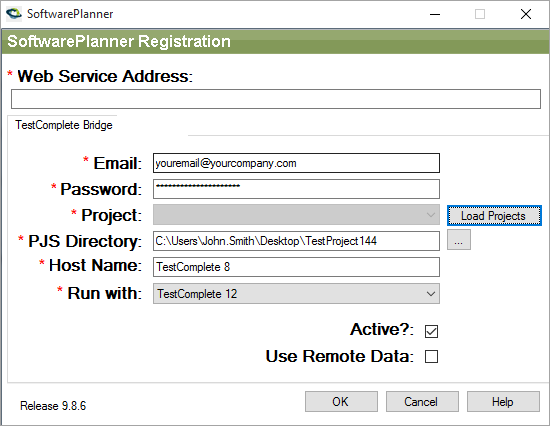
The automation bridge registration form appears:
Enter the web service address.
- For SaaS users, the address is http://soap.qacomplete.smartbear.com/psWS.asmx
- For On-Premises users, the address is http://[yourserver]/psws/psws.asmx
-
On the TestComplete Bridge tab, enter the email you want to use to log in to QAComplete or ALMComplete and your password, then click Load Projects.
The registration mechanism will validate your credentials, then populate the Project drop-down list with values matching your QAComplete projects.
-
Select the project that will store your automation results.
-
Click the ellipsis button next to the PJS Directory field and navigate to the folder that contains your TestComplete project files (.pjs).
-
The Host Name field will be filled in automatically with the TestComplete machine name. You can modify this value to quickly find this machine later.
-
In Run With, select TestComplete or TestExecute.
-
The Active check box should be selected. You can remove the selection to disable the automation bridge.
-
Click OK.
Automation scheduler
Once the automation bridge is configured, you can set a schedule for TestComplete tests in Test Management > Automation > Automation Scheduler.
Use the drop-down list to select the automation type, host name, project suite and project.
The scheduler will check approximately every 5 minutes, looking for an active schedule. When it finds something to run, it will start up TestComplete on the host and run the project suite. Results will be posted back to Automation.
Automation runs
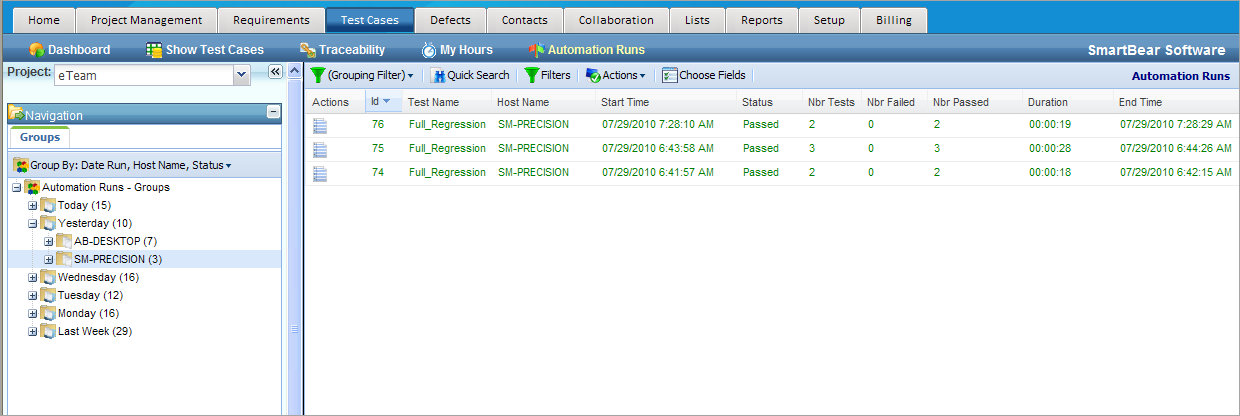
After the end of the automated test run, you can view the results in Automation Runs.
TestComplete logs that are smaller than 30 Mb can be viewed on the list of automation run results.
Analyze test runs
Create defects from TestComplete
You can also generate a defect directly from a TestComplete log. As with the automation bridge, first, the connection has to be configured.
-
Open TestComplete.
-
Open a project.
-
Navigate to the log.
-
In the Post Defect drop-down list, select Post Defect to QAComplete.
-
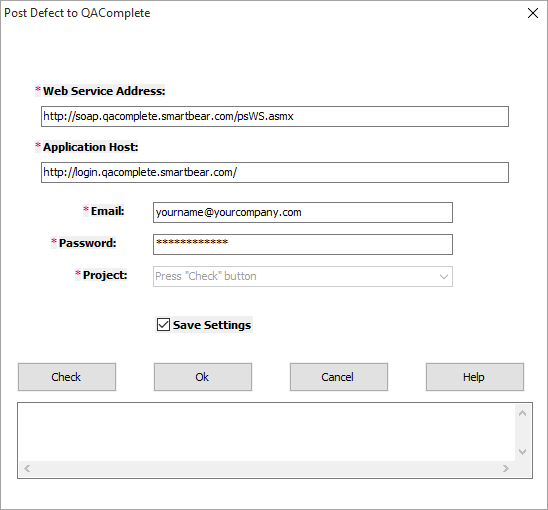
Enter the web service address and application host as demonstrated in the example below, then your login email address and password.
-
Click Check.
-
Your login will be verified, and a list of projects loaded.
Select the project you want to store the defects in.
-
Select the Save Settings check box.
-
Click OK.
-
Fill in the Create Defect form.
-
Click Submit.
After that, a new defect will be added to the selected project.
Legacy Test Management report
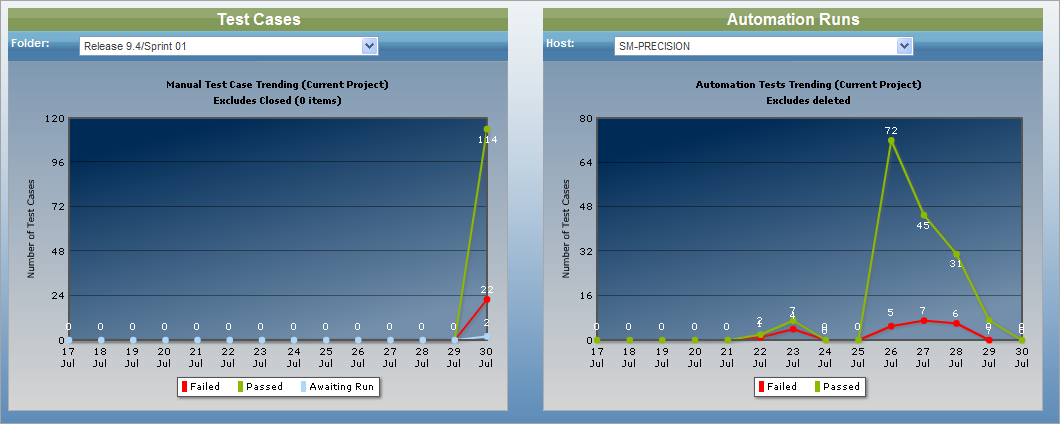
In Reports > Legacy Reports, in the Test Management section, the Automated Test Runs report returns information about the hosts, tests, date of test runs, and status of the runs.


