In QAComplete, lists are items you use to track custom information specific to your own business needs – like hardware available in your office with the service keys and warranty information, knowledge base articles, feature areas to use in custom fields, and so on.
To start working with lists, go to Lists and click either Manage Lists or Lists to open the List Manager or Lists screen respectively.
Manage lists
To manage your lists, click Lists > Manage Lists.
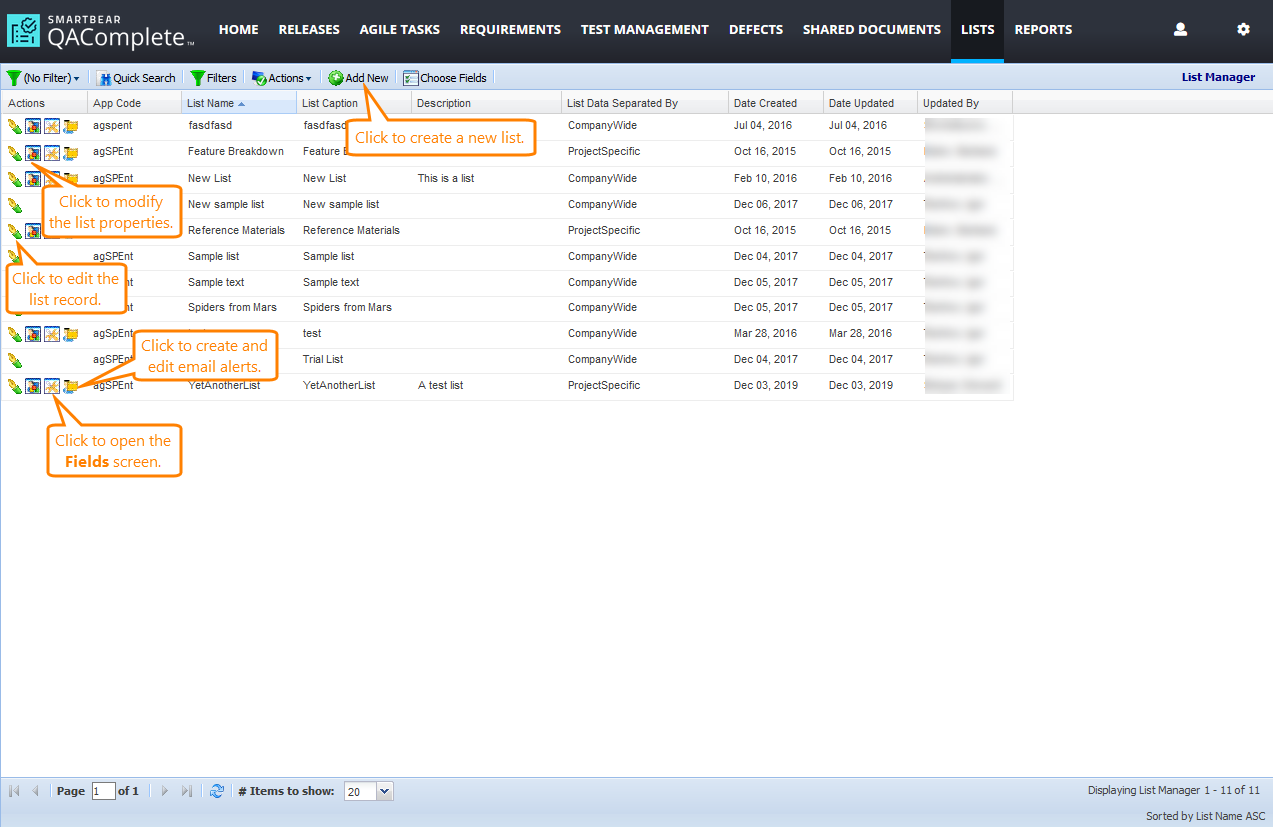
The List Manager screen will appear. Here, the following actions are available:
-
Use the navigation functionality to work with the lists available to you in QAComplete.
-
Find the needed list using search and filters.
-
Create new lists.
-
Edit the list record.
-
Edit advanced properties.
-
Manage fields for the list.
-
Manage email alerts for the list.
For information about the fields available on this screen, see Manager Reference below.
The Fields screen
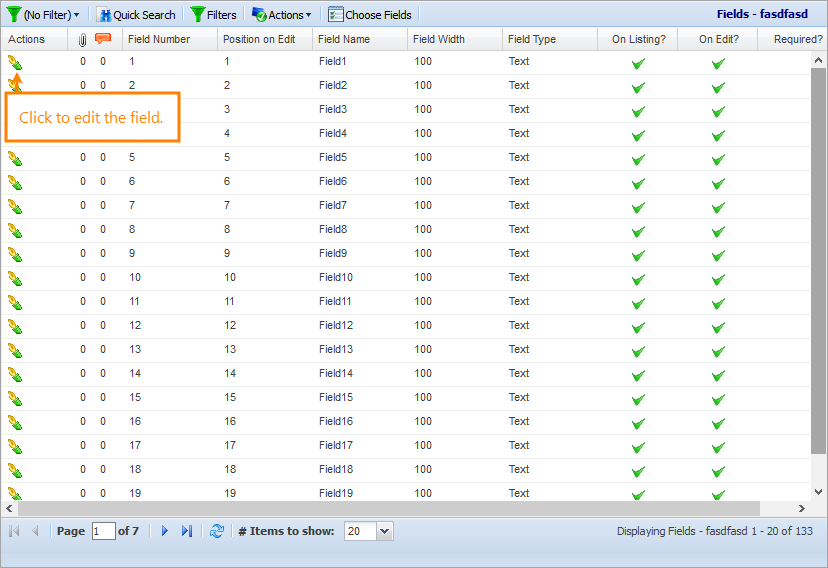
To access the Fields screen for a specific list, click Manage Fields in the Actions column on the row of the needed field.
On this screen, you can edit fields for your list and modify properties of these fields.
For information about fields available on this screen, see Manager Reference below.
Email alerts for lists
To start working with email alerts for a specific list, click Manage Email Alerts for a specific list on the List Manager screen.
To create a new email alert:
-
Click Email Alert .
The Email Alert form will appear.
Click Add Email Alert.
-
Select an alert type from the Email Alert Type drop-down list.
-
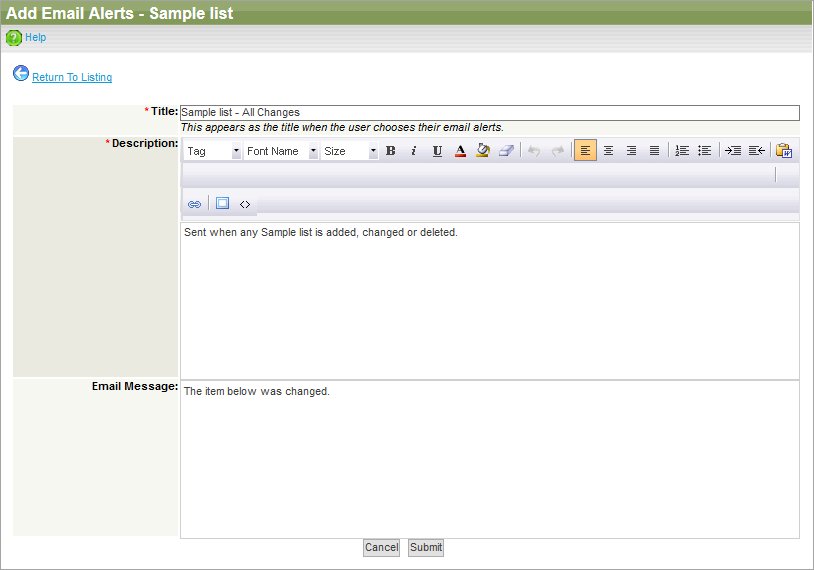
In the subsequent form, specify a title, description, and message for the new email alert template.
-
Click Submit.
The new alert will appear in the list.
To edit an existing email alert:
-
Click Edit in the Actions column next to the needed email alert.
-
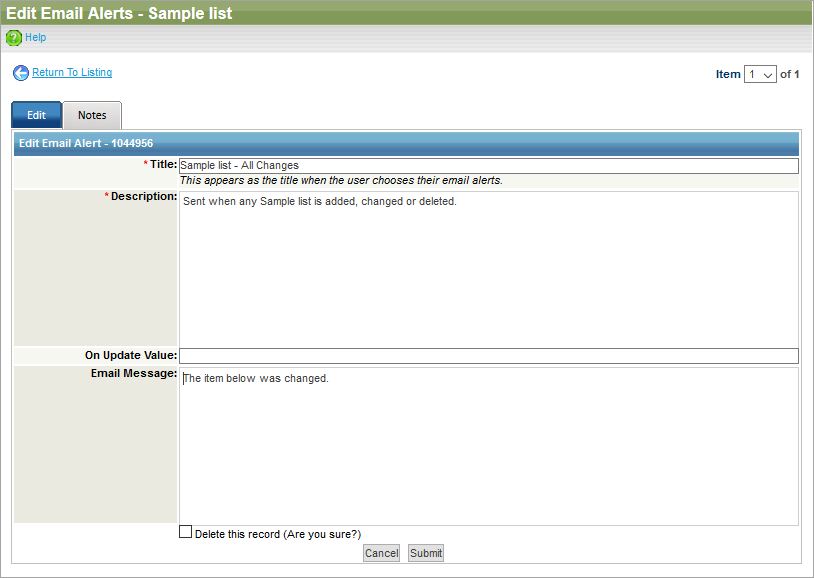
In the subsequent Edit Email Alert form, make the changes you need.
-
Click Submit.
To delete an email alert:
-
Click Edit in the Actions column next to the needed email alert.
-
Click Delete Button.
-
Click Submit.
The Lists screen
To access the Lists screen, go Lists > Lists.
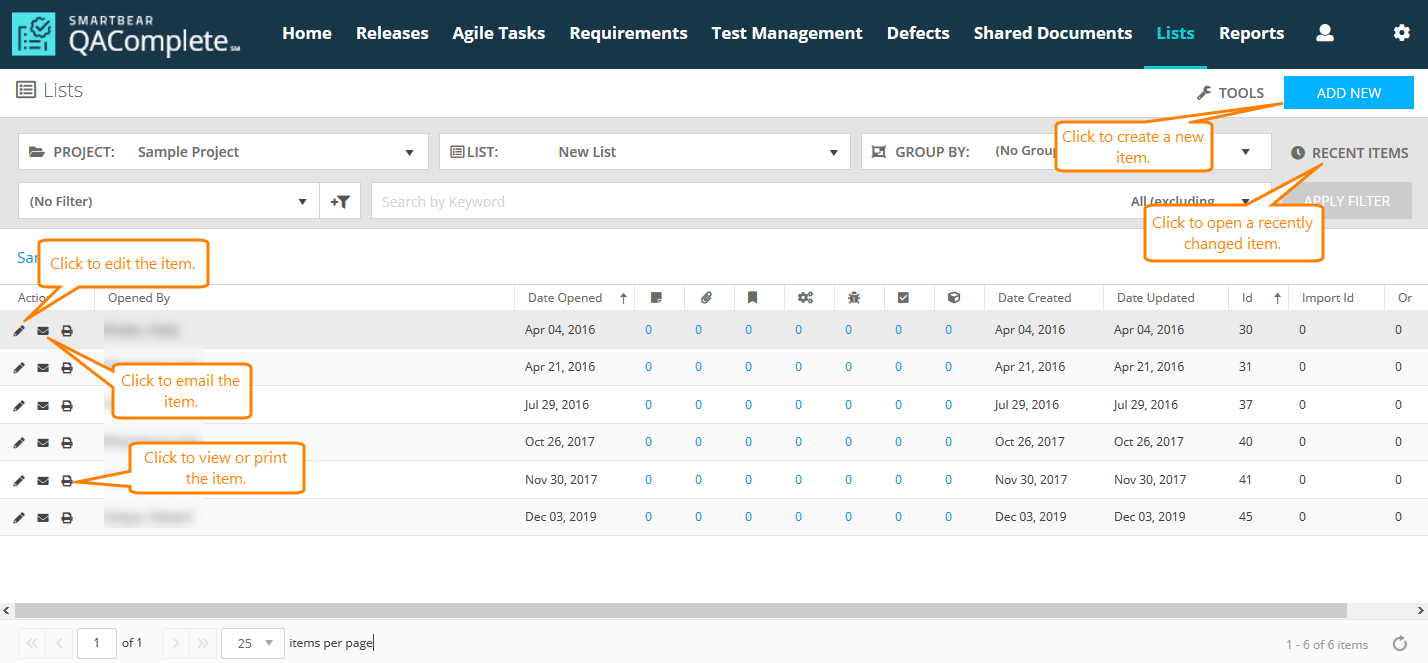
On the Lists screen, you can add new items to the list or view, edit, and delete the existing ones.
For information about the fields available on this screen, see Manager Reference below.
Common actions
There are common actions for each item on the Lists screen – navigation, filtering, search, and so on.
Navigate through items
Search for items
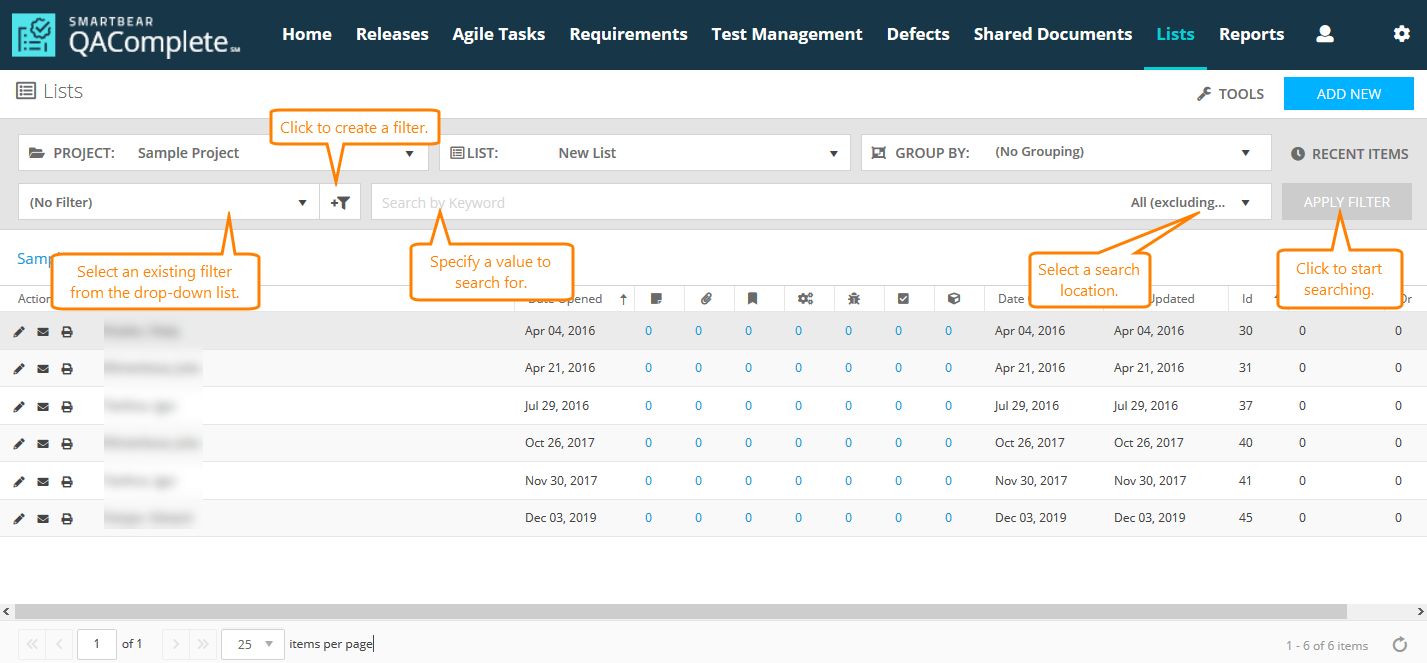
To search for a specific item, you can do the following:
- Search for an item field value using the Search box.
- Select a predefined filter from the Filter drop-down list.
- Create a new filter by clicking Add Filer.
To learn more about the filtering and search functionality in QAComplete, see the Search and Filters section.
The Tools menu
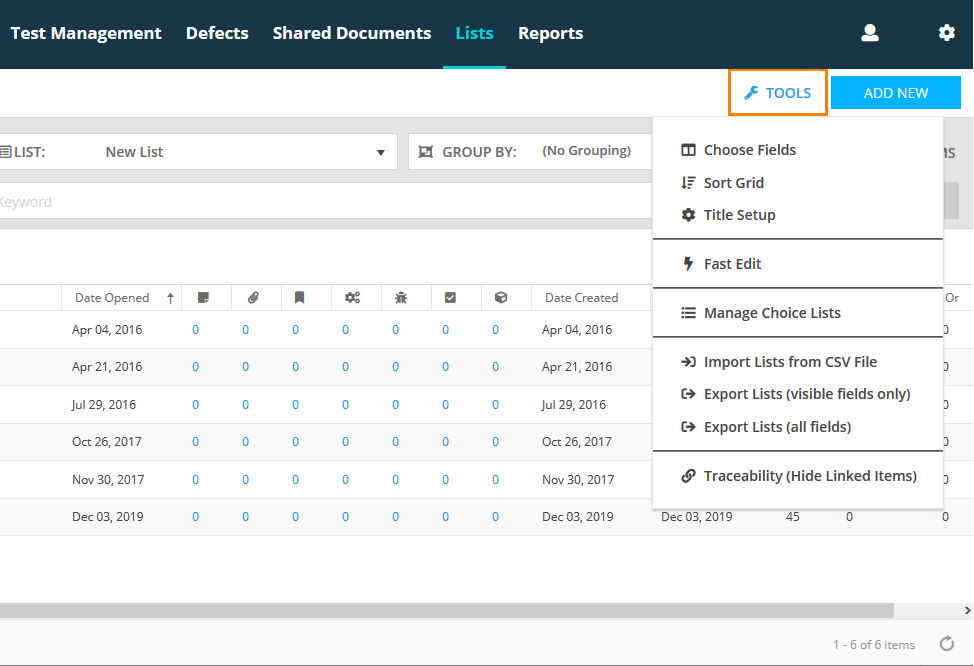
Click Tools to perform various actions on the Lists screen:
To learn more about each option, see Tools (Actions) Menu.
List reference
This section describes the fields and drop-down lists available on the Edit Shared Document form. You can use them to describe your items.
| Note: | For some options in the tables below, possible values are determined by choice lists. These options are marked with an asterisk (*). To manage choice lists for your project, go to Actions > Manage Choice Lists on the needed listing screen. |
List Manager Reference
| Option | Description | ||
|---|---|---|---|
| Date Created |
The date the list was created.
|
||
| Date Updated |
The date the list was updated.
|
||
| Updated By |
The user who updated the list last time.
|
||
| App Code |
The application code of QAComplete instance this list belongs to.
|
||
| List Name | The name of the list. | ||
| List Caption | The caption (title) of the list. | ||
| Description | The description of the list. | ||
| List Data Separated By* |
The coverage of the list.
|
The Fields screen reference
| Option | Description |
|---|---|
| Default Value | The default value of the field. |
| Locked | Defines whether the field is locked. |
| Minimum / Maximum Values | The minimal and maximal values of the field. |
| Field Number | The ordinal number of the field. |
| Field Name | The name of the field. |
| Field Type* | The type of the field. |
| On Listing | Defines whether the value of the field appears on the listing screen. |
| On Edit | Defines whether the user can modify the field value on the Edit form. |
| Required | Defines whether the field is required. |
The Lists screen reference
| Option | Description | ||
|---|---|---|---|
| Date Created |
The date the item was created.
|
||
| Date Updated |
The date the item was updated.
|
||
| Id |
The ID of the item.
|
||
| Import Id |
The import ID of the item.
|
||
| Original Id |
The original ID of the item (if imported).
|
||
| Updated By |
The user who updated the item last time.
|
||
| Opened By |
The user who added the item to the list.
|
||
| Date Opened |
The date the item was opened.
|


