
What is the navigation URL?
This is the URL of the first tested page, that is, the URL from which your UI test starts. This URL is a full URL, it includes the protocol, host name, port and the page path.
LoadNinja doesn’t track the URLs of other pages. It assumes they are opened from the start page and that the links on it function correctly.
Why edit the navigation URL?
You may want this in the following cases:
-
The tested app has been moved to another host. For instance, you might start creating tests on some local test server, and you will need to change the URL if your teammates move the app to another environment.
-
The tested web application has changed and uses another URL for the start.
-
The page path depends on the test data. For instance, it might contain the project or screen id or name. If you are creating a data-driven test that checks application behavior on different data sets, it’s important that the URL matches the data you use for the test run.
Change the URL
This approach to changing the URL is useful if the change is not frequent, for instance, if the application behavior has been changed or if the app has been moved to another host:
Option 1
-
In the UI test editor, enter the new URL in the text box at the top of the editor. Press Enter to confirm the change:

Click the image to enlarge it.
-
From the menu, select File > Save to save the UI test.
Option 2
-
In the UI test editor, expand the first step. Then, expand the
 Navigation Event and click
  next to the URL.
 -
Enter the new URL in the subsequent dialog:

Click the image to enlarge it.
-
Click Submit to save the changes and to close the dialog, and then select File > Save from the menu to save the UI test.
Data-driven URL
In modern web apps, the pages’ URLs can contain varying parts that depend on the operation the application performs. For instance, the URL might include the project or username or id: https://mycompany.com/project/my-project-name/settings. In this case, you can parameterize the URL with the values of the databank you use. The test engine will read the URL value from the databank and will use a new URL for each new test iteration.
Option 1
-
In the UI test editor, expand the first step. Then, expand the
Navigation Event and click next to the URL. -
In the subsequent dialog, click Map to External Databank:

Click the image to enlarge it.
Note: If you’ve mapped the URL to data earlier, this button’s text will be Edit Data Mapping: 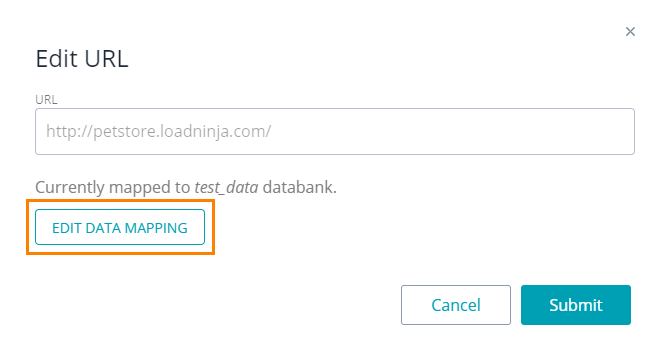
This will open the Import Databank wizard.
-
Follow the wizard steps (connect to a new data store or use a databank that is already attached to your test).
On the last step of the wizard, click URL, and then specify the databank and column for the URL:

Click the image to enlarge it.
-
Save the mapping settings in the dialog, and then select File > Save from the menu to save changes you made to the UI test.
Option 2
You can also map a URL to data from your databank at the time you are adding the databank to your test.
-
You start this procedure by selecting Add > Databank from the menu:

Click the image to enlarge it.
-
Follow the steps of the Import Databank wizard, and on the last step specify a value for the navigation URL as it is described above.