
Expects (validations, or checkpoints) are special actions in your scripts that check the state and data of the tested web application. They are an essential part of automated testing as they help you check the tested app automatically.
Available expects
| Expect | Description |
|---|---|
| Page Url |
Checks if the current page’s URL matches the expected value. |
| Page Title |
Checks if the current page’s |
| Cookie |
Checks if the specified cookie value has the expected data. |
| Local Storage |
Checks if a key in the local storage ( |
|
Checks if a key in the session storage ( |
|
| Element |
Checks the contents, attributes, and properties of an element on the web page. The way you create these validations is slightly different from the way you create other validations, see below. Your scripts can verify the following data:
|
-
The script treats all expected values as strings.
-
The comparison operations —equals, doesn’t equal, contains, doesn’t contain— are string comparison operations.
-
The comparison is case-sensitive. Wildcards and regular expressions are not supported.
What happens if a validation fails?
If a validation fails during the script run, the runner logs an error as a failed test step and continues running the script. After the run is over, you can check the results for the failed steps.
 The script runner doesn’t check expects when you replay the script on the recorder screen.
Add an expect
You add expects during script recording:
-
Start recording and record the script as usual.
-
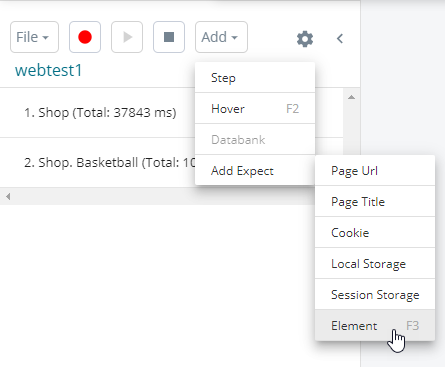
When you reach a point where you need an expect, select Add > Add Expect on the recorder toolbar and choose one of the expect types.
-
In the subsequent dialog, configure validation parameters and select Add Expect.

Click the image to enlarge it.
The controls on the dialog are different for different expect's types. The image above is an example of the dialog view for the Page Url validations:
Add the Element expect
Adding the Element expect to your script is slightly different way in comparison to adding other expects:
-
Start recording and record the script as usual.
-
When you reach a point where you need an expect, select Add > Add Expect > Element on the recorder toolbar:
This activates the selection mode.
-
Move the mouse pointer to the needed element and click it (while you are moving, the recorder highlights the element under the mouse pointer):
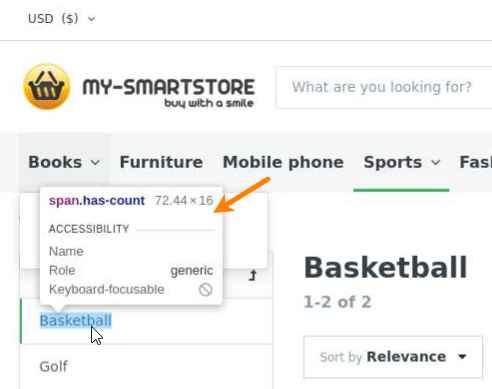
This will select the elements for the validation.
-
In the subsequent dialog, specify the element’s data to check, condition, expected value and select Add Expect:

Click the image to enlarge it.
Edit an expect
-
Find the expect in the list of recorded events.
-
Expand the expect node and select Edit:
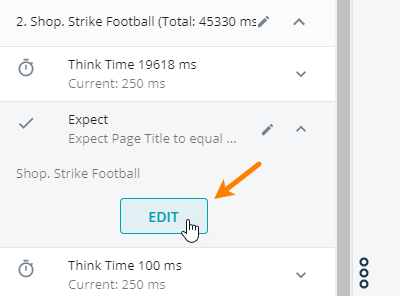
-
Update expect properties in the subsequent dialog.
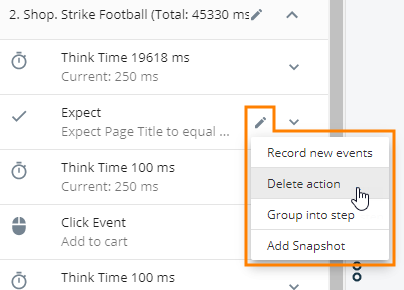
Delete an expect
You can delete expects in the same manner, in which you delete any other test events:
-
Find the expect in the list of recorded events.
-
Click and select Delete action from the context menu:
See Also
Record and Replay
Recorder UI Overview
Record and Replay – Tutorial