For this document, we provide an example Lambda Function located in our AWS CodePipeline GitHub Repository.
AWS CodePipeline is a continuous delivery tool that lets you automate your development process quickly, safely, and at scale. Through AWS CodePipeline’s integration with many other AWS and third party services such as ECS, S3, Elastic Beanstalk, CloudFormation, GitHub, and Jenkins, every time you commit code, a build is created and automatically run, allowing you to test every commit.
In this guide we will use AWS CodePipeline with GitHub and an AWS Lambda Function for testing using the Selenium WebDriver and the JavaScript programming language.
Create an AWS Lambda Function
-
Navigate to https://console.aws.amazon.com/lambda/
-
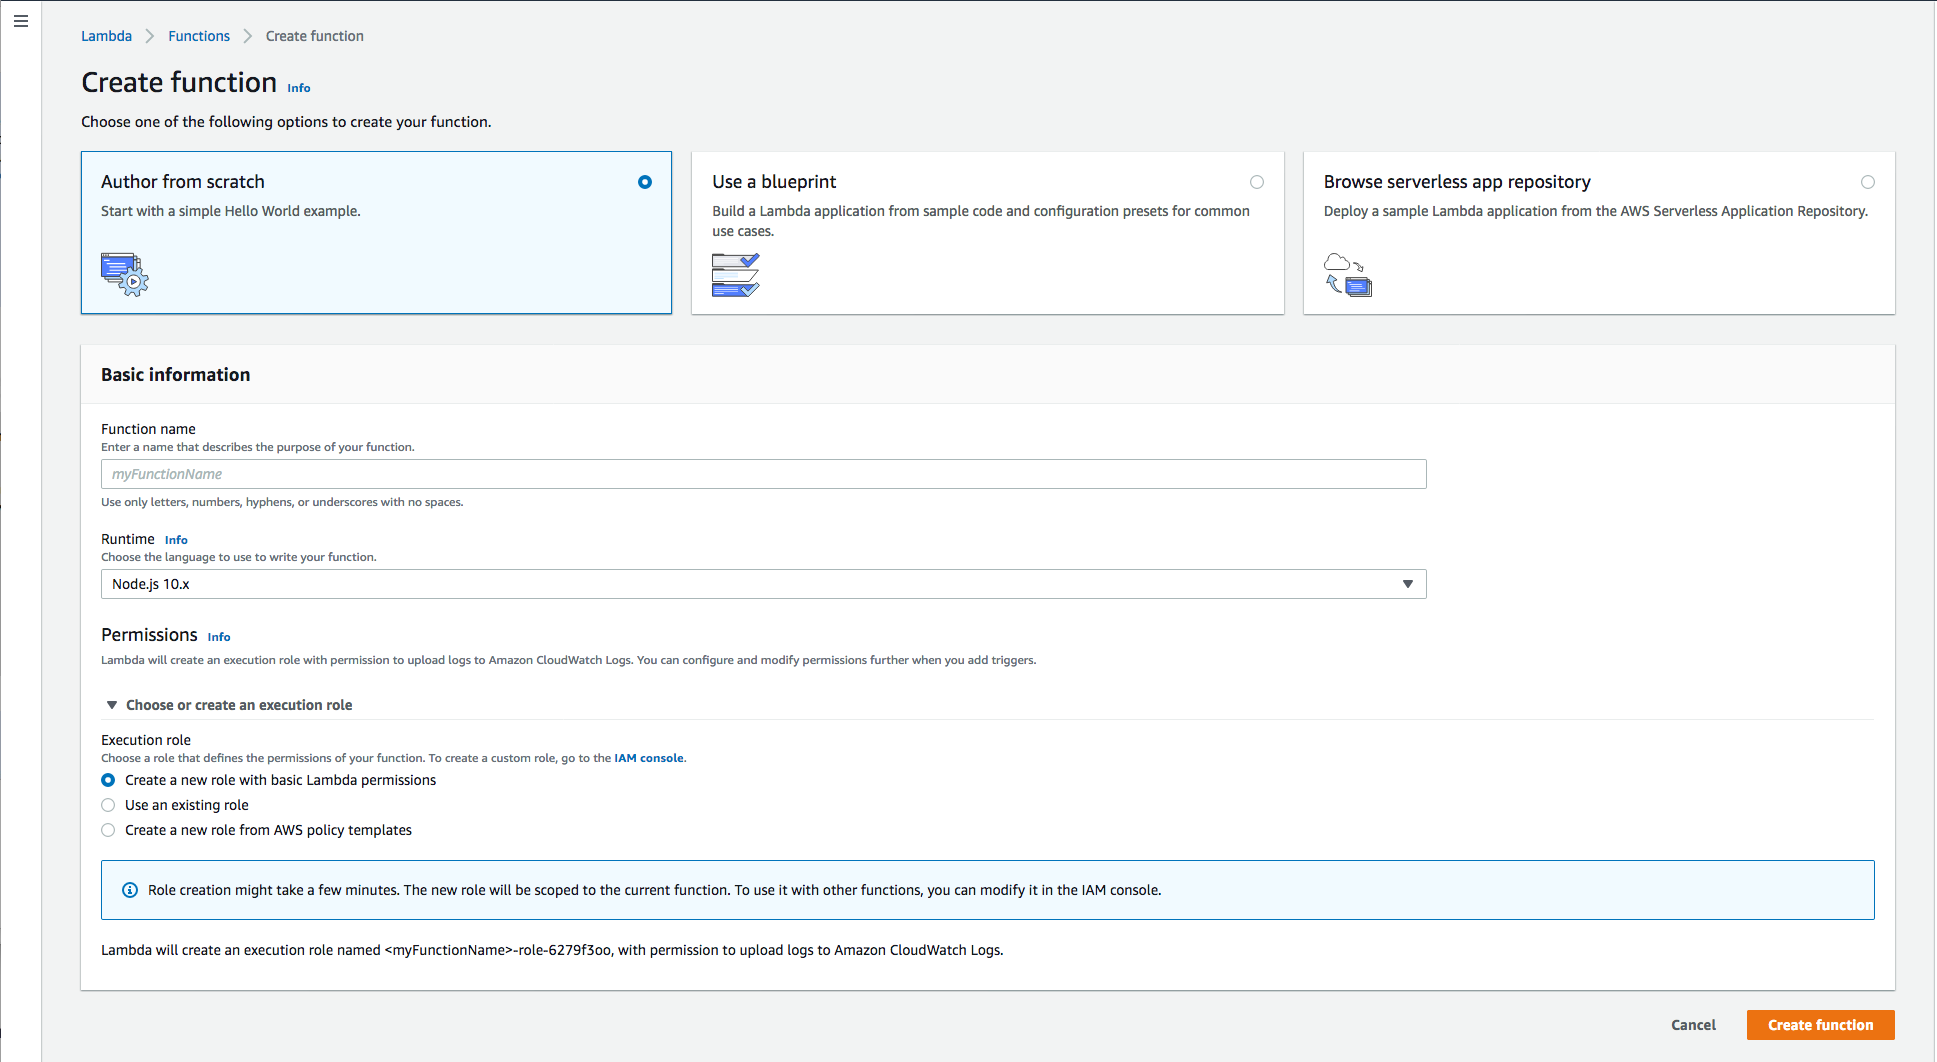
Click the Create Function button.
-
Name your function and click the Create Function button.
-
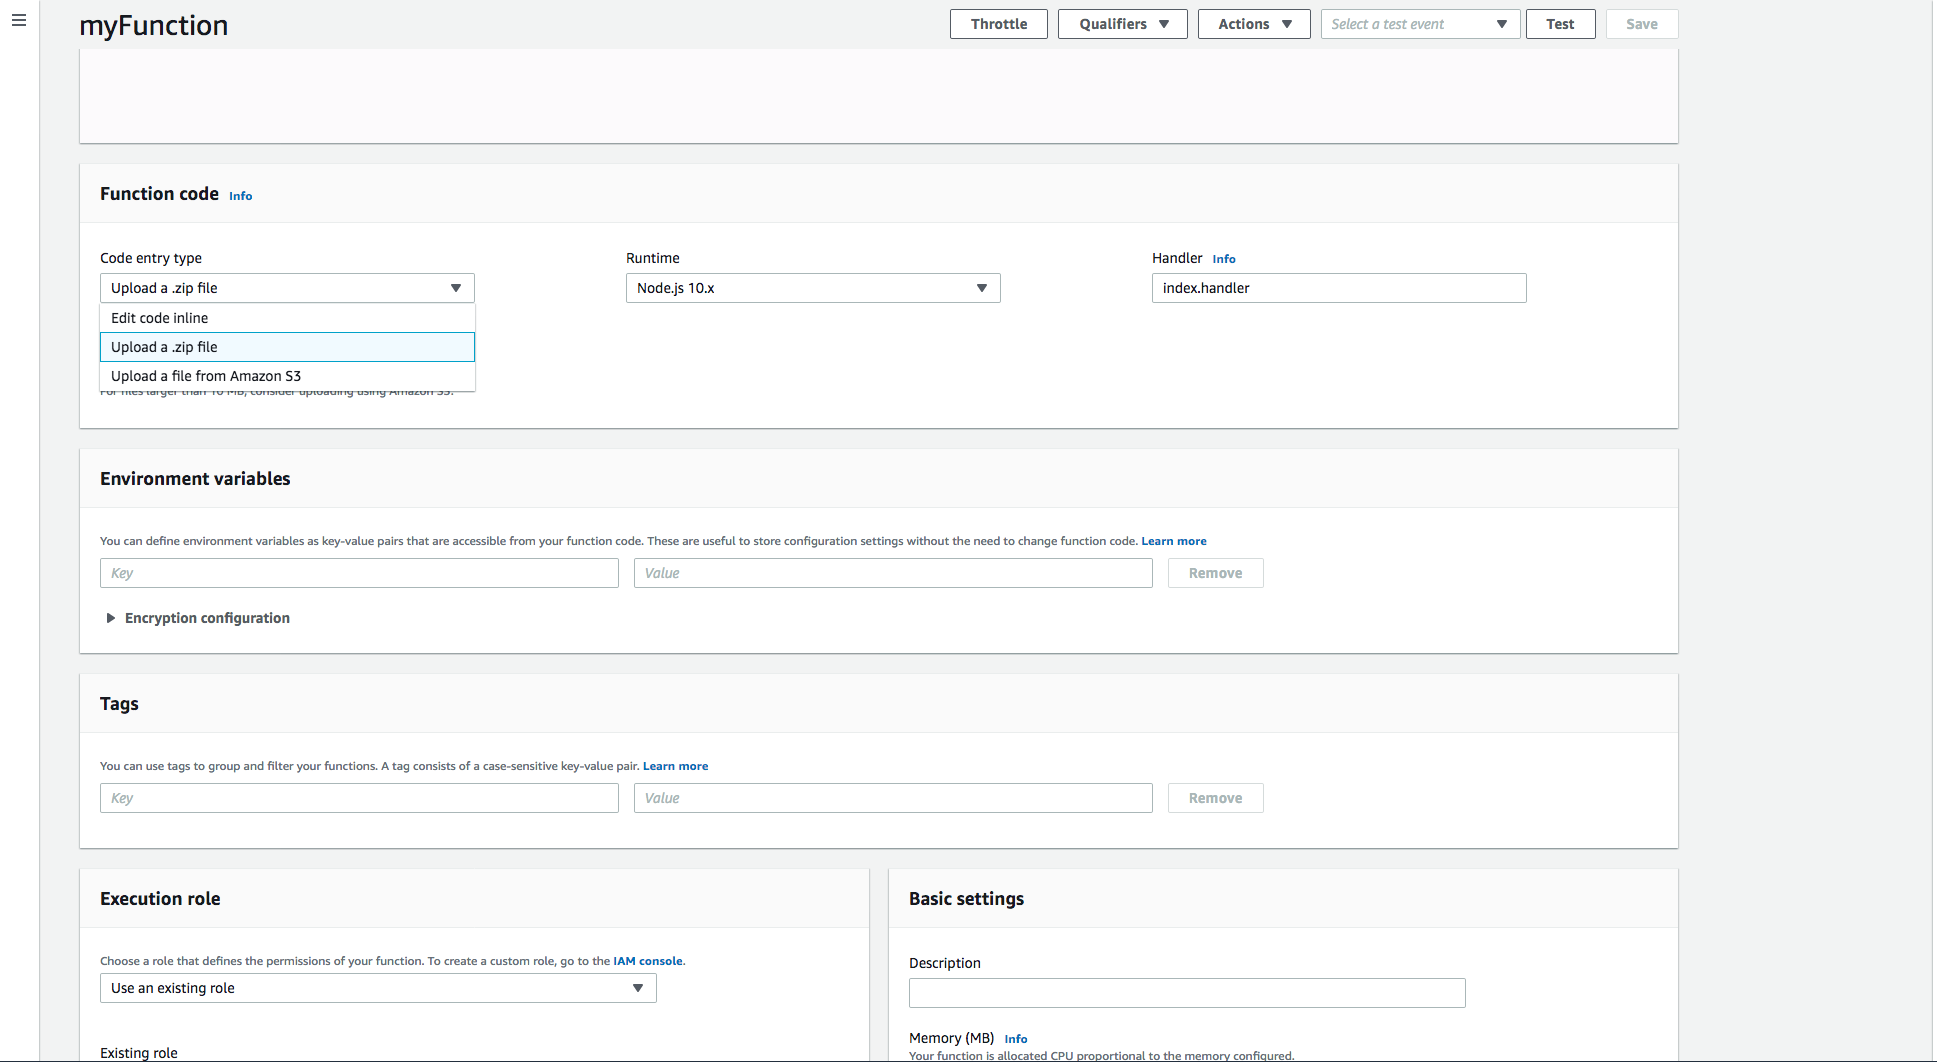
Download the example Lambda Function, and choose Upload a .zip file from the Code entry type drop-down in the Function Code section.
-
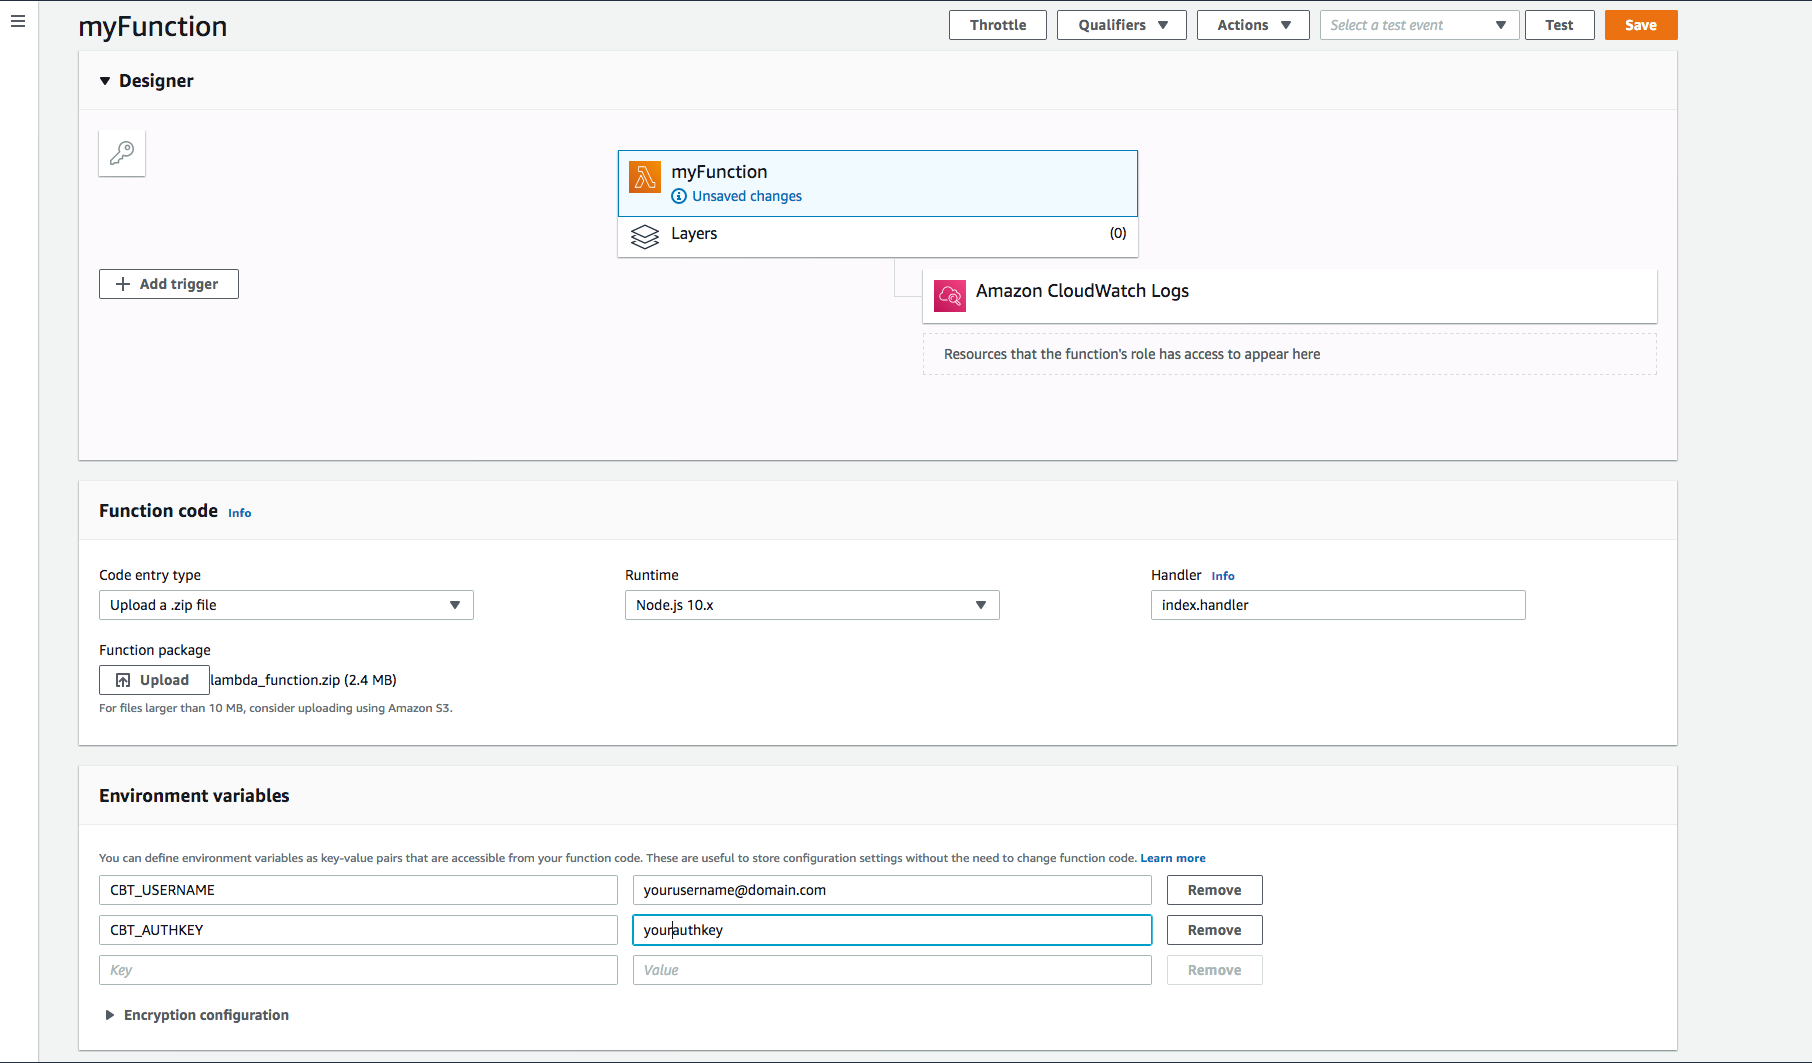
Set your username and authkey as environment variables.
-
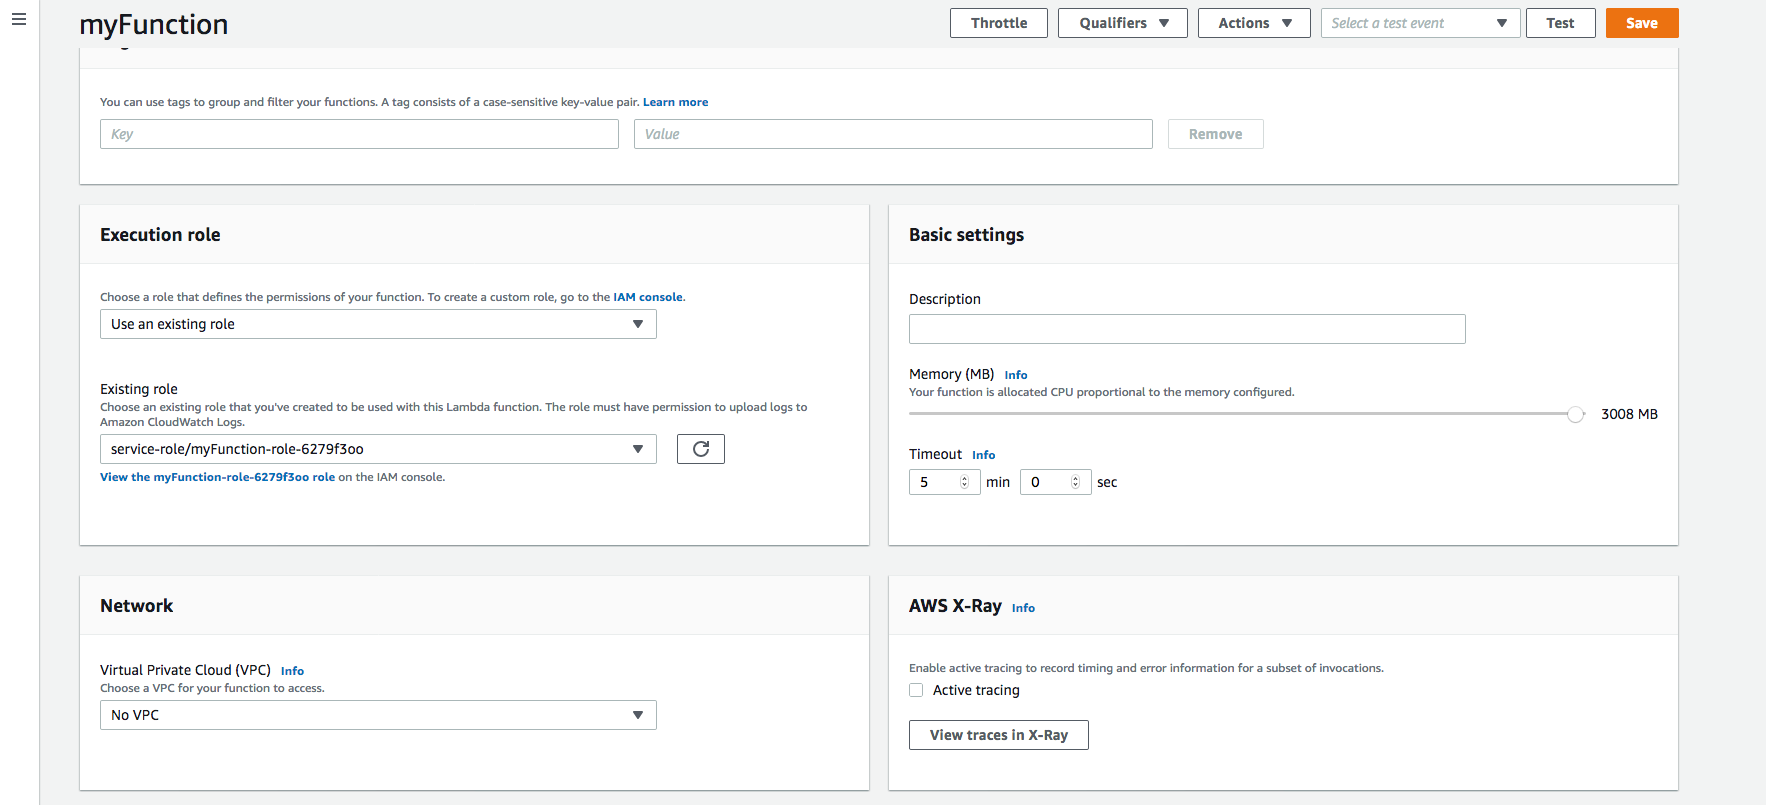
Set your execution role and basic settings then click Save.
Set up AWS CodePipeline
-
Navigate to the AWS CodePipeline homepage.
-
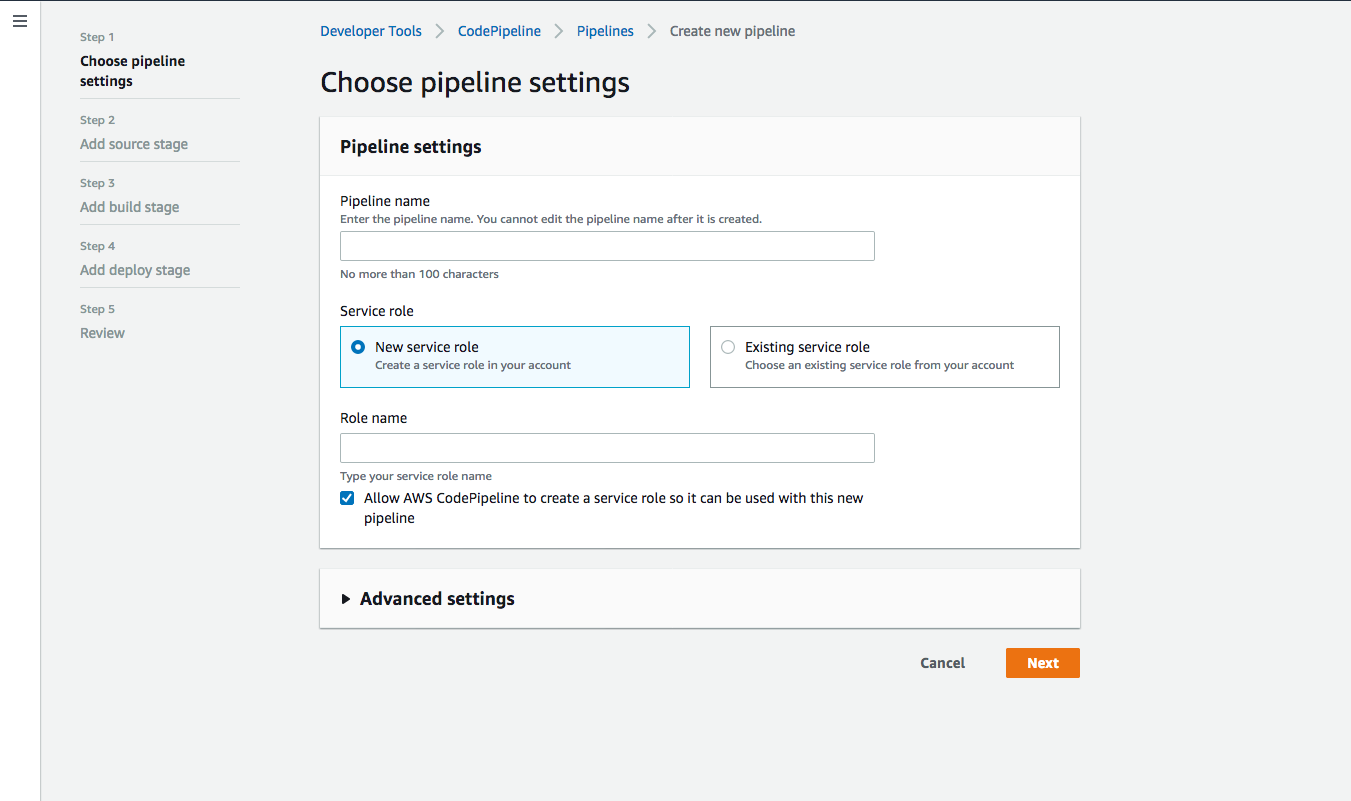
Click the Create pipeline button.
-
Name your Pipeline and click Next.
-
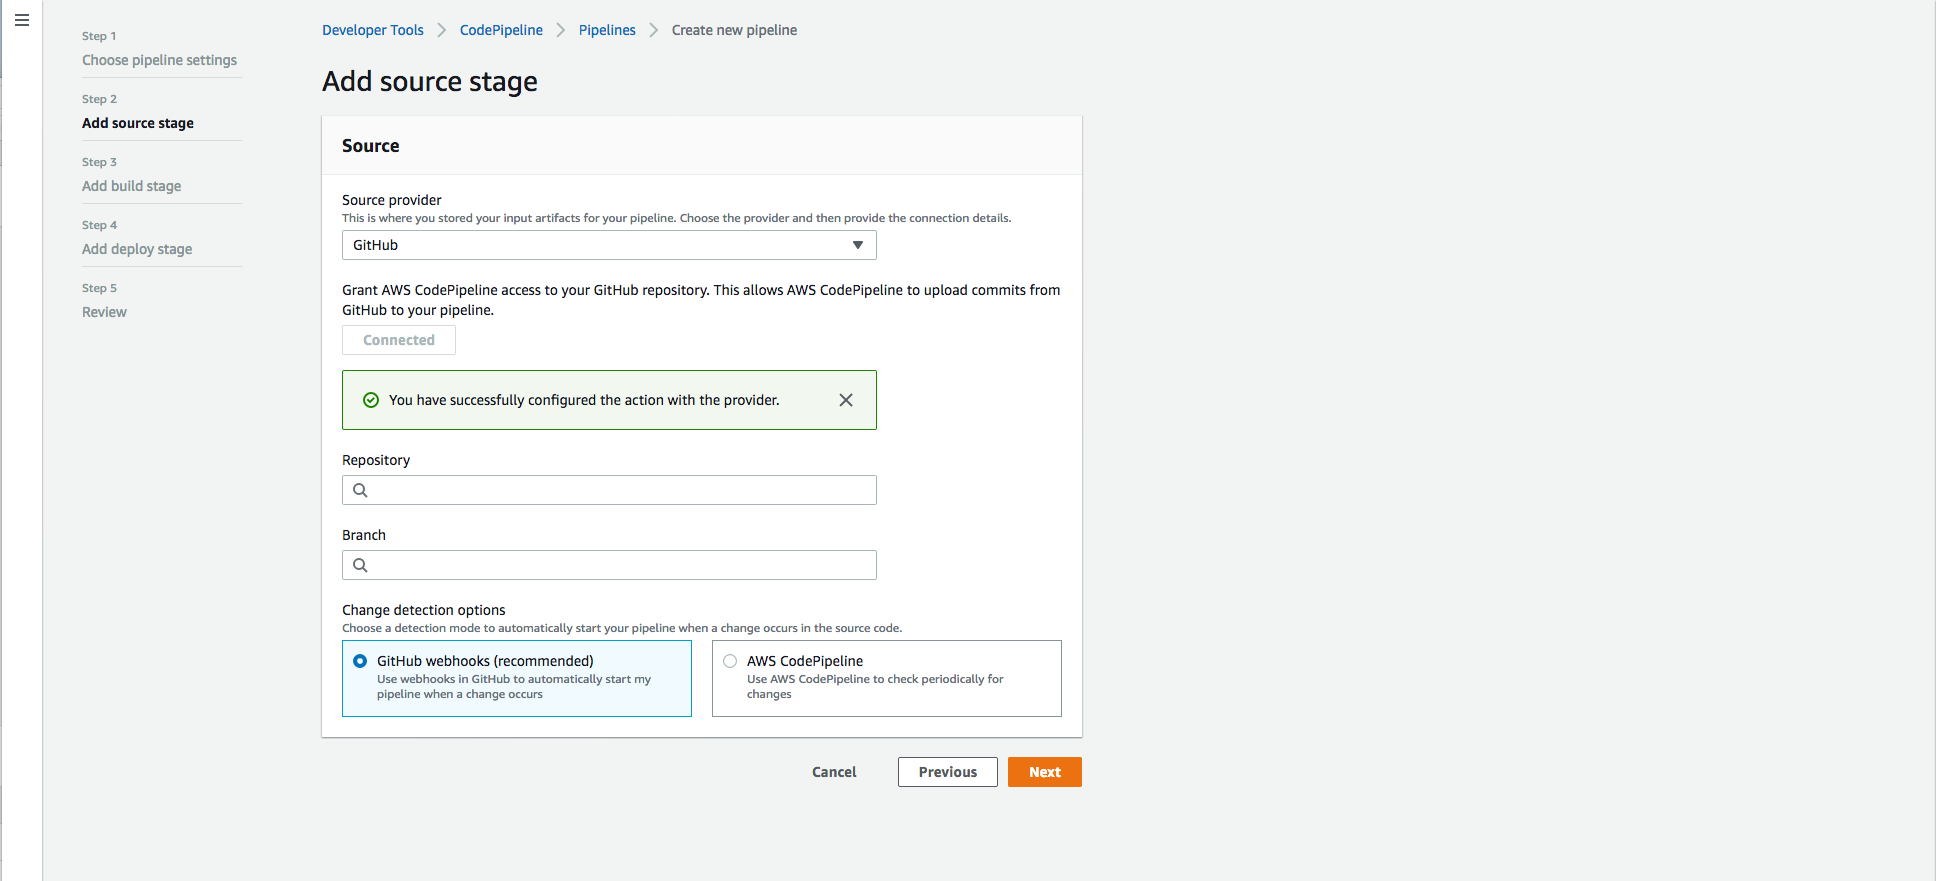
Select GitHub from the Source provider drop-down, click the Connect to GitHub button, chose your repository and branch, then click Next.
-
Add any additional desired steps, click Next, and then Create Pipeline.
-
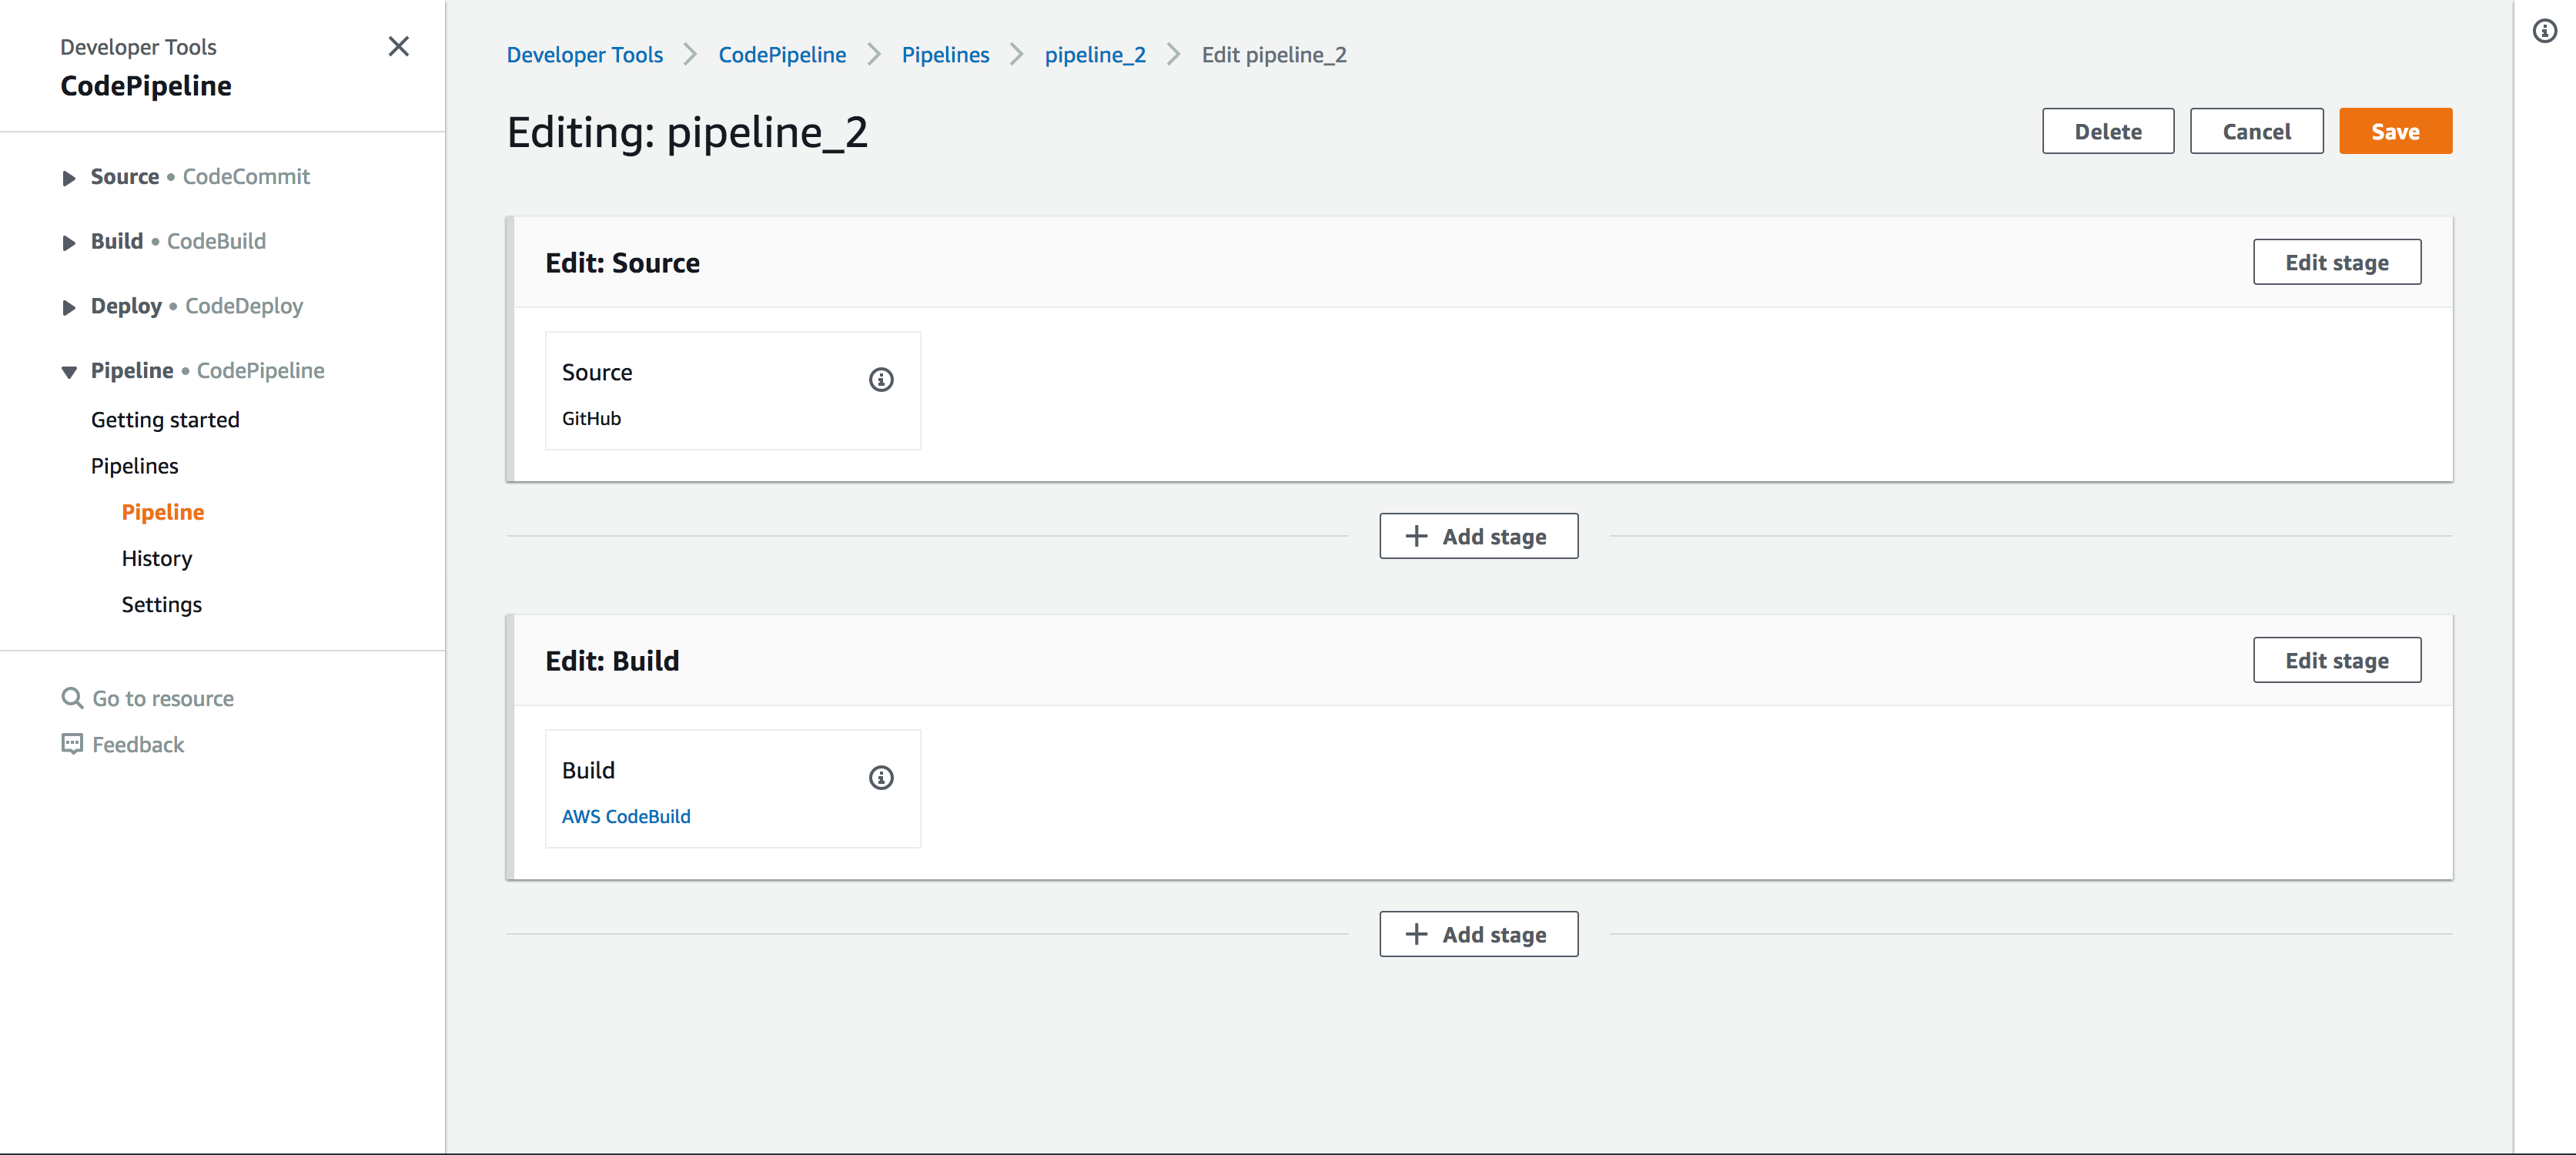
Edit you pipeline to add a Lambda stage by clicking the Edit > Add Stage > Add action group.
-
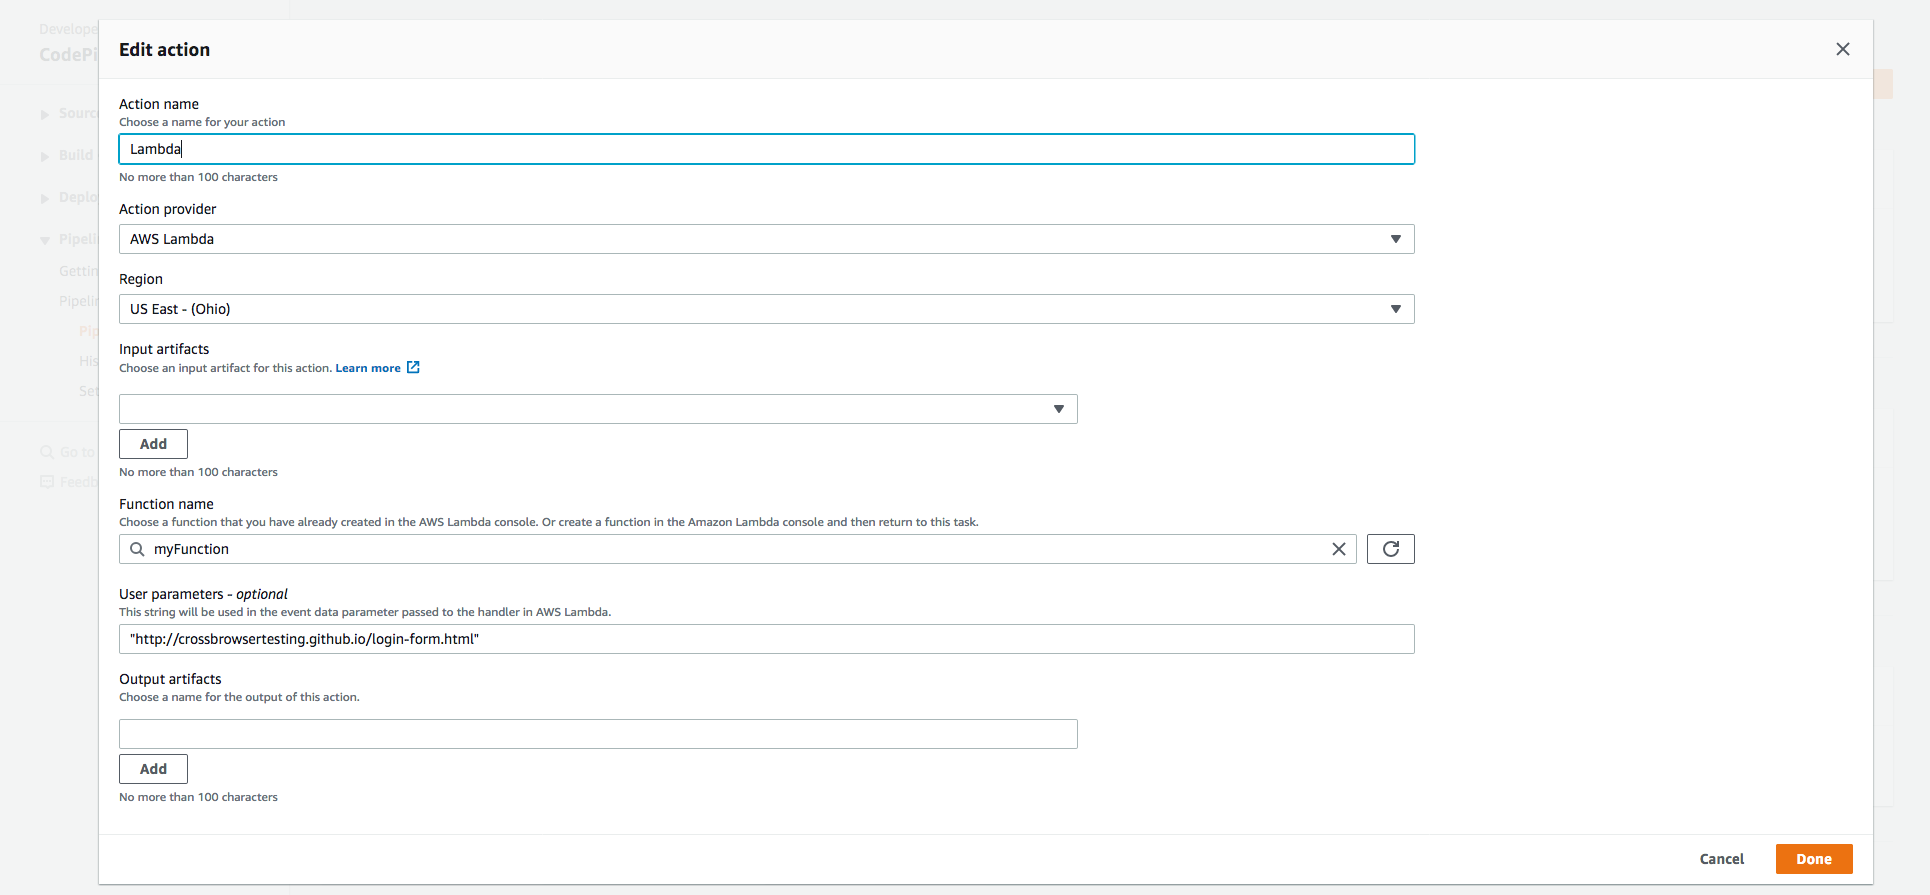
Name your action, choose AWS Lambda as the Action Provider, set your function name and user parameters, and click Done.
-
Save your pipeline and commit to your repository.
Congratulations! You have successfully integrated CrossBrowserTesting and AWS CodePipeline. Now you are ready to see your test run in our app.
Conclusions
By following the steps outlined in this guide, you are now able to seamlessly integrate AWS CodePipeline and CrossBrowserTesting. If you have any questions or concerns, please feel free to reach out to our Support team.


