
When integration between JIRA and Collaborator is enabled and properly configured, you can create JIRA tickets/items directly from the Collaborator user interface.
To create JIRA ticket, do the following:
-
Login to Collaborator Web Client.
-
Open the desired review in the Review Screen.
-
In the General Information section find the JIRA project field and select a JIRA project where you want to create the new item.
-
Scroll to the Participants section.
-
Click the JIRA ticket All button to make a ticket for all participants.
-- or --
Click the Create JIRA ticket link next to the participant name to make a ticket for the selected participant.

Collaborator will perform the following actions:
-
Create a new item in the specified project.
-
Fill-in item's Title and Description with the information from the review.
-
Assign this item to a JIRA account linked with the chosen participant.
-
Add a link to the created JIRA ticket in the Participants section.

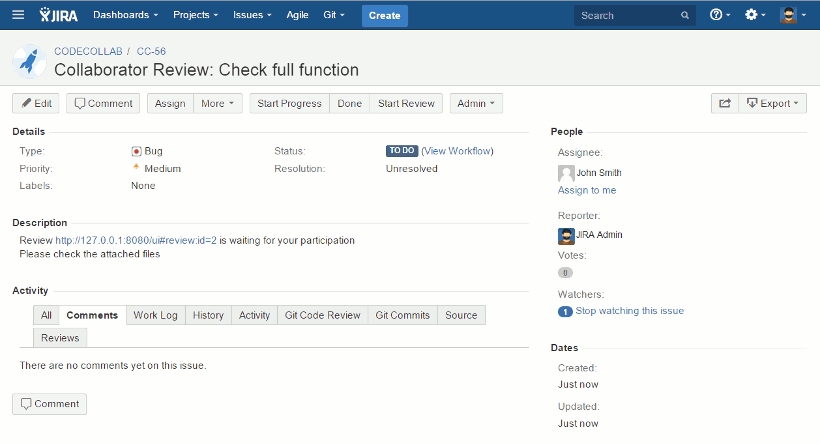
The newly created JIRA item will look like this:
Known Issues
- Currently, Collaborator cannot populate values of arbitrary custom fields. If your JIRA server requires certain custom fields to be set during the creation of tickets/items, then Collaborator will be unable to create new tickets/items.