
This topic describes how to enable authentication to Collaborator server using Atlassian cloud account. To achieve this, you need create OAuth application on the Atlassian side and specify its parameters in Collaborator server. To learn about other authentication options, see Additional Authentication Options.
Technical details
-
Authentication supports Atlassian cloud products, currently it does not support on-premise products.
-
Atlassian authentication for Collaborator can be used on organization level only.
-
Collaborator retrieves user information from the Atlassian server and checks if any of existing users have matching login names or email addresses. Once such user is found, it logs the user in. Otherwise, it creates a new user account in Collaborator.
Enable HTTPS Connections
Atlassian OAuth application will use HTTPS connections, thus you will need to enable it for Collaborator server as well. For instructions, please see Configure HTTPS. Do not forget to restart the Collaborator server to apply changes.
Configure Atlassian OAuth
-
Log into Atlassian Developer Console under organization you have administrative access to.
-
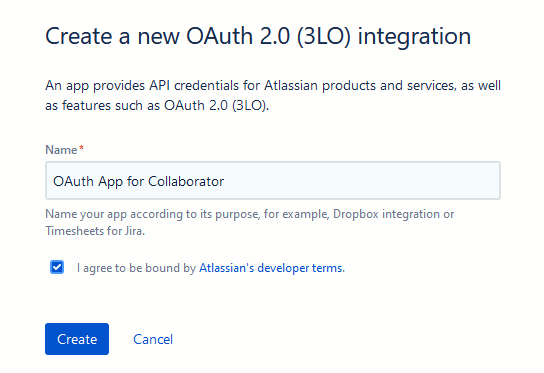
In the upper-right corner click Create and then select OAuth 2.0 integration from the drop-down. This will display the new application settings.
Click the image to enlarge it.
-
Specify any meaningful name for your application, check the "I agree to be bound by Atlassian's developer terms" check box and click Create.
This will create an application and display its settings.
-
Select Authorization in the left menu.
-
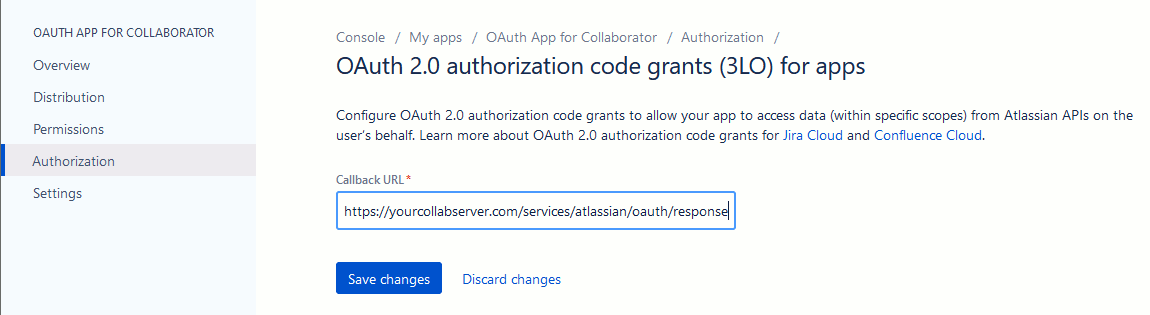
Next to OAuth 2.0 (3LO), select Configure.
-
In the Callback URL setting specify the URL where the OAuth response will be sent to.
Collaborator servers have this service at the following endpoint: https://yourcollabserver.com/services/atlassian/oauth/response
Click the image to enlarge it.
-
Click Save changes.
-
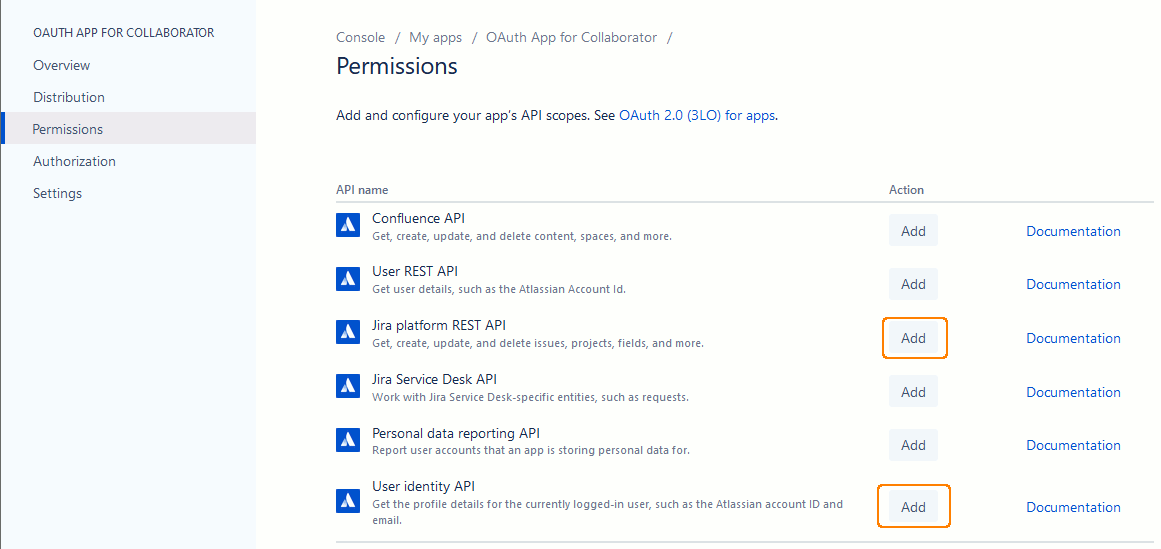
Select Permissions in the left menu.
-
Locate the Jira platform REST API and User identity API items and click Add next to them. Optionally, add any other API scopes to be used for authorization.
Click the image to enlarge it.
-
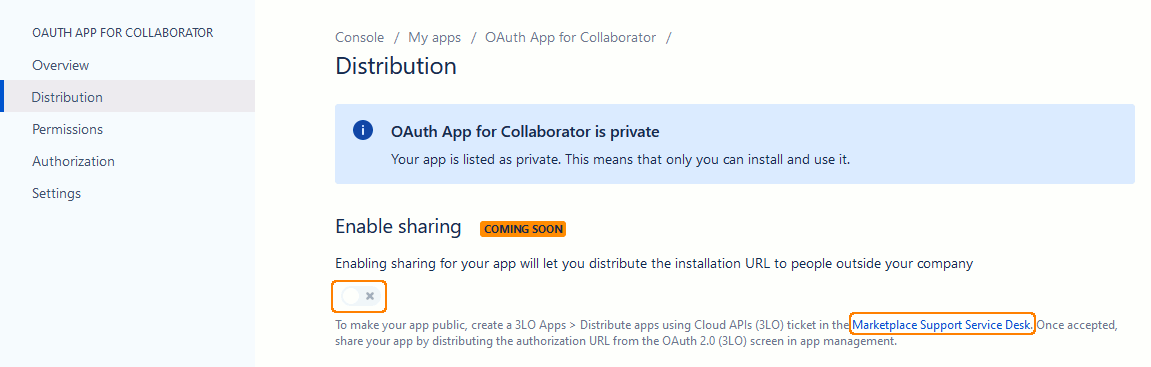
Select Distribution in the left menu.
-
Under the Enable sharing setting click the Marketplace Support Service Desk link to submit a request to make your app public.
Click the image to enlarge it.
Once the request is approved, toggle-on the Enable sharing slider.
- Select Settings in the left menu.
-
Copy the values of Client ID and Secret, as we will user them a bit latter.

Click the image to enlarge it.
Configure Collaborator Server
-
Open the Collaborator login page in a browser and log in to Collaborator as an administrator.
-
In Collaborator, go to Admin > Additional Login Options.
-
Locate the Atlassian OAuth configuration and click Edit. This will display the configuration settings.

Click the image to enlarge it.
-
Specify the setting values:
OAuth Client ID and OAuth Client secret The Client ID and secret of OAuth application for Collaborator integration.
This is the application that we have created on the Atlassian server earlier.Atlassian resources The names of Atlassian resources (organizations) whose members would be allowed to log in.
Use ',' as a separator if several resources should be specified.
Restrict access to JIRA Specifies whether to restrict access to JIRA data (links to projects and tickets, their status) on the Collaborator side based on current user permissions on the Atlassian side.
If disabled, Collaborator displays all JIRA items that are accessible to the particular account that was specified in JIRA Integration settings.
If enabled and the user had signed in using Atlassian account, Collaborator will display active links only to those JIRA items that are accessible to current user on the Atlassian side. JIRA items that are not accessible to current user will be displayed as plain-text.
If enabled and the user had signed in using Collaborator's generic authentication, Collaborator will display plain-text instead of JIRA links.
See Restrict access to JIRA items section in Configuring JIRA Integration.
Enable Sign in with Atlassian OAuth Specifies whether to enable authentication using Atlassian accounts.
Now the integration between Collaborator and your Atlassian OAuth application is configured and running.
See Also
Additional Authentication Options
GitHub Authentication
Link User Accounts
JIRA Integration