
To run AQTime projects as part of your team build, create a Visual Studio test project containing AQTime Test items.
In our explanations, we assume that the test project is created and configured on one computer, but will be run on another computer (a build server). For information on requirements to these computers, see Running AQTime Projects as Part of Build And Release Pipeline - Requirements.
 1. Preparing AQTime Projects for Integration
2. Adding AQTime Projects to Visual Studio Test Projects
3. Creating a Test List (for Visual Studio 2005 – 2010)
Requirements
The computer, where you create and configure Visual Studio test projects, must have the following software installed:
-
One of the following Visual Studio versions:
-
Microsoft Visual Studio 2015 (Professional or Enterprise).
-
Microsoft Visual Studio 2010 - 2013 (Professional, Premium or Ultimate).
-
Microsoft Visual Studio Team System 2008 (Team Suite or Test Edition).
-
Microsoft Visual Studio 2005 (Team Suite or Team Edition for Testers).
-
-
AQTime with the appropriate Visual Studio integration.
Before You Start
When you build your Visual Studio projects on a build server, AQTime Test items (.aqtimetest) will be copied to the build output folder. However, the AQTime project files (.aqt) will not be copied to the output folder because they do not belong to the Visual Studio test project.
To run an AQTime project as part of a team build:
-
Configure your team build to copy AQTime projects to the needed location on the build server.
-
Make sure that the AQTime Test items can access the AQTime projects, that is, the path that the items specify is valid.
For this, we will create custom build steps that will copy the AQTime project file to a proper folder. For instructions on how to create custom build steps, see below.
1. Preparing AQTime Projects for Integration
Before creating a Visual Studio test project, prepare your AQTime project for integration:
-
Specify the modules to be profiled, areas, triggers, actions, and so on and make sure that your AQTime project functions properly.
-
Make sure that the build has access to the project. That is, you can either share the folder that contains your AQTime project for network access, or store the project on the server.
-
Make sure that the build computer can access all the required libraries and modules.
Once your AQTime project is ready, you can integrate it into the Visual Studio test project.
2. Adding AQTime Projects to Visual Studio Test Projects
-
In Visual Studio, open your Visual Studio test project or create a new one.
-
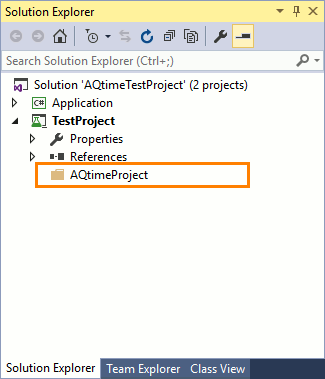
In Solution Explorer, add a new folder to your Visual Studio test project. This is the folder where your AQTime Test items will reside:
-
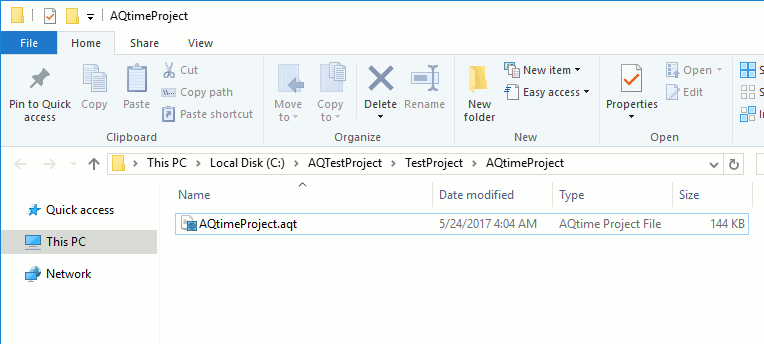
Right-click the created folder and select Open Folder in Windows Explorer from the context menu. This will open the created folder in Windows Explorer.
Place your AQTime project in the folder:
-
Add your AQTime project to source control.
-
In Visual Studio Solution Explorer, add a new AQTime Test item to the created folder:

-
Configure the item to run the needed AQTime project:

Click the image to enlarge it.
To use TestComplete tests to simulate user actions over your application during the profiling, specify the TestComplete project.
3. Creating a Test List (for Visual Studio 2005 – 2010)
If you use Visual Studio 2005 – 2001, create a test list containing your AQTime test (if you use a later version of Visual Studio, skip this step):
-
In Visual Studio 2010 and 2008, switch to the Test List Editor panel. To display the Test List Editor panel, select Test > Windows > Test List Editor from the main menu.
In Visual Studio 2005, switch to the Test Manager panel. To display the Test Manager panel, select Test > Windows > Test Manager from the main menu.
-
In the left section of the corresponding panel, right-click the List of Tests node and choose New Test List from the context menu. This will call the Create New Test List dialog:
In the dialog, specify the test list name, description and location and click OK. Visual Studio will display the newly created test list in the Test Manager panel (or in the Test List Editor panel).
-
Select the All Loaded Tests node in the Test List Editor panel (or in Test Manager). Visual Studio will display a list of all available tests on the right.
-
Drag the AQTime test from the right part of the Test List Editor panel (or Test Manager) to the test tree and drop the test on the created test list.
-
Check the AQTime test in the Test List Editor panel (or in Test Manager) to enable it.
-
Save the changes made to the test project by selecting File > Save All from Visual Studio main menu.
4. Creating Custom Build Steps
Create custom builds steps that will copy your AQTime project to the test project’s output folder:
-
In Visual Studio Solution Explorer, select your test project and choose Properties from the Project menu.
-
In the ensuing Project Designer panel, switch to the Build Events tabbed page.
-
In the Pre-build event command line box, specify commands that will clear the AQTimeFolder_Name folder in the project’s output folder:
rd /S /Q "$(TargetDir)AQTimeFolder_Name"
And in the Post-build event command line box, specify commands that will copy your AQTime project to the Visual Studio test project’s output folder:
md "$(TargetDir)AQTimeFolder_Name"
xcopy "$(ProjectDir)AQTimeFolder_Name" "$(TargetDir)AQTimeFolder_Name" /Y /EWhere AQTimeFolder_Name is the name of the folder that contains your AQTime Test file (.aqtimetest) and the corresponding AQTime project (see above).
5. Adding Test Projects to Source Control System
Team Foundation tools work only with files stored in a source control. Add your Visual Studio test project to a source control:
If You Use Team Foundation Version Control
-
Right-click your solution in the Solution Explorer and select Add Solution to Source Control from the context menu.
-
(For Visual Studio 2013 and later) In the subsequent Choose Source Control dialog, select the Team Foundation Version control and click OK.
-
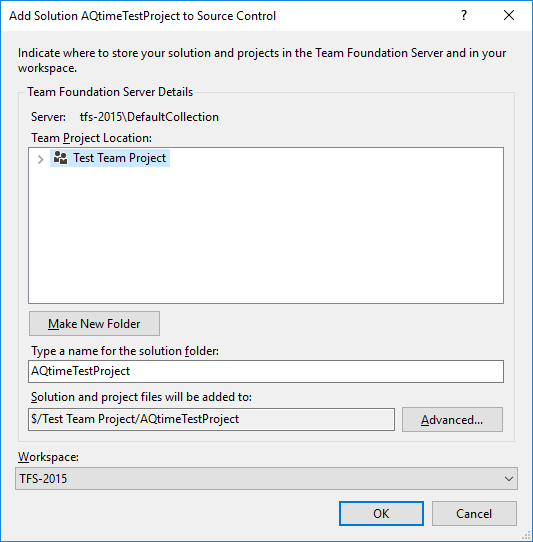
In the subsequent Add Solution to Source Control dialog, specify the source control project and folder where the test project will be added.
-
Click OK. Visual Studio will add the project files to the Team Foundation source control.
-
Right-click the solution node in the Solution Explorer and choose Check In from the context menu or click Check In in the Team Explorer panel.
-
In the subsequent Check In dialog, click the Check In button. Visual Studio will check in the solution files to the source control system.
If You Use Git (For Visual Studio 2013 and later)
-
Right-click your solution in Solution Explorer and select Add Solution to Source Control from the context menu.
-
In the subsequent Choose Source Control dialog, select Git and click OK.
-
In Team Explorer, click Commit to commit your solution files to the Git repository.

See Also
Running AQTime Projects as Part of Build And Release Pipeline
Adding AQTime Projects to Visual Studio Test Projects