AlertSite supports IPv6 monitoring and lets you monitor websites that use IPv6 addresses. This topic explains how to create and configure IPv6 monitors.
Considerations
-
Your monitored website must have an IPv6 address assigned.
-
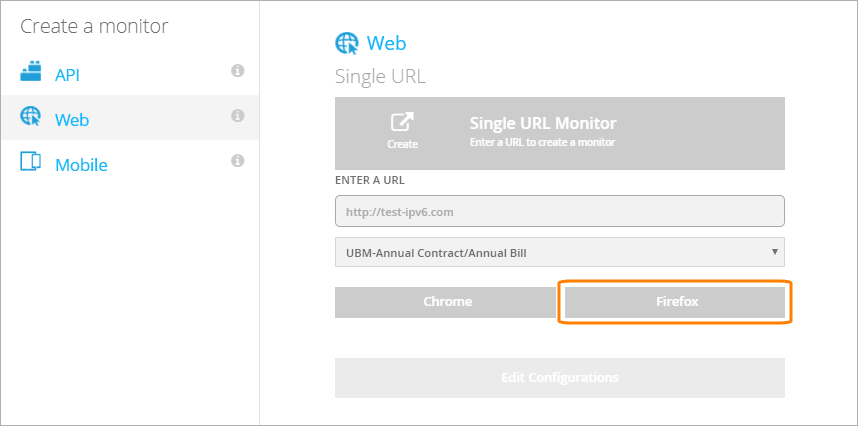
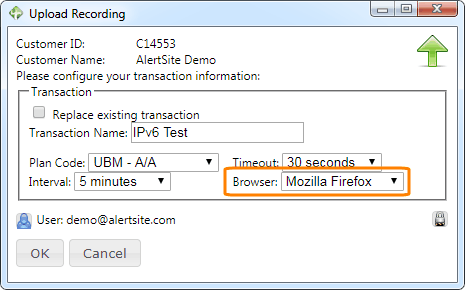
IPv6 monitoring is supported only for real-browser (DéjàClick) monitors that use the Firefox browser.
-
The monitor must have the Use IPv6 option enabled and must use only IPv6-enabled monitored locations (see below). IPv6 monitors will not run tests from non-IPv6 locations.
-
IPv6 monitors use only IPv6 and do not use IPv4, so, if you want to monitor your website over both IPv4 and IPv6, you will need two monitors.
Monitoring Locations
AlertSite offers IPv6 monitoring from the following locations:
| Location | IPv6 Address | Location ID |
|---|---|---|
| Fort Lauderdale, FL | 2607:f758:5100::3 | 10 |
| Boston, MA (not Expedient) | 2001:4830:C400:955:FFFF:FFFF:FFFF:FFFF | 72 |
| Newark, NJ | 2001:19f0:200:3b8e:225:90ff:feae:2f2c | 71 |
| Stockholm, Sweden | 2a00:1a28:1100:f::7d8:5e7c | 5110 |
You may need to configure your firewall to allow access from these IP addresses.
Each AlertSite IPv6 location has a dedicated server for IPv6 tests. This server does IPv6 DNS lookups only, that is, it uses IPv6 throughout the entire test. AlertSite IPv6 servers do not do IPv4 lookups.
1. Creating a Firefox Browser Monitor
If you do not have a Firefox monitor for your website yet, you need to create one.
2. Enabling IPv6 Support
After you create a Firefox monitor, you can enable IPv6 monitoring in the monitor settings:
AlertSite UXM
-
Open the monitor settings. To do this, click on the monitor tile or row on the Dashboard, then select Edit Configurations.
-
On the Main tab, select Use IPv6.
-
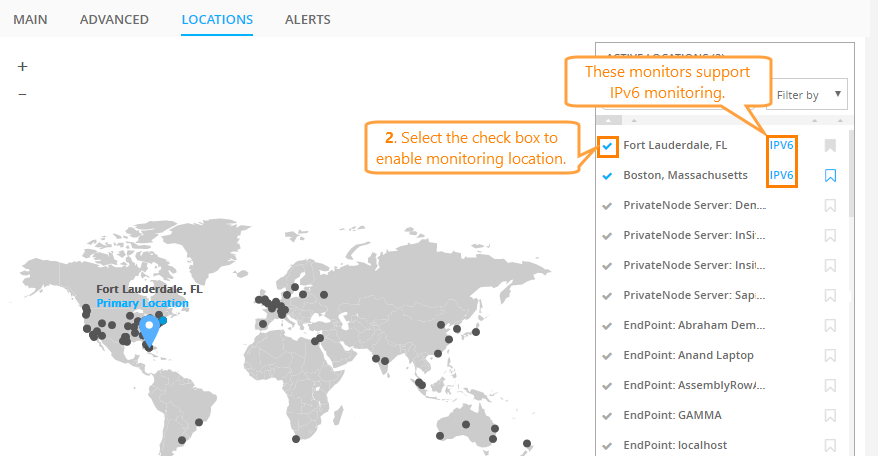
On the Locations tab, select one or more IPv6-enabled locations (they have the IPv6 label in the list). Do not use non-IPv6 locations for IPv6 monitors.
Tip: Sort the list by the IPv6 column to find all IPv6-enabled locations. -
Click Save.
-
(Optional.) Click Test on Demand to test your monitor.
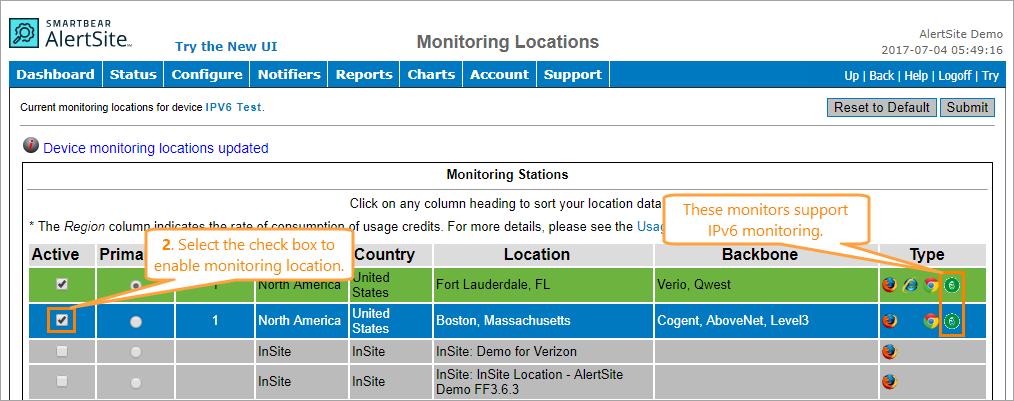
AlertSite 1.0
-
Go to Configure > Transactions.
-
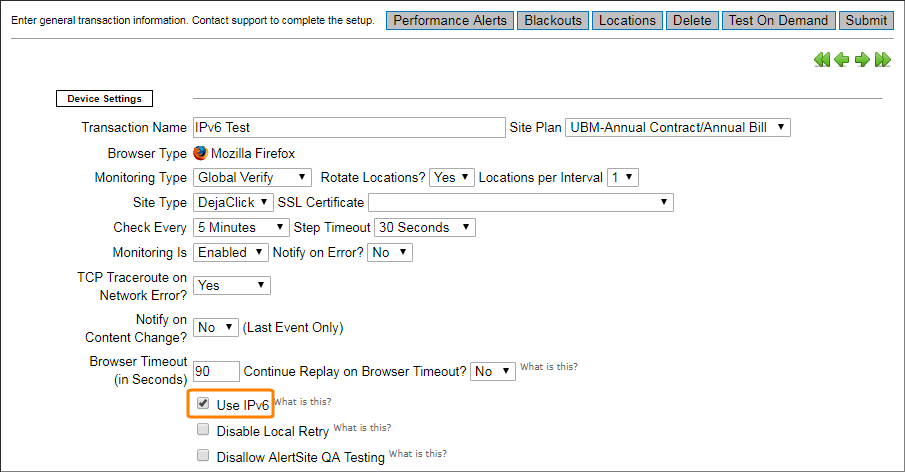
Click the name of your monitor. This will open the monitor configuration screen.
-
Select Use IPv6.
-
Click Submit in the top right corner to save the changes.
-
Click Locations in the top right corner.
-
Select one or more IPv6-enabled locations (they are displayed with the
 icon). Do not use non-IPv6 locations for IPv6 monitors.
 -
Click Submit.
-
(Optional.) Click Test on Demand to test your monitor.
The monitor will now connect to your website using IPv6.
3. Verifying IPv6 Connectivity
To verify that AlertSite connects to your server using IPv6, you can check the IP addresses in the Request Log:
-
In AlertSite UXM, go to Monitors > Runs.
-
Select your IPv6 monitor from the list in the top left corner.
-
Expand any run.
-
Click Request Log.
-
The IP Address column displays the IP address of your server we connected to. It should be an IPv6 address.
See Also
Transaction Monitors
Real-Browser Monitor (DéjàClick) Settings

 Single URL monitor